文章中提到的【上文】都指它 ↑
目录结构和使用
我们从使用方式来分析,为什么要打包成上面的目录结构。
1,npm 安装
每个模块都有 package.json 文件,其中的 main 字段表示模块的入口文件。
{

  "name": "element-ui",
  "version": "2.15.9",
  "main": "lib/element-ui.common.js"
}
1.1,完整引入
import Vue from 'vue';
import ElementUI from 'element-ui';
import 'element-ui/lib/theme-chalk/index.css';
import App from './App.vue';
Vue.use(ElementUI);
new Vue({

  el: '#app',
  render: h => h(App)
});
样式引入不必多说。
完整引入对应的是上文中第2.3节 build/webpack.common.js 打包后的内容,其中 output 输出设置:
module.exports = {

  entry: {

    app: ['./src/index.js']
  },
  // ...
  output: {

    path: path.resolve(process.cwd(), './lib'),
    filename: 'element-ui.common.js',
    libraryExport: 'default',
    library: 'ELEMENT',
    libraryTarget: 'commonjs2'
  },
}
注意到:webpack 设置的打包名称是 ELEMENT,但引入时却是 ElementUI,
因为 element-ui 使用的 webpack4 版本,所以设置 libraryTarget: 'commonjs2' 时 ,会自动忽略output.library。
所以,import导入的名称随意,只是一个对象而已。
import ElementUI from 'element-ui';
Vue.use(ElementUI);
Vue.use(ElementUI)会调用 install 方法,也就是入口文件 ./src/index.js中的 install 方法,来遍历每个组件,使用 Vue.component全局注册每个组件,实现全量引入。
/* Automatically generated by './build/bin/build-entry.js' */
import Pagination from '../packages/pagination/index.js';
// ... 其他组件略
import locale from 'element-ui/src/locale';
import CollapseTransition from 'element-ui/src/transitions/collapse-transition';
const components = [
Pagination,
Result,
CollapseTransition
];
const install = function(Vue, opts = {
}) {
locale.use(opts.locale);
locale.i18n(opts.i18n);
components.forEach(component => {
Vue.component(component.name, component);
});
Vue.use(InfiniteScroll);
Vue.use(Loading.directive);
Vue.prototype.$ELEMENT = {
size: opts.size || '',
zIndex: opts.zIndex || 2000
};
Vue.prototype.$loading = Loading.service;
Vue.prototype.$msgbox = MessageBox;
Vue.prototype.$alert = MessageBox.alert;
Vue.prototype.$confirm = MessageBox.confirm;
Vue.prototype.$prompt = MessageBox.prompt;
Vue.prototype.$notify = Notification;
Vue.prototype.$message = Message;
};
/* istanbul ignore if */
if (typeof window !== 'undefined' && window.Vue) {
install(window.Vue);
}
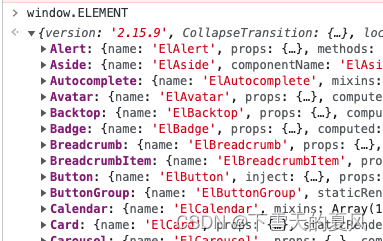
export default {
version: '2.15.9',
locale: locale.use,
i18n: locale.i18n,
install,
CollapseTransition,
Loading,
Pagination,
// ... 其他组件略
};
1.2,按需引入
import Vue from 'vue';
import {
    Button, Select } from 'element-ui';
import App from './App.vue';
Vue.component(Button.name, Button);
Vue.component(Select.name, Select);
/* 或写为
 * Vue.use(Button)
 * Vue.use(Select)
 */
new Vue({

  el: '#app',
  render: h => h(App)
});
前面说了,package.json 中的 main 字段是模块的入口,
{

  "name": "element-ui",
  "version": "2.15.9",
  "main": "lib/element-ui.common.js"
}
所以想实现这样引入,注意样式也要一起引入。
import {
    Button, Select } from 'element-ui';
1,首先得把模块分别打包,对应上文中第2.4节 build/webpack.component.js 打包后的目录:
-- lib
  -- pagination.js
  -- dialog.js
  -- ...
2,编译引入语法,变成下面这样
import {
    Button, Select } from 'element-ui';
// to
var button = require('element-ui/lib/button')
require('element-ui/lib/button/style.css') // 样式目录可以配置,这里只是举例
这就需要借助 babel-plugin-component 来实现:
npm install babel-plugin-component -D
指定 libraryName和 styleLibraryName,最终效果:
require('{libraryName}/lib/button')
require('{libraryName}/lib/{styleLibraryName}/button/style.css')
{

  "presets": [["es2015", {
    "modules": false }]],
  "plugins": [
    [
      "component",
      {

        "libraryName": "element-ui",
        "styleLibraryName": "theme-chalk"
      }
    ]
  ]
}
另外,每个组件中都自定义了 install 方法,所以也可直接使用 Vue.use() 注册组件。
import ElButton from './src/button';

/* istanbul ignore next */
ElButton.install = function(Vue) {

  Vue.component(ElButton.name, ElButton);
};

export default ElButton;
2,CDN
<!-- 引入样式 -->
<link rel="stylesheet" href="https://unpkg.com/element-ui/lib/theme-chalk/index.css">
<!-- 引入组件库 -->
<script src="https://unpkg.com/element-ui/lib/index.js"></script>
unpkg:是一个内容来自 npm 的全球CDN,可以指定版本号。比如 unpkg.com/element-ui@2.15.9
引入 css,不必多说。
引入的 js,对应上文第2.2节 build/webpack.conf.js 的输出:
module.exports = {

  entry: {

    app: ['./src/index.js']
  },
  // ...
  output: {

    path: path.resolve(process.cwd(), './lib'),
    publicPath: '/dist/',
    filename: 'index.js',
    libraryExport: 'default',
    library: 'ELEMENT',
    libraryTarget: 'umd',
    globalObject: 'typeof self !== \'undefined\' ? self : this'
  },
}
打包为 umd 模块(自执行函数)
(function webpackUniversalModuleDefinition(root, factory) {

  if(typeof exports === 'object' && typeof module === 'object')
    module.exports = factory();
  else if(typeof define === 'function' && define.amd)
    define([], factory);
  else if(typeof exports === 'object')
    exports["ELEMENT"] = factory();
  else
    root["ELEMENT"] = factory();
})(typeof self !== 'undefined' ? self : this, () => {

  return _entry_return_; // 此模块返回值,是入口 chunk 返回的值
});
在 HTML 引入后,可直接在 js 中使用 (window || self || this).ELEMENT 访问。组件也可直接在页面内使用。
参考 element-ui 官网例子
3,国际化
npm 的使用方式不多赘述,就是引入了上文第2.5节 npm run build:utils 生成的 locale 目录下的多语言文件。
主要介绍下CDN的国际化
在上文第2.6节 npm run build:umd 中,对生成的 umd 模块做了一些替换:以打包后的 zh-CN.js 为例。
(function (global, factory) {

  if (typeof define === "function" && define.amd) {

    // 原:define('zh-CN', ['module', 'exports'], factory);
    define('element/locale/zh-CN', ['module', 'exports'], factory);
  } else if (typeof exports !== "undefined") {

    factory(module, exports);
  } else {

    var mod = {

      exports: {
   }
    };
    factory(mod, mod.exports);
    // 原:global.zhCN = mod.exports;
    global.ELEMENT.lang = global.ELEMENT.lang || {
   };
    global.ELEMENT.lang.zhCN = mod.exports;
  }
})(this, function (module, exports) {

  // 被打包文件的内容
}
我们对比下CDN引入多语言的方式就明白了
<script src="//unpkg.com/vue"></script>
<script src="//unpkg.com/element-ui"></script>
<script src="//unpkg.com/element-ui/lib/umd/locale/en.js"></script>
<script>
  ELEMENT.locale(ELEMENT.lang.en)
</script>
因为通过 CDN 引入后 umd 模块的 element-ui(一个自执行函数)后,
umd 会同时以 AMD、CommonJS 和全局属性形式暴露。这样可以在 commonjs 模块和 amd 和浏览器环境同时使用该库。
会给浏览器添加一个全局变量 ELEMENT,可以通过this.ELEMENT访问。
所以,上面替换的作用是:当引入对应的多语言文件时,可以通过 this.ELEMENT.lang访问到对应的多语言文件。
element-ui 打包整体流程介绍完毕,希望对你有帮助。
以上。