接下来会做一个MES场景下的数字孪生,所以开始做车间相关的模型,不过还是尽量少用建模,纯代码实现,因为一方面可以动态使用,可以调节长度和宽度等,
下面这节就做一个简单的传送带,这是所有车间都会有的,
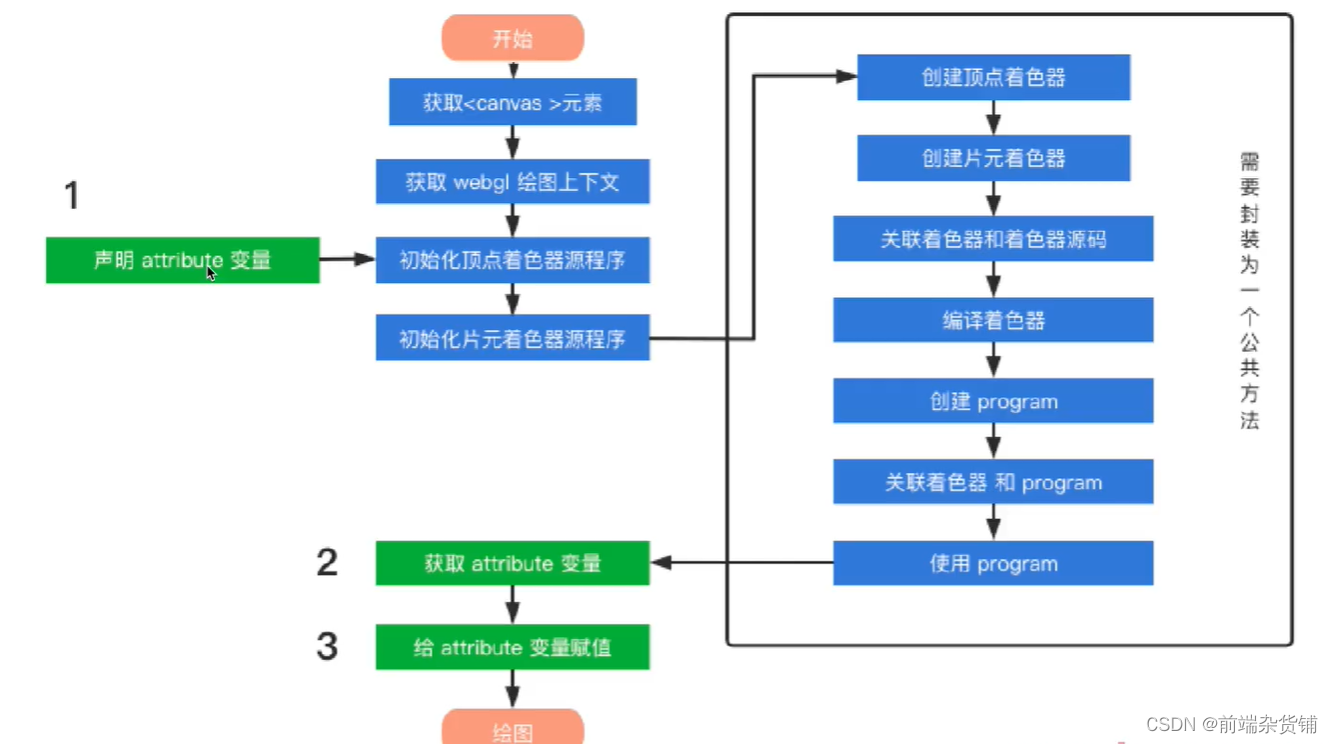
首先添加一个场景,相机,灯光等。
initScene(){//初始化场景
this.scene = new THREE.Scene();//创建场景
const axesHelper = new THREE.AxesHelper( 100 );
axesHelper.position.set(0,0,0)
this.scene.add( axesHelper );
},
initCamera(){//初始化相机,创建透视相机,第一个参数是视角角度,第二个参数是宽高比,第三个参数是近裁剪面,第四个参数是远裁剪面
this.camera = new THREE.PerspectiveCamera(45, window.innerWidth / window.innerHeight, 0.1, 10000);
this.camera.position.set(100,100,100);//设置相机位置
this.camera.up.set(0, 0, 1); // <=== spin // around Z-axis
},
initLight(){//初始化灯光
const directionalLight1 = new THREE.DirectionalLight(0xffffff, 1.5);//颜色是白色,强度是1.5
directionalLight1.position.set(300,300,600);//设置灯光位置
this.scene.add(directionalLight1);
},
initRenderer(){//初始化渲染器
this.renderer = new THREE.WebGLRenderer({ antialias: true });
this.container = document.getElementById("container");//获取容器
this.renderer.setSize(this.container.clientWidth, this.container.clientHeight);//设置渲染器的大小
this.renderer.setClearColor('#FFFFFF', 1.0);//设置背景颜色
this.container.appendChild(this.renderer.domElement);//将渲染器添加到容器中
},
initControl(){//创建控制器
this.controls = new OrbitControls(this.camera, this.renderer.domElement);//创建控制器
},
initAnimate() {//创建动画
requestAnimationFrame(this.initAnimate);
this.renderer.render(this.scene, this.camera);
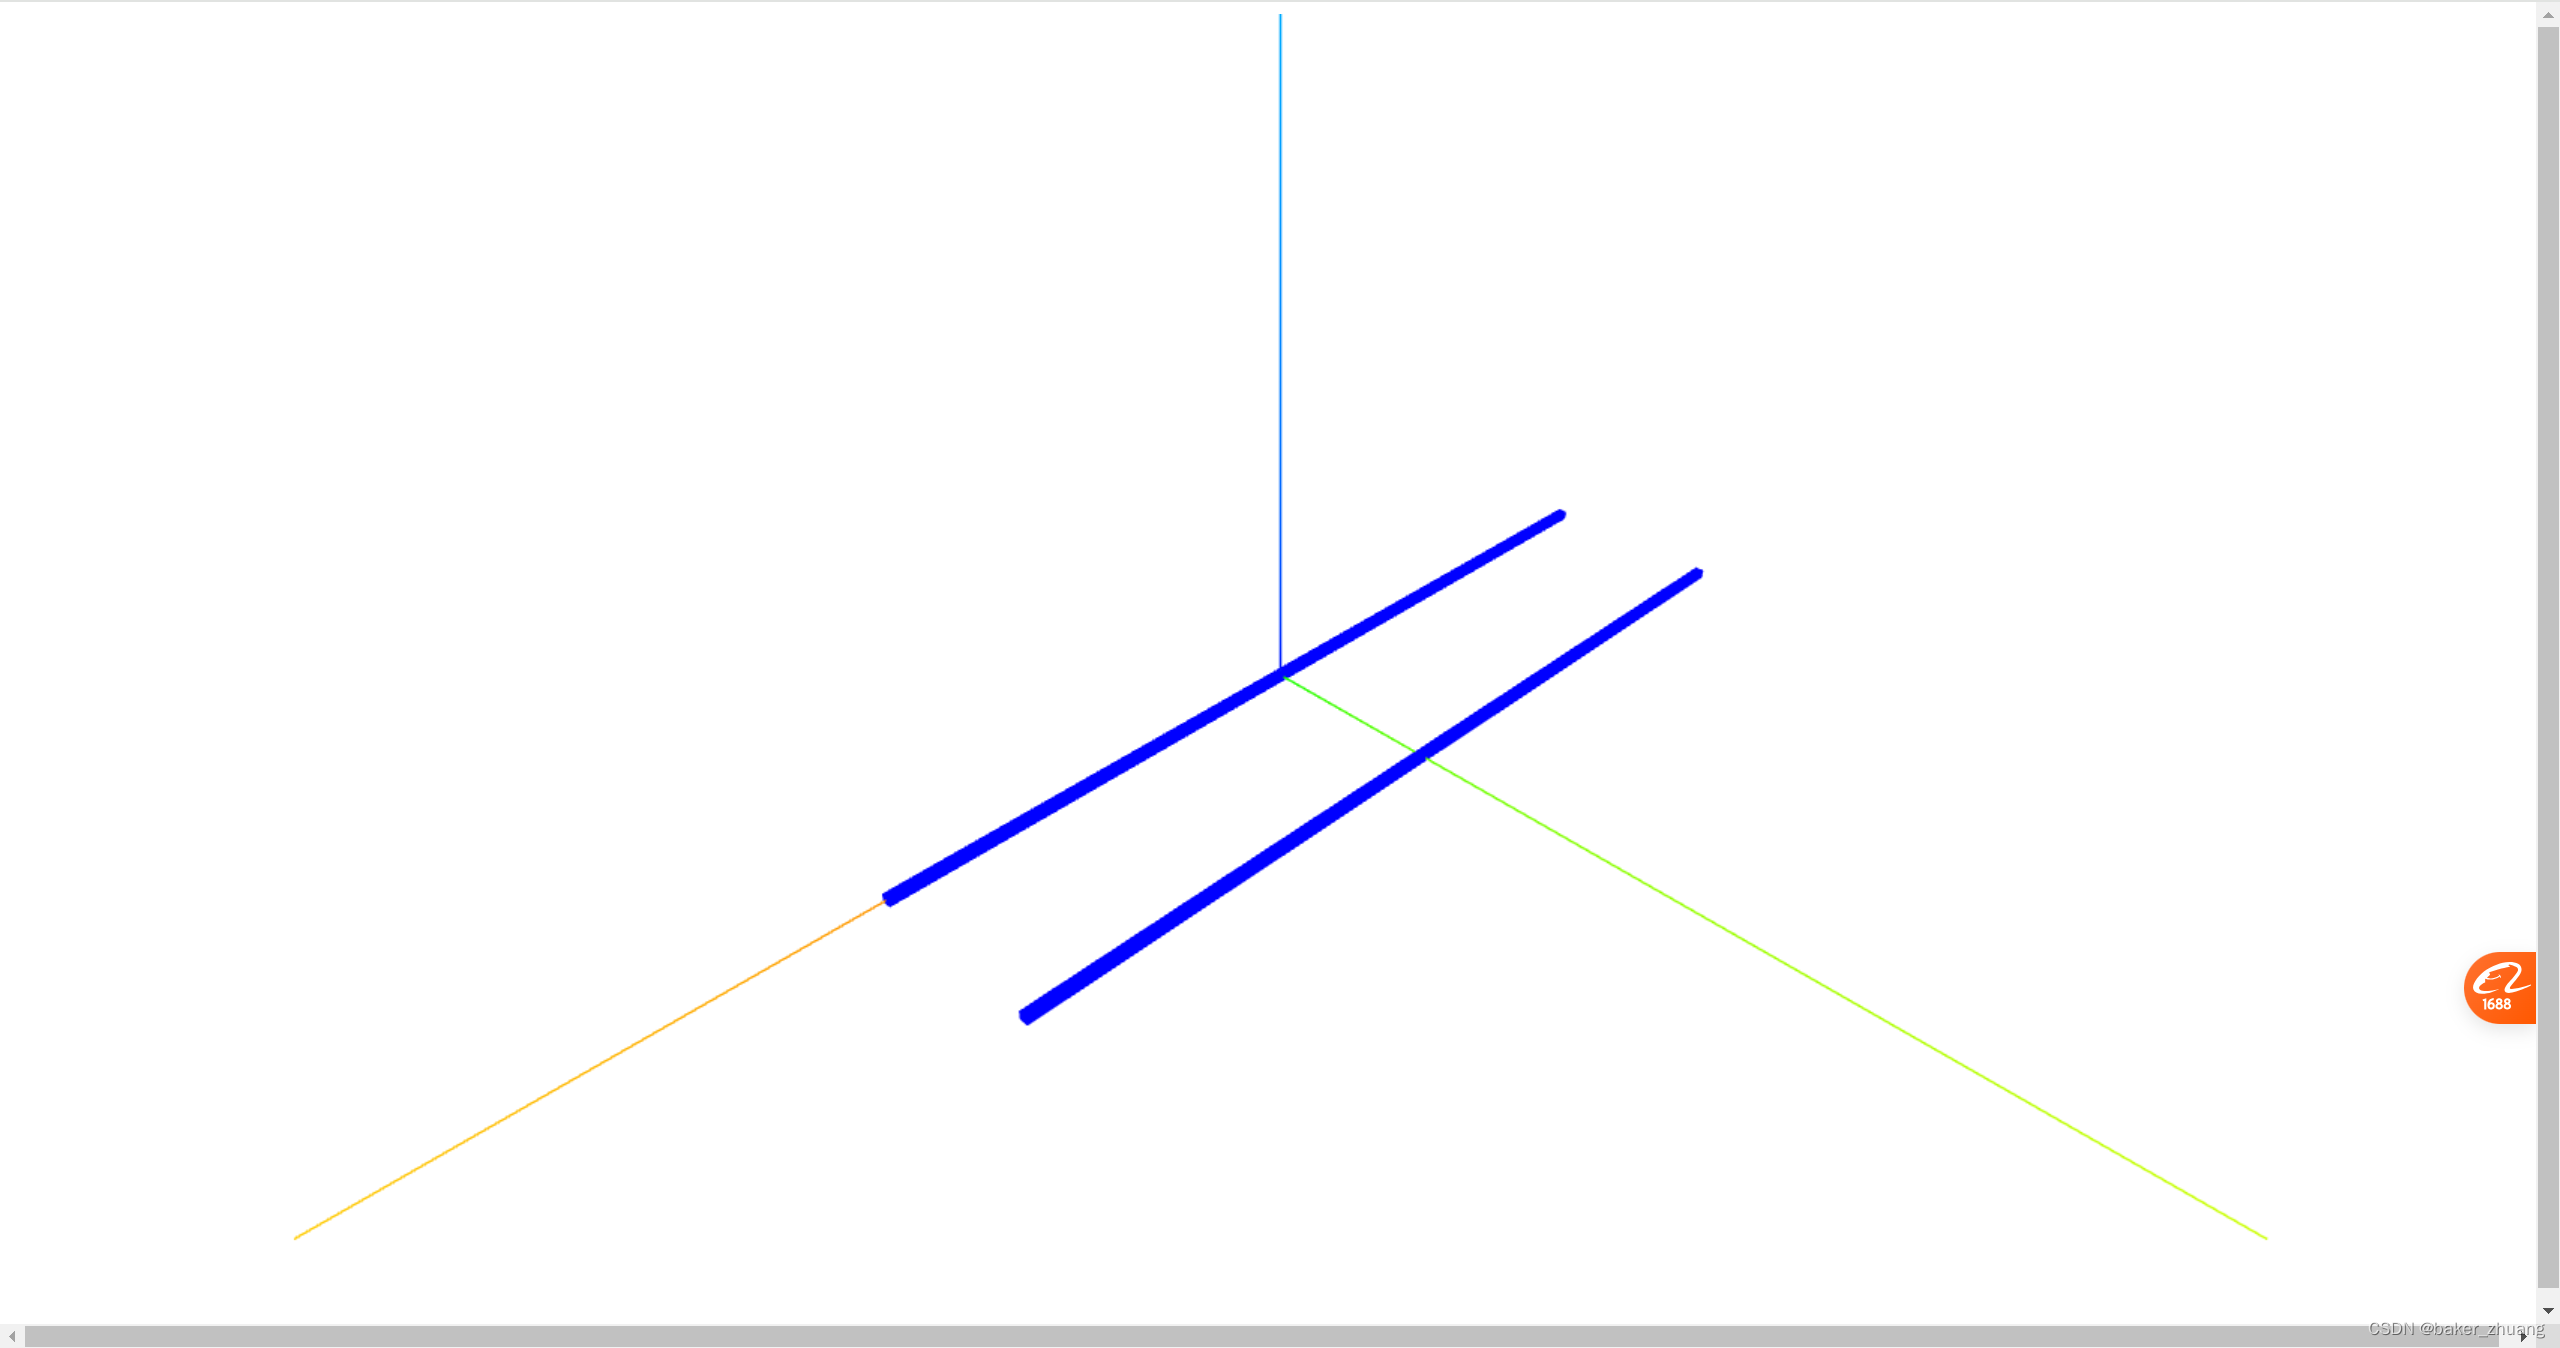
},有了基础的设置之后,下面开始绘制传送带,传送带需要两条边上的边框为长方体,两个边框中间为间距相同的滚轮,下面先画两个边框,设置边框之间的距离为20
      let width = 20;
      let geometryLeft = new THREE.BoxGeometry(conveyorLength,1,1);//创建一个几何体
      let materialLeft = new THREE.MeshBasicMaterial({color:'#0000FF'});//创建材质
      let borderLeft = new THREE.Mesh(geometryLeft, materialLeft);//创建网格模型
      borderLeft.position.set(x,y,z);
      this.scene.add(borderLeft);//添加到场景中

      let geometryRight = new THREE.BoxGeometry(conveyorLength,1,1);//创建一个几何体
      let materialRight = new THREE.MeshBasicMaterial({color:'#0000FF'});//创建材质
      let borderRight = new THREE.Mesh(geometryRight, materialRight);//创建网格模型
      borderRight.position.set(x ,y+ width,z)
      this.scene.add(borderRight);//添加到场景中
添加后是这样的效果
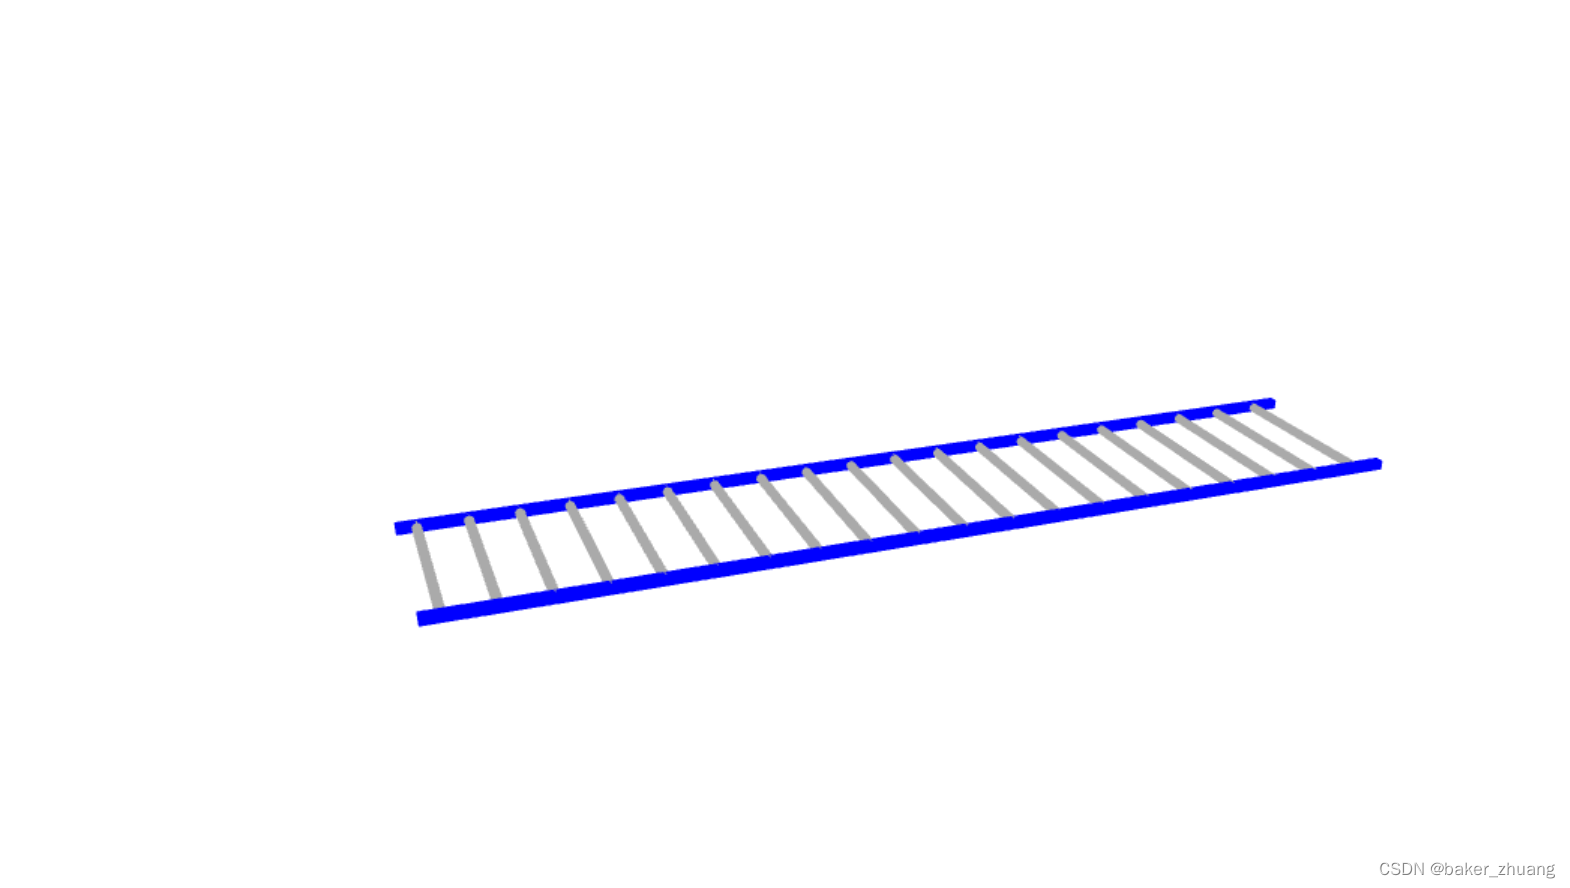
然后等间距的添加中间的滚轮,这里要注意的是在threejs中,默认的点都是模型的中间,所以设置滚轮位置的时候要从边框的一端开始,并且向y轴正方向偏移半个滚轮的长度,
let lineX = x - conveyorLength/2 +3;let lineY = y + width/2;
      for (let i = 0; i < conveyorLength/5; i++) {
        const cylinderGeometry = new THREE.CylinderGeometry(0.5, 0.5, width, 32); // 创建圆柱体几何体 参数依次为:半径, 顶部半径, 高, 侧面分段数
        const cylinderMaterial = new THREE.MeshBasicMaterial({ color: '#AAAAAA' }); //  // 创建圆柱体材质绿色
        const cylinderMesh = new THREE.Mesh(cylinderGeometry, cylinderMaterial);// 使用几何体和材质创建圆柱体网格
        cylinderMesh.position.set(lineX+(i*5),lineY,z);
        this.scene.add(cylinderMesh);// 将圆柱体添加到场景中
      }
最后把边框和滚轮的功能封装成一个可以通过传参动态调整传送带长度以及宽度的功能函数
initConveyor(x,y,z,width,conveyorLength){
      //初始化传送带
      let geometryLeft = new THREE.BoxGeometry(conveyorLength,1,1);//创建一个几何体
      let materialLeft = new THREE.MeshBasicMaterial({color:'#0000FF'});//创建材质
      let borderLeft = new THREE.Mesh(geometryLeft, materialLeft);//创建网格模型
      borderLeft.position.set(x,y,z);
      this.scene.add(borderLeft);//添加到场景中

      let geometryRight = new THREE.BoxGeometry(conveyorLength,1,1);//创建一个几何体
      let materialRight = new THREE.MeshBasicMaterial({color:'#0000FF'});//创建材质
      let borderRight = new THREE.Mesh(geometryRight, materialRight);//创建网格模型
      borderRight.position.set(x ,y+ width,z)
      this.scene.add(borderRight);//添加到场景中

      let lineX = x - conveyorLength/2 +3;let lineY = y + width/2;
      for (let i = 0; i < conveyorLength/5; i++) {
        const cylinderGeometry = new THREE.CylinderGeometry(0.5, 0.5, width, 32); // 创建圆柱体几何体 参数依次为:半径, 顶部半径, 高, 侧面分段数
        const cylinderMaterial = new THREE.MeshBasicMaterial({ color: '#AAAAAA' }); //  // 创建圆柱体材质绿色
        const cylinderMesh = new THREE.Mesh(cylinderGeometry, cylinderMaterial);// 使用几何体和材质创建圆柱体网格
        cylinderMesh.position.set(lineX+(i*5),lineY,z);
        this.scene.add(cylinderMesh);// 将圆柱体添加到场景中
      }
    },
最终效果如下:


![[大模型]Qwen-7B-Chat WebDemo](https://img-blog.csdnimg.cn/direct/568fd79bf1fe4e10ba83ff9bcf545de9.png#pic_center)