WebSocketpp是什么
最近手上有一个c++项目,需要用websocket从服务器端收内容。于是网上找了圈,发现WebSocketpp库可以做websocket的客户端。
WebSocketpp也叫WebSocket++,github地址是:https://github.com/zaphoyd/websocketpp,6.7k Stars。最新版本0.8.2.
话不多少,先把代码从github上拉下来。查看README,找到UserManual,进入Getting Started。文档中如此描述:
WebSocket++ is a header only library. You can start using it by including the websocketpp source directory in your project's include path and including the appropriate WebSocket++ headers in your program. You may also need to include and/or link to appropriate Boost/system libraries.
WebSocket++ includes cmake and scons scripts for building the examples and unit tests.
WebSocket++是一个只需要头文件的库,直接包含在到工程中就可以使用了。但是呢,还需要Boost库。
WebSocket++包含了cmake脚本来编译examples和unit tests。
我的目标就是编译成功examples和unit tests。
查看WebSocketpp的CMakeLists.txt
WebSocketpp支持cmake脚本呢编译examples和tests。于是先查看CMakeLists.txt。迅速看到了依赖内容Dependencies,里面明确提到了要依赖Boost库。由于我之前没有使用过boost库,所以得先安装boost库。
由于我的程序同事支持Windows和Linux,所以两个平台都要安装。
安装Boost
首先从官网https://www.boost.org/users/download/下载boost源码。我没有想太多,直接下载的最新版本1.84.0,直觉感觉WebSocketpp未必能支持这么新的版本。先硬着头皮试试,不行再换低版本。
进入到boost源码目录,打开vs2019的命令行,先执行:
bootstrap.bat执行完成之后,会生成一个b2.exe的可执行文件。接着执行:
.\b2 variant=debug link=static threading=multi runtime-link=static参数含义:
- variant=debug 编译Debug
- link=static 静态库
- threading=multi支持多线程
- runtime-link=static 静态连接
也就是我要编译一个使用MTD运行库的debug版本的静态库。没有指定编译目录,默认本文件夹。
编译完成之后输出:
The Boost C++ Libraries were successfully built!

The following directory should be added to compiler include paths:

    E:\boost_1_84_0

The following directory should be added to linker library paths:

    E:\boost_1_84_0\stage\lib
先试试debug版本能不能用,如果可以,后续再编译Release版本。
尝试WebSocket++能否连接Boost(Debug)
再次进入WebSocket++的CMakeLists.txt文件,找到加载Boost的部分:
    set (Boost_ADDITIONAL_VERSIONS "1.39.0" "1.40.0" "1.41.0" "1.42.0" "1.43.0" "1.44.0" "1.46.1") # todo: someone who knows better spesify these!

    find_package (Boost 1.39.0 COMPONENTS "${WEBSOCKETPP_BOOST_LIBS}")

    if (Boost_FOUND)
        # Boost is a project wide global dependency.
        include_directories (${Boost_INCLUDE_DIRS})
        link_directories (${Boost_LIBRARY_DIRS})

        # Pretty print status
        message (STATUS "-- Include Directories")
        foreach (include_dir ${Boost_INCLUDE_DIRS})
            message (STATUS "       " ${include_dir})
        endforeach ()
        message (STATUS "-- Library Directories")
        foreach (library_dir ${Boost_LIBRARY_DIRS})
            message (STATUS "       " ${library_dir})
        endforeach ()
        message (STATUS "-- Libraries")
        foreach (boost_lib ${Boost_LIBRARIES})
            message (STATUS "       " ${boost_lib})
        endforeach ()
        message ("")
    else ()
        message (FATAL_ERROR "Failed to find required dependency: boost")
    endif ()
把Boost的版本号修改为:1.84.0
 set (Boost_ADDITIONAL_VERSIONS "1.84.0" "1.39.0" "1.40.0" "1.41.0" "1.42.0" "1.43.0" "1.44.0" "1.46.1") # todo: someone who knows better spesify these!

 find_package (Boost 1.84.0 COMPONENTS "${WEBSOCKETPP_BOOST_LIBS}")
开始生成,首先在WebSocket++根目录下创建一个build目录,进入build目录,执行:
cmake .. -DBUILD_EXAMPLES=TRUE -DBUILD_TESTS=TRUE -DBOOST_ROOT=E:\boost_1_84_0 -DCMAKE_BUILD_TYPE=debug执行失败,找不到Boost:
e:\websocketpp-master\build>cmake .. -DBUILD_EXAMPLES=TRUE -DBUILD_TESTS=TRUE  -DBOOST_ROOT=E:\boost_1_84_0 -DCMAKE_BUILD_TYPE=debug
-- Selecting Windows SDK version 10.0.19041.0 to target Windows 10.0.18362.
* Configuring Boost
-- -- Using BOOST_ROOT
--        E:\boost_1_84_0
CMake Warning at C:/Program Files/CMake/share/cmake-3.20/Modules/FindBoost.cmake:1354 (message):
  New Boost version may have incorrect or missing dependencies and imported
  targets
Call Stack (most recent call first):
  C:/Program Files/CMake/share/cmake-3.20/Modules/FindBoost.cmake:1476 (_Boost_COMPONENT_DEPENDENCIES)
  C:/Program Files/CMake/share/cmake-3.20/Modules/FindBoost.cmake:2086 (_Boost_MISSING_DEPENDENCIES)
  CMakeLists.txt:218 (find_package)
从网上搜索错误信息“New Boost version may have incorrect or missing dependencies and imported targets”。原因是cmake版本比boost版本旧,如果想使用特定版本的boost,就得使用在该boost发布后发布的cmake版本。
详见:https://stackoverflow.com/questions/65560775/cmake-new-boost-version-may-have-incorrect-or-missing-dependencies-and-importe 我的cmake版本是3.20.3,查看FindBoost.cmake的1354行:
if(Boost_VERSION_STRING VERSION_GREATER_EQUAL 1.77.0 AND NOT Boost_NO_WARN_NEW_VERSIONS)
    message(WARNING "New Boost version may have incorrect or missing dependencies and imported targets")
endif()可以看到该版本的cmake最多支持1.77.0的Boost。不打算安装新版本的cmake,我本来就怀疑WebSocket++不支持Boost1.84.0,趁此机会使用一个确定可用的版本。在github上的Issues上https://github.com/zaphoyd/websocketpp/issues/912,作者回复到:
0.8.2 has been tested through Boost 1.72
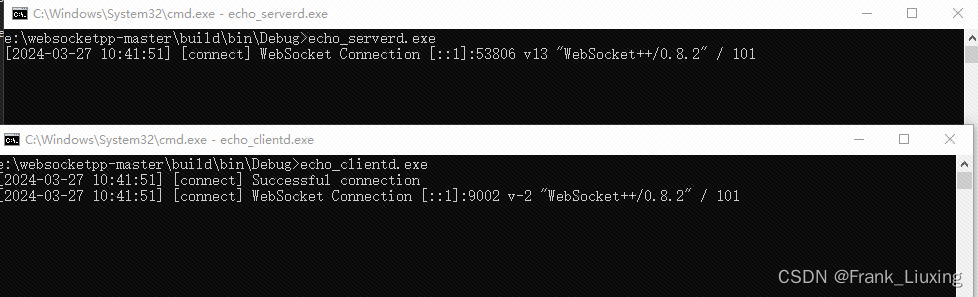
所以,也不折腾Boost版本了,下载Boost1.72,重新生成vs工程。这次生成工程成功。然后使用vs2019打开工程,分别编译examples里面的echo_client和echo_server,编译时把运行库改为MTD,与Boost库保持一致。编译成功。
同时启动echo_client和echo_server,也成功,可以运行。
TODO:这里有一个疑问,只指定了boost库的路径,并没有设置要链接哪些boost库,vs是怎么链接到正确的库呢?
SSL
首先,在编译examples的是没有链接openssl的,肯定不支持的。但是,我决定先从代码层面上支持SSL。在CMakeLists中,是使用find_package加载openssl的,但是我电脑上没有没有openssl的cmake module。不过我有已经编译好的open ssl 静态库。于是把静态库copy到WebSocketPP文件夹中。然后手动修改了一下CMakeList.txt:
	#原来是用find_package来设置openssl的,现在改成手动添加OpenSSL的路径
    #find_package(OpenSSL)
    set(OPENSSL_SSL_LIBRARY "libssl.lib")
	set(OPENSSL_CRYPTO_LIBRARY "libcrypto.lib")
	set(OPENSSL_INCLUDE_DIR "${PROJECT_SOURCE_DIR}/openssl/include")
	#添加openssl路径
	link_directories(${PROJECT_SOURCE_DIR}/openssl/win64_static)

	#设置变量OpenSSL_FOUND,后续会根据该标志来创建TLS的工程
	set(OPENSSL_FOUND ON)
然后重新cmake生成工程,可以看到,生成了print_client_tls。编译成功。在运行之前,我先看了一下大致的逻辑。print_client_tls默认的连接地址是echo_server_tls的地址。echo_server_tls默认使用的一个自签署的证书,print_client_tls使用提前生成的pem文件来验证。
但是,我想用一个有效的网址,采用根证书验证。于是,我把地址改为了:wss://echo.websocket.org。验证部分的代码也要做相应的调整:
void add_windows_root_certs(context_ptr ctx)
{
    HCERTSTORE hStore = CertOpenSystemStoreA(0, "ROOT");
    if (hStore == NULL) {
        return;
    }

    X509_STORE* store = X509_STORE_new();
    PCCERT_CONTEXT pContext = NULL;
    while ((pContext = CertEnumCertificatesInStore(hStore, pContext)) != NULL) {
        X509* x509 = d2i_X509(NULL,
            (const unsigned char**)&pContext->pbCertEncoded,
            pContext->cbCertEncoded);
        if (x509 != NULL) {
            X509_STORE_add_cert(store, x509);
            X509_free(x509);
        }
    }

    CertFreeCertificateContext(pContext);
    CertCloseStore(hStore, 0);

    SSL_CTX_set_cert_store(ctx->native_handle(), store);
}

context_ptr on_tls_init(const char * hostname, websocketpp::connection_hdl) {
    context_ptr ctx = websocketpp::lib::make_shared<boost::asio::ssl::context>(boost::asio::ssl::context::sslv23);

    try {
        ctx->set_options(boost::asio::ssl::context::default_workarounds |
                         boost::asio::ssl::context::no_sslv2 |
                         boost::asio::ssl::context::no_sslv3 |
                         boost::asio::ssl::context::single_dh_use);


        ctx->set_verify_mode(boost::asio::ssl::verify_peer);
        //设置verify_none就不要验证服务端,也不需要加载证书
        //ctx->set_verify_mode(boost::asio::ssl::verify_none);
        //ctx->set_verify_callback(bind(&verify_certificate, hostname, ::_1, ::_2));
        ctx->set_verify_callback(bind(&verify_certificate, "hostname", ::_1, ::_2));

 #ifndef _WIN32
           //这个方法在windows上不起作用
        ctx->set_default_verify_paths();
#else
        //加载系统的根证书链
        add_windows_root_certs(ctx);
#endif

        // 这个方法可以显示添加某个pem证书文件
        //ctx->load_verify_file("");
    } catch (std::exception& e) {
        std::cout << e.what() << std::endl;
    }
    return ctx;
}
运行成功。
TODO:open ssl 静态库没有debug版本,使用MT运行库,为什么可以和使用MTD运行库的examples一起编译?