好了,兄弟们,继昨天的项目之后,开始继续敲前端代码,完成前端部分(今天应该能把前端大概完成开启后端部分了)
昨天补充了一下登录界面加上了文章管理界面和用户个人中心界面
完善用户个人中心界面
修改一下昨天写的个人用户中心界面,先从用户介绍这块开始改一下吧,这里肯定是要用到一些图标的,去组件库找找
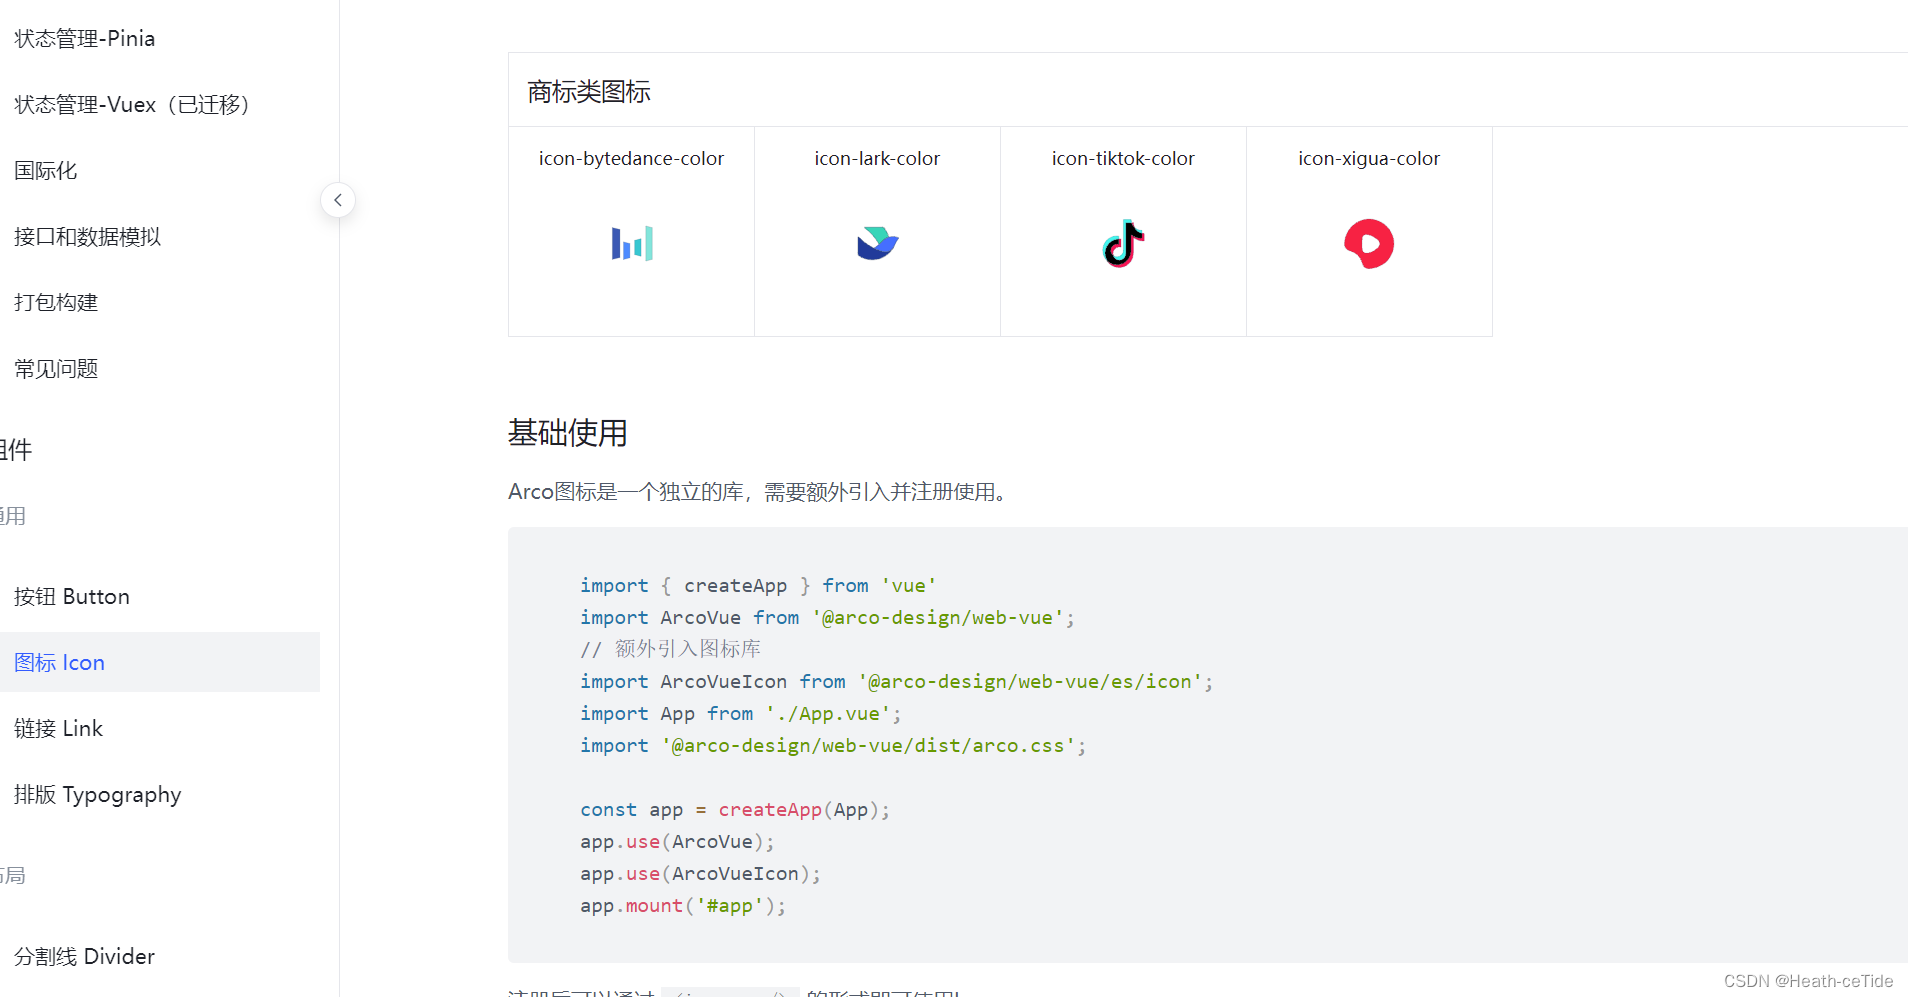
OK,找到了(今天的组件库也是格外好用)
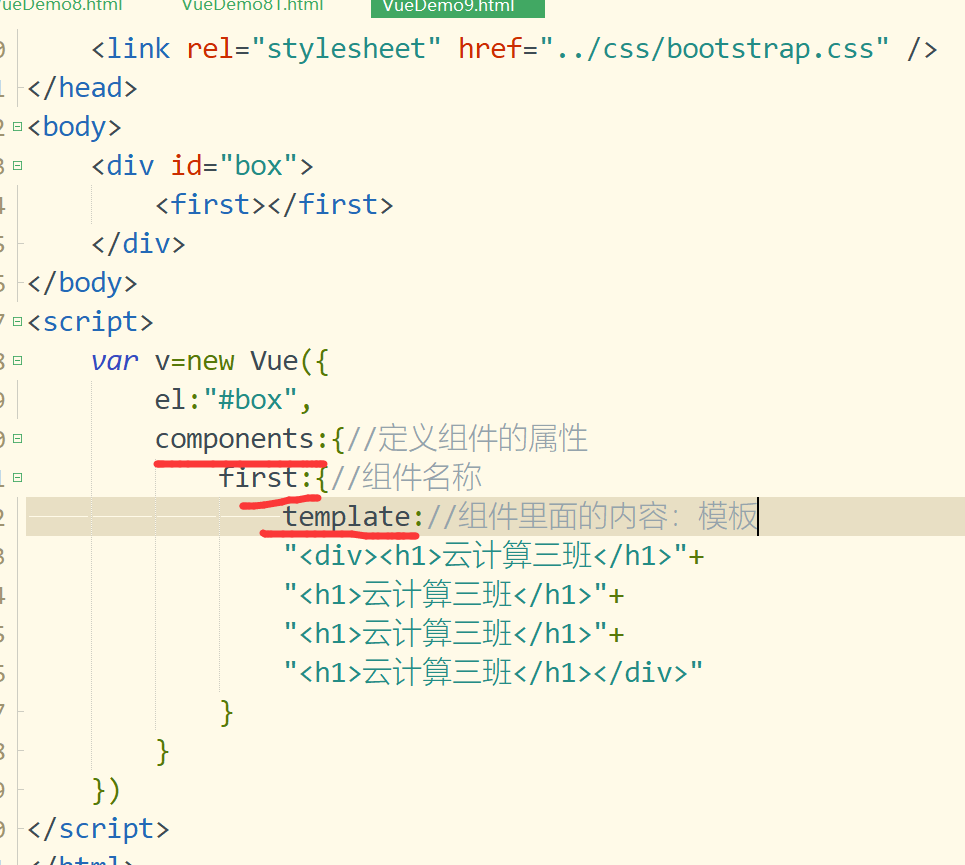
这里因为要用图标要专门引入一下,那就复制粘贴一下代码,把它放到main.js中吧
import { createApp } from 'vue'
import ArcoVue from '@arco-design/web-vue';
// 额外引入图标库
import ArcoVueIcon from '@arco-design/web-vue/es/icon';
import App from './App.vue';
import '@arco-design/web-vue/dist/arco.css';

const app = createApp(App);
app.use(ArcoVue);
app.use(ArcoVueIcon);
app.mount('#app');
import { createApp } from 'vue'
import App from './App.vue'
import router from './router'
import store from './store'
import ArcoVue from '@arco-design/web-vue';
import '@arco-design/web-vue/dist/arco.css';
import ArcoVueIcon from '@arco-design/web-vue/es/icon';
createApp(App).use(store).use(ArcoVue).use(ArcoVueIcon).use(router).mount('#app')
然后就可以点击图标进行使用了,
个人介绍这一块,我想到的就是在左上角加上一个用户图片,然后加上昵称,文章总数,粉丝数,关注人数,个人介绍什么的,还挺多的,暂时先写几个常用的吧,后续要添加的话也不难
<template>
  <div id="userCenter">
    <a-layout style="height: 100vh">
      <a-layout-header>
        <div class="header">
          <div class="user-introduce">
            <img :src="userNum.userImg" width="70px" height="70px" class="user-img" />
            <div>
            <div class="personal-introduce">
              <div style="margin-left: 10px">
              <span class="name">{{ userNum.userName }}</span>
              <span class="sex-icon"></span>
              </div>
            </div>
            </div>
          </div>
          <div class="user-follow">
            {{ userNum.attention }}
            <icon-star />
            <span class="follow-num">关注</span>
            {{ userNum.fans }}
            <icon-heart />
            <span class="follow-num">粉丝</span>
            {{ userNum.article }}
            <icon-select-all />
            <span class="follow-num">文章</span>
          </div>
          <div class="user-follow">个人简介:{{userSelfIntroduce}} </div>
        </div>
      </a-layout-header>
      <a-layout style="margin: 24px 120px">
        <a-layout-sider>Sider</a-layout-sider>
        <a-layout-content>Content</a-layout-content>
      </a-layout>
      <a-layout-footer>Footer</a-layout-footer>
    </a-layout>
  </div>
</template>

<script setup>
import { ref } from "vue";
import avatar from '../assets/userbg.png'

const userSelfIntroduce = ref("这个人很懒,什么都没有留下");
// const userSelfSex = ref("male");
const userNum = ref({
    userImg : avatar,
    // userImg :'../assets/userbg.jpg',
    userName: "我是小丑",
    attention: 0,
    fans: 0,
    article: 0
})
</script>

<style lang="scss" scoped>

#userCenter {
  background: url("../assets/image.png") no-repeat bottom center / 100% 100%;
}
.header {
  font-family: "Satisfy", cursive;
  margin: 5% 100px 2% 100px;
  height: 20vh;
  background: url("../assets/back.png") no-repeat center / 100% 100%;
}

.personal-introduce {
  display: flex;
  justify-content: center;
  align-items: flex-end;
  margin-top: 10px;
  text-shadow: 0px 0px 4px rgba(0, 0, 0, 0.31);
  .name {
    line-height: 29px;
    font-size: 26px;
  }
  .sex-icon {
    display: inline-block;
    width: 16px;
    height: 16px;
    margin: 0px 8px;
    margin-bottom: 4px;
    background: url(../assets/user-images/sex-icon.png) no-repeat center;
    background-size: contain;
    border-radius: 50%;
  }
  .level-icon {
    display: inline-block;
    width: 16px;
    height: 16px;
    margin-bottom: 4px;
    background: url(../assets/user-images/leval-icon.png) no-repeat center;
    background-size: contain;
    border-radius: 50%;
  }
}

.user-introduce {
  display: flex;
  justify-items: left;
  padding: 10px;
}
.user-img {
  border-radius: 50%;
  margin-left: 20px;
}
.user-follow{
  margin-left: 30px;
  font-size: 16px;
  display: flex;
  justify-items: left;
}
.follow-num{
  font-size: 16px;
  padding-right: 20px;
}
</style>

(个人感觉好丑,hhh)
这边一些不确定的元素都可以先定义数据模型存放未从后端拿取数据的默认状态
下面来开发一下侧栏的代码,这里可以试试这个伸缩框(感觉会很有意思)这里只需要加上一个属性就OK(:resize-directions="['right']")


这样就实现了左右伸缩功能了,然后我们整一个布局
      <a-layout style="margin: 24px 120px">
        <a-layout-sider :resize-directions="['right']">
          <a-layout >
            <a-layout-content>Content</a-layout-content>
            <a-layout-content>Content</a-layout-content>
            <a-layout-content>Content</a-layout-content>
          </a-layout>
        </a-layout-sider>
加一个全是内容的区域吧,
这边再给侧栏和内容区域填充颜色就差不多了
<template>
  <div id="userCenter">
    <a-layout style="height: 100vh">
      <a-layout-header>
        <div class="header">
          <div class="user-introduce">
            <img :src="userNum.userImg" width="70px" height="70px" class="user-img" />
            <div>
            <div class="personal-introduce">
              <div style="margin-left: 10px">
              <span class="name">{{ userNum.userName }}</span>
              <span class="sex-icon"></span>
              </div>
            </div>
            </div>
          </div>
          <div class="user-follow">
            {{ userNum.attention }}
            <icon-star />
            <span class="follow-num">关注</span>
            {{ userNum.fans }}
            <icon-heart />
            <span class="follow-num">粉丝</span>
            {{ userNum.article }}
            <icon-select-all />
            <span class="follow-num">文章</span>
          </div>
          <div class="user-follow">个人简介:{{userSelfIntroduce}} </div>
        </div>
      </a-layout-header>
      <a-layout style="margin: 24px 180px">
        <a-layout-sider :resize-directions="['right']">
          <a-layout style="height: 100%; text-align: left; padding-left: 20px; background-color: #c4c4c4;">
            <a-layout-content style="height: 20%">
              <h3>CeTide等级</h3>
            </a-layout-content>
            <a-layout-content style="height: 20%">
              <h3>个人成就</h3>
            </a-layout-content>
            <a-layout-content style="height: 60%">
              <h3>个人动态</h3>
            </a-layout-content>
          </a-layout>
        </a-layout-sider>
        <a-layout-content class="content">
          <h3>用户中心</h3>
        </a-layout-content>
      </a-layout>
      <a-layout-footer>Footer</a-layout-footer>
    </a-layout>
  </div>
</template>

<script setup>
import { ref } from "vue";
import avatar from '../assets/userbg.png'

const userSelfIntroduce = ref("这个人很懒,什么都没有留下");
// const userSelfSex = ref("male");
const userNum = ref({
    userImg : avatar,
    // userImg :'../assets/userbg.jpg',
    userName: "我是小丑",
    attention: 0,
    fans: 0,
    article: 0
})
</script>

<style lang="scss" scoped>

#userCenter {
  background: url("../assets/image.png") no-repeat bottom center / 100% 100%;
}
.header {
  font-family: "Satisfy", cursive;
  margin: 5% 100px 2% 100px;
  height: 20vh;
  background: url("../assets/back.png") no-repeat center / 100% 100%;
}

.personal-introduce {
  display: flex;
  justify-content: center;
  align-items: flex-end;
  margin-top: 10px;
  text-shadow: 0px 0px 4px rgba(0, 0, 0, 0.31);
  .name {
    line-height: 29px;
    font-size: 26px;
  }
  .sex-icon {
    display: inline-block;
    width: 16px;
    height: 16px;
    margin: 0px 8px;
    margin-bottom: 4px;
    background: url(../assets/user-images/sex-icon.png) no-repeat center;
    background-size: contain;
    border-radius: 50%;
  }
  .level-icon {
    display: inline-block;
    width: 16px;
    height: 16px;
    margin-bottom: 4px;
    background: url(../assets/user-images/leval-icon.png) no-repeat center;
    background-size: contain;
    border-radius: 50%;
  }
}

.user-introduce {
  display: flex;
  justify-items: left;
  padding: 10px;
}
.user-img {
  border-radius: 50%;
  margin-left: 20px;
}
.user-follow{
  margin-left: 30px;
  font-size: 16px;
  display: flex;
  justify-items: left;
}
.follow-num{
  font-size: 16px;
  padding-right: 20px;
}
.content{
  margin-left: 70px;
  background-color: #c4c4c4;
}
</style>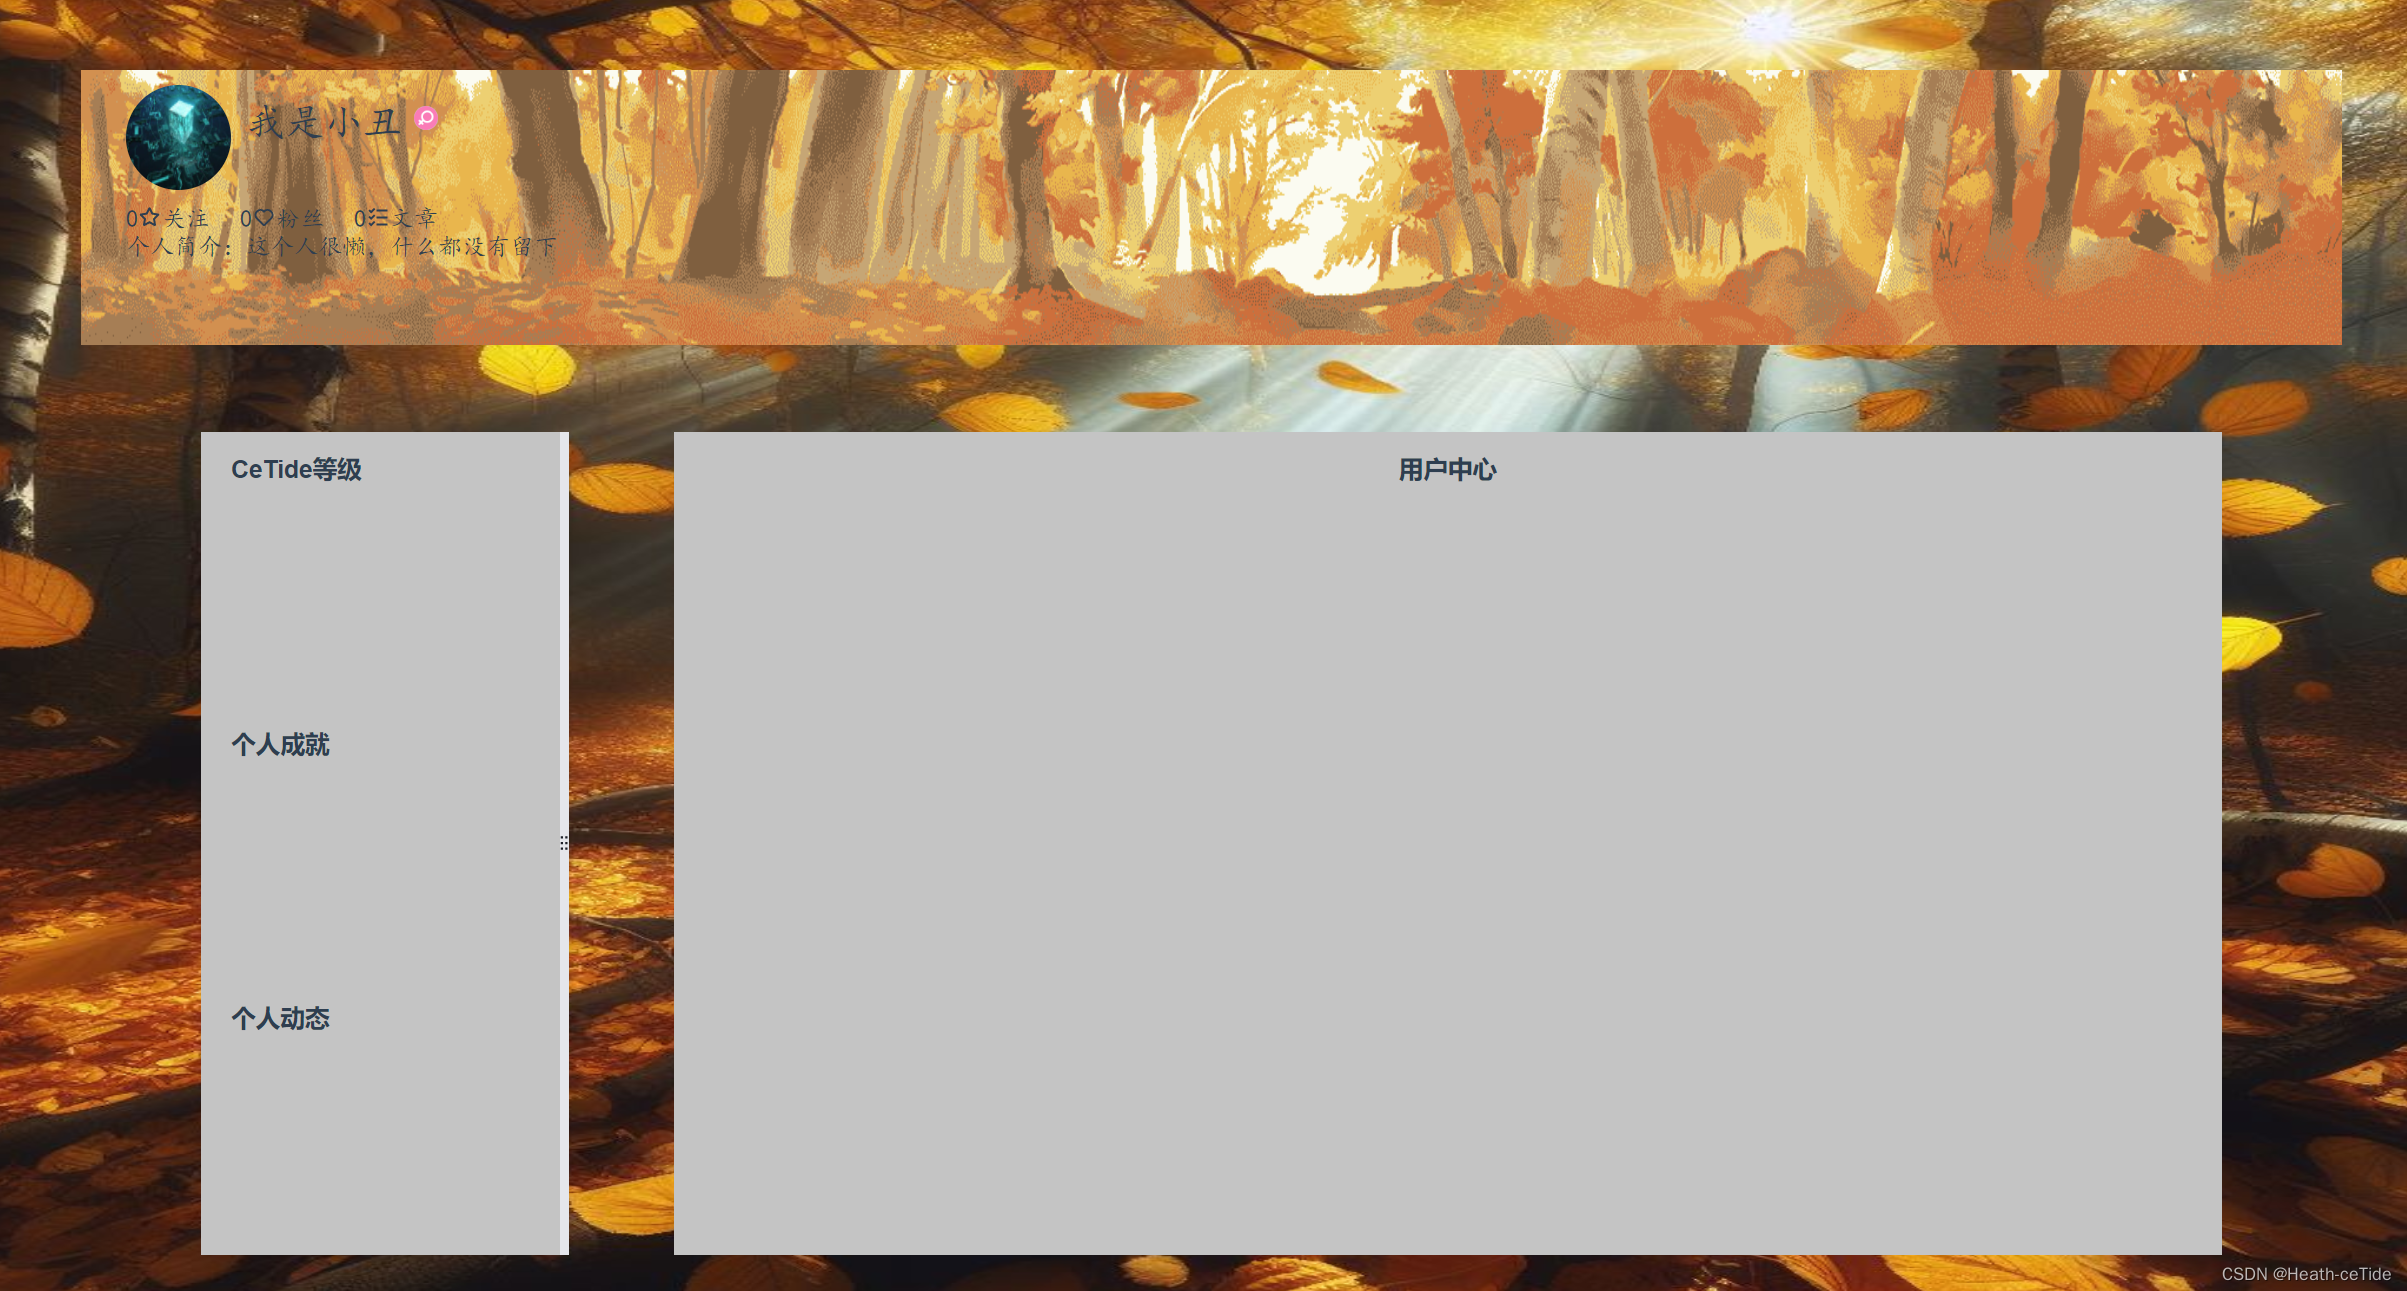
就先这个样子吧。
那么,前端先把基础架子搭起来这样也就差不多了,后面我们就根据后端的开发来整前端,(这次就不面向前端编程了,来试试面向后端编程),后端初始化启动!
后端初始化:
现在开始后端开发,打开idea新建Spring项目
1.springboot项目优先创建,并且引入其起步依赖(根据要求添加必须依赖)
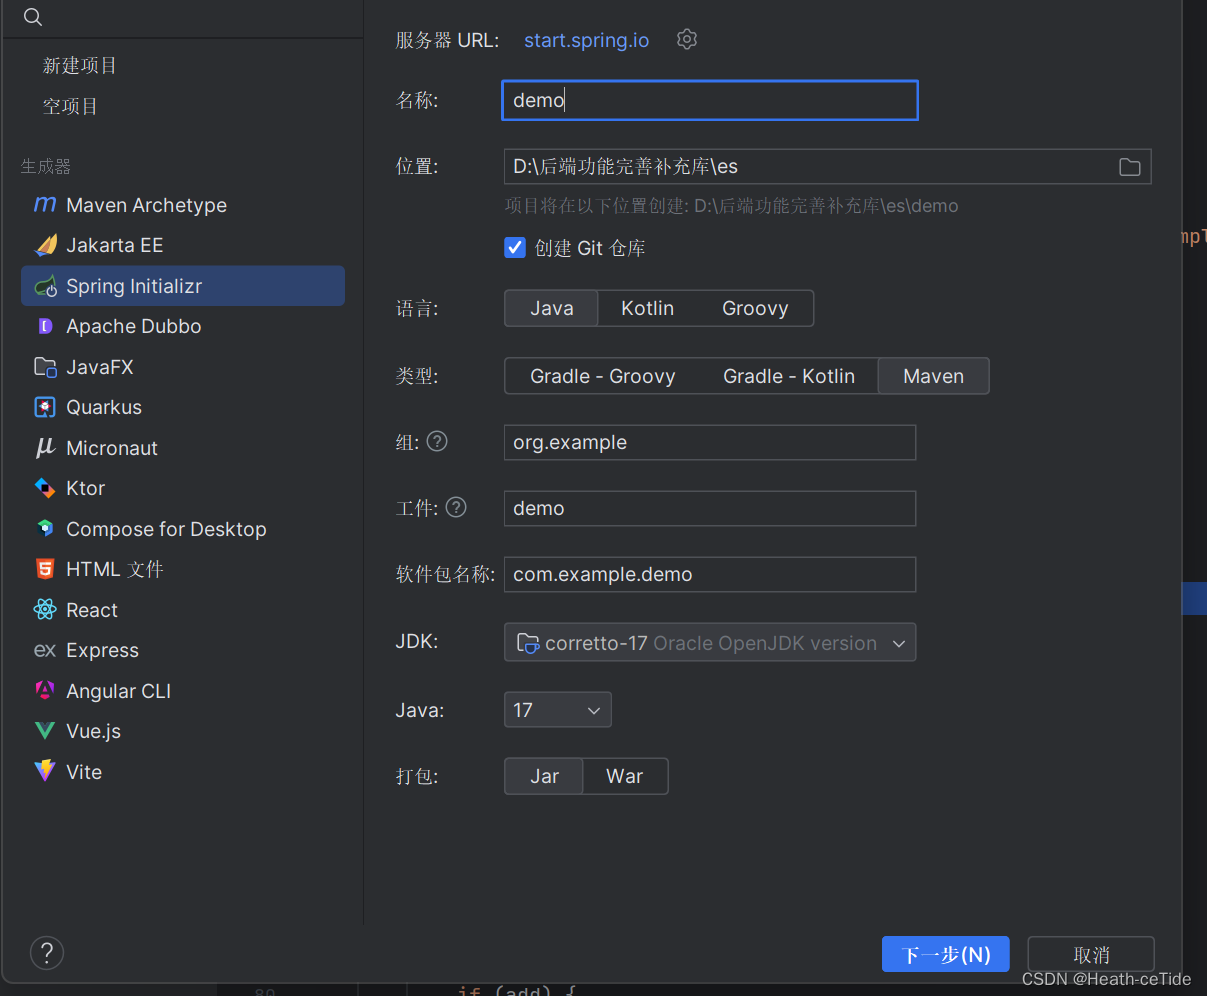

这里就先选这三个依赖吧(之后要用的依赖再加吧,(这里我就不用lombok了,偶尔跳一个版本问题也挺麻烦的))

目前的项目结构就是这样了,(项目最好不要放在带有中文目录的文件夹下,无论前后端)
2.查看pom文件
然后我们看看pom.xml文件
<?xml version="1.0" encoding="UTF-8"?>
<project xmlns="http://maven.apache.org/POM/4.0.0" xmlns:xsi="http://www.w3.org/2001/XMLSchema-instance"
         xsi:schemaLocation="http://maven.apache.org/POM/4.0.0 https://maven.apache.org/xsd/maven-4.0.0.xsd">
    <modelVersion>4.0.0</modelVersion>
    <parent>
        <groupId>org.springframework.boot</groupId>
        <artifactId>spring-boot-starter-parent</artifactId>
        <version>2.3.0.RELEASE</version>
        <relativePath/> <!-- lookup parent from repository -->
    </parent>

    <groupId>org.example</groupId>
    <artifactId>cetide-net</artifactId>
    <version>0.0.1-SNAPSHOT</version>
    <name>cetide-net</name>

    <properties>
        <java.version>1.8</java.version>
    </properties>
    <dependencies>
        <dependency>
            <groupId>commons-codec</groupId>
            <artifactId>commons-codec</artifactId>
            <version>1.14</version>
        </dependency>
        <dependency>
            <groupId>org.apache.commons</groupId>
            <artifactId>commons-lang3</artifactId>
            <version>3.10</version>
        </dependency>
        <dependency>
            <groupId>com.alibaba</groupId>
            <artifactId>druid-spring-boot-starter</artifactId>
            <version>1.1.23</version>
        </dependency>
        <dependency>
            <groupId>com.github.pagehelper</groupId>
            <artifactId>pagehelper-spring-boot-starter</artifactId>
            <version>1.2.13</version>
        </dependency>
        <dependency>
            <groupId>org.springframework.boot</groupId>
            <artifactId>spring-boot-starter-web</artifactId>
        </dependency>
        <dependency>
            <groupId>org.mybatis.spring.boot</groupId>
            <artifactId>mybatis-spring-boot-starter</artifactId>
            <version>2.1.3</version>
        </dependency>

        <dependency>
            <groupId>mysql</groupId>
            <artifactId>mysql-connector-java</artifactId>
            <scope>runtime</scope>
        </dependency>
        <dependency>
            <groupId>org.springframework.boot</groupId>
            <artifactId>spring-boot-starter-test</artifactId>
            <scope>test</scope>
            <exclusions>
                <exclusion>
                    <groupId>org.junit.vintage</groupId>
                    <artifactId>junit-vintage-engine</artifactId>
                </exclusion>
            </exclusions>
        </dependency>
    </dependencies>
</project>
这里我没有用上面Spring项目的高版本(感觉低版本容易适配一些,大家可以试试创建新版本的Spring项目,或者就用这代码改造pom文件用较低版本的,感觉都可)
3.三层架构和application.yml配置数据库等等信息
先把三层架构搭建好:
创建controller,service,dao三个包
再创建放置实体类的包model,model包下还有三个包dto,entity,vo
这里给不熟悉的或者不太熟悉的兄弟们解释一下dto,entity和vo
- Entity:它的主要作用是映射数据库中的记录,使得程序能够以面向对象的方式操作数据库数据。Entity中的每个字段通常直接对应数据库中的一个列。
- (作为后端系统的核心数据结构,Entity贯穿于整个应用的持久层。它不仅用于数据的CRUD操作,还可能包含业务逻辑方法。)
- DTO:DTO专注于数据的传输和业务逻辑的实现。它不直接对应数据库结构,而是根据业务需求封装数据。DTO主要用于在不同层级或服务间传递数据,降低系统的耦合度。
- VO:VO主要关注于数据的展示。它的结构设计是为了便于前端页面的显示需求,因此VO的字段通常与用户界面的元素相对应。VO可以视为UI层的数据模型,用于封装应该展现给用户的数据。

先这样吧,然后点开resources包下的application.properties,然后把这个文件删了(hhhh)
在resources包下新建一个文件applilcation.yml
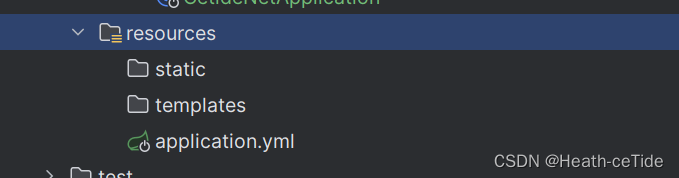 有小叶子表示就ok了
然后我们编写application.yml(这里先写一个初始版,后面再加)
spring:
  application:
    name: cetide-net
  datasource:
    url: jdbc:mysql://localhost:3306/db?serverTimezone=GMT%2B8
    username: root
    password: 1234
#数据库连接
    druid:
      stat-view-servlet:
        enabled: true
        url-pattern: /druid/*
        login-password: druid
        login-username: druid
        allow:
        deny:
#Druid数据库连接池的监控配置,用于开启Druid的StatViewServlet
  jackson:
    deserialization:
      fail-on-unknown-properties: false #表示在反序列化时,如果遇到未知属性,不会抛出异常,而是忽略该属性。
    default-property-inclusion: non_null #表示在序列化时,只有非空属性才会被包含在JSON中。
server:
  port: 1949
mybatis:
  mapper-locations: classpath:org/example/cetidenet/dao/*.xml
#MyBatis的配置文件,用于指定Mapper XML文件的位置
这里的配置文件主要还是连接一下数据库,配了一下端口号,然后加上了一些小配置
那么现在来测试一下目前的配置能不能用吧:
在controller下创建一个UserController文件

在UserController文件下写一个处理gei请求的方法,然后直接返回字符串
编写完成,回到CetideNetApplication启动类,右击启动!
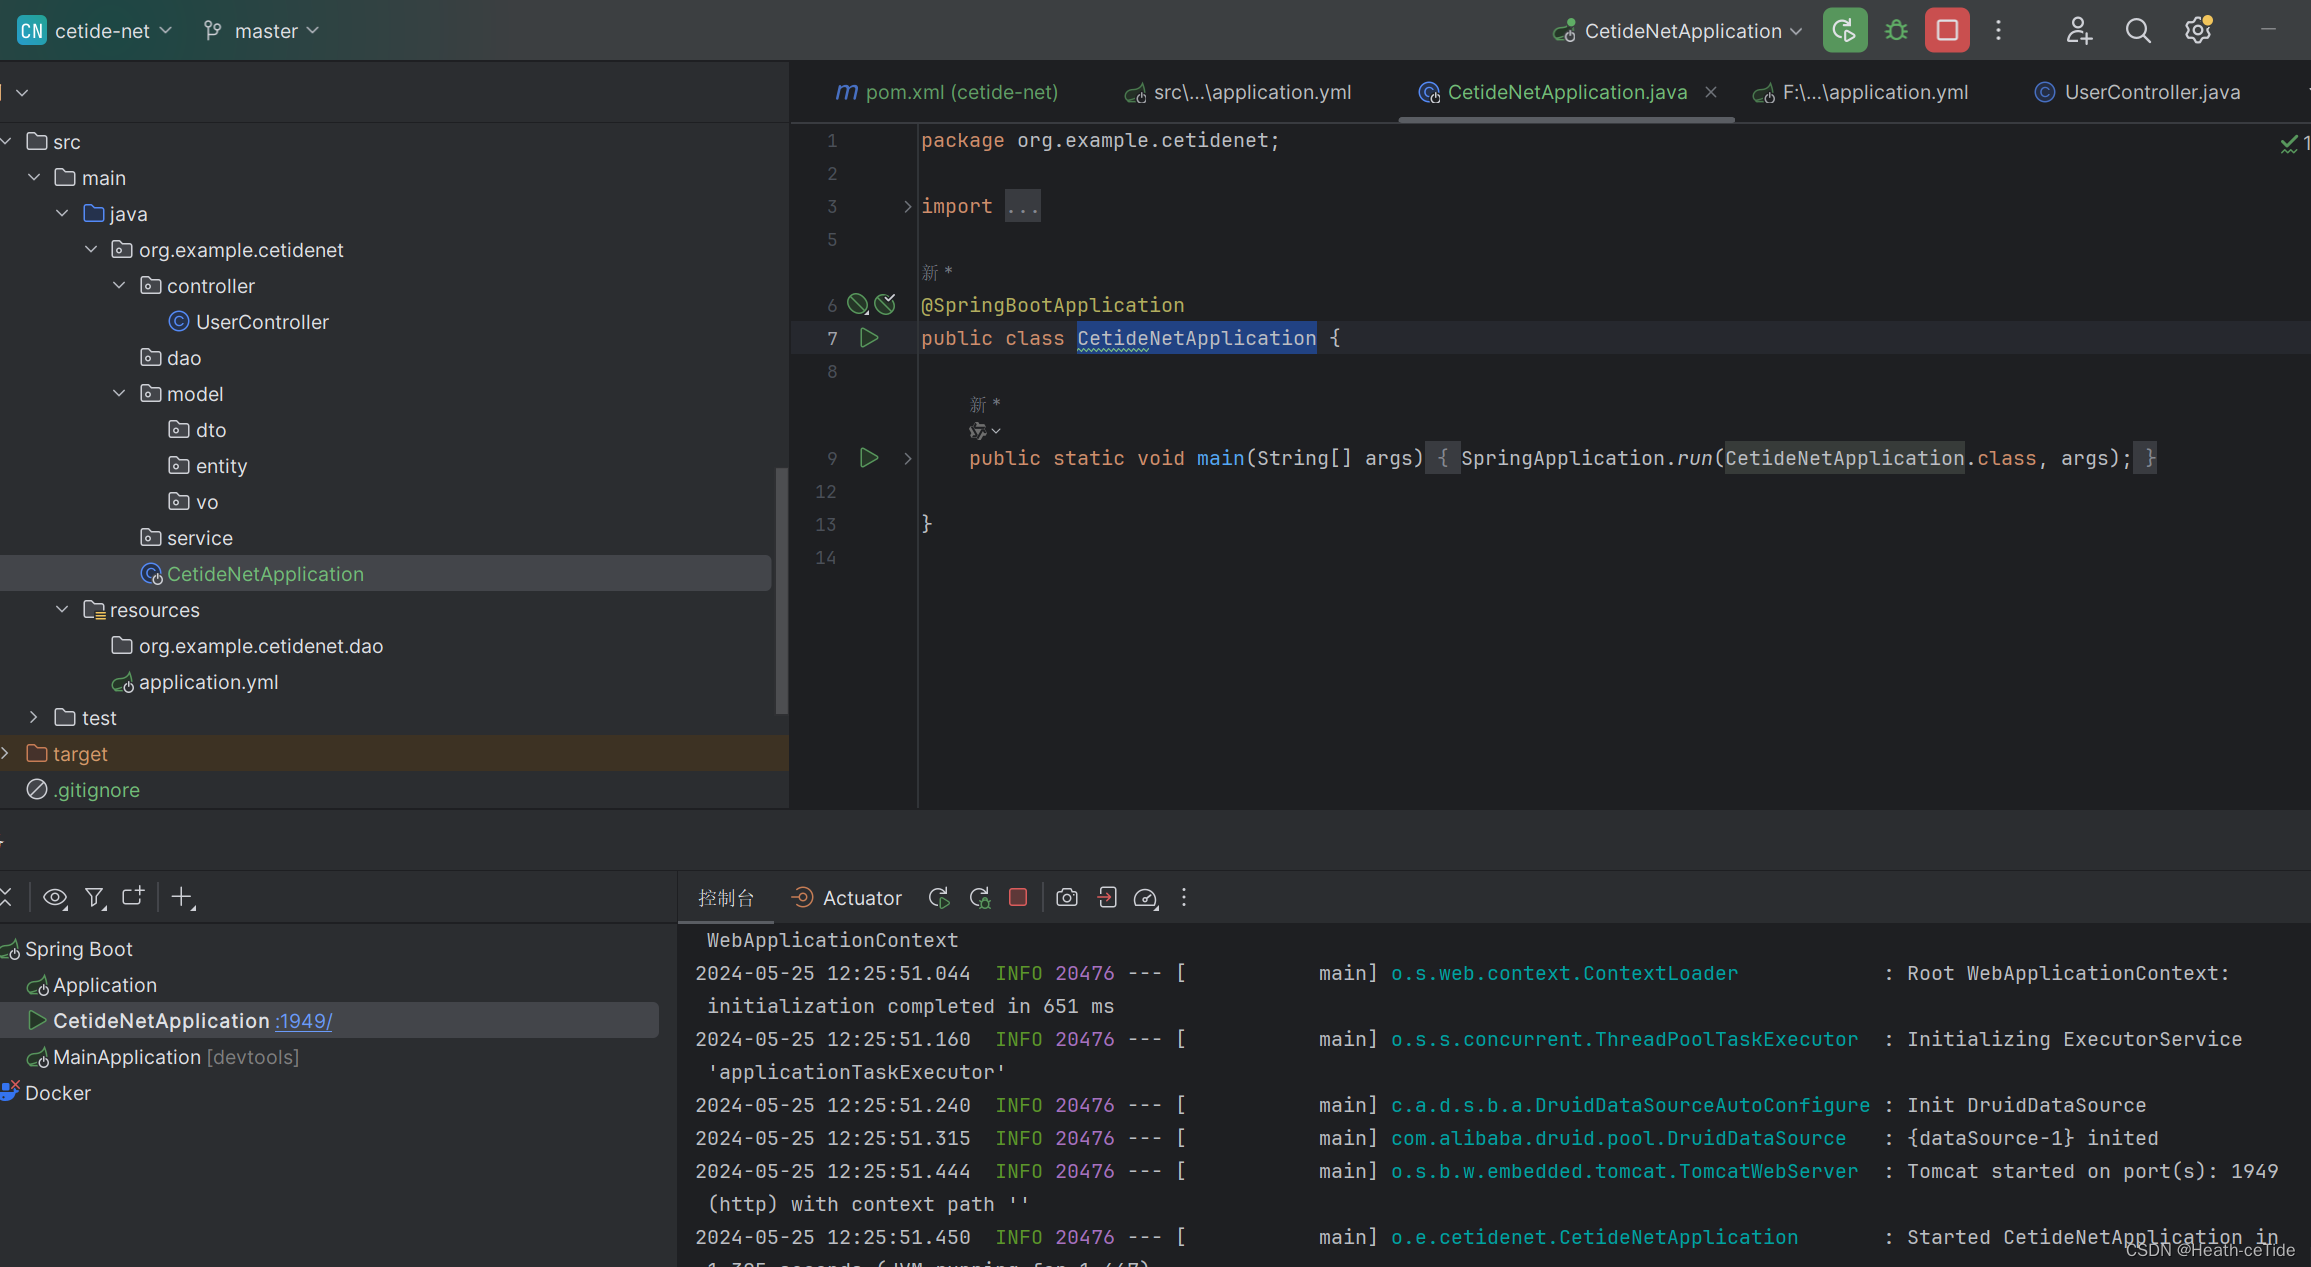
很好,没有报错,那我们到浏览器中试试
输入 http://localhost:1949/user(注意端口号,根据大家自己的端口号输入(如果没有指定,默认为8080))

也能成功显示出来,那么看来是没问题了,开始下一步
4.使用Swagger规范设计和管理API接口(引入Swagger依赖)
使用后端开发感觉这个Swagger还是很有必要的(其实个人感觉postman更好用一点点,但是Swagger还是方便)
注意:这里使用knife4j对于我项目中的Spring版本是可以使用Swagger的,但最新版的几个Spring项目有可能是不适用的,如果遵循下面的步骤一步步搭建依旧无法出现页面,那么可以试试1.调低Spring版本或者调整knife4j的版本,又或者使用其他的Swagger搭建方法(网上还有其他很多Swagger的版本和使用方法)
使用步骤:(之前的文章有过使用这个的详细教程)
1.导入knife4j的maven坐标
添加依赖
<!--        knife4j-->
        <dependency>
            <groupId>com.github.xiaoymin</groupId>
            <artifactId>knife4j-spring-boot-starter</artifactId>
            <version>3.0.2</version>
        </dependency>
2.配置类中加入knife4j的相关配置
创建config包并创建WebConfiguration类

WebConfiguration继承WebMvcConfigurationSupport
在配置类中加入knife4j的相关配置然后配置静态资源映射,否则接口文档页面无法访问。(别忘了加上@Configuration)注意要扫描的包指定好,不然无法扫描到
直接看代码
package org.example.cetidenet.config;

import org.springframework.context.annotation.Bean;
import org.springframework.context.annotation.Configuration;
import org.springframework.web.servlet.config.annotation.WebMvcConfigurationSupport;
import org.springframework.web.servlet.config.annotation.ResourceHandlerRegistry;
import springfox.documentation.builders.ApiInfoBuilder;
import springfox.documentation.builders.PathSelectors;
import springfox.documentation.builders.RequestHandlerSelectors;
import springfox.documentation.service.ApiInfo;
import springfox.documentation.spi.DocumentationType;
import springfox.documentation.spring.web.plugins.Docket;


@Configuration
public class WebConfiguration extends WebMvcConfigurationSupport {

    @Bean
    public Docket docket(){
        ApiInfo apiInfo = new ApiInfoBuilder()
                .title("CeTide-Net接口文档")
                .version("1.0")
                .description("描述")
                .build();

        Docket docket = new Docket(DocumentationType.SWAGGER_2)
                .apiInfo(apiInfo)
                .select()
                //指定生成接口需要扫描的包
                .apis(RequestHandlerSelectors.basePackage("org.example.cetidenet.controller"))
                .paths(PathSelectors.any())
                .build();
        return docket;
    }

    protected void addResourceHandlers(ResourceHandlerRegistry registry) {
        registry.addResourceHandler("/doc.html").addResourceLocations("classpath:/META-INF/resources/");
        registry.addResourceHandler("/webjars/**").addResourceLocations("classpath:/META-INF/resources/webjars/");
    }
}
3.启动项目,查看是否成功
此时可以访问一下localhost:1949/doc.html#/home

显示成功了,那么就可以通过Swagger的进行接口测试了
5.添加工具类:
1.定义统一结果封装类:
(因为要统一结果输出样式,这边写了一个结果封装类)
package org.example.cetidenet.model.entity;

/**
 * 统一响应结果封装类
 */
public class Result<R> implements Serializable{
    private Integer code;//1 成功 , 0 失败
    private String msg; //提示信息
    private R data; //数据 data

    public Result() {
    }

    public Result(Integer code, String msg, R data) {
        this.code = code;
        this.msg = msg;
        this.data = data;
    }

    public Integer getCode() {
        return code;
    }

    public void setCode(Integer code) {
        this.code = code;
    }

    public String getMsg() {
        return msg;
    }

    public void setMsg(String msg) {
        this.msg = msg;
    }

    public Object getData() {
        return data;
    }

    public void setData(R data) {
        this.data = data;
    }

    public static <R> Result<R> success(R data) {
        Result<R> r = new Result<R>();
        r.code = 1;
        r.msg = "success";
        r.data = data;
        return r;
    }

    public static <R> Result<R> success() {
        Result<R> r = new Result<R>();
        r.code = 1;
        r.msg = "success";
        r.data = null;
        return r;
    }

    public static <R> Result<R> error(String msg) {
        Result<R> r = new Result<R>();
        r.code = 0;
        r.msg = msg;
        r.data = null;
        return r;
    }

    @Override
    public String toString() {
        return "Result{" +
                "code=" + code +
                ", msg='" + msg + '\'' +
                ", data=" + data +
                '}';
    }
}
2.解决跨域问题:(这个问题很常见)
下面,我来详细介绍一下所谓的跨域问题和多种解决方法
来一个面试题:
介绍一下跨域问题,以及SpringBoot如何解决跨域问题?
回答:
跨域是指浏览器在执行网页中的Js代码时,由于浏览器的同源策略的一个限制,只能访问同源的资源,而要解决跨域问题就是要在不破坏同源策略的情况下,能够安全地实现数据共享和交互
(注意,这里说明跨域是在浏览器中才存在的,而前后端是不存在这种问题的,那么也就是说我们可以不通过浏览器,直接前后端进行请求发送就能解决这个问题)
下面,上方案!
常见的解决跨域问题的方法有:
1.CORS:这是一种在服务器后端解决跨域的方案(也就是SpringBoot中解决跨域问题)
如果一个网站要访问另一个网站的信息,浏览器首先会发送一个OPTIONS的一个请求,根据服务器返回的Access-Controller-Allow-Origin这样一个头的信息,来决定是否允许跨域访问,所以只需要在服务器端配置这样一个属性即可,并配置允许哪些域名支持跨区请求就好了
SpringBoot中提供了两种配置Access-Controller-Allow-Origin属性的一个方法来解决跨域问题
- 1.通过这样一个注解@CrossOrigin(origins=“http://localhost:8080”)注解指定允许哪些origins允许跨域
- 2.使用WebMvcConfigurer接口来重写addCorsMappings这样一个方法来配置允许跨域的请求源
(这么说,好像有一点点抽象,但是面试这么回答应该也就没问题了)
对于这个项目的话就直接一些,创建utils包,并创建CORSConfig类文件即可
package org.example.cetidenet.utils;

import org.springframework.context.annotation.Configuration;
import org.springframework.web.servlet.config.annotation.CorsRegistry;
import org.springframework.web.servlet.config.annotation.WebMvcConfigurer;

@Configuration
public class CORSConfig implements WebMvcConfigurer {

    public void addCorsMappings(CorsRegistry registry) {
        // 设置允许跨域的路径
        registry.addMapping("/**")
                // 设置允许跨域请求的域名
                .allowedOriginPatterns("*")
                // 是否允许cookie
                .allowCredentials(true)
                // 设置允许的请求方式
                .allowedMethods("GET", "POST", "DELETE", "PUT")
                // 设置允许的header属性
                .allowedHeaders("*")
                // 跨域允许时间
                .maxAge(3600);
    }
}


方案二:
import org.springframework.context.annotation.Bean;
import org.springframework.context.annotation.Configuration;
import org.springframework.web.cors.CorsConfiguration;
import org.springframework.web.cors.UrlBasedCorsConfigurationSource;
import org.springframework.web.filter.CorsFilter;

@Configuration
public class CORSConfig {

    // 当前跨域请求最大有效时长。这里默认1天
    private static final long MAX_AGE = 24 * 60 * 60;

    @Bean
    public CorsFilter corsFilter() {
        UrlBasedCorsConfigurationSource source = new UrlBasedCorsConfigurationSource();
        CorsConfiguration corsConfiguration = new CorsConfiguration();
        corsConfiguration.addAllowedOrigin("*"); // 1 设置访问源地址
        corsConfiguration.addAllowedHeader("*"); // 2 设置访问源请求头
        corsConfiguration.addAllowedMethod("*"); // 3 设置访问源请求方法
        corsConfiguration.setMaxAge(MAX_AGE);
        source.registerCorsConfiguration("/**", corsConfiguration); // 4 对接口配置跨域设置
        return new CorsFilter(source);
    }
}
加上代码,问题就解决啦。
咳咳,我们还是顺便讲一下其他的解决方法:
2.Nginx反向代理技术
这里就以我们写的前端为例子吧,
1.点开request.js

呐,就是这个位置,这里URL是直接写的http://localhost:1949,也是这样导致在浏览器上访问后端造成了跨域问题,这边既然不能直接访问后端,我们就去访问前端看看。
将代码改成
const URL = '/api'这是一种省略的写法,实际上是http://localhost:8080/api(因为我前端没有专门设置端口号,所以端口号为8080)
在request.js改完之后,点开vue.config.js文件中编写方向代理
加上proxy这一块的代码就可以了
const { defineConfig } = require("@vue/cli-service");
module.exports = defineConfig({
  transpileDependencies: true,

  server: {
    proxy: {
      "/api": {
        target: "http://localhost:1949",
        changeOrigin: true,
        rewrite: (path) => path.replace(/^\/api/, ""),
      },
    },
  },
});
3.jsonp(现在用的很少了,存在一些限制和安全考虑,就不演示使用方法了)
(前后端的跨域问题找一个方案解决,这里我就把前端的跨域问题的解决代码给注释了,选择使用后端的解决方案)
3.使用ThreadLocalUtil存储登录用户信息
在utils下创建ThreadLocalUtil类:
提供相关代码如下:
package org.example.cetidenet.utils;

/**
 * ThreadLocal 工具类
 */
@SuppressWarnings("all")
public class ThreadLocalUtil {
    //提供ThreadLocal对象,
    private static final ThreadLocal THREAD_LOCAL = new ThreadLocal();

    //根据键获取值
    public static <T> T get(){
        return (T) THREAD_LOCAL.get();
    }

    //存储键值对
    public static void set(Object value){
        THREAD_LOCAL.set(value);
    }

    //清除ThreadLocal 防止内存泄漏
    public static void remove(){
        THREAD_LOCAL.remove();
    }
}
这边其实还可以添加一些其他的工具类,比如md5加密,jwt什么的
4.使用JWT令牌,创建JwtUtil类
第一步:引入依赖
        <!--java-jwt坐标-->
        <dependency>
            <groupId>com.auth0</groupId>
            <artifactId>java-jwt</artifactId>
            <version>4.4.0</version>
        </dependency>
第二步编写代码
上代码:
package org.example.cetidenet.utils;

import com.auth0.jwt.JWT;
import com.auth0.jwt.algorithms.Algorithm;

import java.util.Date;
import java.util.Map;

public class JwtUtil {

    private static final String KEY = "itheima";

	//接收业务数据,生成token并返回
    public static String genToken(Map<String, Object> claims) {
        return JWT.create()
                .withClaim("claims", claims)
                .withExpiresAt(new Date(System.currentTimeMillis() + 1000 * 60 * 60 ))
                .sign(Algorithm.HMAC256(KEY));
    }

	//接收token,验证token,并返回业务数据
    public static Map<String, Object> parseToken(String token) {
        return JWT.require(Algorithm.HMAC256(KEY))
                .build()
                .verify(token)
                .getClaim("claims")
                .asMap();
    }

}
好了,这些初始工作也做的差不多了,现在开始后端设计,先来用户模块吧,先设计一下数据库这一块,我觉着这块可以先问问ai的意见然后再自己补充设计,就很有效率
6.设计用户表
设计数据表

| gender | ENUM('M', 'F', 'O') | 性别(男性、女性、其他) |
好家伙,性别还知道加一个其他
感觉很全面+很有效率(危机感+1)
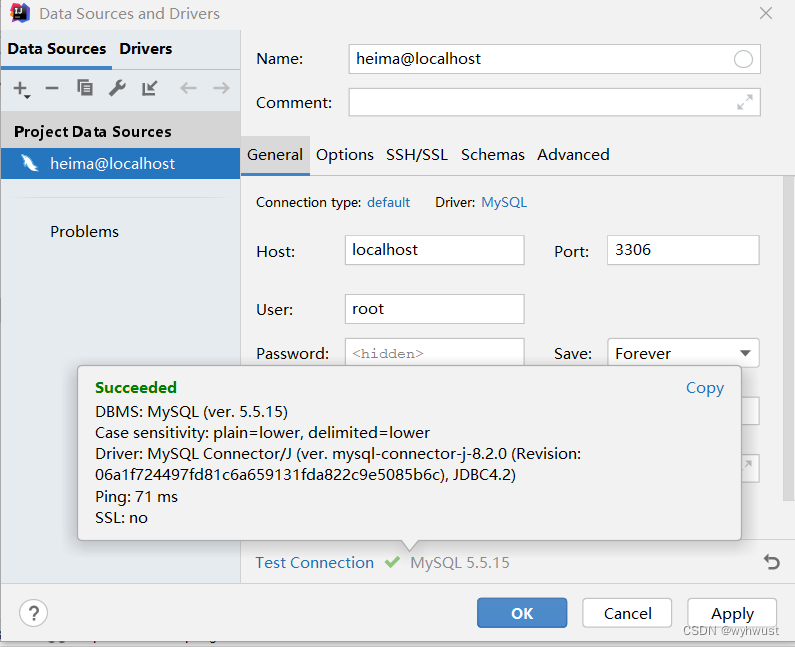
这边来后端连接一下数据库:

选择MySQL数据库
 输入密码之后就可以连接成功了(如果出现没连接成功的可以查查问题,或者询问一下)
放一手用户表代码(其中还有几组初始数据)
-- 创建数据库
CREATE DATABASE cetide_db;

-- 使用创建的数据库
USE cetide_db;

-- 创建用户表
CREATE TABLE user (
                      id INT AUTO_INCREMENT PRIMARY KEY,
                      username VARCHAR(50) UNIQUE,
                      email VARCHAR(100) UNIQUE,
                      password VARCHAR(255),
                      full_name VARCHAR(100),
                      avatar VARCHAR(255),
                      bio TEXT,
                      birth_date DATE,
                      gender ENUM('M', 'F', 'O'),
                      phone VARCHAR(20),
                      country VARCHAR(100),
                      address VARCHAR(255),
                      created_at TIMESTAMP DEFAULT CURRENT_TIMESTAMP,
                      updated_at TIMESTAMP DEFAULT CURRENT_TIMESTAMP ON UPDATE CURRENT_TIMESTAMP
);

-- 创建唯一索引
CREATE UNIQUE INDEX idx_username ON user(username);
CREATE UNIQUE INDEX idx_email ON user(email);


-- 插入常规用户信息
INSERT INTO user (username, email, password, full_name, avatar, bio, birth_date, gender, phone, country, address)
VALUES ('john_doe', 'john.doe@example.com', 'hashed_password', 'John Doe', 'https://example.com/avatar/john_doe.jpg', 'Hello, I\'m John Doe.', '1990-05-15', 'M', '+1 (123) 456-7890', 'USA', '123 Main St, Anytown, USA');

-- 插入企业用户信息
INSERT INTO user (username, email, password, full_name, avatar, bio, phone, country, address)
VALUES ('acme_corp', 'contact@acmecorp.com', 'hashed_password', 'Acme Corporation', 'https://example.com/avatar/acme_corp.jpg', 'Welcome to Acme Corporation.', '+1 (800) 555-1234', 'USA', '456 Business Blvd, Corporate City, USA');

-- 插入VIP用户信息
INSERT INTO user (username, email, password, full_name, avatar, bio, birth_date, gender, phone, country, address)
VALUES ('vip_customer', 'vip@example.com', 'hashed_password', 'VIP Customer', 'https://example.com/avatar/vip_customer.jpg', 'I\'m a VIP customer.', '1985-03-20', 'O', '+1 (555) 123-4567', 'Canada', '789 VIP St, Elite Town, Canada');

-- 插入普通用户信息
INSERT INTO user (username, email, password, full_name, avatar, bio, birth_date, gender, phone, country, address)
VALUES ('jane_smith', 'jane.smith@example.com', 'hashed_password', 'Jane Smith', 'https://example.com/avatar/jane_smith.jpg', 'Nice to meet you!', '1988-11-30', 'F', '+44 20 1234 5678', 'UK', '456 Park Ave, London, UK');
放入直接运行就好了
数据库表结构好了就可以
开始设计实体类了
在Entity包下创建User类
根据数据库设计就好了(照着填充就是了(这里我改了创建时间和更新时间两个列的名字))

然后getter和setter,tostring方法填充(其实这里还是可以添加很多细节的,emmmm,后面开发接口的时候再一并说吧)
7.用户模块后端接口开发
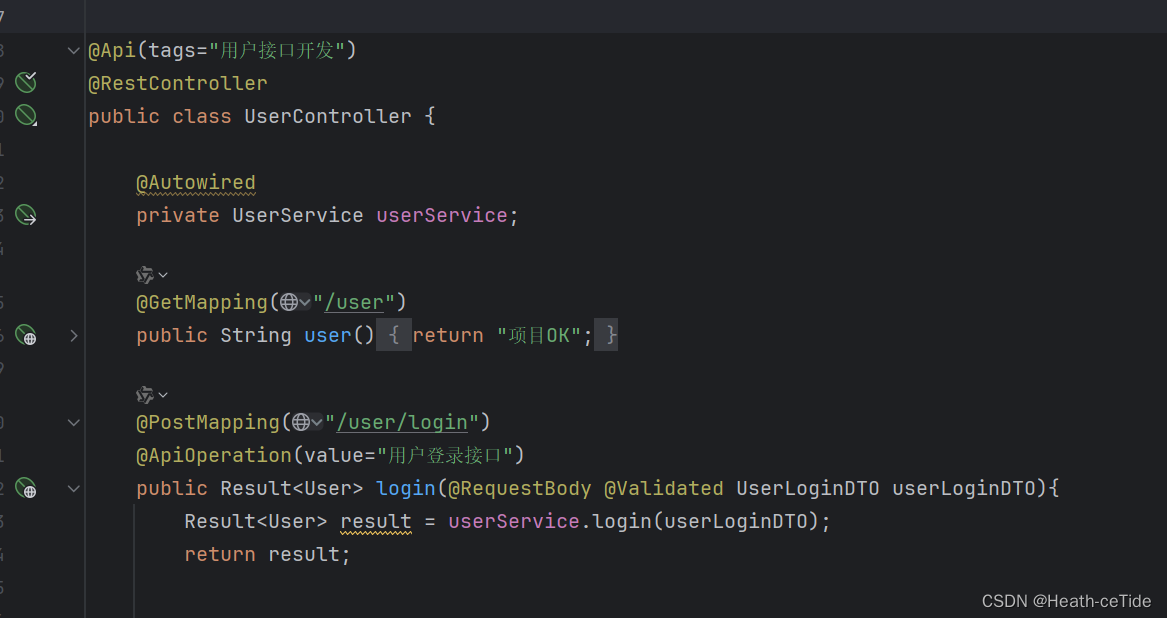
下面来开发一下用户接口,先完成一下登录注册的接口吧。
分析一下,登录接口从前端向后端发的数据有哪些,登录好像只有账号和密码,那就设计一个DTO包含账号密码

加上getter和setter方法之后也就ok了,下面到UserController类中编写代码
前端我们规定的发起请求的路径是/user/login,那么后端编写代码即可

@RequestBody一定不要忘了加上
    @PostMapping("/user")
    public Result<User> login(@RequestBody UserLoginDTO userLoginDTO){
        Result<User> result = userService.login(userLoginDTO);
        return result;
然后直接调用userService的方法就OK了,这里尽量不要把逻辑处理的步骤加载controller类方法上,
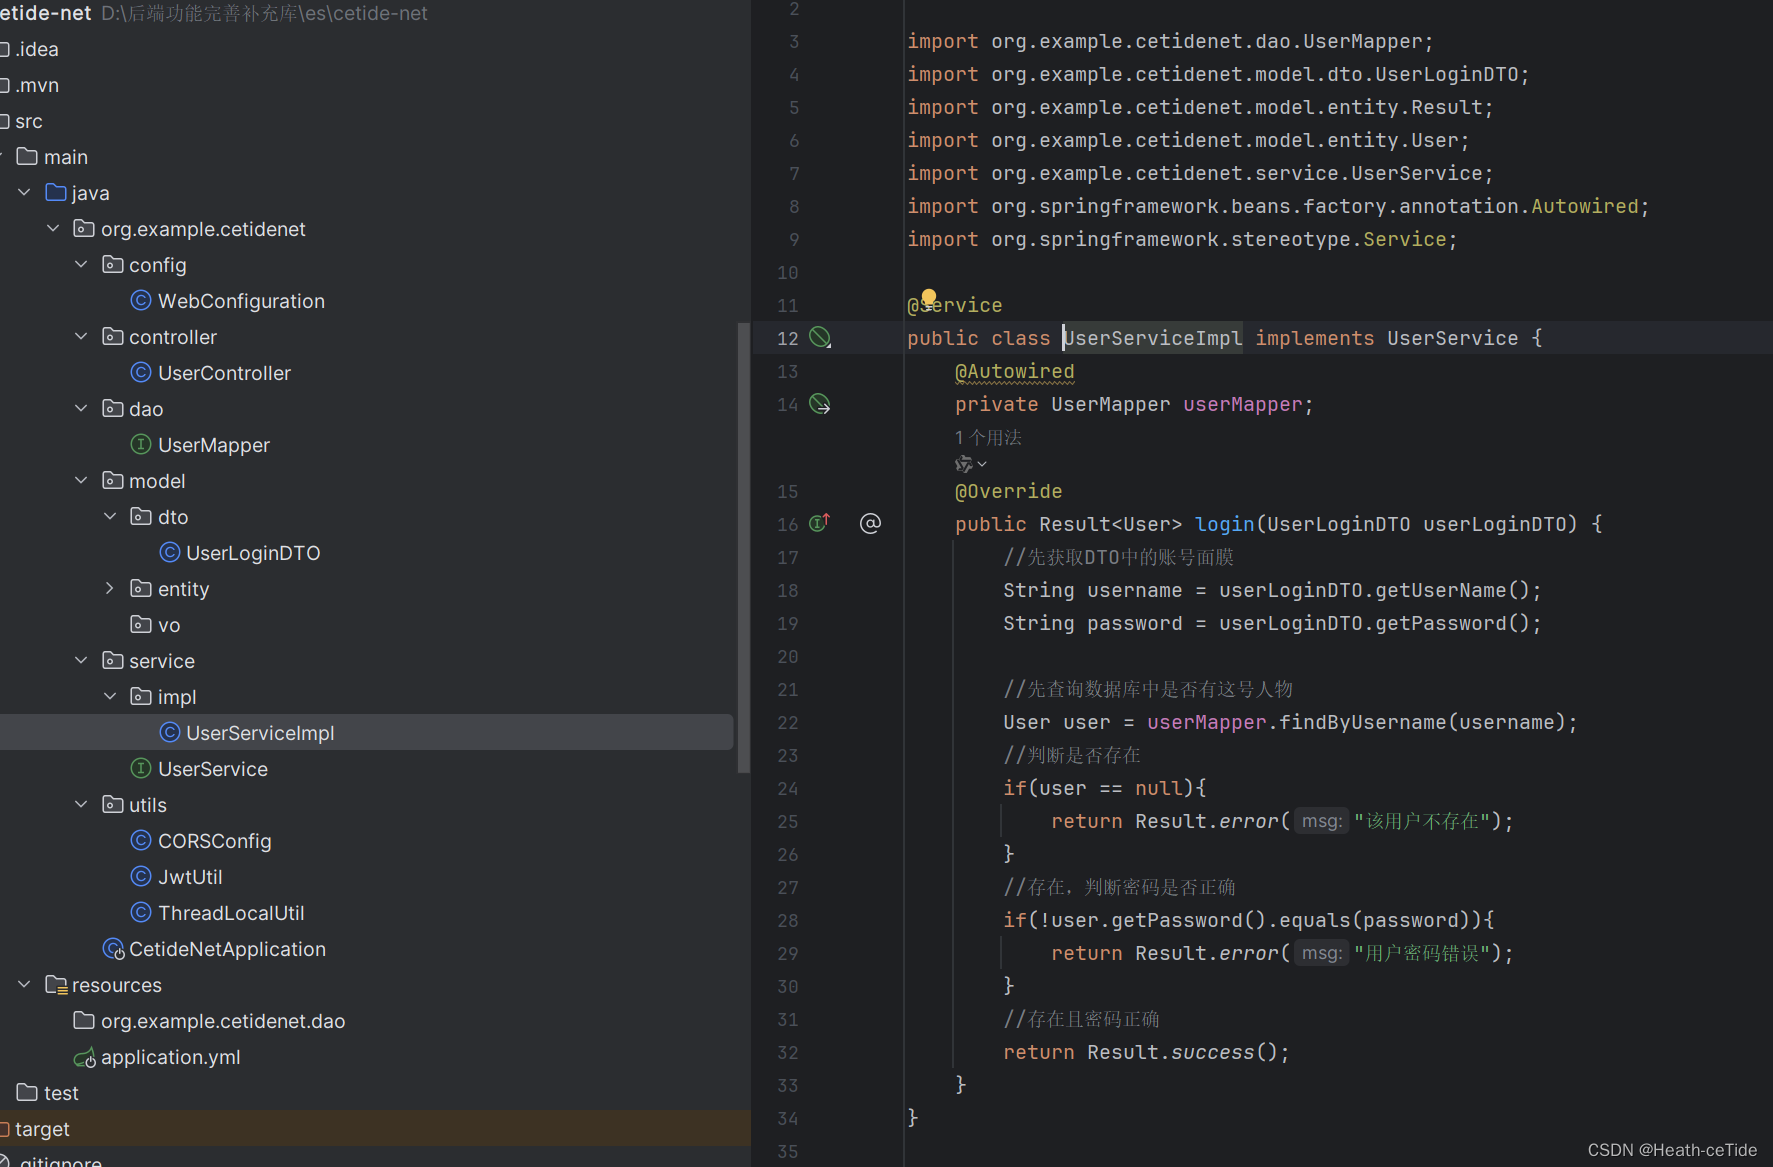
现在在service包下创建UserService接口

并在service包下创建impl包,impl包下创建UserServiceImpl实现UserService,并且加上@Service注解

都到这一步了,就顺便把持久层解决,在dao包下创建UserMapper接口,并加上@Mapper注解

OK,现在回到UserController类中,注入UserService

    @Autowired
    private UserService userService;
在UserService中创建方法login,并在UserServiceImpl中实现


现在开始编写逻辑处理部分,
STOP!这里我觉着有必要加上一个参数校验,虽然前端代码中一般也会进行参数校验,比如看账号密码是否是处于5~16位这种条件,但是有些时候,会有些人不通过前端直接访问接口,所以前后端都进行一次参数校验比较好
对于参数校验这一块,可以手动if判断,但每次都写一遍或者封装成方法到处用,感觉还是太过麻烦了,这边建议可以使用SpringValidation进行参数校验
使用SpringValidation进行参数校验:
使用方法:
1.引入依赖
<!--        springvalidation-->
        <dependency>
            <groupId>org.springframework.boot</groupId>
            <artifactId>spring-boot-starter-validation</artifactId>
</dependency>2.在参数前面加上@Pattern注解
在UserLoginDTO这里加上注解(这里就规定都是5~16位的账号密码吧)

package org.example.cetidenet.model.dto;

import javax.validation.constraints.Pattern;

public class UserLoginDTO {

    @Pattern(regexp = "^\\S{5,16}$")
    private String userName;
    @Pattern (regexp = "^\\S{5,16}$")
    private String password;

    public String getUserName() {
        return userName;
    }

    public void setUserName(String userName) {
        this.userName = userName;
    }

    public String getPassword() {
        return password;
    }

    public void setPassword(String password) {
        this.password = password;
    }
}
3.在Controller类上添加@Validated注解
@PostMapping("/user")
public Result<User> login(@RequestBody @Validated UserLoginDTO userLoginDTO){
    Result<User> result = userService.login(userLoginDTO);
    return result;
在login方法参数中添加@Validated
好,差不多就先这样,然后我们回到UserServiceImpl类中编写登录接口,
先确定一下执行逻辑
这里已经先判断了其长度了,便不用过多判断什么,
用户登录有多种情况,要么是用户根本不存在要么是用户的密码错误,或者......
就先这两情况
先根据用户名查询一波数据库看看是否存在该用户,存在则比对密码是否正确,如果正确则登录成功,如果错误则返回密码错误,如果用户不存在则返回错误信息,用户不存在。
先写一个简单的吧,(这个太简陋了,其实有很多可以补充的点,比如密码进行Md5加密,加盐处理,大小写的转换,应对高并发的redis处理,等等等)
这里因为之前插入的数据密码是没有加密的,所以这里暂时不加密,后面再加上去

这是其中调用的一个Mapper的方法,这里就用注解的方式写了(毕竟是比较简单的一个)
来试试接口测试
先加上了两个注解
然后我们打开Swagger

此时接口文档就有文字描述了,点击该接口测试看看

测试了一下,很成功
那么意味着登录接口开发成功了。
那么就再写一个用户注册接口开发吧:
先写一个UserRegisterDTO

这里我感觉有了登录的DTO也可以用这个DTO,没必要多写一个。。。。

controller这块都差不多
然后就是逻辑处理这一块了,就不细说了,先看代码
    @Override
    public Result<User> register(UserRegisterDTO userRegisterDTO) {
        String username = userRegisterDTO.getUserName();
        String password = userRegisterDTO.getPassword();
        String email = userRegisterDTO.getEmail();
        //注册要求:email不重复,username不重复
        //用户名次要,先看看email是否重复
        User user = userMapper.findByEmail(email);
        //判断人物是否存在
        if(user!=null){
            return Result.error("该邮箱已被注册");
        }
        //user为空,可以注册
        user = userMapper.findByUsername(username);
        if(user!=null){
            return Result.error("该用户名重复");
        }
        //user为空,用户名不重复
        String salt = password + "ceTide";
        String md5Pwd = DigestUtils.md5Hex(salt.getBytes()).toUpperCase();

        boolean isRegister = userMapper.addUser(username,md5Pwd,email);
        if(isRegister){
            return Result.success();
        }
        return Result.error("注册失败");
    }
然后进行接口测试
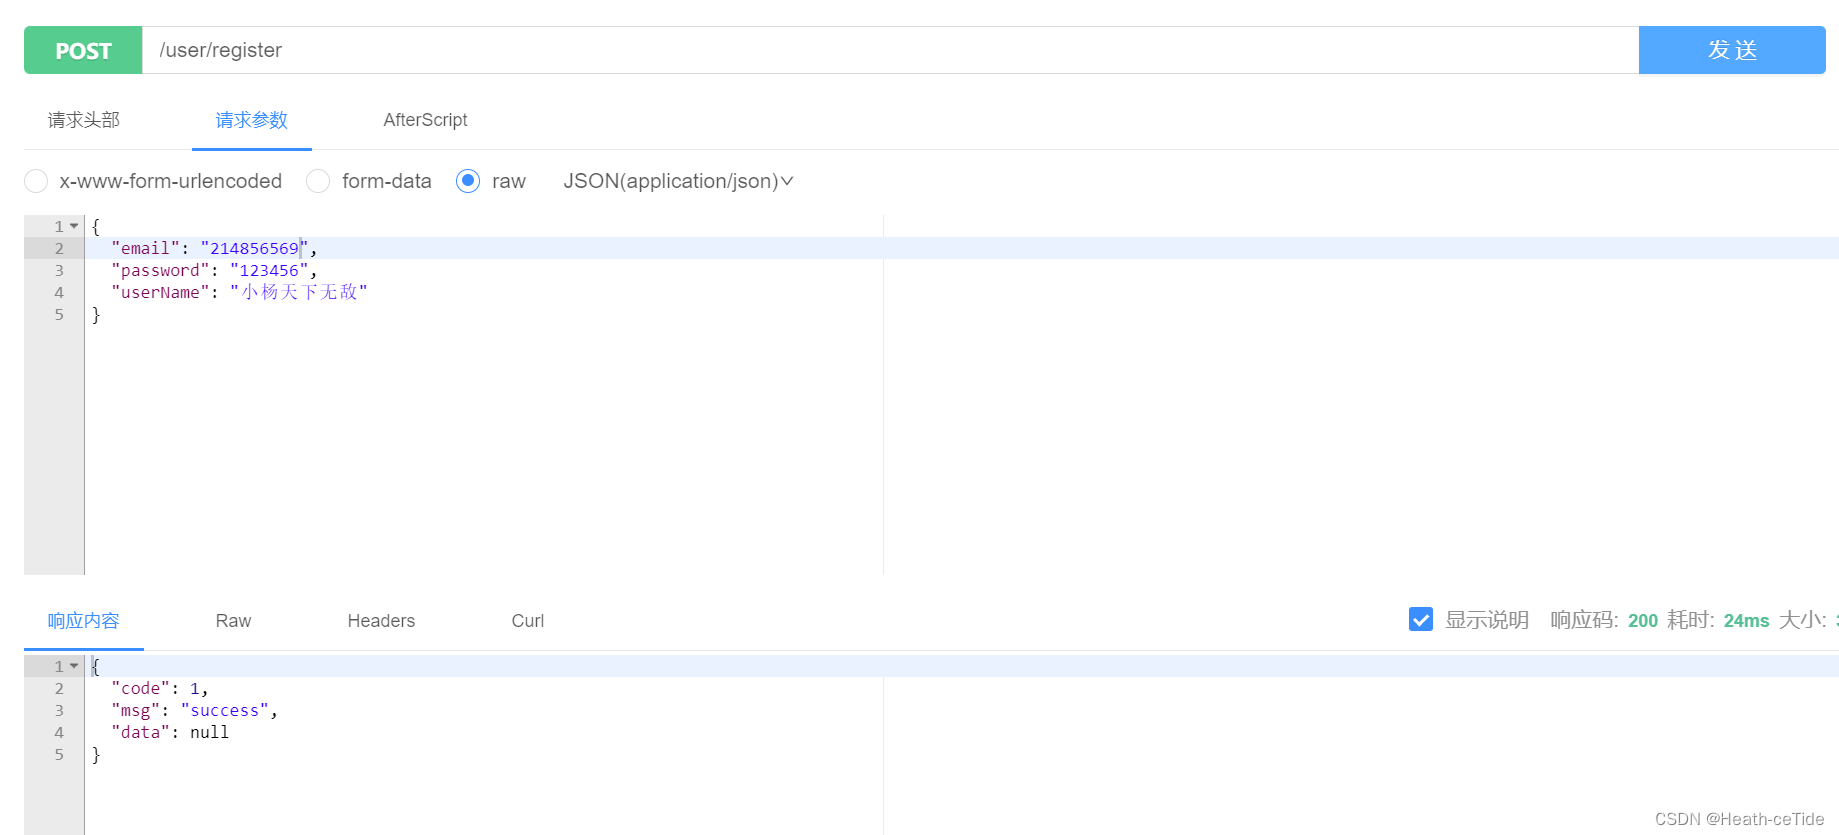
就成功了,

再次注册就会触发异常,okok,差不多登录注册这一块的内容就到这里吧
下面继续把用户功能完善一下
回到前端的用户界面

添加三个组件按钮,用来编辑用户信息,就先从编辑资料开始吧
这里再造一个页面来编辑资料感觉好麻烦,就用抽屉组件做一个编辑资料的吧
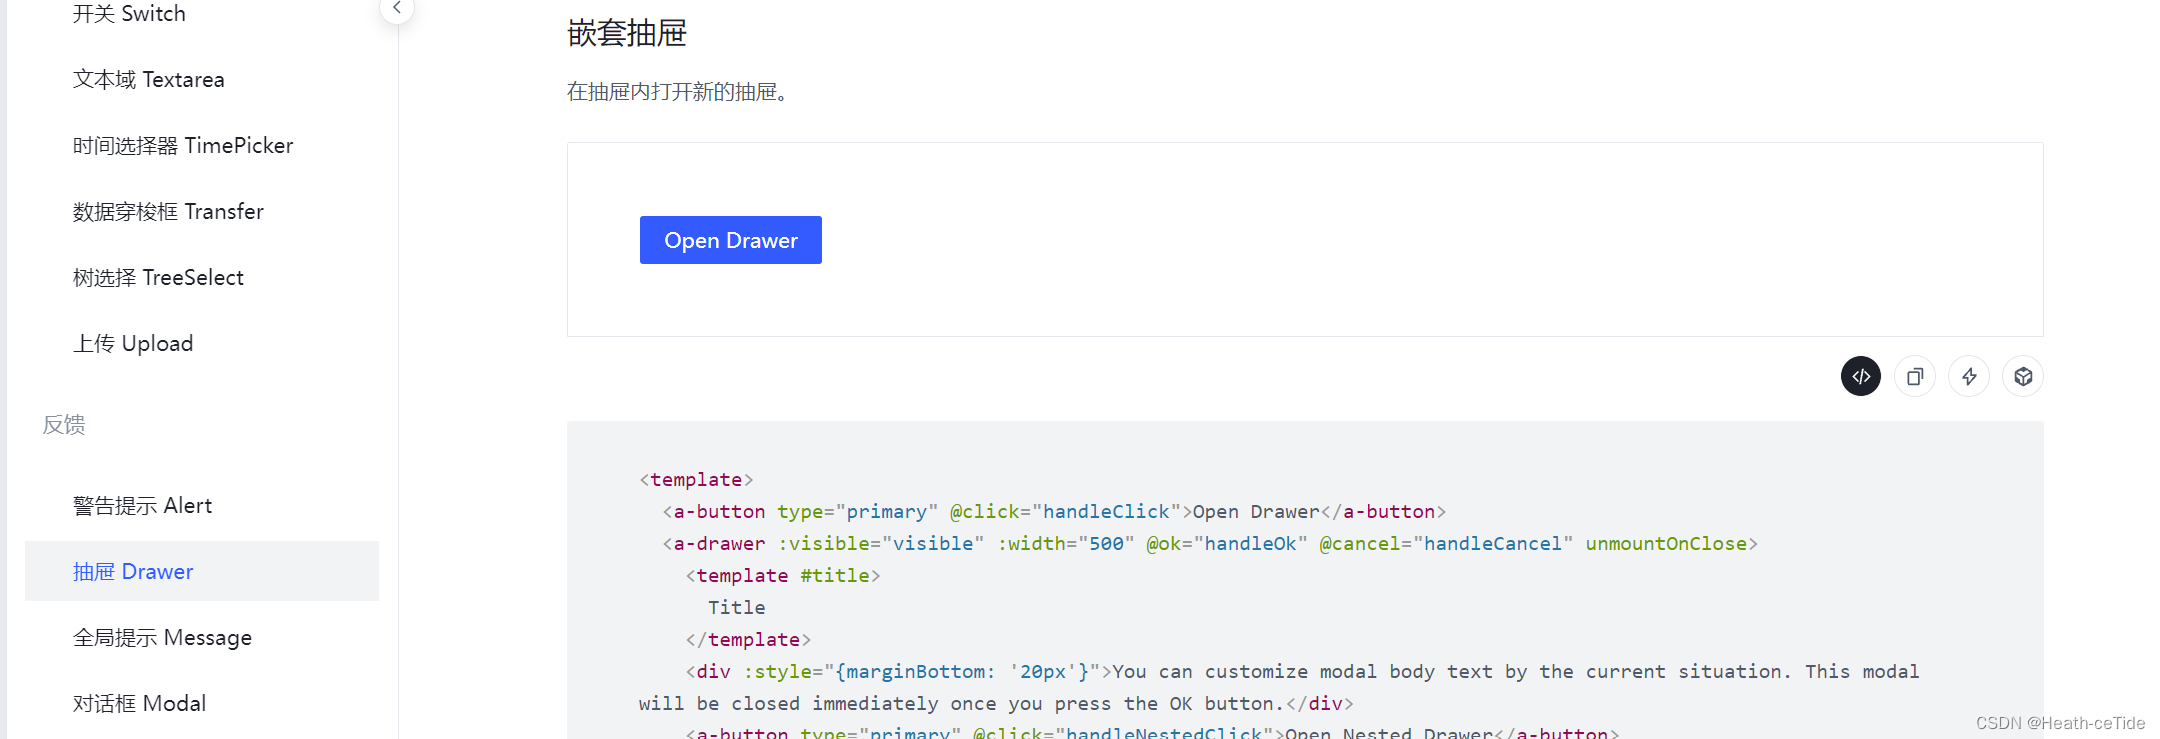
就用这个折叠的,此处就不展示代码了,后面一起展示(感觉比较简单)
然后修改折叠页面的内容定义数据结构进行页面就好了

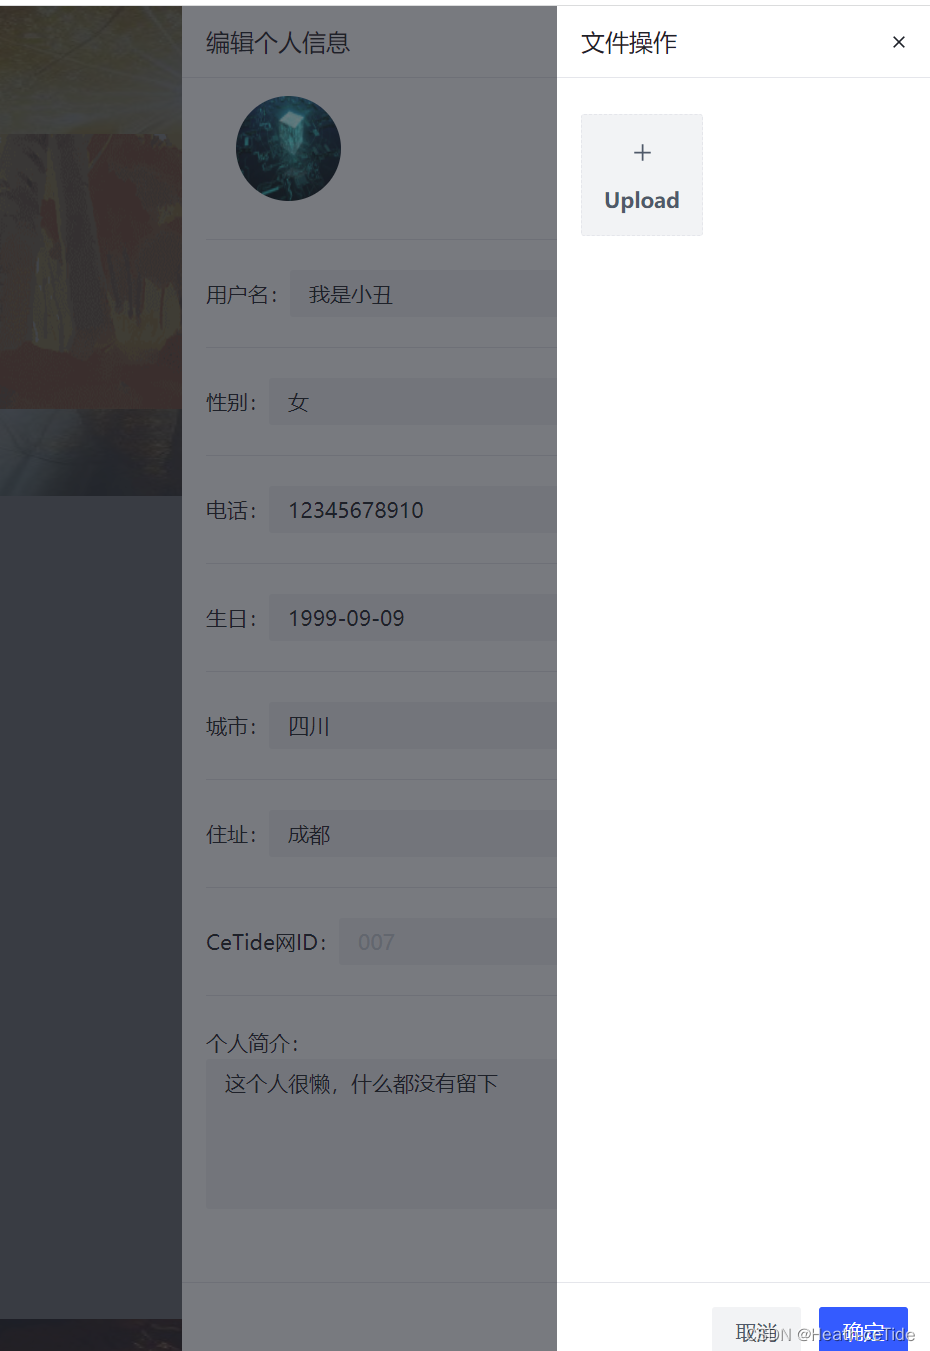
这边加了一个嵌套的抽屉
不过要是只进行文件操作也不必这么麻烦,这里可以加一个查看之前照片并保存的功能
然后再给个人中心加上一个页头就好了

就先这样吧
<template>
  <div id="userCenter">
    <a-layout style="height: 100vh">
      <a-layout-header>
        <a-page-header title="用户中心" subtitle="CeTide网" @click="returnPage"/>
        <div class="header">
          <div class="user-introduce">
            <img
              :src="userNum.userImg"
              width="70px"
              height="70px"
              class="user-img"
            />
            <div>
              <div class="personal-introduce">
                <div style="margin-left: 10px">
                  <span class="name">{{ userNum.userName }}</span>
                  <span class="sex-icon"></span>
                </div>
                <a-space class="btn">
                  <a-button type="dashed" shape="round" @click="handleClick"
                    ><icon-pen-fill />编辑资料</a-button
                  >
                  <a-button type="dashed" shape="round"
                    ><icon-settings />设置</a-button
                  >
                  <a-button type="dashed" shape="round"
                    ><icon-list />文章管理</a-button
                  >
                </a-space>
              </div>
            </div>
          </div>
          <div class="user-follow">
            {{ userNum.attention }}
            <icon-star />
            <span class="follow-num">关注</span>
            {{ userNum.fans }}
            <icon-heart />
            <span class="follow-num">粉丝</span>
            {{ userNum.article }}
            <icon-select-all />
            <span class="follow-num">文章</span>
          </div>
          <div class="user-follow">个人简介:{{ userSelfIntroduce }}</div>
        </div>
      </a-layout-header>
      <a-layout style="margin: 24px 180px">
        <a-layout-sider :resize-directions="['right']">
          <a-layout
            style="
              height: 100%;
              text-align: left;
              padding-left: 20px;
              background-color: #c4c4c4;
            "
          >
            <a-layout-content style="height: 20%">
              <h3>CeTide等级</h3>
            </a-layout-content>
            <a-layout-content style="height: 20%">
              <h3>个人成就</h3>
            </a-layout-content>
            <a-layout-content style="height: 60%">
              <h3>个人动态</h3>
            </a-layout-content>
          </a-layout>
        </a-layout-sider>
        <a-layout-content class="content">
          <h3>用户中心</h3>
        </a-layout-content>
      </a-layout>
      <a-layout-footer>Footer</a-layout-footer>
    </a-layout>

    <!-- 编辑个人信息的抽屉 -->
    <a-drawer
      :visible="visible"
      :width="500"
      @ok="handleOk"
      @cancel="handleCancel"
      unmountOnClose
    >
      <template #title> 编辑个人信息 </template>
      <div :style="{ marginBottom: '20px' }">
        <div >
          <img :src="userNum.userImg" width="70px" height="70px" class="user-img"/>
      <a-button type="primary" @click="handleNestedClick" style="float: right;margin-top: 20px"
        >更换头像</a-button
      >
        </div>
            <a-divider />
        <div> 用户名:<a-input :style="{width:'320px'}" allow-clear v-model="userNum.userName"/></div>
            <a-divider />
        <div> 性别:<a-input :style="{width:'320px'}" v-model="userNum.userSex" /></div>
            <a-divider />
        <div> 电话:<a-input :style="{width:'320px'}" v-model="userNum.phone"/></div>
            <a-divider />
        <div> 生日:<a-input :style="{width:'320px'}" v-model="userNum.birthday" /></div>
            <a-divider />
        <div> 城市:<a-input :style="{width:'320px'}" v-model="userNum.county" /></div>
            <a-divider />
        <div> 住址:<a-input :style="{width:'320px'}" v-model="userNum.address" /></div>
            <a-divider />
        <div> CeTide网ID:<a-input :style="{width:'320px'}" v-model="userNum.id" disabled/></div>
            <a-divider />
        <div> 个人简介: <a-textarea v-model="userSelfIntroduce" allow-clear style="height: 100px"/></div>
      </div>

    </a-drawer>
    <a-drawer
      :visible="nestedVisible"
      @ok="handleNestedOk"
      @cancel="handleNestedCancel"
      unmountOnClose
    >


      <template #title> 文件操作 </template>
            <a-space direction="vertical" :style="{ width: '100%' }" class="picture">
    <a-upload
      action="/"
      :fileList="file ? [file] : []"
      :show-file-list="false"
      @change="onChange"
      @progress="onProgress"
    >
      <template #upload-button>
        <div
          :class="`arco-upload-list-item${
            file && file.status === 'error' ? ' arco-upload-list-item-error' : ''
          }`"
        >
          <div
            class="arco-upload-list-picture custom-upload-avatar"
            v-if="file && file.url"
          >
            <img :src="file.url" />
            <div class="arco-upload-list-picture-mask">
              <IconEdit />
            </div>
            <a-progress
              v-if="file.status === 'uploading' && file.percent < 100"
              :percent="file.percent"
              type="circle"
              size="mini"
              :style="{
                position: 'absolute',
                left: '50%',
                top: '50%',
                transform: 'translateX(-50%) translateY(-50%)',
              }"
            />
          </div>
          <div class="arco-upload-picture-card" v-else>
            <div class="arco-upload-picture-card-text">
              <IconPlus />
              <div style="margin-top: 10px; font-weight: 600">Upload</div>
            </div>
          </div>
        </div>
      </template>
    </a-upload>
  </a-space>
    </a-drawer>
  </div>
</template>

<script setup>
import { ref } from "vue";
import avatar from "../assets/userbg.png";
import { useRouter } from "vue-router";
const router = useRouter();

const userSelfIntroduce = ref("这个人很懒,什么都没有留下");
// const userSelfSex = ref("male");
const userNum = ref({
  id: "007",
  county: "四川",
  address: "成都",
  phone: "12345678910",
  birthday: "1999-09-09",
  userSex: "女",
  email: "123@qq.com",
  userImg: avatar,
  // userImg :'../assets/userbg.jpg',
  userName: "我是小丑",
  attention: 0,
  fans: 0,
  article: 0,
});

//抽屉显示隐藏
const visible = ref(false);
const nestedVisible = ref(false);

const handleClick = () => {
  visible.value = true;
};
const handleOk = () => {
  visible.value = false;
};
const handleCancel = () => {
  visible.value = false;
};
const handleNestedClick = () => {
  nestedVisible.value = true;
};
const handleNestedOk = () => {
  nestedVisible.value = false;
};
const handleNestedCancel = () => {
  nestedVisible.value = false;
};

//返回方法
const returnPage = () =>{
  router.push('/')
}
</script>

<style lang="scss" scoped>
#userCenter {
  background: url("../assets/image.png") no-repeat bottom center / 100% 100%;
}
.header {
  font-family: "Satisfy", cursive;
  margin: 2% 100px;
  height: 20vh;
  background: url("../assets/back.png") no-repeat center / 100% 100%;
  position: relative;
}

.personal-introduce {
  display: flex;
  justify-content: center;
  align-items: flex-end;
  margin-top: 10px;
  text-shadow: 0px 0px 4px rgba(0, 0, 0, 0.31);
  .name {
    line-height: 29px;
    font-size: 26px;
  }
  .sex-icon {
    display: inline-block;
    width: 16px;
    height: 16px;
    margin: 0px 8px;
    margin-bottom: 4px;
    background: url(../assets/user-images/sex-icon.png) no-repeat center;
    background-size: contain;
    border-radius: 50%;
  }
  .level-icon {
    display: inline-block;
    width: 16px;
    height: 16px;
    margin-bottom: 4px;
    background: url(../assets/user-images/leval-icon.png) no-repeat center;
    background-size: contain;
    border-radius: 50%;
  }
}

.user-introduce {
  display: flex;
  justify-items: left;
  padding: 10px;
}
.user-img {
  border-radius: 50%;
  margin-left: 20px;
}
.user-follow {
  margin-left: 30px;
  font-size: 16px;
  display: flex;
  justify-items: left;
}
.follow-num {
  font-size: 16px;
  padding-right: 20px;
}
.content {
  margin-left: 70px;
  background-color: #c4c4c4;
}
.btn {
  position: absolute;
  right: 40px;
}

</style>


![[国产大模型简单使用介绍] 开源与免费API](https://img-blog.csdnimg.cn/img_convert/6b0671c29fd0501b7dcfb4aeb9863cb9.png)