概念
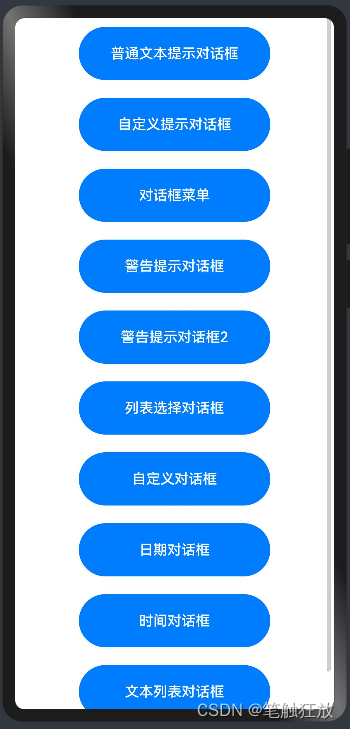
对话框在任何一款应用中,任何一个系统或者平台上使用都非常频繁,这里介绍一下鸿蒙系统中对话框的用法,分别为:普通文本对话框,自定义提示对话框,对话框菜单,警告提示对话框,列表选择对话框,自定义对话框,日期对话框,时间对话框,文本列表对话框……
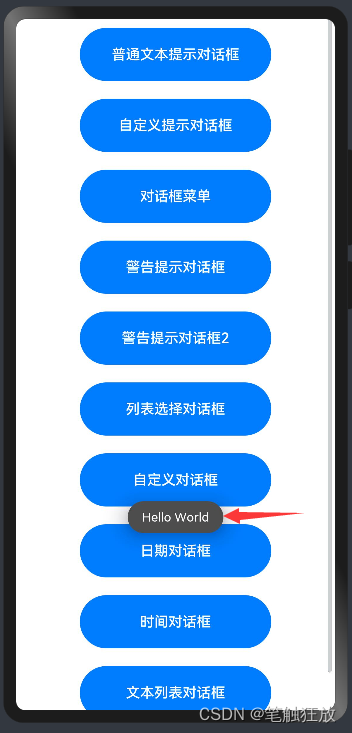
1.普通文本对话框
@Entry
@Component
struct Index {
@State message: string = 'Hello World'
//文本提示对话框
build() {
Scroll(){
Column() {
Button("普通文本提示对话框").width("60%").height(60).margin(10)
.onClick(()=>{
promptAction.showToast({
message:this.message,//显示的提示内容
duration:2000,//显示的时长
bottom:200,//设置提示对话框距离底部的间距
})
})
}.width("100%")
}
}
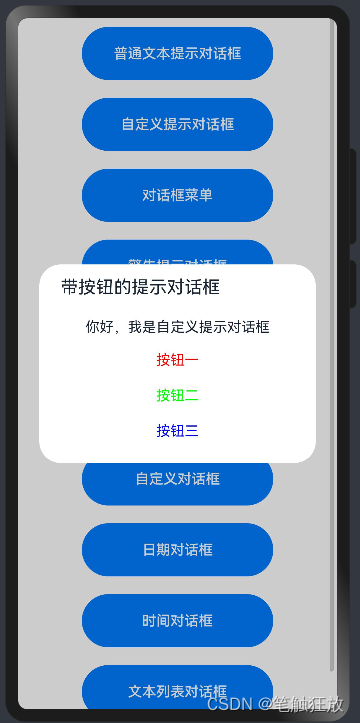
}2.自定义提示对话框
//该提示对话框默认为中央显示
        Button("自定义提示对话框").width("60%").height(60).margin(10)
          .onClick(()=>{
            promptAction.showDialog({
              title:"带按钮的提示对话框",
              message:"你好,我是自定义提示对话框",
              //对话框中显示两个按钮时横向显示,三个按钮会垂直显示
              buttons:[{
                text:"按钮一",
                color:"#f00",
              },
                {
                  text:"按钮二",
                  color:"#0f0",
              },
                {
                  text:"按钮三",
                  color:"#00f",
                }
               ]
            })
            //给按钮添加点击事件
              .then(data=>{
                switch (data.index){
                  case 0:
                    console.info("第一个按钮被点击了")
                  break;
                  case 1:
                    console.info("第二个按钮被点击了")
                    break;
                  case 2:
                    console.info("第三个按钮被点击了")
                    break;
                }
              })
          })
3.对话框菜单

Button("对话框菜单").width("60%").height(60).margin(10)
.onClick(()=>{
//菜单对话框,最多可添加6个按钮
promptAction.showActionMenu({
title:"对话框菜单",
buttons:[{
text:"按钮一",
color:"#0ff",
},
{
text:"按钮二",
color:"#f0f",
},
{
text:"按钮三",
color:"#f30",
},
{
text:"按钮四",
color:"#aaf",
},
{
text:"按钮五",
color:"#777",
},
{
text:"按钮六",
color:"#0f7",
},]
}).then(data=>{
console.info("第"+(data.index+1)+"个按钮被点击了")
})
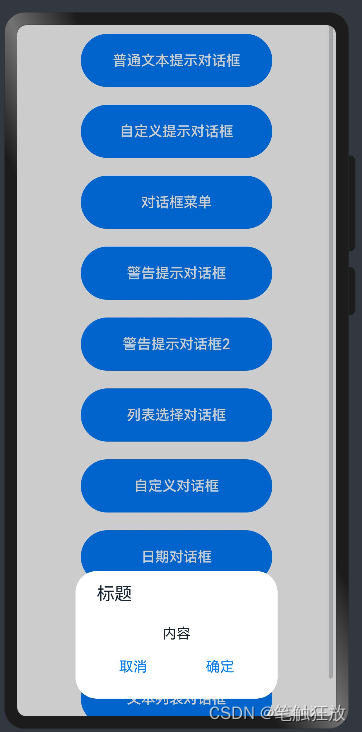
})4.警告提示对话框

Button("警告提示对话框").width("60%").height(60).margin(10)
          .onClick(()=>{
            AlertDialog.show({
              title:"标题",//设置标题
              message:"内容",//设置内容
              autoCancel:true,//是否允许自动取消
              alignment:DialogAlignment.Bottom,//设置对话框显示的位置
              offset:{dx:0,dy:-20},//在对齐方式的条件下,设置水平和垂直方向的偏移量
              //x轴向右为正,y轴向下为正
              gridCount:3,//通过设置占用的栅格数设置对话框的宽度
              confirm:{//添加确定按钮
                value:"确定",
                action:()=>{
                  console.info("确定按钮被点击了")
                },
                backgroundColor:"#0ff",//添加按钮的背景颜色
                fontColor:"#f0f",//字体颜色
              },
              cancel:()=>{//当对话框被取消的时候触发
                console.info("对话框被取消了")
              }
            })
          })
 //警告提示对话框2
        Button("警告提示对话框2").width("60%").height(60).margin(10)
          .onClick(()=>{
            AlertDialog.show({
              title:"标题",//设置标题
              message:"内容",//设置内容
              autoCancel:true,//是否允许自动取消
              alignment:DialogAlignment.Bottom,//设置对话框显示的位置
              offset:{dx:0,dy:-20},//在对齐方式的条件下,设置水平和垂直方向的偏移量
              //x轴向右为正,y轴向下为正
              gridCount:3,//通过设置占用的栅格数设置对话框的宽度
              primaryButton:{
                value:"取消",
                action:()=>{
                  console.info("取消按钮被点击了")
                },
              },
              secondaryButton:{
                value:"确定",
                action:()=>{
                  console.info("确定按钮被点击了")
                }
              },
              cancel:()=>{//当对话框被取消的时候触发
                console.info("对话框被取消了")
              }
            })
          })
5.列表选择对话框
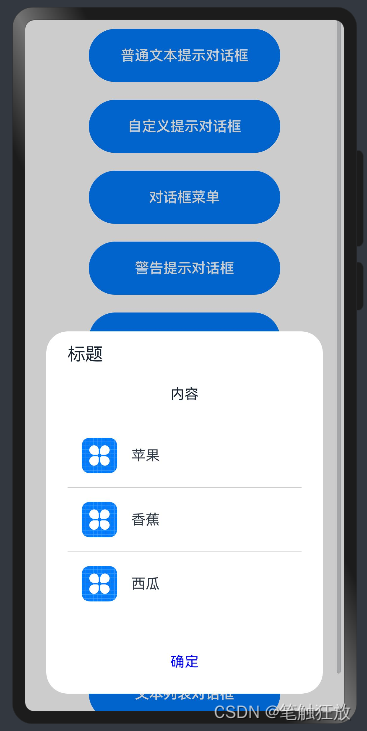
//列表选择对话框
        Button("列表选择对话框").width("60%").height(60).margin(10)
          .onClick(()=>{
            ActionSheet.show({
              title:"标题",
              message:"内容",
              autoCancel:true,
              alignment:DialogAlignment.Bottom,
              offset:{dx:0,dy:-20},
              sheets:[{
                title:"苹果",
                icon:$r("app.media.icon"),
                action:()=>{
                  console.info("苹果选项被点击了")
                }
              },
                {
                  title:"香蕉",
                  icon:$r("app.media.icon"),
                  action:()=>{
                    console.info("香蕉选项被点击了")
                  }
                },
                {
                  title:"西瓜",
                  icon:$r("app.media.icon"),
                  action:()=>{
                    console.info("西瓜选项被点击了")
                  }
                },],
              confirm:{
                value:"确定",
                action:()=>{
                  console.info("确定按钮被点击了")
                }
              },
              cancel:()=>{
                console.info("对话框被取消了")
              }
            })
          })
6.自定义对话框

import promptAction from '@ohos.promptAction'

//自定义对话框
@CustomDialog
struct Dialog1{
  //自定义对话框控制器
  controller:CustomDialogController
  cancel:()=>void //定义对话框被取消的事件
  confirm:()=>void //定义对话框被确定的事件
  build(){
    Column(){
      Text("标题").width("100%").height(60).backgroundColor("#600f")
        .fontColor(Color.White).fontWeight(FontWeight.Bold).fontSize(26)
        .textAlign(TextAlign.Center).letterSpacing(10)
      Text("我是自定义对话框的内容").width("100%").height(60).margin({left:10})
        .fontSize(24).fontColor(Color.Black)
      Row({space:10}){
        Button("取消").width("40%").backgroundColor(Color.Red)
          .fontColor(Color.White)
          .height(40).type(ButtonType.Normal).borderRadius(10)
          .onClick(()=>{
            this.controller.close()
            this.cancel()
          })
        Button("确定").width("40%").backgroundColor("#00f")
          .fontColor(Color.White)
          .height(40).type(ButtonType.Normal).borderRadius(10)
          .onClick(()=>{
            this.controller.close()
            this.confirm()
          })
      }
    }.width("100%").margin({bottom:10})
  }
}

@Entry
@Component
struct Index {
  //初始化自定义对话框的控制器
  dialogController:CustomDialogController=new CustomDialogController({
    //创建自定义对话框对象
    builder:Dialog1({
      //实现两个未实现的方法
      cancel:this.onCancel,
      confirm:this.onAccept,
    }),
    autoCancel:true,
    alignment:DialogAlignment.Bottom,
  })
  //定义两个方法
  onCancel(){
    console.info("自定义对话框被取消了")
  }
  onAccept(){
    console.info("自定义对话框被确定了")
  }
  //文本提示对话框
  build() {
    Scroll(){
      Column() {

        Button("自定义对话框").width("60%").height(60).margin(10)
          .onClick(()=>{
            //通过控制器打开自定义对话框   关闭调用close方法
            this.dialogController.open()
          })

      }
      .width('100%')
    }
  }
}
7.日期对话框
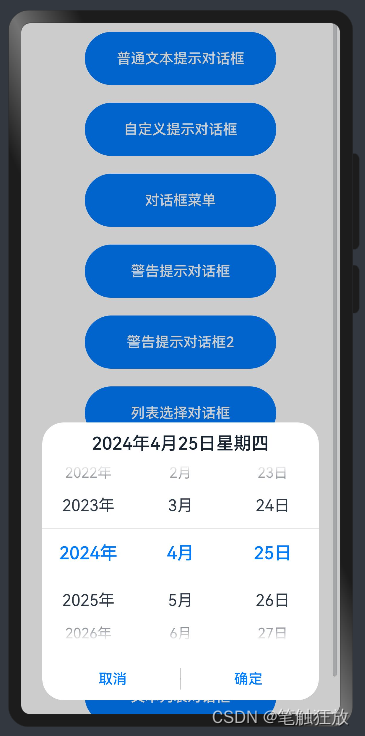

//日期对话框
        Button("日期对话框").width("60%").height(60).margin(10)
          .onClick(()=>{
            //创建日期对话框
            DatePickerDialog.show({
              start:new Date("2000-1-1"), //设置开始的日期
              end:new Date("2100-1-1"),//设置结束的日期
              selected:this.currentDate,//设置当前选中的日期为现在的日期
              // lunar:true,//允许月份和天数显示为中文
              onAccept:(value:DatePickerResult)=>{
                //保存当前这一次用户选中的日期,用户下一次打开对话框时,显示上一次选中的日期
                    this.currentDate.setFullYear(value.year,value.month,value.day)
                console.info(JSON.stringify(value))
              },
              onCancel:()=>{
                console.info("日期对话框被取消了")
              },
              onChange:(value:DatePickerResult)=>{
                console.info("用户正在更改日期"+JSON.stringify(value))
              }
            })
          })
8.时间对话框
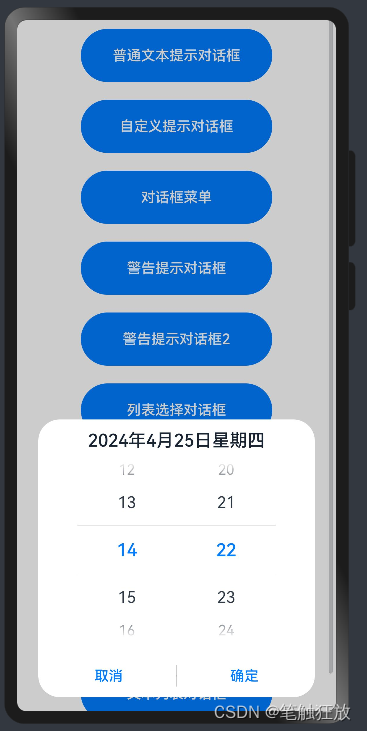
//时间对话框
        Button("时间对话框").width("60%").height(60).margin(10)
          .onClick(()=>{
            TimePickerDialog.show({
                //设置当前的时间
              selected:this.currentDate,
              useMilitaryTime:true,//是否使用24小时制
              //选中事件
              onAccept:(value:TimePickerResult)=>{
                this.currentDate.setHours(value.hour,value.minute)
                console.info(JSON.stringify(value))
              },
              //取消事件
              onCancel:()=>{
                console.info("时间对话框被取消了")
              },
              //改变事件
              onChange:(value:TimePickerResult)=>{
                console.info(JSON.stringify(value))
              },
            })
          })
9.文本列表对话框
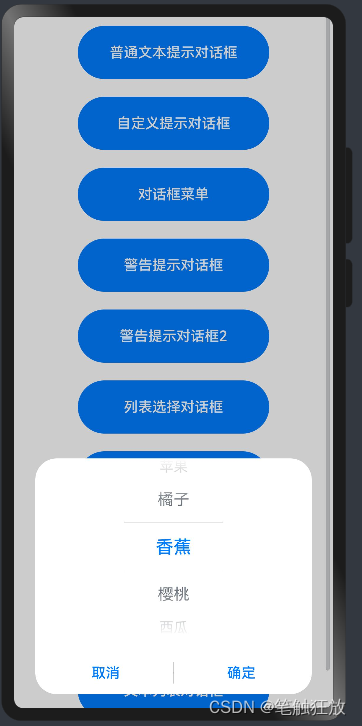

//文本列表对话框
        Button("文本列表对话框").width("60%").height(60).margin(10)
          .onClick(()=>{
              TextPickerDialog.show({
                range:this.texts,//添加数据信息
                selected:2,//默认选中第几项,默认第0项开始
                onAccept:(value:TextPickerResult)=>{
                  promptAction.showToast({message:"下标为:"+value.index+"的"+value.value+"被选中了"})
                },
                onCancel:()=>{
                  promptAction.showToast({message:"对话框取消了"})
                },
                onChange:(value:TextPickerResult)=>{
                  console.info(JSON.stringify(value))
                }
              })
          })