HarmonyOS 有19种装饰器
必须【2】
绘制一个页面,这两个肯定会用到
- @Entry
- @Component
可选【17】
- @State
- @Prop
- @Link
- @ObjectLink
- @Watch
- @Styles
- @StorageProp
- @StorageLink
- @Provide
- @Consume
- @Observed
- @Builder
- @BuilderParam
- @LocalStorageProp
- @LocalStorageLink
- @Extend
- @Concurrent
如果你有一定编程基础,应该在你所熟悉的语言领域已见过这种形式。
@format("Hello, %s")
helloWorld: string;
@Deprecated
private static void helloWord(){
System.out.println("这个方法已经不推荐使用");
}@ParamMetadata("ClassThree", 5)
class HelloWorld {
int timeYear;
}@RestController
public class HelloWorldController {
}@interface HelloWorldObject : NSObject {
}装饰器
| 鸿蒙OS开发 | 更多内容↓点击 | HarmonyOS与OpenHarmony技术 |
|---|---|---|
| 鸿蒙技术文档 | 开发知识更新库gitee.com/li-shizhen-skin/harmony-os/blob/master/README.md在这。 |
@Entry @Component
@Entry //这是一个页面
@Component //页面中有一个视图容器,即根布局 Row()
struct Index {
@State message: string = 'Hello World'
build() {
Row() {
Column() {
Text(this.message)
.fontSize(50)
.fontWeight(FontWeight.Bold)
}.width('100%')
}.height('100%')
}
}
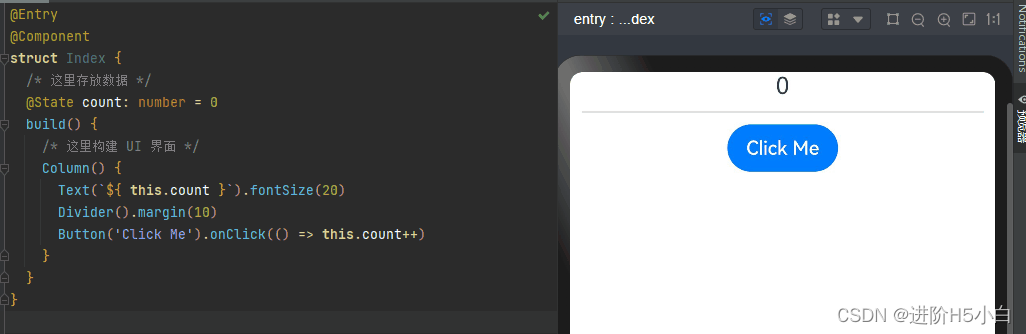
}@State
组件内状态更新(即,变量内容发生变化,组件自动刷新)
@Entry //这是一个页面
@Component //页面中有一个视图容器,即根布局 Row()
struct Index {
  @State message: string = 'Hello World'
     build() {
         Row() {
            Column() {
               Text(this.message)
                 .fontSize(50)
                 .fontWeight(FontWeight.Bold)

               Button('更新this.message内容')
                 .onClick( ()=>{
                      this.message = 'HarmonyOS'
                 })
             }.width('100%')
          }.height('100%')
     }
}
@Link
父组件与子组件双向同步数据(即,父组件和子组件都可以更新父组件已关联的数据)
NOTE: 子组件中的 @Link 变量,不能初始化。
import { TestChild } from './TestChild'
@Entry //这是一个页面
@Component //页面中有一个视图容器,即根布局 Row()
struct Index {
    @State message: string = '混沌'
    build() {
       Row() {
          // 父组件
          Column( {space : 20} ) {
                   Text(this.message)
                      .fontSize(30)
                      .fontWeight(FontWeight.Bold)
                   Button('Parent 更新文字内容')
                      .onClick( ()=>{
                          this.message = 'Hello Word'
                      })
                   // 子组件
                   TestChild({m: $message})
                   }.width('100%')
          }.height('100%')
    }
}
@Component
export struct TestChild{
@Link m: string
private childCount: number = 0
build(){
Button('Child 更新文字内容')
.onClick( ()=>{
this.m = 'HarmonyOS - Child' + (this.childCount++)
})
}
}@Prop
父组件与子组件单向同步数据(即,父组件可以同步数据至子组件,子组件无法同步数据到父组件)
NOTE: 父组件的更新指的是其内容相比之前状态发生了变化,如下代码中,如果将count 字段内容不赋值给 message, 则子组件仅仅会更新一次内容
import { TestChild } from './TestChild'

@Entry //这是一个页面
@Component //页面中有一个视图容器,即根布局 Row()
struct Index {
   @State message: string = '混沌'

   count: number = 0

   build() {
     Row() {
       Column( {space : 20} ) {
         Text(this.message)
           .fontSize(30)
           .fontWeight(FontWeight.Bold)

         Button('Parent 更新文字内容')
           .onClick( ()=>{
              this.message = 'Hello Word ' + this.count++
           })

         TestChild({m: this.message})

       }
       .width('100%')
     }
     .height('100%')
   }
}
@Component
export struct TestChild{
   @Prop m: string
   private childCount: number = 0

   build(){
      Column( {space:20} ){
         Text(this.m).fontSize(30)
         Button('TestChild 更新文字内容')
           .onClick( ()=>{
              this.m = 'HarmonyOS - Child' + (this.childCount++)
            })
       }.backgroundColor(Color.Pink)
    }
}
@Provide @Consume
父组件与子组件的子组件(官方叫法:后代组件)双向向同步数据(即,父组件与后代组件可以相互操作 @Provide 修饰的数据)
NOTE:@Provide 与 @Consume声明的变量名必须一致
import {TestChild } from './TestChild'
@Entry //这是一个页面
@Component // 页面中有一个视图容器,即根布局 Row()
struct Index {
  @Provide msg: string = '混沌'
  count: number = 0
  build(){
     Row(){
       Column( {space : 20} ) {
          Text(this.msg)
            .fontSize(30)
            .fontWeight(FontWeight.Bold)

          Button('Parent 更新文字内容')
             .onClick( ()=>{
                  this.msg = 'Hello World ' + (this.count++)
               })

          TestChild()

       }.width('100%')

     }.height('100%')
  }
}
TestChild 嵌套 TestChild2, TestChild2嵌套TestChild3
@Component
export struct TestChild{
   build(){
     TestChild2(){
       .width('100%')
       .backgroundColor(Color.Red)
       .align(Alignment.Center)
     }
   }
}

@Component
export struct TestChild2{
   build(){
      TestChild3()
   }
}

@Component
export struct TestChild3{
   @Consume msg: string

   count: number = 0

   build(){
      Column(){
        Text(this.msg).fontSize(30)
        Button('TestChild2 更新文字内容')
          .onClick( ()=>{
              this.msg = 'HarmonyOS - Child' + (this.count++)
           })
      }.backgroundColor(Color.Pink)
   }
}
@Observed @ObjectLink
父组件与嵌套对象或数组进行双向向同步数据
说明
实际业务研发中,我们封装好多类(与 @Component 修饰的组件无关),这个时候,如果要让父组件 和 嵌套对象进行数据同步,前边所介绍的所有装饰器是无法做到的。
NOTE
1. 子组件中@ObjectLink装饰器装饰的状态变量用于接收@Observed装饰的类的实例,和父组件中对应的状态变量建立双向数据绑定
2. 单独使用@Observed是没有任何作用的,需要搭配@ObjectLink或者@Prop使用初始状态
NOTE:
这次你会发现 点击“Parent 更新文字内容”,父组件文字没有发生变化,原因是因为有3级嵌套类如何破解?
“子组件中@ObjectLink装饰器装饰的状态变量用于接收@Observed装饰的类的实例,和父组件中对应的状态变量建立双向数据绑定”
// 引起此问题初始化代码
@State b: ClassB = new ClassB(new ClassA(0));
// 修改
@State a: ClassA = new ClassA(0)
@State b: ClassB = new ClassB(a)
import {ClassA, ClassB, TestChild } from './TestChild'
@Entry //这是一个页面
@Component //页面中有一个视图容器,即根布局 Row()
struct Index {
@State b: ClassB = new ClassB(new ClassA(0));
build() {
Row() {
Column( {space : 20} ) {
Text(this.b.a.c + '')
.fontSize(30)
.fontWeight(FontWeight.Bold)
Button('Parent 更新文字内容')
.onClick( ()=>{
this.b.a.c += 1;
})
TestChild({a: this.b.a})
}.width('100%')
}.height('100%')
}
}@Component
export struct TestChild {
@ObjectLink a: ClassA;
build(){
Column(){
Text(this.a.c + '').fontSize(30)
Button('TestChild2 更新文字内容')
.onClick( ()=>{
this.a.c += 1;
} )
}.backgroundColor(Color.Pink)
}
}
@Observed
export class ClassA {
public c: number;
constructor(c: number) {
this.c = c;
}
}
export class ClassB {
public a: ClassA;
constructor(a: ClassA) {
this.a = a;
}
}@Watch
关注某个变量状态发生变化
NOTE:监听的这个变量不要放在回调方法中,让其发生二次变化,容易导致死循环
import {ClassA, ClassB, TestChild } from './TestChild'

@Entry //这是一个页面
@Component //页面中有一个视图容器,即根布局 Row()
struct Index {
   @State msg: string = '混沌'
   @State index: number = 0;

   build(){
      Row(){
        Column( {space : 20} ) {
          Text(this.msg + ' ' + this.index)
            .fontSize(30)
            .fontWeight(FontWeight.Bold)

          Button('Parent 更新文字内容')
            .onClick( ()=>{
               this.index++
            })

          TestChild({count: this.index})

        }.width('100%')
      }.height('100%')
   }
}
NOTE:使用 @Prop 修饰的原因:感知父组件改变 count 值
@Component
export struct  TestChild{
    @Prop @Watch('onCountUpdated') count: number;
    @State total: number = 0;


    // @Watch 回调
    onCountUpdated(propName: string): void {
       this.total += 1;
    }

    build(){
        Column(){
          Text('HarmonyOS - Child' + this.total).fontSize(30)
          Button('TestChild2 更新文字内容')
             .onClick( ()=>{
                this.count++
             })
        }.backgroundColor(Color.Pink)
    }

}
@LocalStorageLink @LocalStorageProp
LocalStorage是页面级的UI状态存储,通过@Entry装饰器接收的参数可以在页面内共享同一个LocalStorage实例。LocalStorage也可以在UIAbility内,页面间共享状态
LocalStorage在场景使用过程中包含了两个装饰器,即@LocalStorageLink 和 @LocalStorageProp
import { TestChild } from './TestChild';

// 创建新实例并使用给定对象初始化
let storage = new LocalStorage({ 'PropA': 47 });

// 使LocalStorage可从@Component组件访问
@Entry(storage)
@Component
struct Index {
    // @LocalStorageLink变量装饰器与LocalStorage中的'PropA'属性建立双向绑定
    @LocalStorageLink('PropA') count: number = 1;

    build(){
       Row(){
          Column( {space : 20} ){
             Text('混沌 ' + this.count)
               .fontSize(30)
               .fontWeight(FontWeight.Bold)

             Button('Parent 更新文字内容')
               .onClick( ()=>{
                  this.count++
               })

             TestChild()

          }.width('100%')

       }.height('100%')
    }

}
@Component
export struct TestChild {
// @LocalStorageLink变量装饰器与LocalStorage中的'PropA'属性建立双向绑定
@LocalStorageLink('PropA') count: number = 1;
build() {
Column( {space : 20} ) {
Text('HarmonyOS - Child' + this.count)
.fontSize(30)
.fontWeight(FontWeight.Bold)
Button('TestChild2 更新文字内容')
.onClick( ()=>{
this.count++
})
}.width('100%')
.backgroundColor(Color.Pink)
}
}总结,本例展示了:
- 使用构造函数创建LocalStorage实例storage
- 使用@Entry装饰器将storage添加到 Index 顶层组件中
- @LocalStorageLink绑定LocalStorage对给定的属性,建立双向数据同步
import { TestChild } from './TestChild';

// 创建新实例并使用给定对象初始化
let storage = new LocalStorage({ 'PropA': 47 });

// 使LocalStorage可从@Component组件访问
@Entry(storage)
@Component
struct Index {
    // @LocalStorageLink变量装饰器与LocalStorage中的'PropA'属性建立双向绑定
    @LocalStorageProp('PropA') count: number = 1;

    build() {
       Row() {
          Column( {space : 20} ) {
            Text('混沌 ' + this.count)
              .fontSize(30)
              .fontWeight(FontWeight.Bold)

            Button('Parent 更新文字内容')
              .onClick( ()=>{
                 this.count++
                 })

            TestChild()

          }.width('100%')

       }.height('100%')
    }
}
let storage = LocalStorage.GetShared()
@Component
export struct TestChild{
// @LocalStorageLink变量装饰器与LocalStorage中的'PropA'属性建立双向绑定
@LocalStorageLink('PropA') count: number = 1;
build() {
Column( {space : 20} ) {
Text('HarmonyOS - Child' + this.count)
.fontSize(30)
.fontWeight(FontWeight.Bold)
Button('TestChild2 更新文字内容')
.onClick( ()=>{
this.count++
})
}.width('100%')
.backgroundColor(Color.Pink)
}
}总结
@LocalStorageLink(key)是和LocalStorage中key对应的属性建立双向数据同步:
- 本地修改发生,该修改会被写回LocalStorage中;
- LocalStorage中的修改发生后,该修改会被同步到所有绑定LocalStorage对应key的属性上,包括单向(@LocalStorageProp和通过prop创建的单向绑定变量)、双向(@LocalStorageLink和通过link创建的双向绑定变量)变量。
这个例子中TestChild组件使用了@LocalStorageLInk, 当其值发生变化时,会同时影响到父布局使用到 @LocalStorageProp 装饰器的变量值,即 子组件的变量通过LocalStorage可以影响到相应的父组件变量值,但父组件的相关变量值是无法影响到子组件的变量值
@StorageLink @StorageProp
AppStorage是应用全局的UI状态存储,是和应用的进程绑定的,由UI框架在应用程序启动时创建,为应用程序UI状态属性提供中央存储。
AppStorage在场景使用过程中包含了两个装饰器,即@StorageLink 和 @StorageProp
和AppStorage不同的是,LocalStorage是页面级的,通常应用于页面内的数据共享。而AppStorage是应用级的全局状态共享,还相当于整个应用的“中枢”,持久化数据PersistentStorage和环境变量Environment都是通过和AppStorage中转,才可以和UI交互。
NOTE: AppStorage 和 LocalStorage是互不影响的
import { TestChild } from './TestChild';
AppStorage.SetOrCreate('PropA', 47);

// 创建新实例并使用给定对象初始化
let storage = new LocalStorage();

// 使LocalStorage可从@Component组件访问
@Entry(storage)
@Component
struct Index {
   // @LocalStorageLink变量装饰器与LocalStorage中的'PropA'属性建立双向绑定
   @StorageLink('PropA') count: number = 1;
   @LocalStorageLink('PropA') countL: number = 1;

   build() {
      Row(){
        Column( {space : 20} ) {
           Text('AppStorage ' + this.count)
             .fontSize(30)
             .fontWeight(FontWeight.Bold)

           Button('更新AppStorage内容')
             .onClick( ()=>{
                this.count++
             })

           Text('LocalStorage ' + this.countL)
             .fontSize(30)
             .fontWeight(FontWeight.Bold)

           Button('更新LocalStorage内容')
             .onClick( ()=>{
                this.countL++
             })

          TestChild()

        }.width('100%')

      }.height('100%')
   }
}
@Component
export struct TestChild {
// @LocalStorageLink变量装饰器与LocalStorage中的'PropA'属性建立双向绑定
@StorageLink('PropA') count: number = 1;
build(){
Column( {space : 20} ) {
Text('HarmonyOS - Child' + this.count)
.fontSize(30)
.fontWeight(FontWeight.Bold)
Button('TestChild2 更新文字内容')
.onClick( ()=>{
this.count++
})
}.width('100%')
.backgroundColor(Color.Pink)
}
}@Builder
@Builder 用于UI元素复用,开发者可以将重复使用的UI元素抽象成一个方法,在build方法里调用
总结
值引用方式,可以感知父组件的状态变化
值传递方式,无法感知父组件的状态变化
@Entry
@Component
struct Index {
   @State count: number = 1;

   @Builder BuilderOne($$: { paramA1: number }) {
      Column() {
        Text(`组件1值引用: ${$$.paramA1} `).fontSize(20)
      }.width('100%').backgroundColor(Color.Pink)
   }

   @Builder BuilderTwo(paramA1: number) {
      Column() {
        Text(`组件2值传递: ${paramA1} `).fontSize(20)
      }.width('100%').backgroundColor(Color.Pink)
   }

   build() {
     Row() {
       Column({ space: 20 }) {
          Text('混沌 ' + this.count)
            .fontSize(30)
            .fontWeight(FontWeight.Bold)

          Button('更新')
            .onClick(() => {
               this.count++
            })

         this.BuilderOne({ paramA1: this.count })

         this.BuilderTwo(this.count)

       }.width('100%')

     }.height('100%')
   }
}
@BuilderParam
当开发者创建了自定义组件,并想对该组件添加特定功能时,例如在自定义组件中添加一个点击跳转操作。若直接在组件内嵌入事件方法,将会导致所有引入该自定义组件的地方均增加了该功能。为解决此问题,ArkUI引入了@BuilderParam装饰器,@BuilderParam用来装饰指向@Builder方法的变量,开发者可在初始化自定义组件时对此属性进行赋值,为自定义组件增加特定的功能。该装饰器用于声明任意UI描述的一个元素,类似slot占位符。
import Prompt from '@system.prompt';
import { TestChild } from './TestChild';

@Entry
@Component
struct Index {

   @Builder BuilderOne() {
      TestChild( {msg: 'BuilderOne 视图'} ) {
         Text('1').fontColor(Color.Red)
      }
   }

   @Builder BuilderTwo() {
      Stack(){
         TestChild( {msg: 'BuilderTwo 视图'} ) {
           Text('1').fontColor(Color.Red)
           Text('2').fontColor(Color.Red)
         }
      }.onClick( () => {
         Prompt.showToast({message: '点了 BuilderTwo'})
      })
   }

   @BuilderParam aBuilder0: () => void = this.BuilderOne
   @BuilderParam aBuilder1: () => void = this.BuilderTwo

   build(){
      Column({ space: 20 }) {
        this.aBuilder0()
        this.aBuilder1()

        TestChild( {msg: '中国'} ) {
           Text('1').fontColor(Color.Red)
        })

      }.width('100%')
      .height('100%')
      .justifyContent(FlexAlign.Center)
      .alignItems(HorizontalAlign.Center)
   }

}
@Component
export struct TestChild {
msg: string
@BuilderParam aB0: () => {}
build(){
Column( {space : 20} ) {
this.aB0()
Text('TestChild上下有 '+ this.msg)
.fontSize(20)
.fontWeight(FontWeight.Bold)
this.aB0()
}.width('100%')
.backgroundColor(Color.Pink)
}
}总结
- @BuilderParam 既可以指向一个对象, 也可以指向@Builder修饰的方法
- 关于子组件占位出现两个的问题,应该是系统原因
- 带占位的自定义视图是没法响应onClick事件的,所以在本示例种,将子组件外边再添加了一个容器组件,用来进行点击事件响应
@Styles
如果每个组件的样式都需要单独设置,在开发过程中会出现大量代码在进行重复样式设置,虽然可以复制粘贴,但为了代码简洁性和后续方便维护,我们推出了可以提炼公共样式进行复用的装饰器@Styles
import Prompt from '@system.prompt';

@Entry
@Component
struct Index {

   //仅支持公共属性
   @Styles fancy() {
      .width(200)
      .height(300)
      .backgroundColor(Color.Pink)
      .onClick(() => {
         Prompt.showToast({message: 'I am fancy'})
      })
   }

   build() {
      Column({ space: 20 }) {
         Text('Styles')
           .textAlign(TextAlign.Center)
           .fancy()

      }.width('100%')
      .height('100%')
      .justifyContent(FlexAlign.Center)
      .alignItems(HorizontalAlign.Center)
   }

}
总结
- @Styles 当前仅支持通用属性
- @Styles 修饰的方法不支持参数
- 引用@Styles 修饰的方法时,建议放在最后,比如:Text().fancy().textAlign(....) 应该变为 Text().textAlign(....) .fancy()
@Extend
用于扩展原生组件样式
注意
1. 原生指的ArkTS写的组件
- 扩展,不是新定义增加不存在的属性
import Prompt from '@system.prompt';

//仅支持公共属性
@Styles function fancy() {
    .width(200)
    .height(300)
    .backgroundColor(Color.Pink)
    .onClick(() => {
        Prompt.showToast({message: 'I am fancy'})
    })
}

@Extend(Text) function superFancy(size:number, onClick?: () => void) {
     .fontSize(size)
     .textAlign(TextAlign.Center)
     .fancy()
     .onClick(onClick)
}

@Entry
@Component
struct Index {

    onClickHandler() {
       Prompt.showToast({message: 'fancy出去了'})
    }

    build(){
      Column({ space: 20 }) {
        Text('Styles')
          .superFancy(30, this.onClickHandler.bind(this))
      }.width('100%')
      .height('100%')
      .justifyContent(FlexAlign.Center)
      .alignItems(HorizontalAlign.Center)

    }

}
总结
- @Extend 在 @Styles基础上,增加了传参特性
- @Extend 必须定义为全局
- 支持封装指定的组件的私有属性和私有事件和预定义相同组件的@Extend的方法
@Concurrent
在使用TaskPool时,执行的并发函数需要使用该装饰器修饰,否则无法通过相关校验。
import taskpool from '@ohos.taskpool';

@Concurrent
function add(num1: number, num2: number): number {
    return num1 + num2;
}

async function ConcurrentFunc(): Promise<void> {
  try {
    let task: taskpool.Task = new taskpool.Task(add, 1, 2);
    console.info("taskpool res is: " + await taskpool.execute(task));
  }catch (e) {

  }
}

@Entry
@Component
struct Index {
   @State message: string = 'Hello World'

   build(){
      Row(){
        Column(){
          Text(this.message)
            .fontSize(50)
            .fontWeight(FontWeight.Bold)
            .onClick(() => {
               ConcurrentFunc();
            })

        }.width('100%')

      }.height('100%')
   }
}
结尾
到此我们已学完所有的装饰器用法,灵活使用装饰器,全凭官方指导文档是不够的,它仅仅提供了一种最小化的场景使用模型,到了具体业务实现场景中,非常容易犯糊涂蒙圈。可以前往参考这个鸿蒙技术文档qr23.cn/AKFP8k。
个人感觉@BuilderParam和 @ObjectLink理解起来还是有点费劲。
鸿蒙最值得程序员入行
为什么这么说?市场是决定人力需求的,数据说话最管用:
1、鸿蒙其全栈自研,头部大厂商都陆续加入合作开发鸿蒙原生应用——人才需求上涨。
2、鸿蒙作为新系统、新技术,而现在市面上技术人才少——高薪招聘开启。
3、鸿蒙1+8+N生态,不仅只有应用开发;还有车载、数码、智能家居、家电等——就业范围广。
4、纯血鸿蒙,目前没有多少人熟悉。都处于0基础同一起跑线——无行业内卷。

开发者最需要什么?岗位多、薪资高、不内卷、行业竞争低。而当下的鸿蒙恰恰符合要求。
那么这么好的鸿蒙岗位,应聘要求都很高吧?其实不然鸿蒙作为新出的独立系统,其源头上大家都处于同一水平线上,一开始的技术要求都不会很高,毕竟面试官也是刚起步学习。招聘要求示例:

从信息看出,几乎应职要求是对标有开发经验的人群。可以说鸿蒙对开发者非常友好,尽管上面没提鸿蒙要求,但是面试都会筛选具有鸿蒙开发技能的人。我们程序员都知道学习开发技术,最先是从语言学起,鸿蒙语言有TS、ArkTS等语法,那么除了这些基础知识之外,其核心技术点有那些呢?下面就用一张整理出的鸿蒙学习路线图表示:

从上面的OpenHarmony技术梳理来看,鸿蒙的学习内容也是很多的。现在全网的鸿蒙学习文档也是非常的少,下面推荐一些:完整内容可在头像页保存,或这qr23.cn/AKFP8k甲助力


内容包含:《鸿蒙NEXT星河版开发学习文档》
- ArkTS
- 声明式ArkUI
- 多媒体
- 通信问题
- 系统移植
- 系统裁剪
- FW层的原理
- 各种开发调试工具
- 智能设备开发
- 分布式开发等等。
这些就是对往后开发者的分享,希望大家多多点赞关注喔!