hello hello~ ,这里是 code袁~💖💖 ,欢迎大家点赞🥳🥳关注💥💥收藏🌹🌹🌹

微信小程序实现多张照片上传
1.功能实现
当选择图片后,生成对象tempFilePaths文件路径。在通过for循环依次的图片的src上传到服务器。当服务器的状态码为200且图片上传完毕后将图片的src转化为Json字符串存在数组中以便将其添加到数据库
2.代码实现
1.mp-uploader
<view class="page">
    <view class="page__bd">
        <mp-cells>
            <mp-cell>
                <mp-uploader select="{{selectFile}}" upload="{{uplaodFile}}" files="{{files}}" max-count="4" title="附件上传" tips="最多可上传4张照片"></mp-uploader>
            </mp-cell>
        </mp-cells>
    </view>
</view>
//data中
 this.setData({
            selectFile: this.selectFile.bind(this),
            uplaodFile: this.uplaodFile.bind(this)
        })
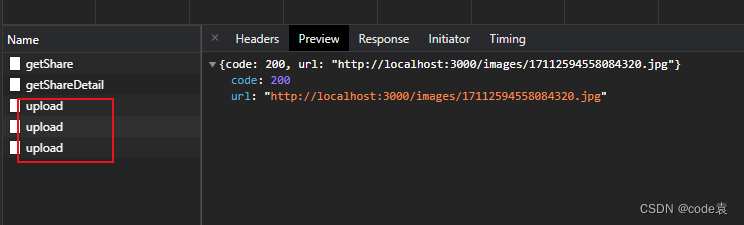
 uplaodFile(files) {
        console.log('upload files', files)
        console.log('upload files', files)
        // 文件上传的函数,返回一个promise
        return new Promise((resolve, reject) => {
          const tempFilePaths = files.tempFilePaths;
          //上传返回值
          const that = this;
          const object = {};
          for (var i = 0; i < tempFilePaths.length; i++) {
            let filePath = tempFilePaths[i]
            wx.uploadFile({
                filePath: filePath,
                name: 'file',
                url: 'http://localhost:3000/upload/upload',
                success: function(res){
                    console.log('444',res.statusCode)
                    if (res.statusCode=== 200 ) {
                        const url = JSON.parse(res.data).url
                        that.data.files.push(url)
                        if (that.data.files.length === tempFilePaths.length) {
                          object.urls = that.data.files;
                          resolve(object)  //这就是判断是不是最后一张已经上传了,用来返回,
                        }
                      } else {
                        reject('error')
                      }
                }
              })
          }

        })
        // 文件上传的函数,返回一个promise
    },

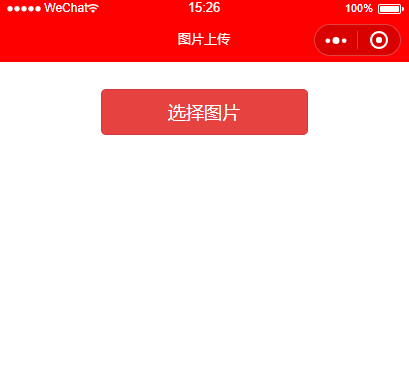
2.chooseImage
<view>
<block wx:for="{{images}}" wx:for-item="src">
  <image  src="{{src}}"></image>
</block>
<view bindtap="upload">上传</view>
upload(){
    let that = this;
    wx.chooseImage({//异步方法
        count: 9,//最多选择图片数量
        sizeType: ['original', 'compressed'],//选择的图片尺寸 原图,压缩图
        sourceType: ['album', 'camera'],//相册选图,相机拍照
        success(res) {
            //tempFilePaths可以作为图片标签src属性
            const tempFilePaths = res.tempFilePaths
            console.log("选择成功", res)

            for (let i = 0; i < tempFilePaths.length; i++) {//多个图片的循环上传
                wx.cloud.uploadFile({//上传至微信云存储
                    cloudPath: 'myImage/' + new Date().getTime() + "_" + Math.floor(Math.random() * 1000) + ".jpg",//使用时间戳加随机数作为上传至云端的图片名称
                    filePath: tempFilePaths[i],// 本地文件路径
                    success: res => {
                        // 返回文件 ID
                        console.log("上传成功", res.fileID)
                        that.setData({
                            images: res.fileID//获取上传云端的图片在页面上显示
                        })
                        wx.showToast({
                            title: '上传成功',
                        })
                    }
                })
            }

        }
    })
}
3.页面展示
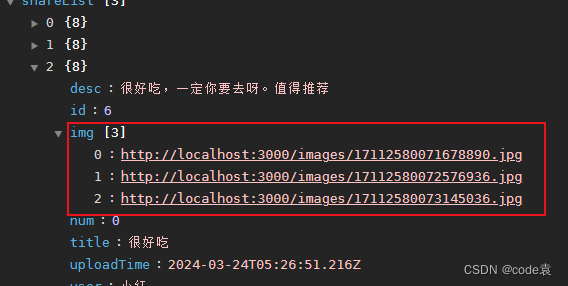
图片的src在数据库中是以字符串的形式存储。当需要展示时我们只需要将字符串转化为数组对象即可
原始数据 “http://localhost:3000/images/17112466754606371.jpg”,“http://localhost:3000/images/17112466755133666.jpg”,“http://localhost:3000/images/17112466756494564.jpg”]
 getShare().then(res=>{
        const list=res.data
         list.forEach(obj => {
            console.log('8888',obj.img)
         const imgString = obj.img;
         const trimmedString = imgString.replace('["', '').replace('\"]', '');
         const imgArray = trimmedString.split('"\,\"');
         console.log('444',imgArray)
         obj.img = imgArray;
        })
        this.setData({
            shareList:list
        })
       })
🎉写在最后
🍻伙伴们,如果你已经看到了这里,觉得这篇文章有帮助到你的话不妨点赞👍或 Star ✨支持一下哦!手动码字,如有错误,欢迎在评论区指正💬~
你的支持就是我更新的最大动力💪~


![[激光原理与应用-80]:PLC通信协议之-OMRON欧姆龙FINS TCP通信协议详细解析](https://img-blog.csdnimg.cn/direct/30efacea13e3472292d34b8d6e7b1d2d.png)


![[AIGC] Redis基础命令集详细介绍](https://img-blog.csdnimg.cn/direct/43ef8148a08a4984886cd00b3cac1a7e.png)