目录
一、介绍
本片文章将实现请求响应同步,什么是请求响应同步呢?就是当我们发起一个请求时,希望能够在一定时间内同步(线程阻塞)等待响应结果。
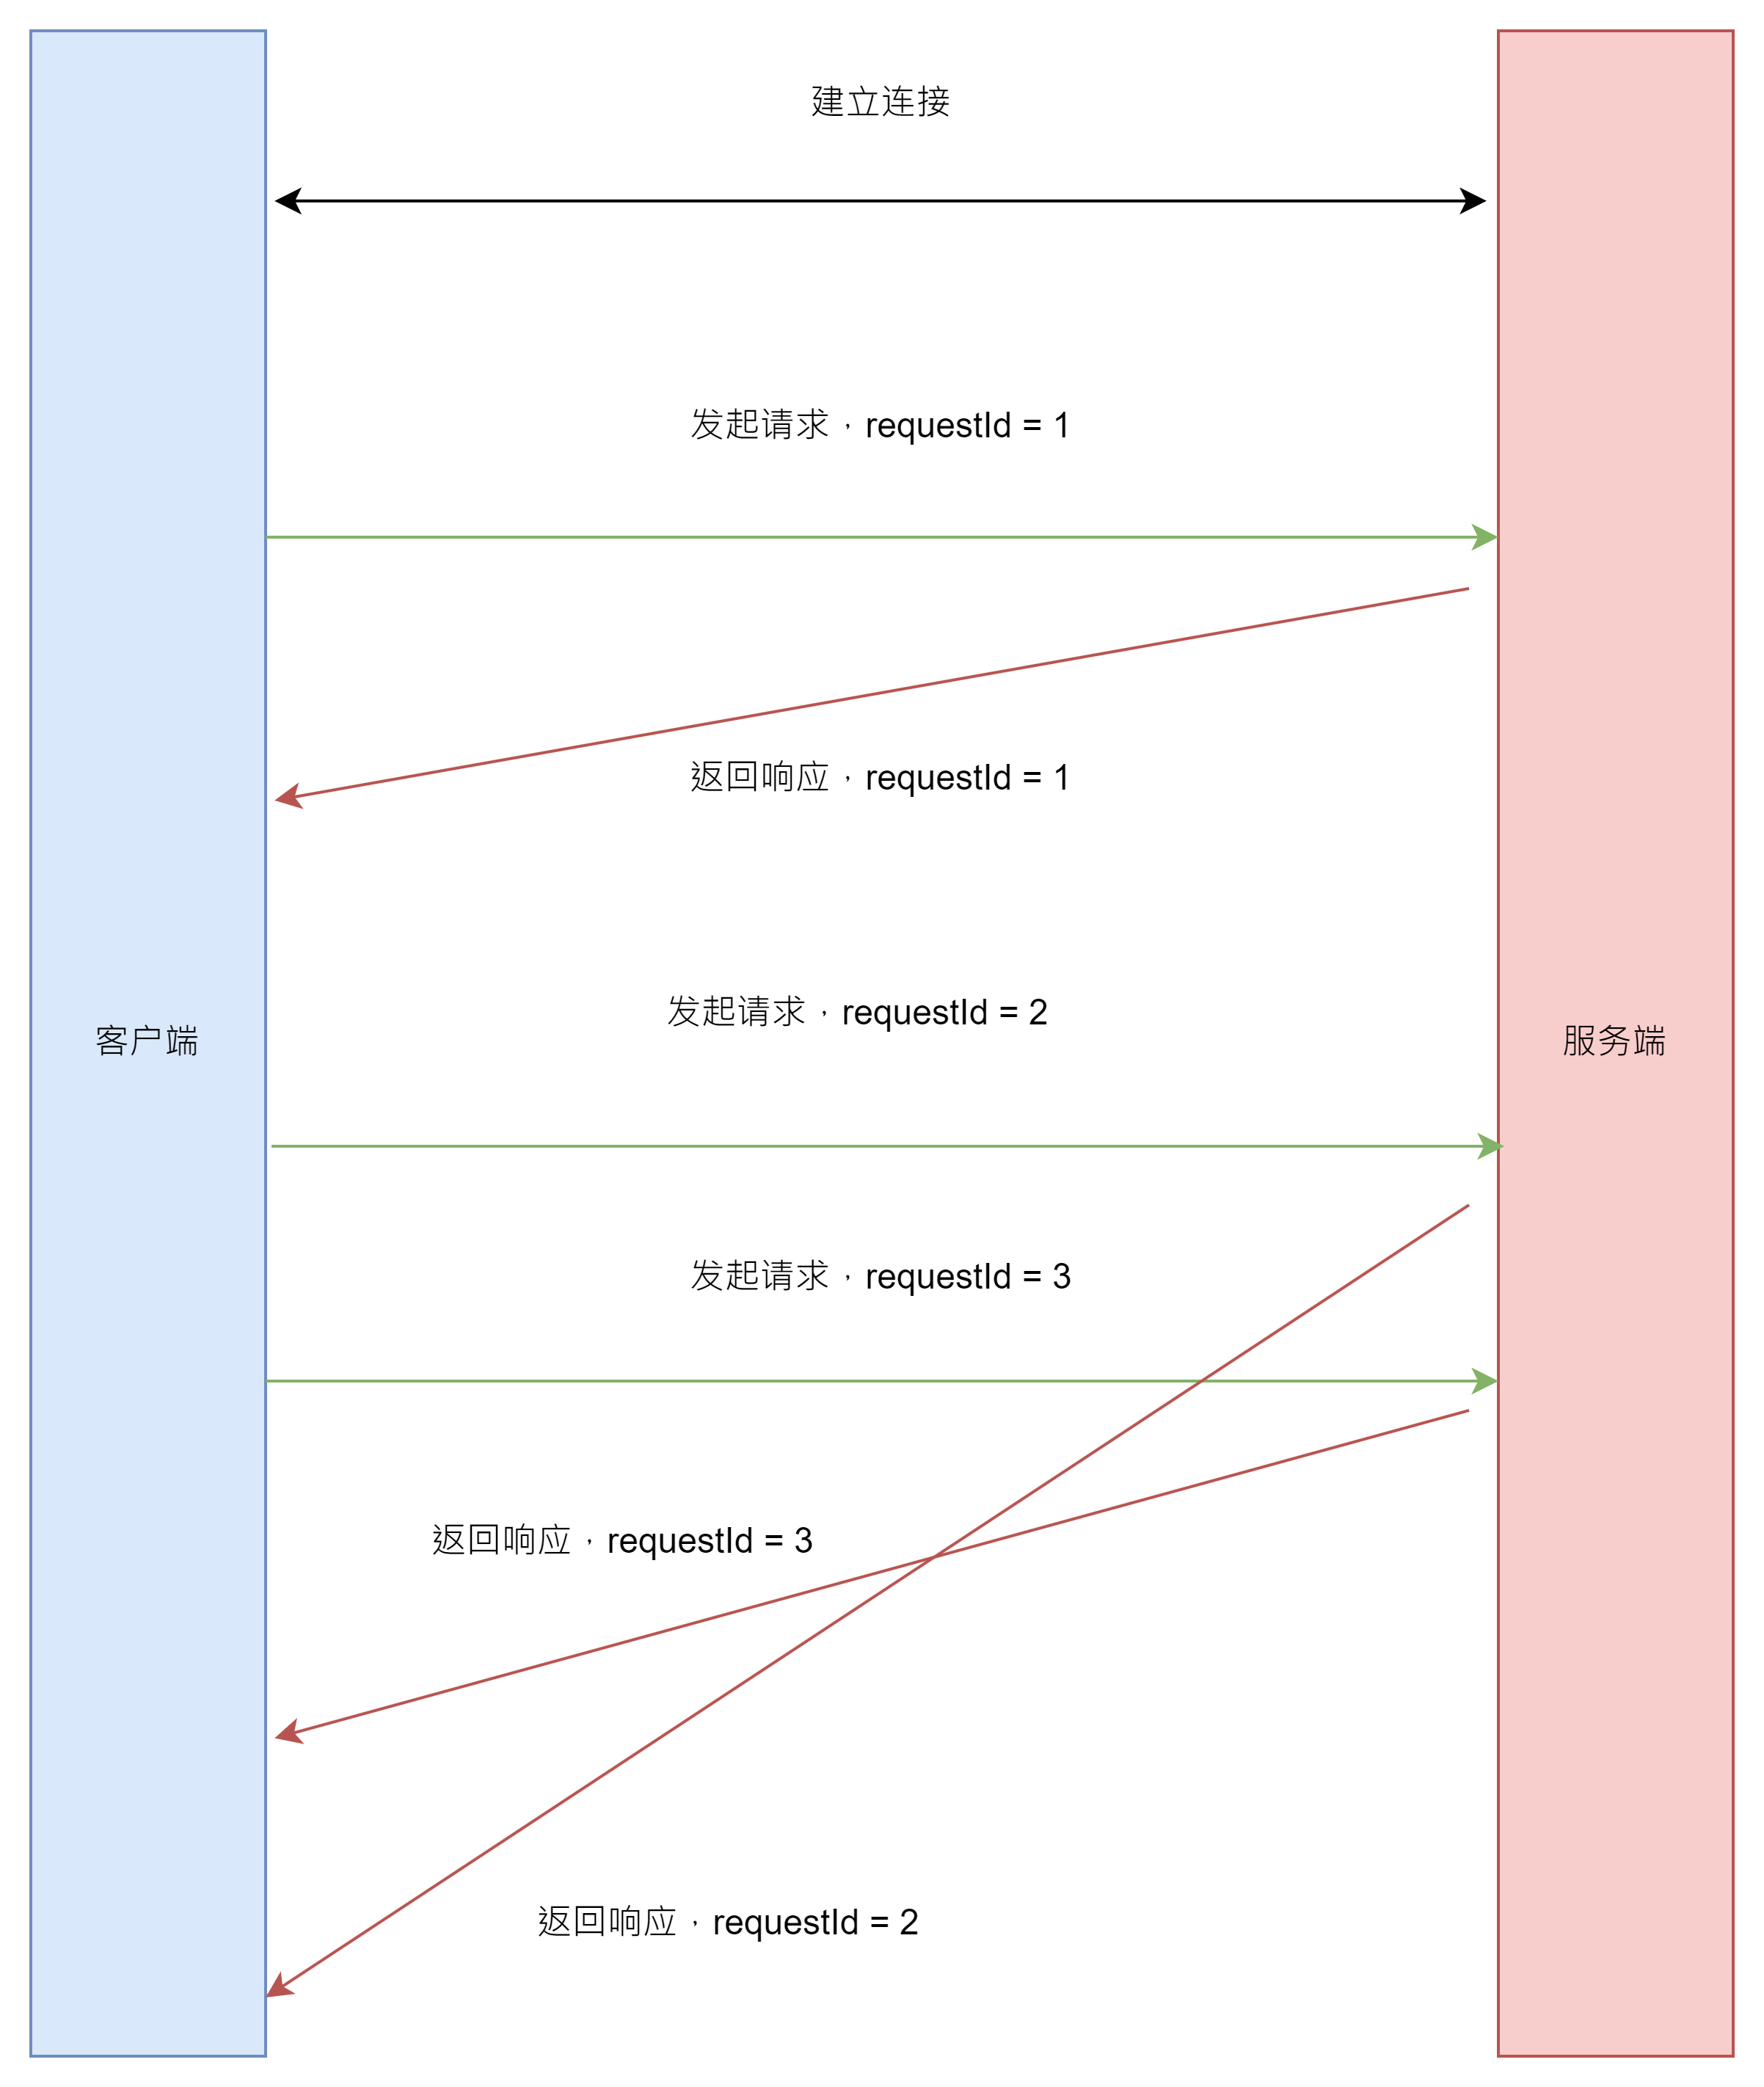
我们通过netty实现rpc调用时,由于客户端和服务端保持连接,在此期间客户端会有无数的接口调用(并发),而此时,每次发送的请求需要能够及时响应获取调用结果,服务端一次次返回调用结果,客户端在处理响应结果时,需要与请求建立联系,确保每一次的请求能够正确获取到对应的调用结果。
由于在一个应用中,客户端与服务端的channel只有一条,所有线程都通过该channel进行rpc调用,所以,在接下来客户端设计中,每个线程发送的请求将会分配一个id,当请求发送完毕之后,该线程会进行阻塞状态,等待channel收到请求id对应返回的响应消息时唤醒或超时唤醒。在接下来服务端设计中,服务端收到客户端的rpc调用请求,对该请求进行处理,将该请求的id和处理结果写入响应类中进行返回。
二、依赖引入
<dependencies>
        <dependency>
            <groupId>io.netty</groupId>
            <artifactId>netty-all</artifactId>
            <version>4.1.101.Final</version>
        </dependency>

        <dependency>
            <groupId>io.protostuff</groupId>
            <artifactId>protostuff-core</artifactId>
            <version>1.8.0</version>
        </dependency>

        <dependency>
            <groupId>io.protostuff</groupId>
            <artifactId>protostuff-runtime</artifactId>
            <version>1.8.0</version>
        </dependency

        <dependency>
            <groupId>org.projectlombok</groupId>
            <artifactId>lombok</artifactId>
            <version>1.18.30</version>
        </dependency>

    </dependencies>
三、公共部分实现
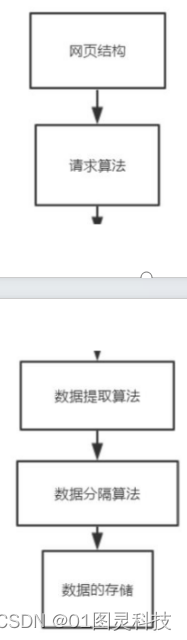
1、结构
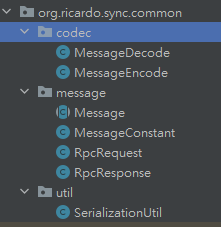
2、Message类,所有Request和Response类的父类,最关键的字段就是messageType,子类继承之后进行赋值,该值与类的类型进行绑定,用于byte字节数组反序列化时能够获取到需要反序列化的类型。
@Data
public abstract class Message {

    protected Byte messageType;


}
RpcRequest,用于客户端向服务端发起调用的消息通信类
@Data
@ToString
public class RpcRequest extends Message{

    private String id;

    private String param;

    public RpcRequest() {
        this.id = UUID.randomUUID().toString();
        super.messageType = MessageConstant.rpcRequest;
    }

}
RpcResponse,用于服务端向客户端返回结构的消息通信类
@Data
@ToString
public class RpcResponse extends Message{

    private String id;

    private String result;

    public RpcResponse() {
        super.messageType = MessageConstant.rpcResponse;
    }

}
3、MessageConstant,通过数值常量messageType绑定消息类型,在序列化对象时,会在数据中记录对象的messageType,在反序列化对象时,会从数据包中拿到messageType,将其转化为对应的消息类型进行处理
public class MessageConstant {

    public final static Byte rpcRequest = 1;
    public final static Byte rpcResponse = 2;

    public static Map<Byte, Class<? extends Message>> messageTypeMap = new ConcurrentHashMap<>();

    static {
        messageTypeMap.put(rpcRequest, RpcRequest.class);
        messageTypeMap.put(rpcResponse, RpcResponse.class);
    }

    public static Class<? extends Message> getMessageClass(Byte messageType){
        return messageTypeMap.get(messageType);
    }

}
4、序列化工具,用于将类对象序列化为字节数组,以及将字节数组反序列化为对象
public class SerializationUtil {

    private final static Map<Class<?>, Schema<?>> schemaCache = new ConcurrentHashMap<>();

    /**
     * 序列化
     */
    public static <T> byte[] serialize(T object){
        LinkedBuffer buffer = LinkedBuffer.allocate(LinkedBuffer.DEFAULT_BUFFER_SIZE);

        try {
            Class<T> cls = (Class<T>) object.getClass();
            Schema<T> schema = getSchema(cls);

            return ProtostuffIOUtil.toByteArray(object, schema, buffer);
        } catch (Exception e) {
            throw e;
        } finally {
            buffer.clear();
        }
    }

    /**
     * 反序列化
     */
    public static <T> T deserialize(Class<T> cls, byte[] data) {
        Schema<T> schema = getSchema(cls);
        T message = schema.newMessage();
        ProtostuffIOUtil.mergeFrom(data, message, schema);
        return message;
    }

    public static <T> Schema<T> getSchema(Class<T> cls) {
        Schema<T> schema = (Schema<T>) schemaCache.get(cls);

        if(schema == null) {
            schema = RuntimeSchema.getSchema(cls);
            schemaCache.put(cls, schema);
        }
        return schema;
    }

}
5、MesasgeEncode和MessageDecode实现
MessageEncode,用于将消息对象序列化为字节数组
字节数组主要包括三部分:
·有效数组长度,占4个字节,长度不包括自己,用于半包黏包判断
·消息的类型,占1个字节,用于反序列选择类型使用
·消息对象,占n个字节
public class MessageEncode extends MessageToByteEncoder<Message> {

    @Override
    protected void encode(ChannelHandlerContext channelHandlerContext, Message message, ByteBuf byteBuf) throws Exception {
        // 将对象进行序列化
        byte[] data = SerializationUtil.serialize(message);

        // 写数据长度,前4个字节用于记录数据总长度(对象 + 类型(1个字节))
        byteBuf.writeInt(data.length + 1);
        // 写记录消息类型,用于反序列选择类的类型
        byteBuf.writeByte(message.getMessageType());
        // 写对象
        byteBuf.writeBytes(data);
    }

}
MesageDecode,用于将字节数组反序列化为消息对象
反序列时会进行判断数据是否足够读取,足够的话就会读取到符合长度的字节数组进行序列化,否则的话等到下一个数据包到来再进行重新判断处理(解决半包黏包方案)
public class MessageDecode extends ByteToMessageDecoder {


    @Override
    protected void decode(ChannelHandlerContext channelHandlerContext, ByteBuf byteBuf, List<Object> list) throws Exception {

        // 由于数据包的前4个字节用于记录总数据大小,如果数据不够4个字节,不进行读
        if(byteBuf.readableBytes() < 4) {
            return;
        }

        // 标记开始读的位置
        byteBuf.markReaderIndex();

        // 前四个字节记录了数据大小
        int dataSize = byteBuf.readInt();

        // 查看剩余可读字节是否足够,如果不是,重置读取位置,等待下一次解析
        if(byteBuf.readableBytes() < dataSize) {
            byteBuf.resetReaderIndex();
            return;
        }

        // 读取消息类型
        byte messageType = byteBuf.readByte();
        // 读取数据, 数组大小需要剔除1个字节的消息类型
        byte[] data = new byte[dataSize -1];

        byteBuf.readBytes(data);

        Message message = SerializationUtil.deserialize(MessageConstant.getMessageClass(messageType), data);

        list.add(message);
    }

}
四、server端实现
1、结构

2、RpcRequestHandler,用于处理客户端rpc请求
public class RpcRequestHandler extends SimpleChannelInboundHandler<RpcRequest> {

    private final static EventLoopGroup worker = new DefaultEventLoopGroup(Runtime.getRuntime().availableProcessors() + 1);


    @Override
    protected void channelRead0(ChannelHandlerContext ctx, RpcRequest msg) throws Exception {

        // 为避免占用网络io,此处异步进行处理
        worker.submit(() -> {
            System.out.println("[RpcRequestHandler] "+ Thread.currentThread().getName()  +" 处理请求,msg: " + msg);

            // 模拟处理耗时
            try {
                Thread.sleep(3000);
            } catch (InterruptedException e) {
                throw new RuntimeException(e);
            }

            RpcResponse rpcResponse = new RpcResponse();
            rpcResponse.setId(msg.getId());
            rpcResponse.setResult("处理" + msg.getParam());

            ctx.writeAndFlush(rpcResponse);
        });

    }

}
3、ServerChannelInitializer,该类用于初始化Server与Client通信的Channel,需要将我们前面写的编解码器以及RequestHandler添加进pipeline
public class ServerChannelInitializer extends ChannelInitializer<SocketChannel> {

    @Override
    protected void initChannel(SocketChannel socketChannel) throws Exception {
        ChannelPipeline pipeline = socketChannel.pipeline();

        pipeline.addLast(new MessageEncode());
        pipeline.addLast(new MessageDecode());

        pipeline.addLast(new RpcRequestHandler());
    }

}
4、RpcServer,用于启动一个Netty Server服务
public class RpcServer {

    public void bind(Integer port) {

        EventLoopGroup parent = new NioEventLoopGroup();
        EventLoopGroup child = new NioEventLoopGroup();
        Channel channel = null;

        try{
            ServerBootstrap serverBootstrap = new ServerBootstrap();

            serverBootstrap.group(parent, child)
                    .channel(NioServerSocketChannel.class)
                    .option(ChannelOption.SO_BACKLOG, 1024)
                    .childHandler(new ServerChannelInitializer());

            ChannelFuture channelFuture = serverBootstrap.bind(port).sync();

            System.out.println("server启动");

            // 非阻塞等待关闭
            channelFuture.channel().closeFuture().addListener(new ChannelFutureListener() {
                @Override
                public void operationComplete(ChannelFuture channelFuture) throws Exception {
                    System.out.println("server关闭");
                    parent.shutdownGracefully();
                    child.shutdownGracefully();
                }
            });

            channel = channelFuture.channel();

        } catch (Exception e) {

            e.printStackTrace();

            if(channel == null || !channel.isActive()) {
                System.out.println("server关闭");
                parent.shutdownGracefully();
                child.shutdownGracefully();
            } else {
                channel.close();
            }
        }
    }


}
五、client端实现
1、结构
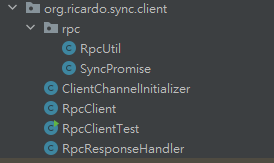
2、SyncPromise,用于Netty客户端的工作线程与外部发起RpcRequest的线程通信的类,通过该类可以阻塞与唤醒外部发起RpcRequest的线程,以及设置线程之间通信的内容(功能有点像Netty提供的Promise,不过此处我加了超时机制)
此处使用CountDownLatch来阻塞与唤醒线程有以下好处:
1、能够通过await(long timeout, TimeUnit unit)返回值true/false进行判断线程等待返回结果是否超时。因为线程进入阻塞时,CountDownLatch的值为1,当netty客户端的工作线程调用countDown()唤醒线程时,CountDownLatch值减为0,await(long timeout, TimeUnit unit)返回true,意味着线程等待响应结果时,没有超时。当netty客户端的工作线程没有来得及调用countDown()唤醒线程时。也就是说服务端返回结果超时,CountDownLatch值为1,线程超时唤醒,await(long timeout, TimeUnit unit)返回false。
综上所述,以await(long timeout, TimeUnit unit)返回值进行判断线程是否超时唤醒。此处给一个对比,就是有人认为为什么不使用LockSupport进行线程的阻塞与唤醒,原因如下:虽然LockSupport提供了超时唤醒的方法,但是该方法既没有返回值,也没有抛出异常,线程唤醒时,我们没有办法判断该线程是否超时了。
2、在我们实现的流程中,我们先发送了请求,才进行线程阻塞。那么存在一种情况,如果结果在我们线程阻塞之前就返回了,那么当线程进入阻塞时,就再也没有唤醒线程的时机了,导致线程每次调用接口都是超时的。
CountDownLatch的await(long timeout, TimeUnit unit)方法很好的规避了上诉问题,如果netty客户端的工作线程调用countDown()唤醒线程,那么此时CountDownLatch值减为0,线程需要调用await()进入阻塞,此时由于CountDownLatch为0,线程将不会进入阻塞,方法返回true,我们线程也能够正常的拿到请求的响应结果。
具体妙处需要大家仔细感受,一开始可能不太能理解,但把流程仔细梳理一下,就能够有更好的体验。
public class SyncPromise {

    // 用于接收结果
    private RpcResponse rpcResponse;

    private final CountDownLatch countDownLatch = new CountDownLatch(1);

    // 用于判断是否超时
    private boolean isTimeout = false;

    /**
     * 同步等待返回结果
     */
    public RpcResponse get(long timeout, TimeUnit unit) throws InterruptedException {
        // 等待阻塞,超时时间内countDownLatch减到0,将提前唤醒,以此作为是否超时判断
        boolean earlyWakeUp = countDownLatch.await(timeout, unit);

        if(earlyWakeUp) {
            // 超时时间内countDownLatch减到0,提前唤醒,说明已有结果
            return rpcResponse;
        } else {
            // 超时时间内countDownLatch没有减到0,自动唤醒,说明超时时间内没有等到结果
            isTimeout = true;
            return null;
        }
    }

    public void wake() {
        countDownLatch.countDown();
    }

    public RpcResponse getRpcResponse() {
        return rpcResponse;
    }

    public void setRpcResponse(RpcResponse rpcResponse) {
        this.rpcResponse = rpcResponse;
    }

    public boolean isTimeout() {
        return isTimeout;
    }

}
3、RpcUtil,封装的请求发送工具类,需要调用rpc发送的请求的线程,将通过该工具的send方法进行远程调用,不能简单的通过channel.writeAndFlush()进行客户端与服务端的通信
syncPromiseMap的作用:记录请求对应的SyncPromise对象(一次请求对应一个SyncPromise对象),由于外部线程与netty客户端的工作线程是通过SyncPromise进行通信的,我们需要通过请求的id与SyncPromise建立关系,确保netty客户端在处理RpcResopnse时,能够根据其中的请求id属性值,找到对应SyncPromise对象,为其设置响应值,以及唤醒等待结果的线程。
public class RpcUtil {

    private final static Map<String, SyncPromise> syncPromiseMap =  new ConcurrentHashMap<>();

    private final static Channel channel;

    static{
        channel = new RpcClient().connect("127.0.0.1", 8888);
    }

    public static RpcResponse send(RpcRequest rpcRequest, long timeout, TimeUnit unit) throws Exception{

        if(channel == null) {
            throw new NullPointerException("channel");
        }

        if(rpcRequest == null) {
            throw new NullPointerException("rpcRequest");
        }

        if(timeout <= 0) {
            throw new IllegalArgumentException("timeout must greater than 0");
        }

        // 创造一个容器,用于存放当前线程与rpcClient中的线程交互
        SyncPromise syncPromise = new SyncPromise();
        syncPromiseMap.put(rpcRequest.getId(), syncPromise);

        // 发送消息,此处如果发送玩消息并且在get之前返回了结果,下一行的get将不会进入阻塞,也可以顺利拿到结果
        channel.writeAndFlush(rpcRequest);

        // 等待获取结果
        RpcResponse rpcResponse = syncPromise.get(timeout, unit);

        if(rpcResponse == null) {
            if(syncPromise.isTimeout()) {
                throw new TimeoutException("等待响应结果超时");
            } else{
                throw new Exception("其他异常");
            }
        }

        // 移除容器
        syncPromiseMap.remove(rpcRequest.getId());

        return rpcResponse;
    }

    public static Map<String, SyncPromise> getSyncPromiseMap(){
        return syncPromiseMap;
    }


}
4、RpcResponseHandler,处理返回的调用结果,在该处理器中,将唤醒等待返回结果的线程
public class RpcResponseHandler extends SimpleChannelInboundHandler<RpcResponse> {

    @Override
    protected void channelRead0(ChannelHandlerContext ctx, RpcResponse msg) throws Exception {
        // 根据请求id,在集合中找到与外部线程通信的SyncPromise对象
        SyncPromise syncPromise = RpcUtil.getSyncPromiseMap().get(msg.getId());

        if(syncPromise != null) {
            // 设置响应结果
            syncPromise.setRpcResponse(msg);

            // 唤醒外部线程
            syncPromise.wake();
        }

    }

}
5、ClientChannelInitializer,该类用于初始化Server与Client通信的Channel,需要将我们前面写的编解码器以及ResponseHandler添加进pipeline
public class ClientChannelInitializer extends ChannelInitializer<SocketChannel> {

    @Override
    protected void initChannel(SocketChannel socketChannel) throws Exception {
        ChannelPipeline pipeline = socketChannel.pipeline();

        pipeline.addLast(new MessageEncode());
        pipeline.addLast(new MessageDecode());

        pipeline.addLast(new RpcResponseHandler());
    }

}
6、RpcClient实现,用于启动客户端
public class RpcClient {

    public Channel connect(String host, Integer port) {
        EventLoopGroup worker = new NioEventLoopGroup();
        Channel channel = null;

        try {
            Bootstrap bootstrap = new Bootstrap();

            bootstrap.group(worker)
                    .channel(NioSocketChannel.class)
                    .option(ChannelOption.AUTO_READ, true)
                    .handler(new ClientChannelInitializer());

            ChannelFuture channelFuture = bootstrap.connect(host, port).sync();

            System.out.println("客户端启动");

            channel = channelFuture.channel();

            // 添加关闭监听器
            channel.closeFuture().addListener(new ChannelFutureListener() {
                @Override
                public void operationComplete(ChannelFuture channelFuture) throws Exception {
                    System.out.println("关闭客户端");
                    worker.shutdownGracefully();
                }
            });

        } catch (Exception e) {
            e.printStackTrace();

            if(channel == null || !channel.isActive()) {
                worker.shutdownGracefully();
            } else {
                channel.close();
            }

        }

        return channel;
    }


}
六、测试
1、启动服务端
public static void main(String[] args) {
        new RpcServer().bind(8888);
}
启动结果如下:
server启动2、启动客户端,并且通过两个异步线程发送请求
public static void main(String[] args) throws Exception{
        //Channel channel = new RpcClient().connect("127.0.0.1", 8888);

        Thread thread1 = new Thread(new Runnable() {
            @Override
            public void run() {
                RpcRequest rpcRequest = new RpcRequest();
                rpcRequest.setParam("参数1");

                try {
                    System.out.println("thread1发送请求");
                    RpcResponse rpcResponse = RpcUtil.send(rpcRequest, 5, TimeUnit.SECONDS);
                    System.out.println("thread1处理结果:" + rpcResponse);
                } catch (Exception e) {
                    throw new RuntimeException(e);
                }
            }
        });

        Thread thread2 = new Thread(new Runnable() {
            @Override
            public void run() {
                RpcRequest rpcRequest2 = new RpcRequest();
                rpcRequest2.setParam("参数2");

                try {
                    System.out.println("thread2发送请求");
                    RpcResponse rpcResponse = RpcUtil.send(rpcRequest2, 5, TimeUnit.SECONDS);
                    System.out.println("thread2处理结果:" + rpcResponse);
                } catch (Exception e) {
                    throw new RuntimeException(e);
                }
            }
        });

        // 休眠一下,等待客户端与服务端进行连接
        Thread.sleep(1000);

        thread1.start();
        thread2.start();

    }
服务端结果:
[RpcRequestHandler] defaultEventLoopGroup-4-3 处理请求,msg: RpcRequest(id=ade6af01-2bcf-4a4c-a42a-381731010027, param=参数1)
[RpcRequestHandler] defaultEventLoopGroup-4-4 处理请求,msg: RpcRequest(id=db57bf9a-3220-44ca-8e4f-d74237a3d5b2, param=参数2)
客户端结果
thread1发送请求
thread2发送请求
thread1处理结果:RpcResponse(id=ade6af01-2bcf-4a4c-a42a-381731010027, result=处理参数1)
thread2处理结果:RpcResponse(id=db57bf9a-3220-44ca-8e4f-d74237a3d5b2, result=处理参数2)
以上由于我们在RpcRequestHandler中模拟处理请求为3秒,而线程等待结果超时为5秒,所以接下来将线程调用rpc请求的的超时时间设置为2秒,重启客户端,客户端结果如下:
thread1发送请求
thread2发送请求
Exception in thread "Thread-1" Exception in thread "Thread-0" java.lang.RuntimeException: java.util.concurrent.TimeoutException: 等待响应结果超时
	at org.ricardo.sync.client.RpcClientTest$1.run(RpcClientTest.java:32)
	at java.lang.Thread.run(Thread.java:748)
Caused by: java.util.concurrent.TimeoutException: 等待响应结果超时
	at org.ricardo.sync.client.rpc.RpcUtil.send(RpcUtil.java:56)
	at org.ricardo.sync.client.RpcClientTest$1.run(RpcClientTest.java:29)
	... 1 more
java.lang.RuntimeException: java.util.concurrent.TimeoutException: 等待响应结果超时
	at org.ricardo.sync.client.RpcClientTest$2.run(RpcClientTest.java:48)
	at java.lang.Thread.run(Thread.java:748)
Caused by: java.util.concurrent.TimeoutException: 等待响应结果超时
	at org.ricardo.sync.client.rpc.RpcUtil.send(RpcUtil.java:56)
	at org.ricardo.sync.client.RpcClientTest$2.run(RpcClientTest.java:45)
	... 1 more
![[<span style='color:red;'>Netty</span><span style='color:red;'>实践</span>] 简单WebSocket服务<span style='color:red;'>实现</span>](https://img-blog.csdnimg.cn/direct/5daf649a7656400da4720ed822c64152.png)