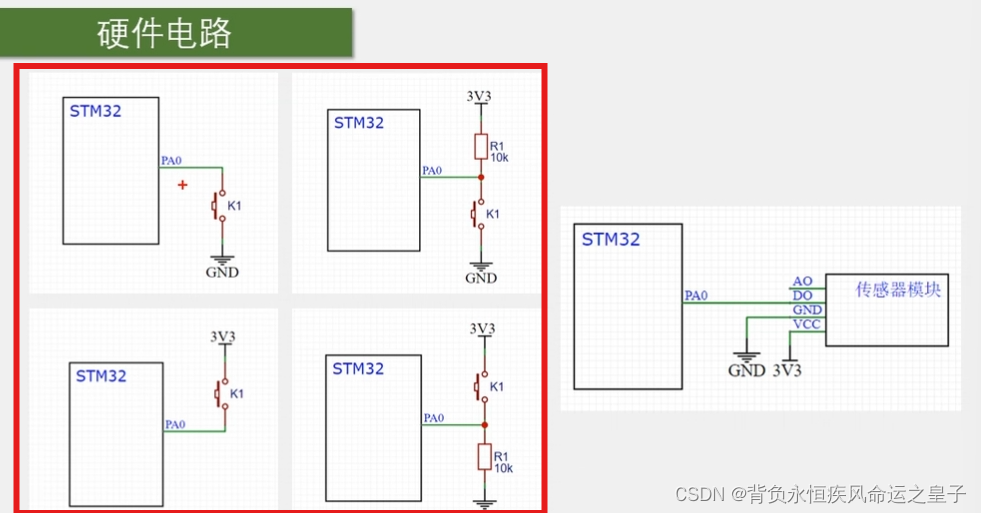
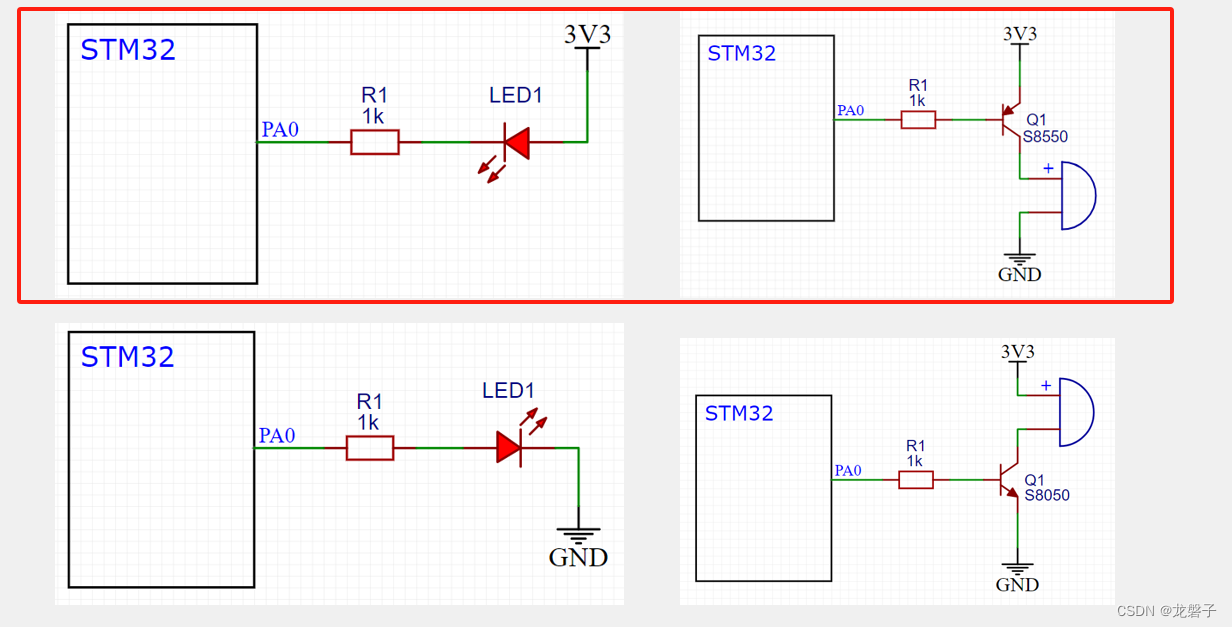
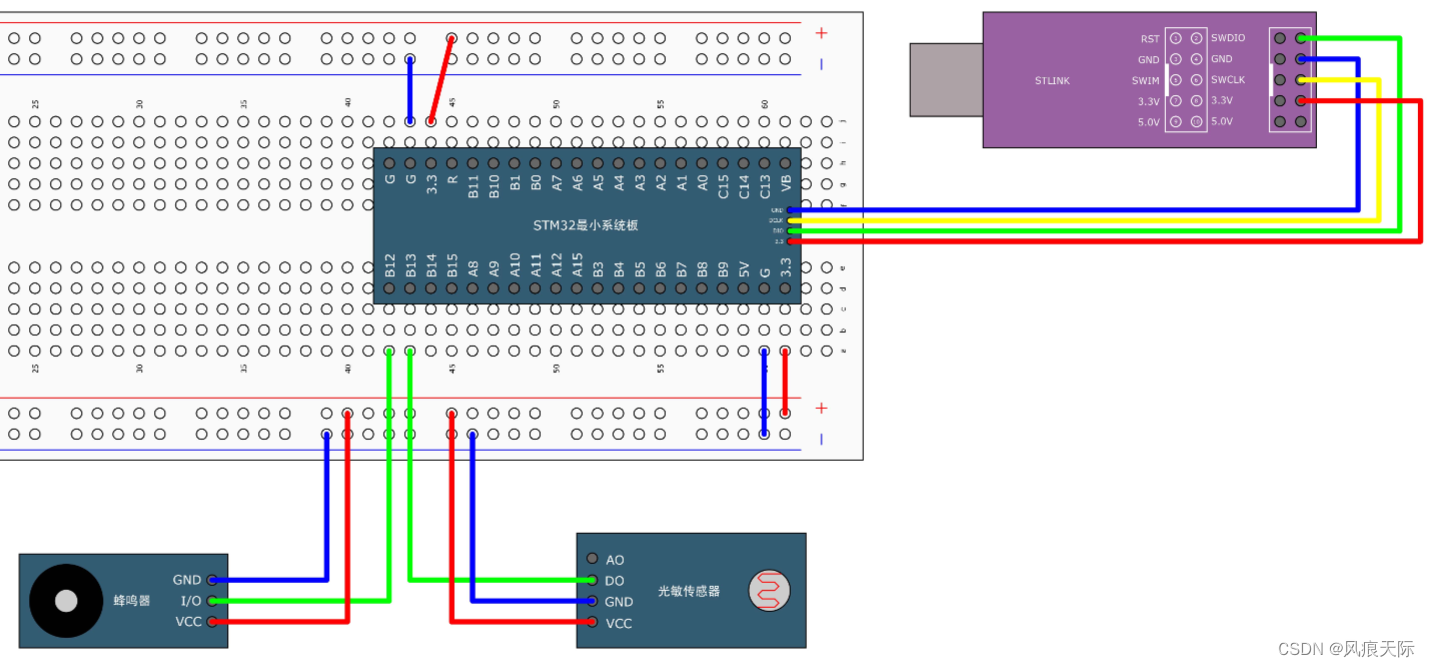
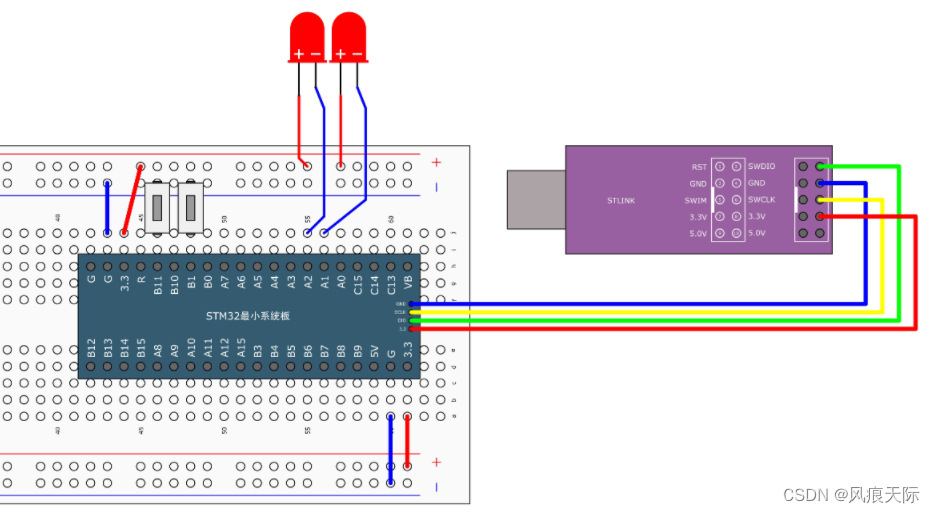
接线:
复制粘贴蜂鸣器文件夹,重命名为“3-4 按键控制LED”,新建一个名为“Hardware”的文件夹用于存放硬件驱动文件。
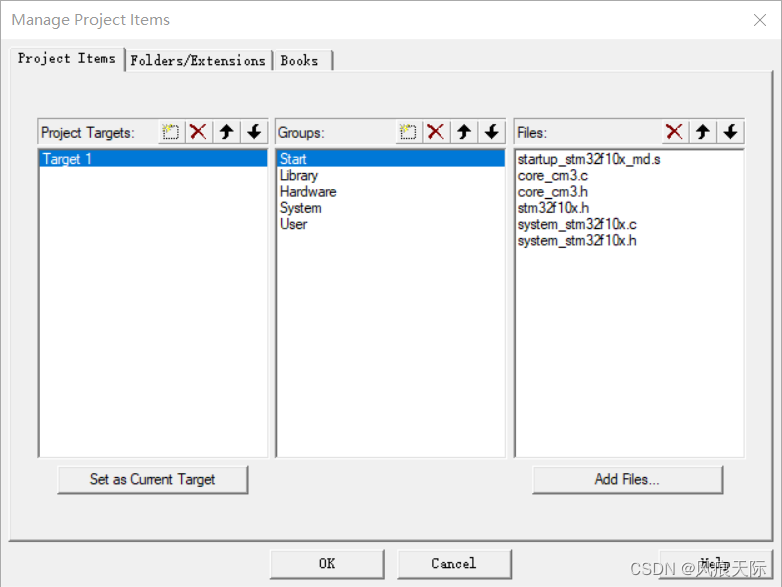
打开keil5,点击三个箱子按钮,在“Groups”中新建一个“Hardware”。
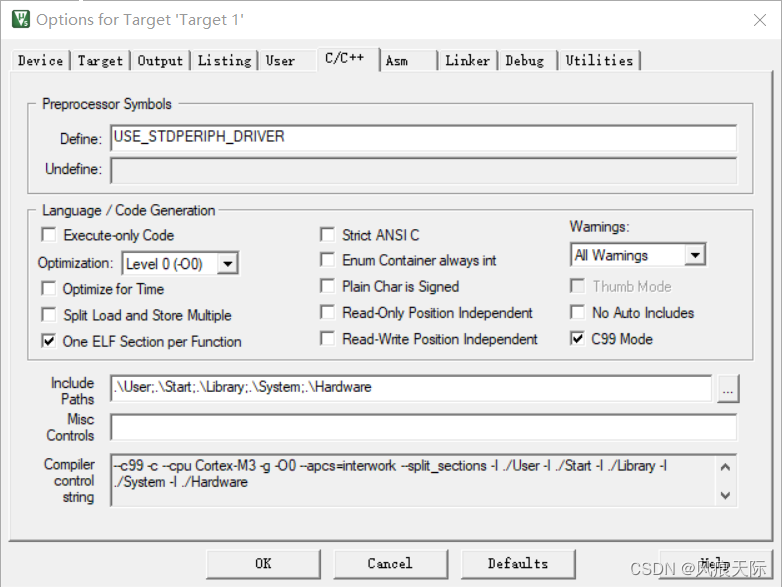
再点击魔术棒按钮,在C/C++中选择“Include Paths”,将Hardware的文件路径加入进来。
回到keil,右键“Hardware”新建“LED.c”和“LED.h”,注意在新建时记得更改文件路径到“Hardware”文件夹。
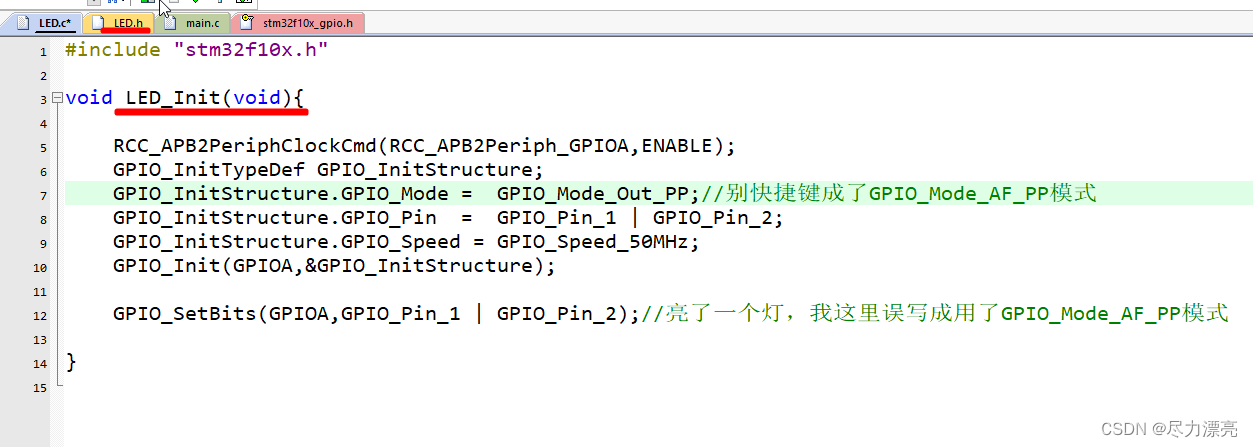
LED.c:
#include "stm32f10x.h"                  // Device header

void LED_Init(void)
{
	RCC_APB2PeriphClockCmd(RCC_APB2Periph_GPIOA,ENABLE);

	GPIO_InitTypeDef GPIO_InitStructure;
	GPIO_InitStructure.GPIO_Mode = GPIO_Mode_Out_PP;
	GPIO_InitStructure.GPIO_Pin = GPIO_Pin_1 | GPIO_Pin_2;
	GPIO_InitStructure.GPIO_Speed = GPIO_Speed_50MHz;
	GPIO_Init(GPIOA,&GPIO_InitStructure);

	GPIO_SetBits(GPIOA,GPIO_Pin_1 |GPIO_Pin_2);
}

void LED1_ON(void)
{
	GPIO_ResetBits(GPIOA,GPIO_Pin_1);
}

void LED1_OFF(void)
{
	GPIO_SetBits(GPIOA,GPIO_Pin_1);
}

void LED1_Turn(void)
{
	if(GPIO_ReadOutputDataBit(GPIOA,GPIO_Pin_1) == 0)
	{
		GPIO_SetBits(GPIOA,GPIO_Pin_1);
	}
	else
	{
		GPIO_ResetBits(GPIOA,GPIO_Pin_1);
	}
}

void LED2_ON(void)
{
	GPIO_ResetBits(GPIOA,GPIO_Pin_2);
}

void LED2_OFF(void)
{
	GPIO_SetBits(GPIOA,GPIO_Pin_2);
}

void LED2_Turn(void)
{
	if(GPIO_ReadOutputDataBit(GPIOA,GPIO_Pin_2) == 0)
	{
		GPIO_SetBits(GPIOA,GPIO_Pin_2);
	}
	else
	{
		GPIO_ResetBits(GPIOA,GPIO_Pin_2);
	}
}
“GPIO_ReadOutputDataBit”是读取GPIO输出端的函数,在“LED1_Turn”中,如果这个端口原来的输出是0,那么将它改变为1;反之亦然。
LED.h:
#ifndef __LED_H
#define __LED_H

void LED_Init(void);
void LED1_ON(void);
void LED1_OFF(void);
void LED2_ON(void);
void LED2_OFF(void);
void LED1_Turn(void);
void LED2_Turn(void);

#endif
接着仿照上面的步骤新建“Key.c”和“Key.h”
Key.c:
#include "stm32f10x.h"                  // Device header
#include "Delay.h"

void Key_Init(void)
{
	RCC_APB2PeriphClockCmd(RCC_APB2Periph_GPIOB,ENABLE);

	GPIO_InitTypeDef GPIO_InitStructure;
	GPIO_InitStructure.GPIO_Mode = GPIO_Mode_IPU;
	GPIO_InitStructure.GPIO_Pin = GPIO_Pin_1| GPIO_Pin_11;
	GPIO_InitStructure.GPIO_Speed = GPIO_Speed_50MHz;
	GPIO_Init(GPIOB,&GPIO_InitStructure);
}

uint8_t Key_GetNum(void)
{
	uint8_t KeyNum = 0;
	if(GPIO_ReadInputDataBit(GPIOB,GPIO_Pin_1) == 0)
	{
		Delay_ms(20);
		while(GPIO_ReadInputDataBit(GPIOB,GPIO_Pin_1) == 0);
		Delay_ms(20);
		KeyNum = 1;
	}
	if(GPIO_ReadInputDataBit(GPIOB,GPIO_Pin_11) == 0)
	{
		Delay_ms(20);
		while(GPIO_ReadInputDataBit(GPIOB,GPIO_Pin_11) == 0);
		Delay_ms(20);
		KeyNum = 2;
	}
	return KeyNum;
}
“GPIO_ReadInputDataBit”是用来读取GPIO输入的函数,如果接入按键的引脚读取为0,那么代表按键被按下,此时先Delay20ms消抖,再进入一个while循环,当按键一直按下时就停在这里。当按键弹起时代表整个按压过程结束,再Delay20ms消抖后返回“KeyNum”变量。
Key.h:
#ifndef __KEY_H
#define __KEY_H

void Key_Init(void);
uint8_t Key_GetNum(void);

#endif
main.c:
#include "stm32f10x.h"                  // Device header
#include "Delay.h"
#include "LED.h"
#include "Key.h"

uint8_t KeyNum;

int main(void)
{
	LED_Init();
	Key_Init();
	while(1)
	{
		KeyNum = Key_GetNum();
		if(KeyNum == 1)
		{
			LED1_Turn();
		}
		if(KeyNum == 2)
		{
			LED2_Turn();
		}
	}
}
编译运行成功后,即可看到按下哪个按钮,对应的LED改变状态。
版权声明:部分图片来源于网络,仅做教学使用,如有侵权请联系本文作者。