文章目录
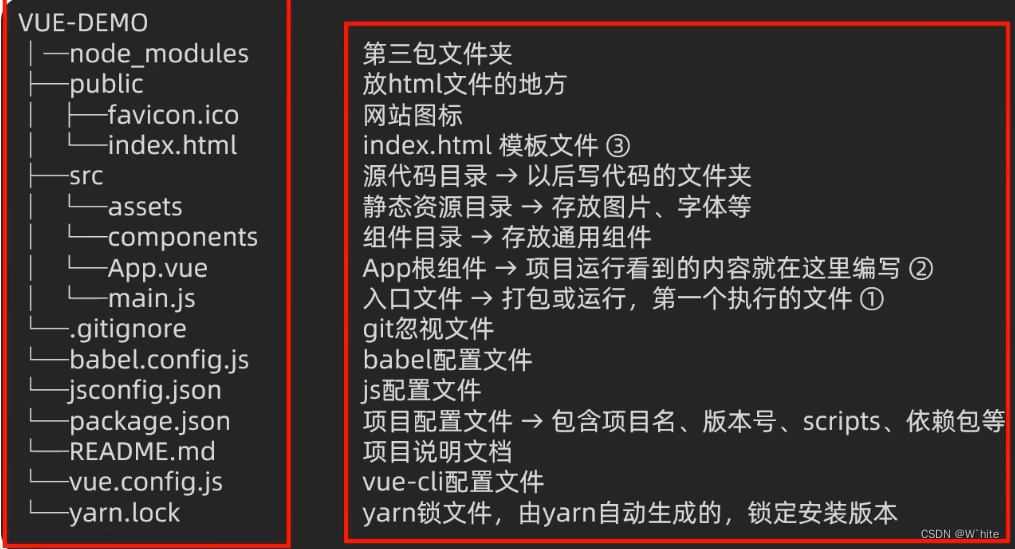
项目目录介绍和运行流程
1.index.html👇
<!DOCTYPE html>
<html lang="">
  <head>
    <meta charset="utf-8">
    <meta http-equiv="X-UA-Compatible" content="IE=edge">
    <meta name="viewport" content="width=device-width,initial-scale=1.0">
    <link rel="icon" href="<%= BASE_URL %>favicon.ico">
    <title><%= htmlWebpackPlugin.options.title %></title>
  </head>
  <body>
    <!-- 兼容:给不支持js的浏览器一个提示 -->
    <noscript>
      <strong>We're sorry but <%= htmlWebpackPlugin.options.title %> doesn't work properly without JavaScript enabled. Please enable it to continue.</strong>
    </noscript>

    <!-- Vue所管理的容器:将来创建结构动态渲染这个容器 -->
    <div id="app">
      <!-- 工程化开发模式中:这里不在直接编写模板语法 ,而是通过App.vue 提供结构渲染-->
    </div>
    <!-- built files will be auto injected -->
  </body>
</html>
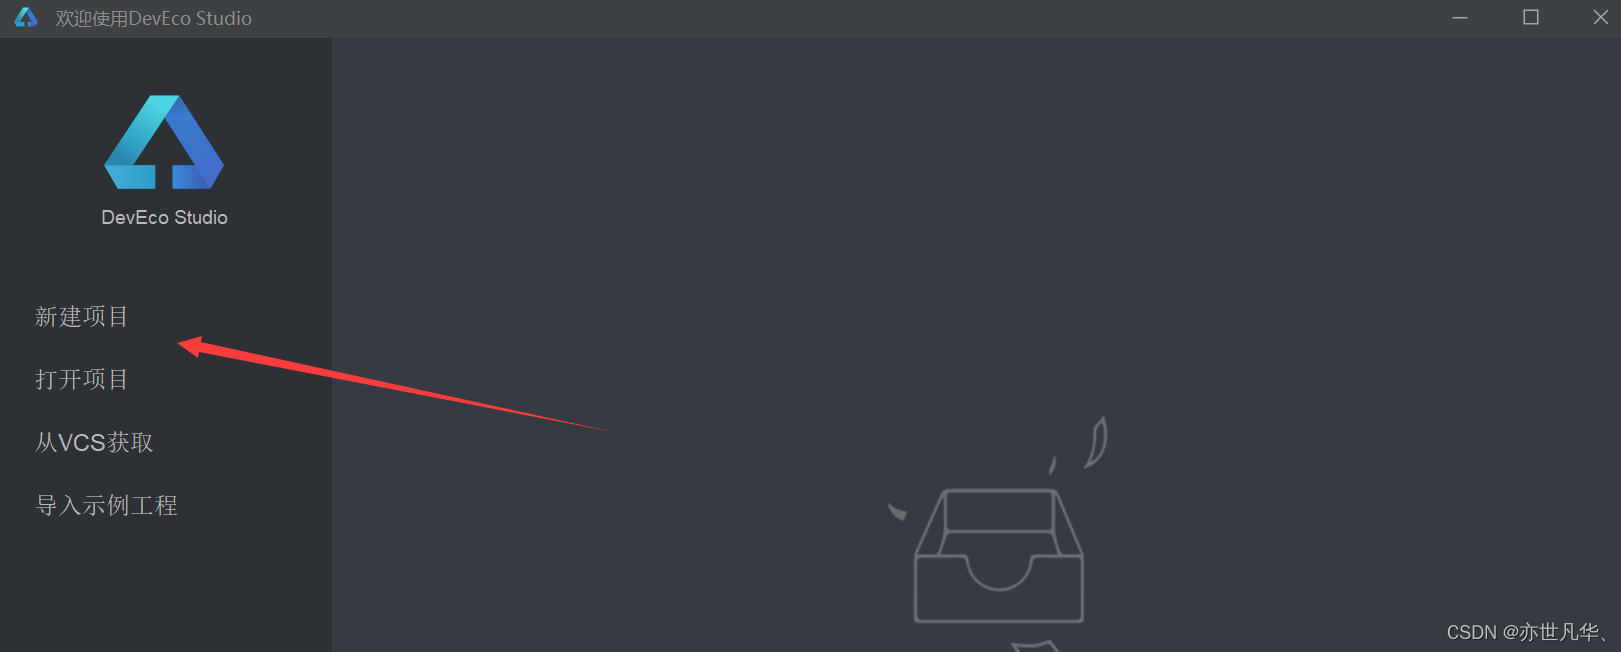
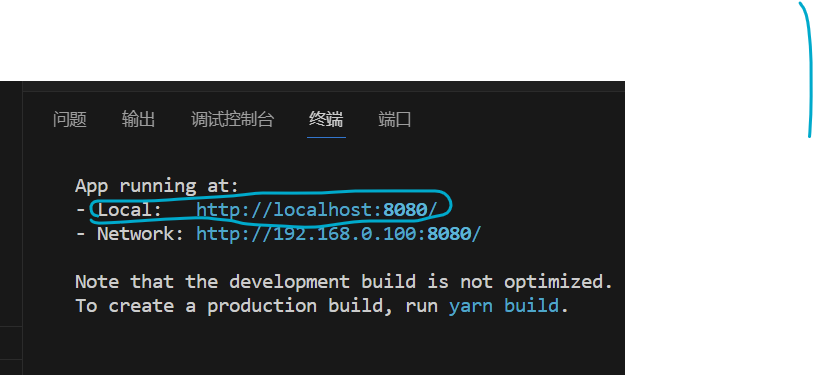
Ctrl + `是切换终端

打开终端,在里面执行
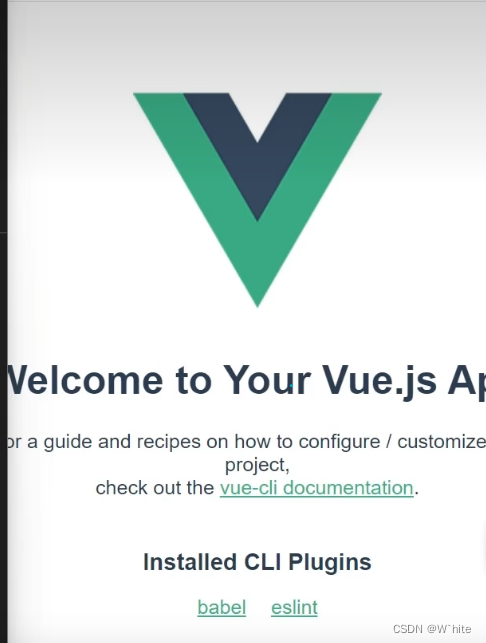
yarn serve,运行项目,然后通过浏览器打开
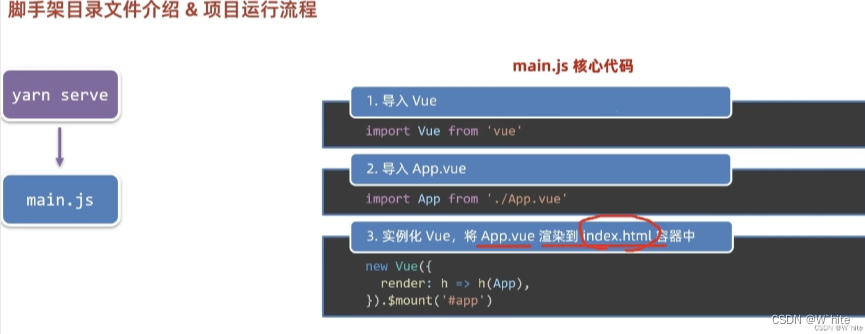
2.整个项目的核心入口文件其实是main.js
//文件核心作用:导入App.vue,基于App.vue创建结构渲染index.html
//1.导入 Vue 核心包
import Vue from 'vue'
//2.导入 App.vue 根组件
import App from './App.vue'

console.log(123)

//提示:当前处于什么环境(生产环境/开发环境)
Vue.config.productionTip = false

//3.Vue实例化,提供render方法 → 基于App.vue创建结构渲染index.html
new Vue({

  //如果要管理index中的app容器,就像下面这么写
  el:'#app',//这个 el 和下面的 .$mount('选择器') 作用完全一样,用于指定Vue所管理的容器
  //render: h => h(App),   //基于App.vue创建结构
                      //这里的 render 写法其实是一个简写
                      //可以写一个完整写法(如下)
  render: (createElement) => {

    // 基于App创建元素结构,但创建了结构并没有返回,所以它得不到你创建的结果,
    //所以前面要加一个return
    return createElement(App)
  }
  //提问:完整写法和之前的有什么不一样?
  //答:creatElement是形参,它可以改成别的,比如一个h
}).$mount('#app')
3.App.vue
<!-- 本质上就是在基于App.vue来创建结构,最终渲染index.html里面的id=App的盒子 -->
<template>
  <div id="app">
    <img alt="Vue logo" src="./assets/logo.png">
    <img alt="Vue logo" src="./assets/logo.png">
    <HelloWorld msg="Welcome to Your Vue.js App"/>
  </div>
</template>

<script>
import HelloWorld from './components/HelloWorld.vue'

export default {

  name: 'App',
  components: {

    HelloWorld
  }
}
</script>

<style>
#app {

  font-family: Avenir, Helvetica, Arial, sans-serif;
  -webkit-font-smoothing: antialiased;
  -moz-osx-font-smoothing: grayscale;
  text-align: center;
  color: #2c3e50;
  margin-top: 60px;
}
</style>
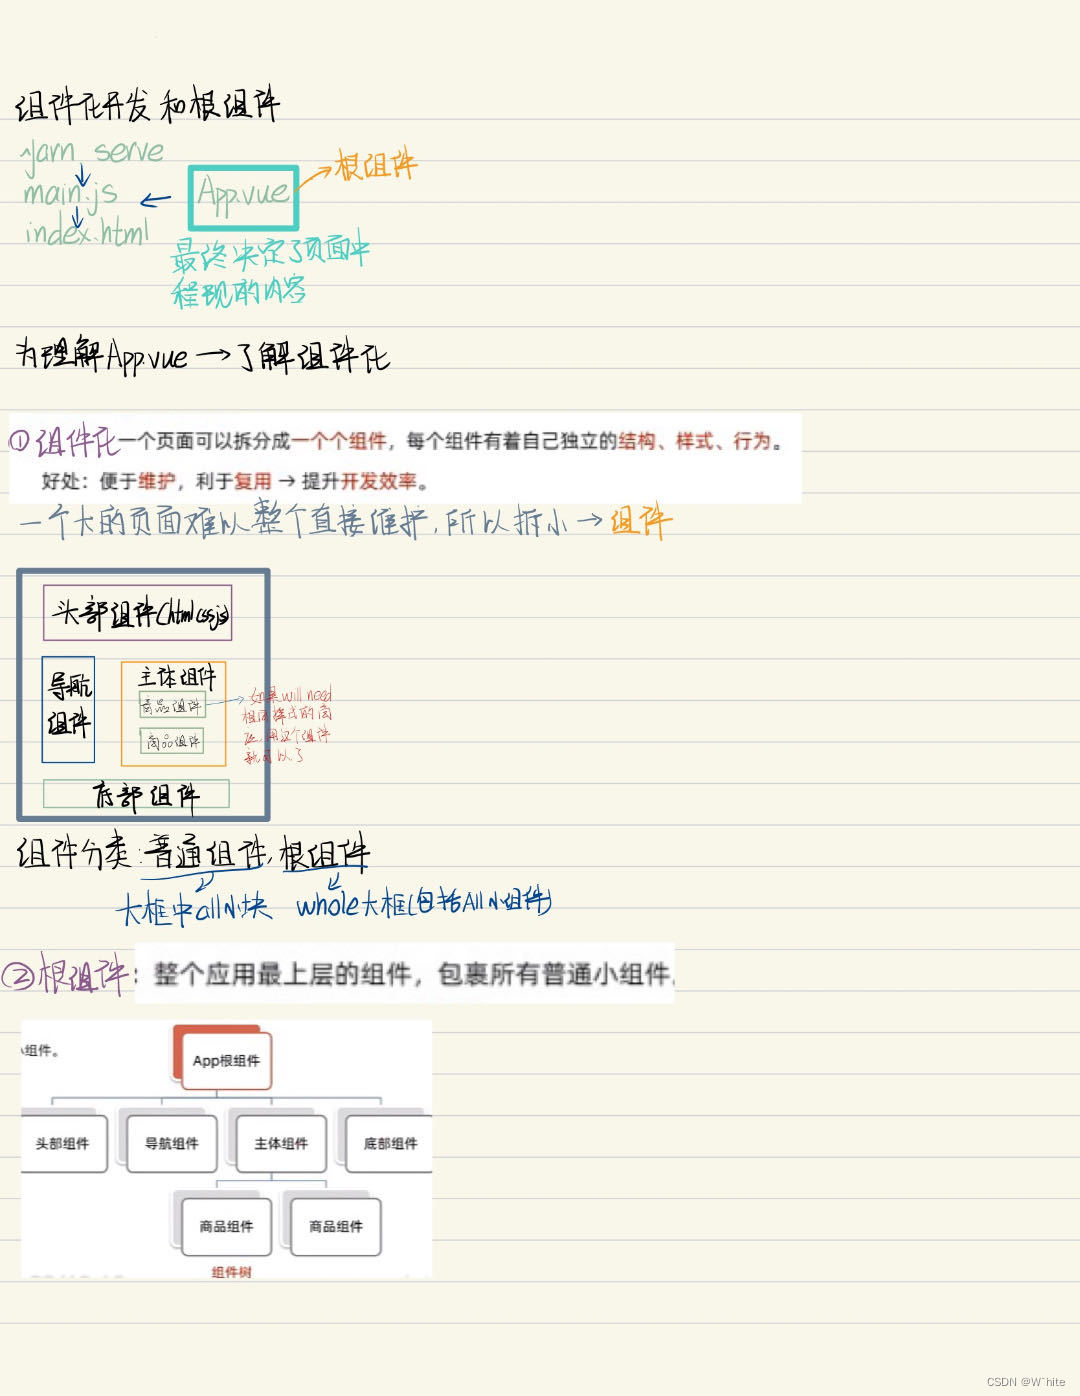
组件化开发 和 根组件

<!-- 结构 -->
<template>
  <div class="App">
    <div class="box" @click="fn">

    </div>
  </div>
</template>

<!-- 逻辑 -->
<script>
//export是导出:导出的是当前组件的配置项
//里面可以提供:data(特殊),methods,computed,watch,生命周期
  export default{

    created (){

      console.log('我是你')
    },
    methods:{

      fn (){

        alert('你好')
      }
    }
  }
</script>

<!-- 样式 -->
<style>
.App{

  width: 400px;
  height: 400px;
  background-color: pink;
}
.box{

  width: 100px;
  height: 100px;
  background-color: skyblue;
}
</style>
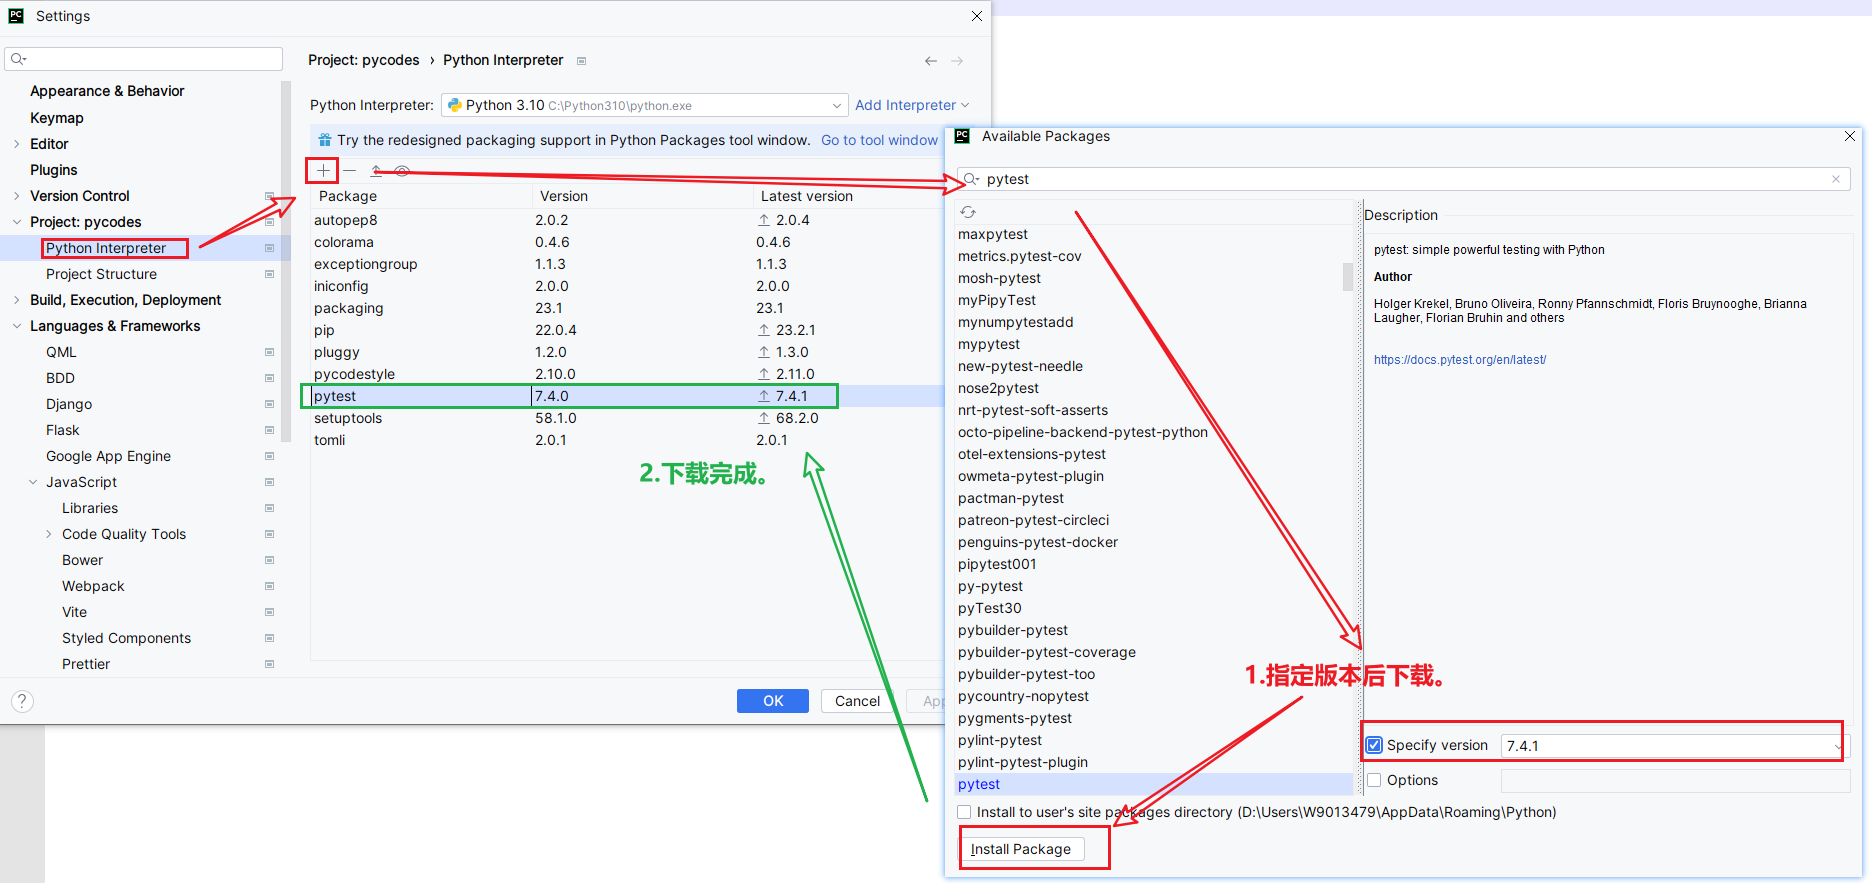
普通组件的注册
普通组件的注册使用
组件注册的两种方式
1.局部注册:只能在注册的组件内使用(联想局部变量)
①:创建.vue文件(三个组成部分)
②:在使用的组件内部导入并注册
2.全局注册:所有组件内都能使用(联想全局变量)
1.局部注册
①:创建.vue文件(三个组成部分)
往哪创建?
往components中创建,要几个就创建几个,每一个都有三个所对应的组成部分:结构,样式,行为
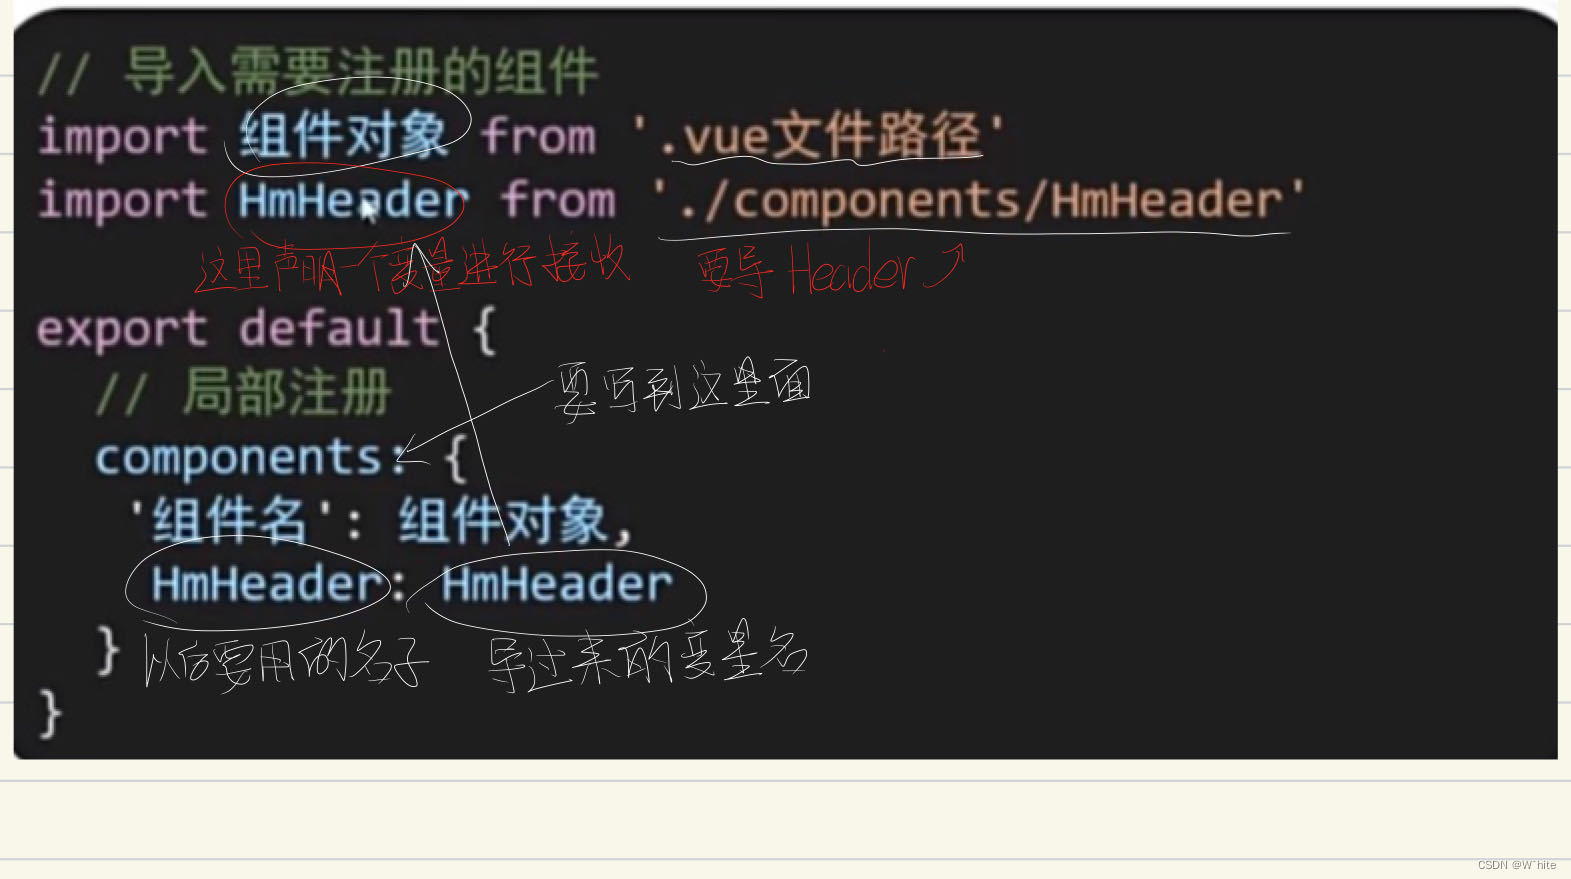
②:在使用的组件内部导入并注册
App.vue内进行导入
使用:
- 当成html标签使用
<组件名></组件名>注意:
- 组件名规范 → 大驼峰命名法,如:HmHeader
举例如下图👇

组件内容包含三部分👇

在App.vue中使用组件方法实例如下代码👇
<template>
  <div class="App">
      <!-- 头部组件 -->
    <ZxyHeader></ZxyHeader>
      <!-- 主题组件 -->
    <ZxyMain></ZxyMain>
      <!-- 底部组件 -->
    <ZxyFooter></ZxyFooter>
  </div>
</template>

<script>
import ZxyHeader from './components/ZxyHeader.vue'
import ZxyMain from './components/ZxyMain.vue'
import ZxyFooter from './components/ZxyFooter.vue'
export default{

  //写一个配置项,在对象里面去进行当前组件的注册
  components:{

    //'组件名':组件对象
    ZxyHeader:ZxyHeader,//这样注册好之后,就可以把它当成组件,在上面的template中使用了
    ZxyMain:ZxyMain,//后面的这两个不用像前面一样,只要写前一半就可以了
    ZxyFooter
  }
}
</script>


<style>
  .App{

    width: 600px;
    height: 700px;
    background-color: skyblue;
    margin: 0 auto;
    padding: 20px;
  }
</style>
2.全局注册
①:创建.vue文件(三个组成部分)
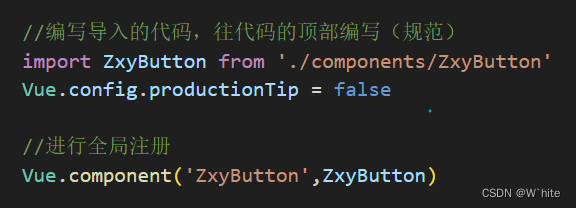
②:main.js中进行全局注册
比如通用按钮
1.全局注册的语法是Vue.component('组件名',组件对象),使用和注意事项和局部注册一样(组件名就是给你要在这里用的组件起个名字,组件对象就是你在component中给组件起的名字)
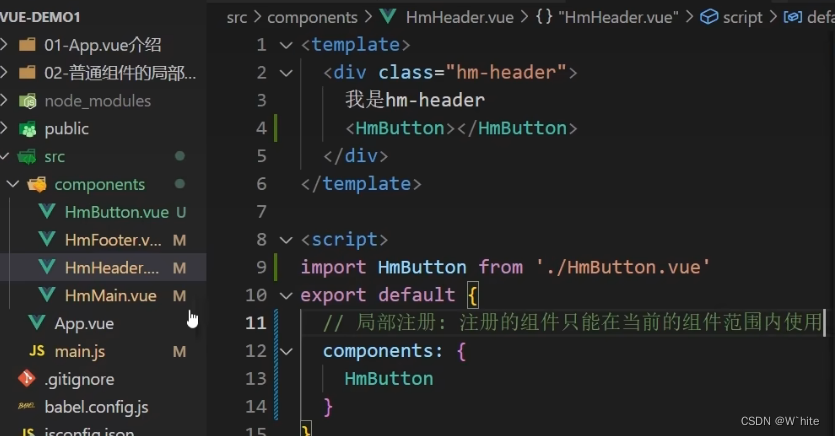
2.像这样注册好之后👉
如果你想要用它,就可以把它用到之前写好的局部组件中,比如要给局部组件加上这个button
小tip:用 cursor:pointer 可以把按钮上的三角鼠标变成一个小手


全部代码如下:
ZxyButton.vue👇
<template>
    <button class="zxy-button">zxy的通用按钮</button>
</template>

<script>
export default{


}

</script>

<style>
.zxy-button{

    height: 50px;
    line-height: 50px;
    padding: 0 20px;
    font-size: 30px;
    background-color: #62707e;
    border-radius: 10px;
}
</style>
main.js👇
import Vue from 'vue'
import App from './App.vue'

//编写导入的代码,往代码的顶部编写(规范)
import ZxyButton from './components/ZxyButton'
Vue.config.productionTip = false

//进行全局注册
Vue.component('ZxyButton',ZxyButton)

new Vue({

  el:'#app',
  render: (createElement) => {

    return createElement(App)
  }
}).$mount('#app')
导入局部组件👇
<template>
    <div class="zxy-footer">
        我是zxy的尾巴
        <ZxyButton></ZxyButton>//就是这一行
    </div>
</template>
如果不像现在全局注册中,就像这个按钮在组件里面,可以这么写
但是如果每个组件里面都想用这个button的话,就需要在想应用到的每个组件里面都写一遍上图的代码,太麻烦了。所以相同的东西,用全局组件很方便,只需写一个标签就好了
图文总结👇

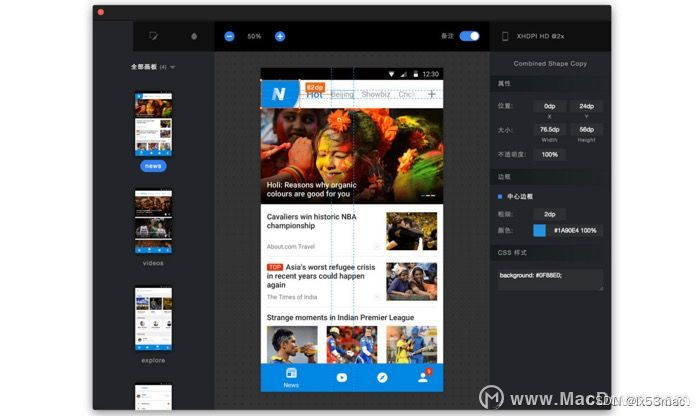
综合案例
看图拆分组件
组件中可以再拆组件:比如新鲜好物、热门品牌、最新专题中的小方块
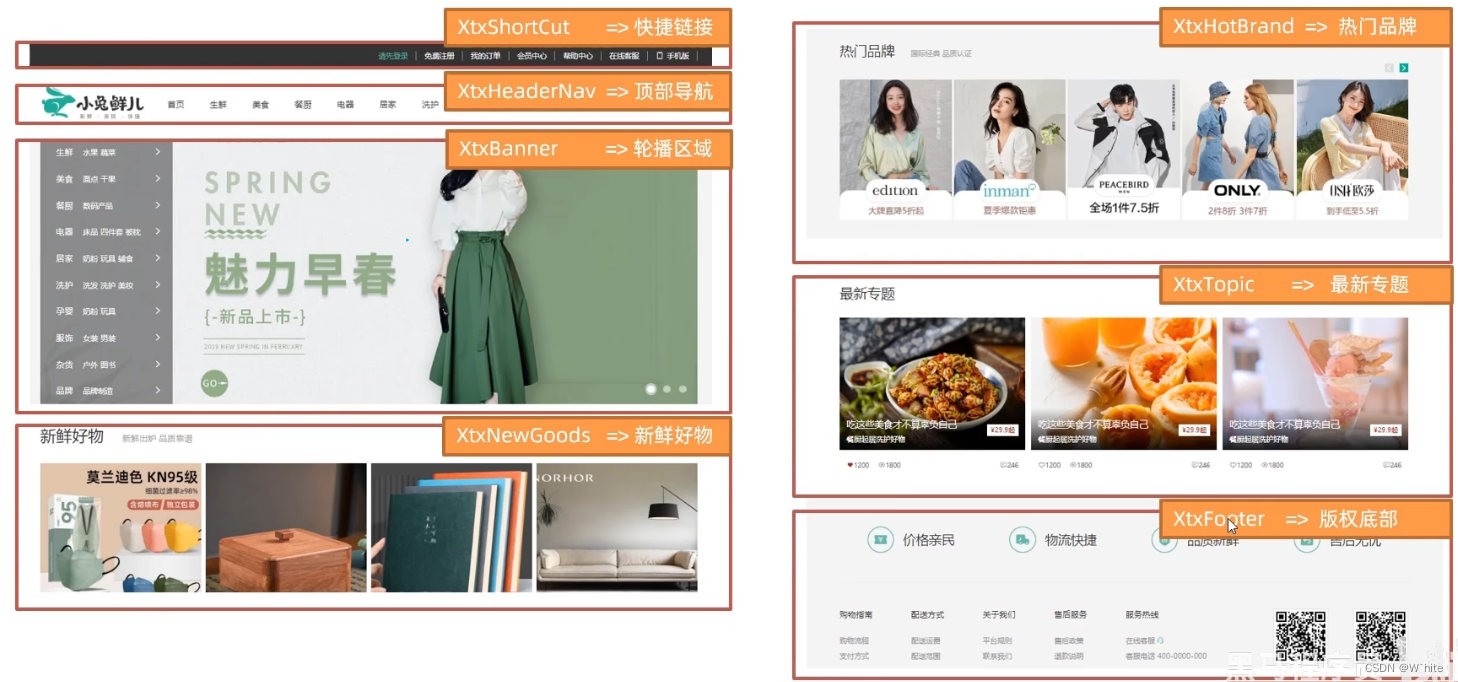
用Vue开发页面的思路:
1.分析页面,按模块拆分组件,搭架子(局部或全局注册)
2.根据设计图,编写组件html结构css样式
3.拆分封装通用小组件(局部或全局注册)
4.通过js动态渲染,实现功能