微信小程序实战系列
前言
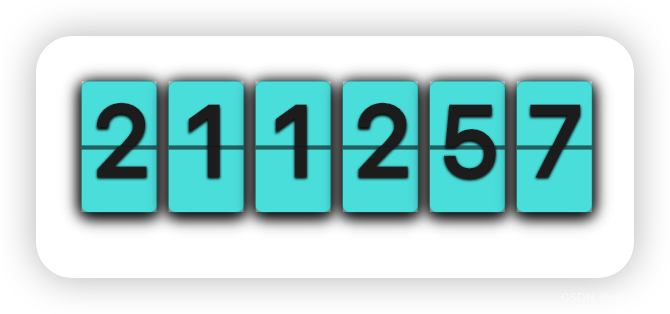
接着《微信小程序实战-01翻页时钟-1》,继续完成“6个页面的静态渲染和计时”功能。
计时功能实现
clock.wxml
clock.wxml中 新增了wx:for(基础知识),用来现实六个“页面”;“item”相当于一个较大的盒子“包裹”着“flip_item”及其后代组件。“item”用来渲染时钟的四个“黑点”,flip_item用来渲染“页轴”。
<!--pages/clock/clock.wxml-->

<view class="container">
  <view class="clock_container">
    <block wx:for="{
    {timeArr}}" wx:for-index="timeIndex" wx:for-item="timeItem" wx:key="timeIndex">
      <view class="item">
        <view class="flip_item">
          <view class="up">
            <view class="number">{
  {timeItem}}</view>
          </view>
          <view class="down">
            <view class="number">{
  {timeItem}}</view>
          </view>
        </view>
      </view>
    </block>
  </view>
</view>
clock.wxss
CSS中,::before和::after都是创建一个伪元素(pseudo-element);::before为匹配选中的元素的第一个子元素;::after为已选中元素的最后一个子元素。通常会配合content属性来为该伪元素添加装饰内容。这个伪元素默认是行内元素。
CSS中,:nth-of-type() 创建一个伪类(pseudo-class),基于同类型元素(组件名称)的兄弟元素中的位置来匹配元素。
每段样式的作用在代码中都做了注释。
/* pages/clock/clock.wxss */
.clock_container{

  display: flex;
}

/* 设置item的样式,固定宽高 */
.item {

  position: relative;
  width: 90rpx;
  height: 155rpx;
  border:1rpx solid rgba(121, 121, 121, 0.384);
  box-shadow: 0 4rpx 18rpx rgba(0,0,0,0.9);
  border-radius: 10rpx;
  margin-right: 12rpx;
  background-color: #55e3e3;
}

.flip_item{

  position: relative;
  width: 100%;
  height: 100%;
  box-shadow: 0 4rpx 18rpx rgba(0,0,0,0.9);
}

/* 第2、4页增加右边距 */
.item:nth-of-type(4),
.item:nth-of-type(2){

  margin-right: 48rpx;
}

/* 第2、4页增点 “黑点” */
.item:nth-of-type(4)::before,
.item:nth-of-type(4)::after,
.item:nth-of-type(2)::before,
.item:nth-of-type(2)::after{

  position: absolute;
  content:'';
  width: 25rpx;
  height: 25rpx;
  background-color: rgba(0,0,0,0.8);
  border-radius: 50%;
  left: 105rpx;
}

/* 增加 上“黑点”边距 */
.item:nth-of-type(4)::before,
.item:nth-of-type(2)::before{

  top: 30rpx;
}

/* 增加 下“黑点”边距 */
.item:nth-of-type(4)::after,
.item:nth-of-type(2)::after{

  bottom: 30rpx;
}

/* 时钟的单个数字 */
.number{

  position: absolute;
  /* border: 1px solid red; 调试用 */
  width: 100%;
  height: 155rpx;
  color: #252525;
  text-align: center;
  text-shadow: 0 2rpx 4rpx rgb(0, 0, 0);
  font-size: 118rpx;
  font-weight: bold;
}

/* 页轴 */
.flip_item::before{

  position: absolute;
  content: '';
  top: 75rpx;
  width: 100%;
  height: 5rpx;
  background-color: rgba(0, 0, 0, 0.5);
}

/*  掩盖“down”的上半部分 */
.down{

  position: absolute;
  width: 100%;
  height: 50%;
  overflow: hidden;
  bottom: 0;
}
.down .number{

  bottom: 0;
}

/* 掩盖“up”的下半部分 */
.up{

  position: absolute;
  width: 100%;
  height: 50%;
  overflow: hidden;
}
clock.js
// pages/clock/clock.js
Page({


  /**
   * 页面的初始数据
   */
  data: {

    timeArr:[]
  },

  /**
   * 获取时间数组
   */
  getTimeArr: function(){

    let tempArr = []
    let str = ""
    let now = new Date()
    // 获取小时
    let hours = now.getHours()
    // console.log("hours", hours)
    str = hours.toString()
    if (str.length === 1){

      tempArr[0] = '0'
      tempArr[1] = str[1]
    }else{

      tempArr[0] = str[0]
      tempArr[1] = str[1]
    }
    // 获取分钟
    let minutes = now.getMinutes()
    // console.log("minutes", minutes)
    str = minutes.toString()
    if (str === '0'){

      tempArr[2] = '0'
      tempArr[3] = '0'
    }else if (str.length === 1){

      tempArr[2] = '0'
      tempArr[3] = str[0]
    }else{

      tempArr[2] = str[0]
      tempArr[3] = str[1]
    }
    // 获取秒数
    let seconds = now.getSeconds()
    // console.log("seconds", seconds)
    str = seconds.toString()
    if (str === '0'){

      tempArr[4] = '0'
      tempArr[5] = '0'
    }else if (str.length === 1){

      tempArr[4] = '0'
      tempArr[5] = str[0]
    }else{

      tempArr[4] = str[0]
      tempArr[5] = str[1]
    }
    this.setData({
   timeArr:tempArr})
    // console.log("timeArr:", this.data.timeArr)
  },

  /**
   * 设置定一个定时器, 每秒更新TimeArr
   */
  timeRunner: function(){

    this.timer = setInterval(()=>{
    //设置定时器
      this.getTimeArr()
    }, 1000)
  },
  /**
   * 生命周期函数--监听页面加载
   */
  onLoad(options) {

    this.getTimeArr()
    this.timeRunner()
  },

  /**
   * 生命周期函数--监听页面初次渲染完成
   */
  onReady() {


  },

  /**
   * 生命周期函数--监听页面显示
   */
  onShow() {


  },

  /**
   * 生命周期函数--监听页面隐藏
   */
  onHide() {


  },

  /**
   * 生命周期函数--监听页面卸载
   */
  onUnload() {

    clearInterval(this.timer);
  },

  /**
   * 页面相关事件处理函数--监听用户下拉动作
   */
  onPullDownRefresh() {


  },

  /**
   * 页面上拉触底事件的处理函数
   */
  onReachBottom() {


  },

  /**
   * 用户点击右上角分享
   */
  onShareAppMessage() {


  }
})
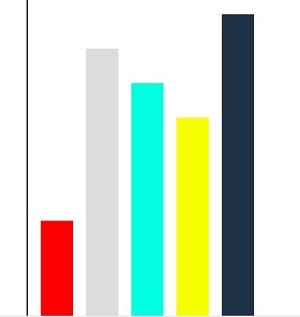
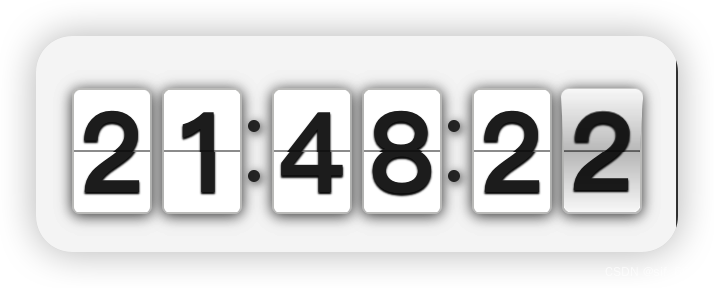
运行效果
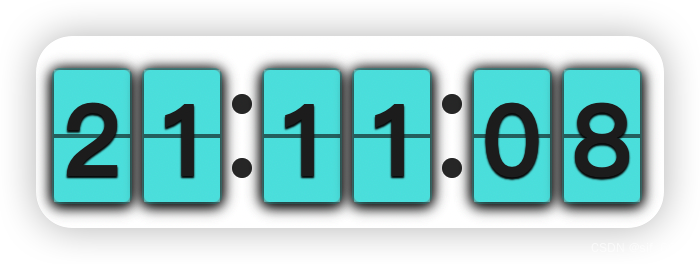
说明:本文样式代码中的nth-of-type只能在WebView渲染模式下正常显示;在Skyline模式下,由于不支持“nth-of-type”,因此“小黑点”渲染不出来,后续Skyline是否支持“nth-of-type”可能只有天知道了!
总结
今天完成了三分之二的“翻页时钟”,下一篇博文将记录最后一个部分“动态翻页效果”。


![[uniapp] uni-ui+vue3.2小程序评论列表组件 回复评论 点赞和删除](https://img-blog.csdnimg.cn/direct/0356c3a5acea4cb58c40f857a05041ec.gif#pic_center)