文章目录
上课笔记
例子:每天若干特征,若干天作为输出
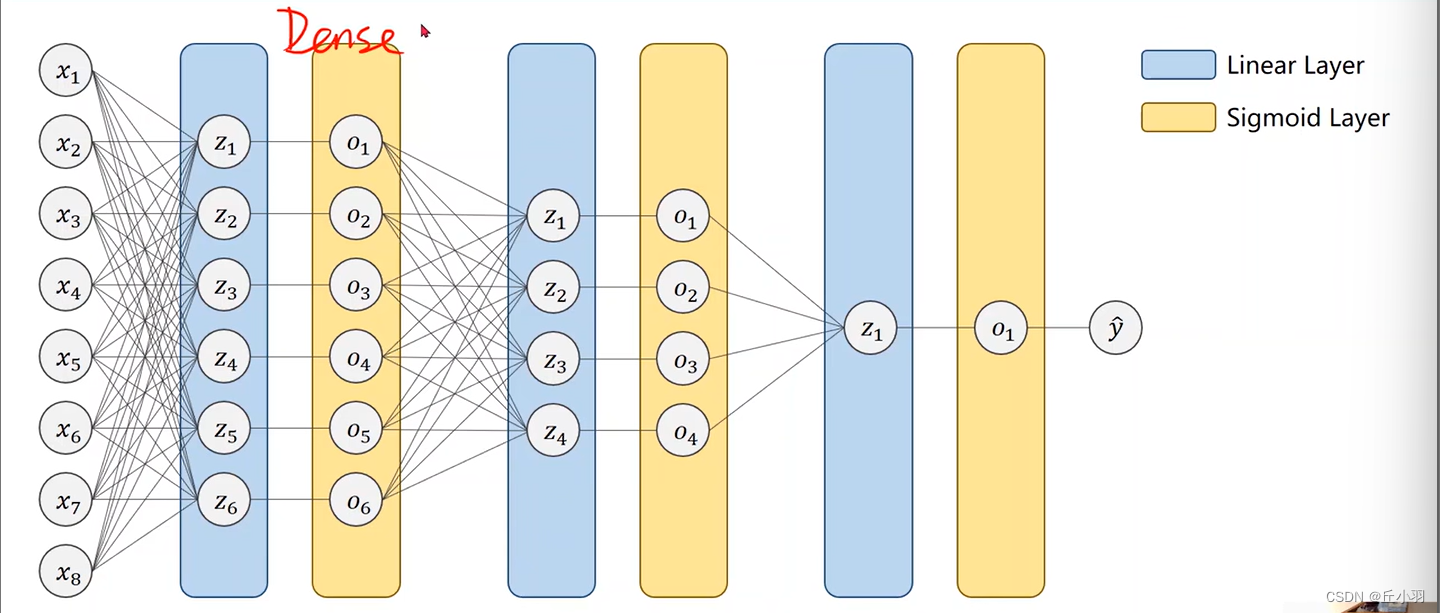
使用cnn的时候要明确全连接层占的权重比例特别大,是训练的瓶颈,通过权重共享的概念来减少需要训练的权重的数量
RNN cell本质就是一个线性层,但是这个线性层是共享的,如下图,每次把hi和xi+1计算得到的hi+1传送到下一层进行计算,同时xi+1还需要通过某种运算融合xi的信息(比如求和、求乘积等)h0是先验知识,比如对于图像生成文本,可以先通过cnn+fc生成h0,也可以把h0设成和h1等统一维度的向量,值都设成0。所有的rnnc都处于同一个线性层

RNN网络最大的特点就是可以处理序列特征,就是我们的一组动态特征。比如,我们可以通过将前三天每天的特征(是否下雨,是否有太阳等)输入到网络,从而来预测第四天的天气。
知识点:RNN处理数据维度,两种构建RNN的方法
问题描述:对于序列数据采用循环神经网络
11.1 RNNCell
主要内容:随机生成seq_size个句子,通过h0为全零的RNN网络,探究输入输出以及隐层的维度
代码实现:利用RNNCell处理单个运算,RNNCell只是RNN的一个单元,用于处理一个时间步的输入数据,需要在循环中手动处理时间步。
seqLen:每个句子所含词的个数
batchSize:每次处理词的批数
InputSize:每个词嵌入向量的位数
dataset: (seq_size, batch_size, input_size)——>整个数据集维度
input: (batch_size, input_size)——>每个时间步处理的输入(input in dataset)
hidden: (batch_size, output_size)——>每次处理的隐层(即为output)
import torch

batch_size = 1
seq_len = 3
input_size = 4
hidden_size = 2

# Construction of RNNCell
cell = torch.nn.RNNCell(input_size=input_size, hidden_size=hidden_size)
# Wrapping the sequence into:(seqLen,batchSize,InputSize)
dataset = torch.randn(seq_len, batch_size, input_size)  # (3,1,4)
# Initializing the hidden to zero
hidden = torch.zeros(batch_size, hidden_size)  # (1,2)

for idx, input in enumerate(dataset):
    print('=' * 20, idx, '=' * 20)
    print('Input size:', input.shape)  # (batch_size, input_size)
    # 按序列依次输入到cell中,seq_len=3,故循环3次
    hidden = cell(input, hidden)  # 返回的hidden是下一次的输入之一,循环使用同一个cell

    print('output size:', hidden.shape)  # (batch_size, hidden_size)
    print(hidden.data)
Wih的size应该是(hidden * input),whh的size应该是(hidden * hidden):输入 * 一个权重和上一个隐藏层 * 一个权重。w1 * h + w2 * x = [w1 w2] [h x]^T,也就是(h * (h+i)) * (h + i) * 1 = h * 1的矩阵 然后丢到tanh()里去计算

写成下面公式
h t = t a n h ( W i h x t + b i h + W h h h t − 1 + b h h ) h_t=tanh(W_{ih}x_t+b_{ih}+W_{hh}h_{t-1}+b_{hh}) ht=tanh(Wihxt+bih+Whhht−1+bhh)
如果使用rnncell主要用下面代码,需要输入维度和隐藏层维度作为函数输入

import torch

batch_size = 1
seq_len = 3
input_size = 4
hidden_size = 2

cell = torch.nn.RNNCell(input_size=input_size, hidden_size=hidden_size)
# #(seqLen, batchSize, inputSize)
datasets = torch.randn(seq_len, batch_size, input_size)
hidden = torch.zeros(batch_size, hidden_size)

for idx, input in enumerate(datasets):
    print("=" * 20, idx, "=" * 20)
    print("input size:", input.shape)

    hidden= cell(input, hidden)

    print("output size:", hidden.shape)
    print(hidden)
Train a model to learn: “hello” -> “ohlol”
基于RNNCell实现

先给每个字母编号(索引),然后对于’hello’序列写出其对应的序列表,将表展开成一个独热向量,出现的位置是1,其他位置是0

每个字母相当于一个独热向量送进去,输出是一个四维向量,经过softmax输出概率最大的值,在本题里应该是"ohlol" -》 “31232”

总代码
import torch

# 输入样本特征数
input_size = 4
# 隐藏层样本特征数(分类数)
hidden_size = 4
# batch大小
batch_size = 1

idx2char = ['e', 'h', 'l', 'o']
# hello
x_data = [1, 0, 2, 2, 3]#输入字典
# ohlol
y_data = [3, 1, 2, 3, 2]#输出词典

# 将x_data转换为one_hot表示
'''
torch.eye()
参数:
n (int ) – 行数
m (int, optional) – 列数.如果为None,则默认为n
out (Tensor, optinal) - Output tensor
'''
x_one_hot = torch.eye(n=4)[x_data, :]
y_one_hot = torch.eye(n=4)[y_data, :]

# x_data转换维度为(seqlen, batch_size, input_size),此维度为RNN的输入
inputs = x_one_hot.view(-1, batch_size, input_size)
# y_data转换维度为(seqlen,1)
labels = torch.LongTensor(y_data).view(-1, 1)

# 构建神经网络模型
class Model(torch.nn.Module):
    def __init__(self):
        super(Model, self).__init__()
        self.input_size = input_size
        self.batch_size = batch_size
        self.hidden_size = hidden_size
        # 对于RNNCell输入为(batch_size, input_size),隐层为(batch_size, hidden_size)
        self.rnncell = torch.nn.RNNCell(input_size=self.input_size, hidden_size=self.hidden_size)

    def forward(self, input, hidden):
        # h_t=Cell(x_t, h_t-1)
        hidden = self.rnncell(input, hidden)
        return hidden

    # 初始化隐层h_0
    def init_hidden(self):
        return torch.zeros(self.batch_size, self.hidden_size)


model = Model()

# 构建损失函数和优化器
criterion = torch.nn.CrossEntropyLoss()
optimizer = torch.optim.Adam(model.parameters(), lr=0.01)

# 训练
for epoch in range(60):
    loss = 0
    optimizer.zero_grad()
    # h_0
    hidden = model.init_hidden()
    print('Predicted string:', end='')
    for input, label in zip(inputs, labels):
        hidden = model(input, hidden)
        loss += criterion(hidden, label)
        _, idx = hidden.max(dim=1)
        print(idx2char[idx.item()], end='')
    loss.backward()
    optimizer.step()
    print(', epoch[%d/60] loss=%.4f' % (epoch+1, loss.item()))
基于RNN实现
RNN需要输入三个参数:input_size, hidden_size, num_layers

输入:input的shape(seqSize, batch, input_size)
hidden的shape(numLayers, batch, hidden_size)
输出:output的shape(seqSize, batch, hidden_size)
hidden的shape(numLayers, batch, hidden_size)

import torch

batch_size = 1
seq_len = 3
input_size = 4
hidden_size = 2
num_layers =1

cell = torch.nn.RNN(input_size=input_size, hidden_size=hidden_size, num_layers=num_layers, batch_first=True)

#(seqLen, batchSize, inputSize)
inputs = torch.randn(batch_size, seq_len, input_size)
hidden = torch.zeros(num_layers, batch_size, hidden_size)

out, hidden = cell(inputs, hidden)
print("output size:", out.shape)
print("output:", out)
print("hidden size:", hidden.shape)
print("hidden:", hidden)
总代码
import torch

# 1.参数设置
seq_len = 5
input_size = 4
hidden_size = 4
batch_size = 1

# 2.数据准备
index2char = ['e', 'h', 'l', 'o']
x_data = [1, 0, 2, 2, 3]
y_data = [3, 1, 2, 3, 2]
one_hot_lookup = [[1, 0, 0, 0],
                  [0, 1, 0, 0],
                  [0, 0, 1, 0],
                  [0, 0, 0, 1]]
x_one_hot = [one_hot_lookup[x] for x in x_data]
inputs = torch.Tensor(x_one_hot).view(-1, batch_size, input_size)
labels = torch.LongTensor(y_data)

# 3.模型构建
class Model(torch.nn.Module):
    def __init__(self, input_size, hidden_size, batch_size, num_layers=1):  # 需要指定输入,隐层,批
        super(Model, self).__init__()
        self.batch_size = batch_size
        self.input_size = input_size
        self.hidden_size = hidden_size
        self.num_layers = num_layers
        self.rnn = torch.nn.RNN(input_size=self.input_size, hidden_size=self.hidden_size, num_layers=self.num_layers)

    def forward(self, input):
        hidden = torch.zeros(self.num_layers,
                             self.batch_size,
                             self.hidden_size)
        out, _ = self.rnn(input, hidden)  # out: tensor of shape (seq_len, batch, hidden_size)
        return out.view(-1, self.hidden_size)  # 将输出的三维张量转换为二维张量,(𝒔𝒆𝒒𝑳𝒆𝒏×𝒃𝒂𝒕𝒄𝒉𝑺𝒊𝒛𝒆,𝒉𝒊𝒅𝒅𝒆𝒏𝑺𝒊𝒛𝒆)


net = Model(input_size, hidden_size, batch_size)

# 4.损失和优化器
criterion = torch.nn.CrossEntropyLoss()
optimizer = torch.optim.Adam(net.parameters(), lr=0.5)

# 5.训练
for epoch in range(15):
    optimizer.zero_grad()
    outputs = net(inputs)
    print(outputs.shape)
    loss = criterion(outputs, labels)
    loss.backward()
    optimizer.step()

    _, idx = outputs.max(dim=1)
    idx = idx.data.numpy()
    print('Predicted string: ', ''.join([index2char[x] for x in idx]), end='')
    print(',Epoch [%d / 15] loss:%.4f' % (epoch+1, loss.item()))
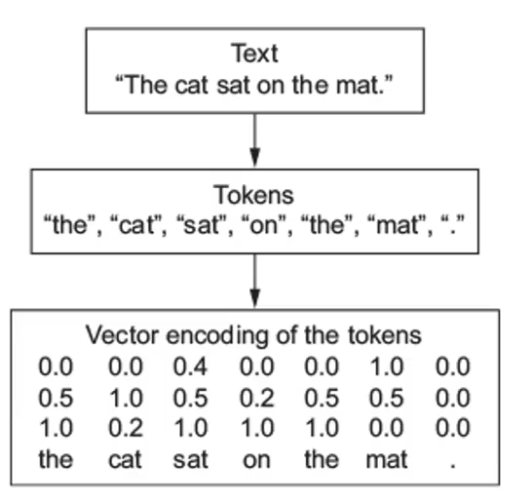
one-hot的缺点:高维、稀疏、硬编码
需求:低维、稠密、从数据中学习
实现方法:embedding
含嵌入层的RNN网络
from gpt4o:
含嵌入层的RNN网络是结合嵌入层(Embedding Layer)和循环神经网络(RNN)的一种神经网络架构,常用于自然语言处理(NLP)任务。嵌入层的主要作用是将离散的词汇映射到连续的向量空间中,从而为RNN提供密集的、低维的输入表示,这比直接使用稀疏的one-hot编码更为高效。
嵌入层的作用
嵌入层将词汇表中的每个词映射到一个固定维度的向量。它的主要优点包括:
- 降低维度:从高维的one-hot编码(词汇表大小)转换为低维的密集向量表示。
- 捕捉语义关系:相似的词在嵌入空间中往往具有相近的向量表示,从而能够捕捉词与词之间的语义关系。
含嵌入层的RNN网络架构
一个典型的含嵌入层的RNN网络架构包括以下几个部分:
- 嵌入层:将输入的词汇索引序列转换为嵌入向量序列。
- RNN层:处理嵌入向量序列,捕捉序列中的时序依赖关系。
- 输出层:根据任务的不同,可以是分类层、回归层等,用于生成最终的预测结果。
以下是一个含嵌入层的RNN网络的具体代码示例和详细解释:
import torch
import torch.nn as nn

# 定义超参数
vocab_size = 10      # 词汇表大小
embed_size = 8       # 嵌入向量的维度
hidden_size = 16     # RNN隐藏层的维度
output_size = 5      # 输出层的大小(例如类别数)
num_layers = 1       # RNN的层数

# 定义含嵌入层的RNN模型
class RNNModelWithEmbedding(nn.Module):
    def __init__(self, vocab_size, embed_size, hidden_size, output_size, num_layers=1):
        super(RNNModelWithEmbedding, self).__init__()
        self.embedding = nn.Embedding(vocab_size, embed_size)   # 嵌入层
        self.rnn = nn.RNN(embed_size, hidden_size, num_layers, batch_first=True)
        self.fc = nn.Linear(hidden_size, output_size)           # 全连接层,输出最终结果

    def forward(self, x):
        embedded = self.embedding(x)         # 输入序列通过嵌入层
        out, hidden = self.rnn(embedded)     # 嵌入向量序列通过RNN层
        out = self.fc(out[:, -1, :])         # 取RNN的最后一个时间步的输出,经过全连接层
        return out

# 创建模型实例
model = RNNModelWithEmbedding(vocab_size, embed_size, hidden_size, output_size, num_layers)

# 打印模型结构
print(model)

# 创建随机输入,形状为(batch_size, seq_len)
input_data = torch.randint(0, vocab_size, (2, 3))  # 例如 batch_size=2, seq_len=3

# 前向传播
output = model(input_data)

print("输入:", input_data)
print("输出:", output)
嵌入层:self.embedding = nn.Embedding(vocab_size, embed_size)
vocab_size:词汇表的大小,即词汇数量。embed_size:每个词的嵌入向量的维度。- 嵌入层的作用是将输入的词汇索引序列(如
[1, 2, 3])转换为嵌入向量序列。
RNN层:self.rnn = nn.RNN(embed_size, hidden_size, num_layers, batch_first=True)
embed_size:RNN的输入维度,即嵌入向量的维度。hidden_size:RNN隐藏层的维度。num_layers:RNN的层数。batch_first=True:输入和输出的形状为(batch_size, seq_len, feature_size)。
全连接层:self.fc = nn.Linear(hidden_size, output_size)
hidden_size:RNN隐藏层的维度。output_size:输出层的大小,例如分类任务中的类别数。- 全连接层的作用是将RNN的输出转换为最终的预测结果。
前向传播函数:def forward(self, x)
- 输入
x是词汇索引序列(形状为(batch_size, seq_len))。 - 通过嵌入层将输入序列转换为嵌入向量序列
embedded。 - 嵌入向量序列通过RNN层得到输出
out和隐藏状态hidden。 - 取RNN层最后一个时间步的输出
out[:, -1, :],通过全连接层得到最终输出out。
gpt结束
在下面加一层embed层
外链图片转存失败,源站可能有防盗链机制,建议将图片保存下来直接上传
torch.nn.Embedding(num_embeddings, embedding_dim, padding_idx=None, max_norm=None, norm_type=2.0, scale_grad_by_freq=False, sparse=False)
"""
参数解释
num_embeddings:嵌入字典的大小,即词汇表的大小。比如,如果有 10000 个不同的单词,那么 num_embeddings 就是 10000。
embedding_dim:每个嵌入向量的维度。比如,如果希望每个单词表示为 128 维的向量,那么 embedding_dim 就是 128。
padding_idx (可选):如果指定了这个参数,那么这个索引将在计算梯度时总是返回零向量,并且其对应的嵌入向量不会更新。这个通常用于处理填充(padding)。
max_norm (可选):如果指定了这个参数,每个嵌入向量的范数(norm)将不会超过这个值。如果某个嵌入向量的范数超过了 max_norm,那么它将被重新缩放到 max_norm。
norm_type (可选):用于计算范数的类型。默认为2(L2范数)。
scale_grad_by_freq (可选):如果设为 True,则根据单词在小批量中的频率来缩放梯度。
sparse (可选):如果设为 True,则使用稀疏更新。
"""
当使用嵌入层(torch.nn.Embedding)作为 RNN 的输入时,输入张量通常需要是长整型(torch.LongTensor),因为嵌入层的输入是索引,索引通常以长整型表示。嵌入层将这些索引映射到相应的嵌入向量,然后这些嵌入向量可以作为 RNN 的输入。


总代码
import torch

# 1、确定参数
num_class = 4
input_size = 4
hidden_size = 8
embedding_size = 10
num_layers = 2
batch_size = 1
seq_len = 5

# 2、准备数据
index2char = ['e', 'h', 'l', 'o']  # 字典
x_data = [[1, 0, 2, 2, 3]]  # (batch_size, seq_len) 用字典中的索引(数字)表示来表示hello
y_data = [3, 1, 2, 3, 2]  # (batch_size * seq_len) 标签:ohlol

inputs = torch.LongTensor(x_data)  # (batch_size, seq_len)
labels = torch.LongTensor(y_data)  # (batch_size * seq_len)


# 3、构建模型
class Model(torch.nn.Module):
    def __init__(self):
        super(Model, self).__init__()
        self.emb = torch.nn.Embedding(num_class, embedding_size)
        self.rnn = torch.nn.RNN(input_size=embedding_size, hidden_size=hidden_size, num_layers=num_layers,
                                batch_first=True)
        self.fc = torch.nn.Linear(hidden_size, num_class)

    def forward(self, x):
        hidden = torch.zeros(num_layers, x.size(0), hidden_size)  # (num_layers, batch_size, hidden_size)
        x = self.emb(x)  # 返回(batch_size, seq_len, embedding_size)
        x, _ = self.rnn(x, hidden)  # 返回(batch_size, seq_len, hidden_size)
        x = self.fc(x)  # 返回(batch_size, seq_len, num_class)
        return x.view(-1, num_class)  # (batch_size * seq_len, num_class)


net = Model()

# 4、损失和优化器
criterion = torch.nn.CrossEntropyLoss()
optimizer = torch.optim.Adam(net.parameters(), lr=0.05)  # Adam优化器

# 5、训练
for epoch in range(15):
    optimizer.zero_grad()
    outputs = net(inputs)
    loss = criterion(outputs, labels)
    loss.backward()
    optimizer.step()

    _, idx = outputs.max(dim=1)
    idx = idx.data.numpy()
    print('Predicted string: ', ''.join([index2char[x] for x in idx]), end='')
    print(', Epoch [%d/15] loss: %.4f' % (epoch + 1, loss.item()))
其他RNN扩展
- LSTM(长短期记忆网络)
- LSTM通过引入细胞状态和门控机制(输入门、遗忘门和输出门)来保留和控制长期依赖信息。
- 解决了标准RNN在处理长序列时的梯度消失问题。
import torch
import torch.nn as nn

class LSTMModel(nn.Module):
    def __init__(self, input_size, hidden_size, batch_size, num_layers=1):
        super(LSTMModel, self).__init__()
        self.hidden_size = hidden_size
        self.num_layers = num_layers
        self.lstm = nn.LSTM(input_size, hidden_size, num_layers)

    def forward(self, input):
        h0 = torch.zeros(self.num_layers, input.size(1), self.hidden_size)
        c0 = torch.zeros(self.num_layers, input.size(1), self.hidden_size)
        out, _ = self.lstm(input, (h0, c0))
        return out.view(-1, self.hidden_size)
- GRU(门控循环单元)
- GRU是LSTM的简化版本,使用更新门和重置门来控制信息的流动。
- 与LSTM相比,GRU的参数较少,因此计算效率更高。
import torch
import torch.nn as nn

class GRUModel(nn.Module):
    def __init__(self, input_size, hidden_size, batch_size, num_layers=1):
        super(GRUModel, self).__init__()
        self.hidden_size = hidden_size
        self.num_layers = num_layers
        self.gru = nn.GRU(input_size, hidden_size, num_layers)

    def forward(self, input):
        h0 = torch.zeros(self.num_layers, input.size(1), self.hidden_size)
        out, _ = self.gru(input, h0)
        return out.view(-1, self.hidden_size)
- Bidirectional RNN(双向RNN)
- 双向RNN在输入序列的两个方向(正向和反向)上进行训练,从而捕获更多的上下文信息。
- 可以用于LSTM和GRU。
python复制代码import torch
import torch.nn as nn

class BidirectionalLSTMModel(nn.Module):
    def __init__(self, input_size, hidden_size, batch_size, num_layers=1):
        super(BidirectionalLSTMModel, self).__init__()
        self.hidden_size = hidden_size
        self.num_layers = num_layers
        self.lstm = nn.LSTM(input_size, hidden_size, num_layers, bidirectional=True)

    def forward(self, input):
        h0 = torch.zeros(self.num_layers * 2, input.size(1), self.hidden_size)
        c0 = torch.zeros(self.num_layers * 2, input.size(1), self.hidden_size)
        out, _ = self.lstm(input, (h0, c0))
        return out.view(-1, self.hidden_size * 2)
- Attention Mechanism(注意力机制)
- 注意力机制用于在处理序列时动态地关注重要部分。
- 常用于提高序列到序列模型(如机器翻译)的性能。
python复制代码import torch
import torch.nn as nn

class AttentionModel(nn.Module):
    def __init__(self, input_size, hidden_size, batch_size, num_layers=1):
        super(AttentionModel, self).__init__()
        self.hidden_size = hidden_size
        self.num_layers = num_layers
        self.lstm = nn.LSTM(input_size, hidden_size, num_layers)
        self.attention = nn.Linear(hidden_size, hidden_size)

    def forward(self, input):
        h0 = torch.zeros(self.num_layers, input.size(1), self.hidden_size)
        c0 = torch.zeros(self.num_layers, input.size(1), self.hidden_size)
        out, _ = self.lstm(input, (h0, c0))
        attn_weights = torch.softmax(self.attention(out), dim=1)
        out = torch.bmm(attn_weights.transpose(1, 2), out)
        return out.view(-1, self.hidden_size)
这些RNN变体在不同的应用中各有优势,选择适当的变体可以显著提高模型的性能。
注意力机制(Attention Mechanism)是深度学习中一种强大的技术,尤其在自然语言处理(NLP)任务中。它允许模型在处理序列数据时动态地关注序列的不同部分,从而捕捉更丰富的上下文信息。以下是一些关于注意力机制的详细信息和其主要变体。
基本注意力机制
基本的注意力机制可以用在编码器-解码器结构中,以动态地聚焦在输入序列的不同部分。下面是一个简单的注意力机制示例:
python复制代码import torch
import torch.nn as nn

class BasicAttention(nn.Module):
    def __init__(self, hidden_size):
        super(BasicAttention, self).__init__()
        self.attention = nn.Linear(hidden_size, hidden_size)

    def forward(self, encoder_outputs, decoder_hidden):
        # 计算注意力权重
        attn_weights = torch.bmm(encoder_outputs, decoder_hidden.unsqueeze(2)).squeeze(2)
        attn_weights = torch.softmax(attn_weights, dim=1)

        # 用注意力权重加权平均编码器输出
        context = torch.bmm(attn_weights.unsqueeze(1), encoder_outputs).squeeze(1)
        return context, attn_weights
自注意力机制(Self-Attention)
自注意力机制用于捕获序列中各位置之间的关系,尤其适用于序列到序列任务。它是Transformer模型的核心组件。
自注意力计算
自注意力计算涉及三个矩阵:查询矩阵(Query)、键矩阵(Key)和值矩阵(Value)。下面是自注意力计算的公式:
Attention ( Q , K , V ) = softmax ( Q K T d k ) V \text{Attention}(Q, K, V) = \text{softmax}\left(\frac{QK^T}{\sqrt{d_k}}\right)V Attention(Q,K,V)=softmax(dkQKT)V
python复制代码import torch
import torch.nn as nn

class SelfAttention(nn.Module):
    def __init__(self, input_size, hidden_size):
        super(SelfAttention, self).__init__()
        self.query = nn.Linear(input_size, hidden_size)
        self.key = nn.Linear(input_size, hidden_size)
        self.value = nn.Linear(input_size, hidden_size)
        self.scale = torch.sqrt(torch.FloatTensor([hidden_size]))

    def forward(self, x):
        Q = self.query(x)
        K = self.key(x)
        V = self.value(x)

        attention_weights = torch.bmm(Q, K.transpose(1, 2)) / self.scale
        attention_weights = torch.softmax(attention_weights, dim=-1)

        context = torch.bmm(attention_weights, V)
        return context, attention_weights
多头注意力机制(Multi-Head Attention)
多头注意力机制是自注意力的扩展,它通过多个注意力头(head)来捕获不同的特征子空间。每个头独立地执行自注意力,然后将所有头的输出连接起来。
import torch
import torch.nn as nn

class MultiHeadAttention(nn.Module):
    def __init__(self, input_size, hidden_size, num_heads):
        super(MultiHeadAttention, self).__init__()
        self.num_heads = num_heads
        self.hidden_size = hidden_size

        self.query = nn.Linear(input_size, hidden_size * num_heads)
        self.key = nn.Linear(input_size, hidden_size * num_heads)
        self.value = nn.Linear(input_size, hidden_size * num_heads)

        self.fc = nn.Linear(hidden_size * num_heads, hidden_size)

    def forward(self, x):
        batch_size = x.size(0)

        Q = self.query(x).view(batch_size, -1, self.num_heads, self.hidden_size).transpose(1, 2)
        K = self.key(x).view(batch_size, -1, self.num_heads, self.hidden_size).transpose(1, 2)
        V = self.value(x).view(batch_size, -1, self.num_heads, self.hidden_size).transpose(1, 2)

        attention_weights = torch.matmul(Q, K.transpose(-2, -1)) / torch.sqrt(torch.FloatTensor([self.hidden_size]))
        attention_weights = torch.softmax(attention_weights, dim=-1)

        context = torch.matmul(attention_weights, V).transpose(1, 2).contiguous().view(batch_size, -1, self.hidden_size * self.num_heads)
        output = self.fc(context)

        return output, attention_weights
Transformer模型
Transformer模型是基于自注意力和多头注意力机制的架构。它广泛应用于NLP任务,并通过引入位置编码(Positional Encoding)解决了序列位置问题。
简单的Transformer编码器
class TransformerEncoder(nn.Module):
    def __init__(self, input_size, hidden_size, num_heads, num_layers):
        super(TransformerEncoder, self).__init__()
        self.layers = nn.ModuleList([nn.TransformerEncoderLayer(hidden_size, num_heads) for _ in range(num_layers)])
        self.embedding = nn.Linear(input_size, hidden_size)

    def forward(self, src):
        src = self.embedding(src)
        for layer in self.layers:
            src = layer(src)
        return src


![[米联客-安路飞龙DR1-FPSOC] FPGA基础篇连载-21 VTC视频时序控制器设计](https://i-blog.csdnimg.cn/direct/6ded908cd7804eb598d12aa4d2722615.png)


