✨个人主页: 不漫游-CSDN博客

前言
前面已经总结过线程与进程的区别-->http://t.csdnimg.cn/UIURX
这次咱们来总结下线程的一些常见用法。
线程创建
继承 Thread, 重写 run
class Main extends Thread{
    public void run(){
        while(true){
        System.out.println("hello,Thread");
            try {
                Thread.sleep(1000);//休眠一秒再打印
            } catch (InterruptedException e) {
                e.printStackTrace();
            }
        }
}}
public class Demo1 {
    public static void main(String[] args) {
        Main main=new Main();
        main.start();//创建了一个线程
        while(true){
        System.out.println("hello,Demo1");
            try {
                Thread.sleep(5000);//休眠5秒再打印
            } catch (InterruptedException e) {
                e.printStackTrace();
            }
        }
    }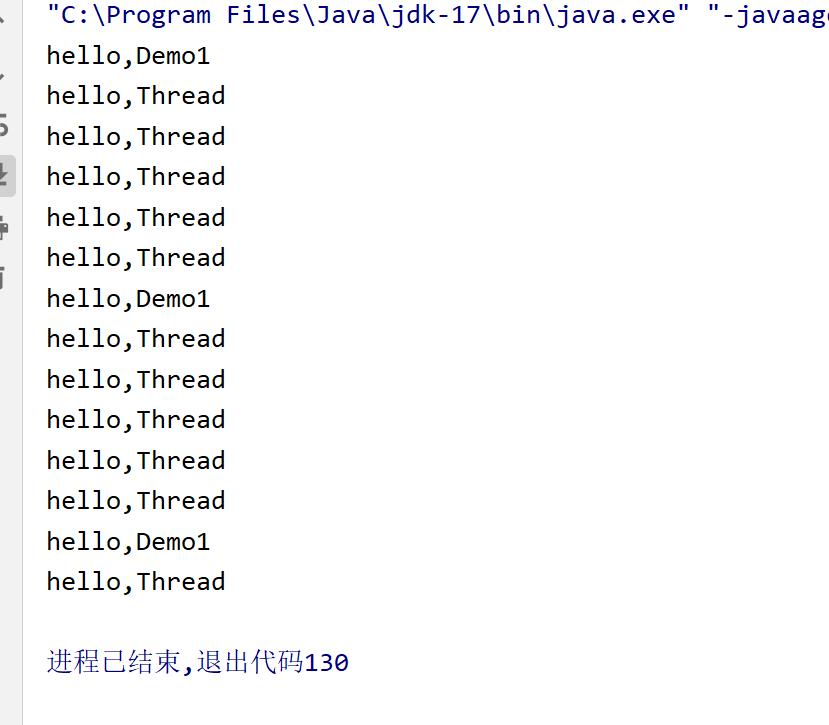
}结果如图,观察这段代码,我们重写了Thread类自带的方法run, 用于无限打印语句。同时除了主线程main函数,还创建了一个main线程(只是名字相同)。
但是,通过设置打印间隔,更好地观察结果-->Demo1和第一次的Thread几乎是同时出现,后续只是设置的打印间隔不同。
实现 Runnable, 重写 run
class MyThread implements Runnable{
    public void run(){
        while(true){
        System.out.println("MyThread!");
            try {
                Thread.sleep(2000);//每隔两秒
            } catch (InterruptedException e) {
                e.printStackTrace();
            }
        }
}
}

public class Demo2 {
    public static void main(String[] args) throws InterruptedException {
        Runnable runnable=new MyThread();
        Thread t=new Thread(runnable);
        t.start();//创建了一个t线程

        //main函数原来要执行的
        while (true){
        System.out.println("Demo2");
        Thread.sleep(5000);//每隔5秒
    }
}
}
这里就是重写了Runnable接口里面的方法,和第一种的继承大同小异,只不过间隔不同。
结果如图~

继承 Thread, 重写 run, 使用匿名内部类
public class demo3 {
    public static void main(String[] args) throws InterruptedException {
        Thread t=new Thread(){
         //重写run()
          public void run(){
              while(true){
              System.out.println("hello world");
                  try {
                      Thread.sleep(5000);//每隔5秒
                  } catch (InterruptedException e) {
                      e.printStackTrace();
                  }
              }
          }
        };
        t.start();创建一个t线程

        while(true){
            System.out.println("1122");
            Thread.sleep(1000);//每隔一秒
        }
    }
}
分别来看两个不同的线程的执行情况:
线程 t:
首先这是一个匿名内部类,继承自 Thread类。
然后重写run方法,每隔5秒钟打印一次"hello world"。
在每次打印后,线程会调用 Thread.sleep(5000)方法休眠5秒钟。
主线程:
在 main方法中,每隔1秒钟打印一次"1122"。
在每次打印后,主线程会调用 Thread.sleep(1000)方法休眠1秒钟。
结果如图~

实现 Runnable, 重写 run, 使用匿名内部类
public class demo4 {
    public static void main(String[] args) {
        Thread t=new Thread(new Runnable(){
            @Override
            public void run() {
                while(true){
                System.out.println("hello");
                    try {
                        Thread.sleep(1000);
                    } catch (InterruptedException e) {
                        e.printStackTrace();
                    }
                }
        }
        }
        );
        t.start();
        }
}
这里就和上一个是基本一致的,只不过在Thread实例化的时候加入了 new Runnable().实现接口里面的方法。

使用 lambda 表达式
public class demo5 {
    public static void main(String[] args) {
        Thread t = new Thread(()->{
            while(true){
                System.out.println("hi");
                try {
                    Thread.sleep(2000);
                } catch (InterruptedException e) {
                    e.printStackTrace();
                }
            }
        });
        t.start();
    }
}
这里就要注意格式了,没有出现run方法的声明,但是用->代替了,基本格式就是这样~
Thread t=new Thread(()->{
...
//具体操作
});

Thread类中run和start的区别
通过上述线程创建的不同方法,简单总结下两者的区别:
run() 方法:该方法包含了线程运行时所执行的代码,也称为“线程的入口”。
可以通过直接调用 run() 方法来执行线程,但这并不会创建新的线程,而是在当前线程中执行 run() 方法的代码。就和以前一样的方法调用。
start() 方法:该方法会创建一个新的线程,并在新的线程中调用 run() 方法。这就是创建和启动线程的正确方式。
线程中断
在Java中,线程中断是一种协作机制,用于向线程发送一个信号,表明它应该停止正在执行的任务。线程可以通过检查中断状态来决定是否响应这个信号。
但中断本身并不会强制线程停止执行,而是由线程自己决定如何处理中断。
public class InterruptExample {
    public static void main(String[] args) throws InterruptedException {
        Thread t = new Thread(() -> {
            //无限循环,直到线程被中断
            while (!Thread.currentThread().isInterrupted()) {
                System.out.println("Thread is running.");
                try {
                    //线程休眠1秒钟
                    Thread.sleep(1000);
                } catch (InterruptedException e) {
                    //当线程在休眠时被中断,会抛出InterruptedException异常
                    System.out.println("Thread interrupted while sleeping.");
                    //恢复线程的中断状态,以便循环中的isInterrupted()检查可以正确检测到中断状态
                    Thread.currentThread().interrupt();
                }
            }
            //线程检测到中断状态,打印停止消息并退出循环
            System.out.println("Thread is stopping.");
        });

        //启动线程 t
        t.start();

       Thread.sleep(5000);

        //中断线程 t
        t.interrupt();
    }
}
1. 创建了一个新的线程 `t`,它在一个无限循环中运行,每隔1秒钟打印一次"Thread is running."。
2. 在主线程中,休眠5秒钟后便调用 t.interrupt() 方法来中断线程 t。
3. 当线程 t 在 `sleep` 方法中被中断时,会抛出 InterruptedException 异常,并在捕获到这个异常后打印一条消息。
4. 在捕获到 InterruptedException异常后,通过调用 Thread.currentThread().interrupt()方法来恢复线程的中断状态,这样循环中的 isInterrupted()检查可以正确地检测到中断状态。
5. 当 isInterrupted() 返回 true时,线程会打印Thread is stopping.并退出循环。
结果如图~

线程等待
对于线程的执行顺序,其特点-->抢占式执行 决定了无法确定执行顺序。
但结束顺序就不一定了,线程等待中的 join() 方法就是为此服务~
public class demo11 {
    public static void main(String[] args) throws InterruptedException {
        Thread t = new Thread(() -> {
            for (int i = 0; i < 3; i++) {
                System.out.println("t线程");
            }
            try {
                Thread.sleep(1000); //让线程 t 休眠 1 秒钟
            } catch (InterruptedException e) {
                e.printStackTrace();
            }
            System.out.println("t线程执行结束");
        });

        System.out.println("主线程开始等待t线程");
        t.start();
        t.join(); //主线程调用 t.join(),等待线程 t 完成执行
        System.out.println("主线程结束等待");
    }
}
调用join()时就记住--> 在a线程中调用b.join(),意思即是a等待b执行结束,a才继续执行!
在这里,a线程就是主线程,b.join()即是t.join(),即只有t线程执行结束后,主线程才会继续执行~
结果如图~

当然,这是无参版本的,那就是“死等”。只有等到b线程执行结束才可以。加上参数就可以规定等待时间了。

线程休眠
在上面已经见过很多次了,就是线程中的sleep ()方法,以便让出 CPU 资源给其他线程使用。
public class demo12 {
    public static void main(String[] args) {
        Thread t = new Thread(() -> {
            while (true) {
                System.out.println("hello");
                try {
                    Thread.sleep(5000); //让线程休眠 5 秒钟
                } catch (InterruptedException e) {
                    e.printStackTrace();
                }
            }
        });
        t.start();
    }
}
每隔5秒打印一次。结果如图~

获取线程实例
获取线程实例通常指的是获取当前正在执行的线程对象。
咱们可以使用 Thread.currentThread()方法来获取当前线程的实例。这个方法返回一个Thread对象,表示当前正在执行的线程。
public class demo13 {
    public static void main(String[] args) {
        //获取主线程实例
        Thread mainThread = Thread.currentThread();
        System.out.println("主线程名称: " + mainThread.getName());

        //创建并启动一个新的线程
        Thread newThread = new Thread(() -> {
            //获取新线程实例
            Thread currentThread = Thread.currentThread();
            currentThread.setName("新线程");
            System.out.println("新线程名称: " + currentThread.getName());
        });
        newThread.start();
    }
    }
结果如图~


看到最后,如果觉得文章写得还不错,希望可以给我点个小小的赞,您的支持是我更新的最大动力