Harbor镜像中心搭建
Harbor是一个镜像中心,我们所熟知的DockerHub就是一个镜像中心,我们可以把我们打包的镜像放在镜像中心中供自己下次拉取或者他人使用,但是DockerHub是一个公共的镜像中心,我们平时打包的很多镜像并不希望放在公共的环境上,所以我们可以用Harbor创建一个属于自己的镜像中心
前置条件
- CPU:至少2核,推荐4核
- 内存:至少4G,推荐8G
- 磁盘:至少40G,推荐160G,但这里我进行搭建简单的使用20G就够了
- Docker:要求Version 20.10.10-ce+或者更高
- Docker Compose:要求v1.18.0+或者更高
关于Docker Compose我们可以去github下载,这里记得科学上网,否则会超级慢
下载完成后,执行以下命令
# docker-compose命令可以不用加./就可以使用
mv docker-compose-linux-x86_64 /usr/local/bin/docker-compose
# 给docker-compose添加可以执行权限
chmod +x /usr/local/bin/docker-compose
# 进行链接
ln -s /usr/local/bin/docker-compose /usr/bin/docker-compose
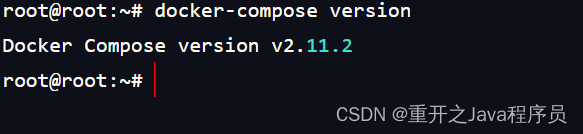
执行docker-compose version出现以下内容便安装成功:
端口:保证80、443、4443没有被占用并且可以使用
下载Harbor
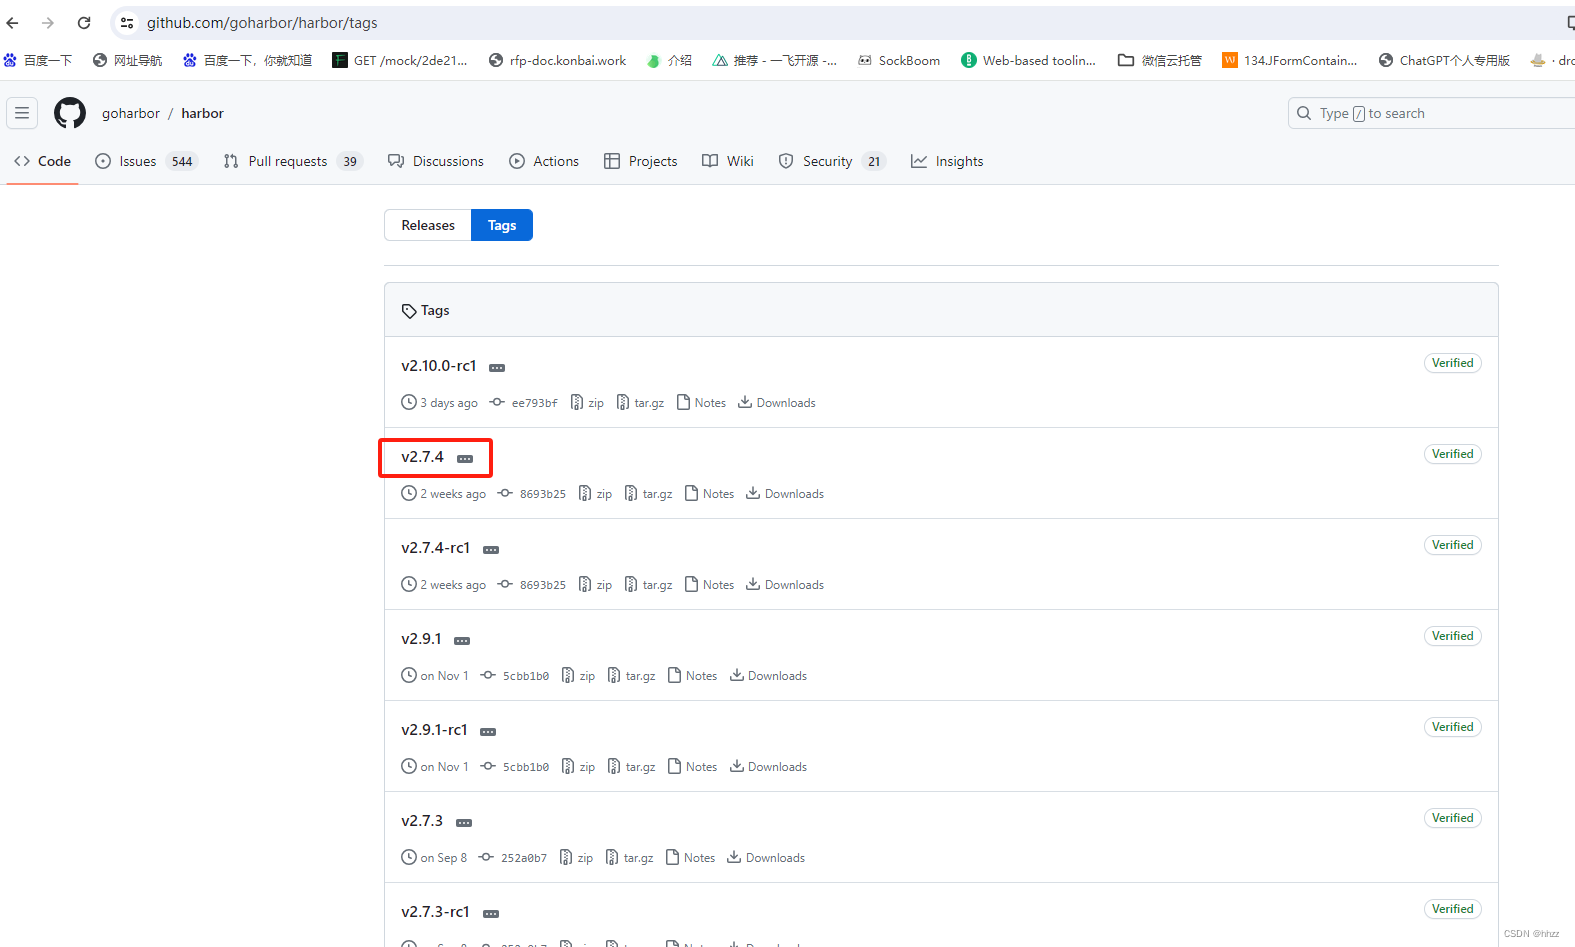
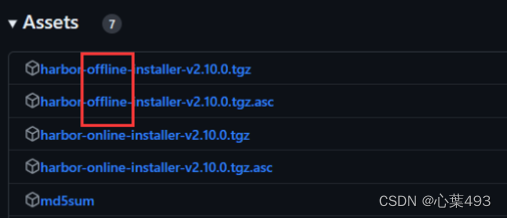
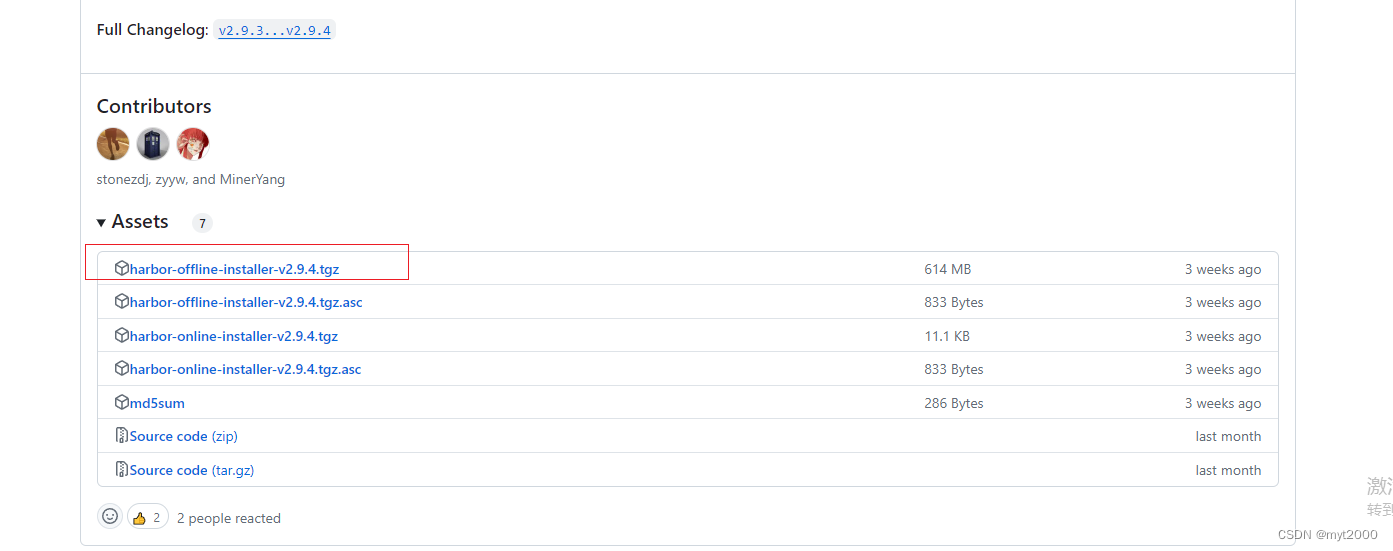
下载地址:https://github.com/goharbor/harbor/releases
这里建议使用offline方式去安装,因为离线安装包将docker镜像也打包了进去,这样我们可以省下很多事情;online方式需要去dockerhub里面拉取镜像,速度很慢
下载完成后上传到Linux中

创建CA证书
harbor要求要有CA证书,官网网址也有相关操作
https://goharbor.io/docs/2.11.0/install-config/configure-https/
**注意:**命令中的所有yourdomain.com都要一模一样,这个也是后面你的harbor的域名比如这里我统一叫harbor.kubeimooc.com
这里可以将这些操作写成一个shell脚本方便使用,按照顺序执行完后会生成这些文件

而且在/etc/docker目录下也会生成certs.d文件,进入到该文件下会看到我们的域名目录

配置Harbor
进入到刚才解压的Harbor目录下,配置harbor.yml文件
# Configuration file of Harbor

# The IP address or hostname to access admin UI and registry service.
# DO NOT use localhost or 127.0.0.1, because Harbor needs to be accessed by external clients.
# 和自己刚才所叫的名字一样
hostname: harbor.kubeimooc.com

# http related config
http:
  # port for http, default is 80. If https enabled, this port will redirect to https port
  # 如果端口被占用,可以在这里修改
  port: 80

# https related config
https:
  # https port for harbor, default is 443
  port: 443
  # The path of cert and key files for nginx
  # 就是/etc/docker/certs.d中的几个文件
  certificate: /etc/docker/certs.d/harbor.kubeimooc.com/harbor.kubeimooc.com.cert
  private_key: /etc/docker/certs.d/harbor.kubeimooc.com/harbor.kubeimooc.com.key


# Uncomment external_url if you want to enable external proxy
# And when it enabled the hostname will no longer used
# external_url: https://reg.mydomain.com:8433

# The initial password of Harbor admin
# It only works in first time to install harbor
# Remember Change the admin password from UI after launching Harbor.
# 登录密码
harbor_admin_password: 123

# Harbor DB configuration
database:
  # The password for the root user of Harbor DB. Change this before any production use.
  password: root123
  # The maximum number of connections in the idle connection pool. If it <=0, no idle connections are retained.
  max_idle_conns: 50
  # The maximum number of open connections to the database. If it <= 0, then there is no limit on the number of open connections.
  # Note: the default number of connections is 100 for postgres.
  max_open_conns: 100

# The default data volume
data_volume: /data

# Harbor Storage settings by default is using /data dir on local filesystem
# Uncomment storage_service setting If you want to using external storage
# storage_service:
#   # ca_bundle is the path to the custom root ca certificate, which will be injected into the truststore
#   # of registry's and chart repository's containers.  This is usually needed when the user hosts a internal storage with self signed certificate.
#   ca_bundle:

#   # storage backend, default is filesystem, options include filesystem, azure, gcs, s3, swift and oss
#   # for more info about this configuration please refer https://docs.docker.com/registry/configuration/
#   filesystem:
#     maxthreads: 100
#   # set disable to true when you want to disable registry redirect
#   redirect:
#     disabled: false

# Clair configuration
clair:
  # The interval of clair updaters, the unit is hour, set to 0 to disable the updaters.
  updaters_interval: 12

jobservice:
  # Maximum number of job workers in job service
  max_job_workers: 10

notification:
  # Maximum retry count for webhook job
  webhook_job_max_retry: 10

chart:
  # Change the value of absolute_url to enabled can enable absolute url in chart
  absolute_url: disabled

# Log configurations
log:
  # options are debug, info, warning, error, fatal
  level: info
  # configs for logs in local storage
  local:
    # Log files are rotated log_rotate_count times before being removed. If count is 0, old versions are removed rather than rotated.
    rotate_count: 50
    # Log files are rotated only if they grow bigger than log_rotate_size bytes. If size is followed by k, the size is assumed to be in kilobytes.
    # If the M is used, the size is in megabytes, and if G is used, the size is in gigabytes. So size 100, size 100k, size 100M and size 100G
    # are all valid.
    rotate_size: 200M
    # The directory on your host that store log
    location: /var/log/harbor

  # Uncomment following lines to enable external syslog endpoint.
  # external_endpoint:
  #   # protocol used to transmit log to external endpoint, options is tcp or udp
  #   protocol: tcp
  #   # The host of external endpoint
  #   host: localhost
  #   # Port of external endpoint
  #   port: 5140

#This attribute is for migrator to detect the version of the .cfg file, DO NOT MODIFY!
_version: 1.10.0

# Uncomment external_database if using external database.
# external_database:
#   harbor:
#     host: harbor_db_host
#     port: harbor_db_port
#     db_name: harbor_db_name
#     username: harbor_db_username
#     password: harbor_db_password
#     ssl_mode: disable
#     max_idle_conns: 2
#     max_open_conns: 0
#   clair:
#     host: clair_db_host
#     port: clair_db_port
#     db_name: clair_db_name
#     username: clair_db_username
#     password: clair_db_password
#     ssl_mode: disable
#   notary_signer:
#     host: notary_signer_db_host
#     port: notary_signer_db_port
#     db_name: notary_signer_db_name
#     username: notary_signer_db_username
#     password: notary_signer_db_password
#     ssl_mode: disable
#   notary_server:
#     host: notary_server_db_host
#     port: notary_server_db_port
#     db_name: notary_server_db_name
#     username: notary_server_db_username
#     password: notary_server_db_password
#     ssl_mode: disable

# Uncomment external_redis if using external Redis server
# external_redis:
#   host: redis
#   port: 6379
#   password:
#   # db_index 0 is for core, it's unchangeable
#   registry_db_index: 1
#   jobservice_db_index: 2
#   chartmuseum_db_index: 3
#   clair_db_index: 4

# Uncomment uaa for trusting the certificate of uaa instance that is hosted via self-signed cert.
# uaa:
#   ca_file: /path/to/ca

# Global proxy
# Config http proxy for components, e.g. http://my.proxy.com:3128
# Components doesn't need to connect to each others via http proxy.
# Remove component from `components` array if want disable proxy
# for it. If you want use proxy for replication, MUST enable proxy
# for core and jobservice, and set `http_proxy` and `https_proxy`.
# Add domain to the `no_proxy` field, when you want disable proxy
# for some special registry.
proxy:
  http_proxy:
  https_proxy:
  # no_proxy endpoints will appended to 127.0.0.1,localhost,.local,.internal,log,db,redis,nginx,core,portal,postgresql,jobservice,registry,registryctl,clair,chartmuseum,notary-server
  no_proxy:
  components:
    - core
    - jobservice
    - clair
开始启动
执行命令
# 启动harbor
./install.sh
# 查看启动状态
docker-compose ps

若状态都是healthy就证明启动成功
地址映射
想要在外部浏览器访问harbor,需要进行地址映射,这里因为我是Windows系统,所以演示Windows系统的地址映射
在C:\Windows\System32\drivers\etc中修改hosts文件
# 虚拟机地址       #harbor地址
192.168.3.61  harbor.kubeimooc.com
访问
在浏览器输入harbor.kubeimooc.com即可访问
用户名:admin
密码:123

配置本地登录
如果想在Linux环境下将镜像推送到Harbor,需要配置/etc/hosts文件
127.0.0.1 localhost
127.0.1.1 root

# The following lines are desirable for IPv6 capable hosts
::1     ip6-localhost ip6-loopback
fe00::0 ip6-localnet
ff00::0 ip6-mcastprefix
ff02::1 ip6-allnodes
ff02::2 ip6-allrouters
# 加入进去
192.168.3.61 harbor.kubeimooc.com
然后执行以下命令登录到自己的harbor镜像
docker login harbor.kubeimooc.com
登录成功后就可以进行拉取上传镜像了
配置外部虚拟机访问
配置/etc/hosts文件
127.0.0.1 localhost
127.0.1.1 ubuntu

# The following lines are desirable for IPv6 capable hosts
::1     ip6-localhost ip6-loopback
fe00::0 ip6-localnet
ff00::0 ip6-mcastprefix
ff02::1 ip6-allnodes
ff02::2 ip6-allrouters
192.168.3.61 harbor.kubeimooc.com
将/etc/docker/certs.d文件传输到外部虚拟机下的/etc/docker中
scp certs.d ubuntu@192.168.3.56:/etc/docker
全部配置好后就可以使用命令docker login 进行登录访问了


![[文献解读]:斯坦福最新研究-HumanPlus:人形机器人跟踪和模仿人类](https://img-blog.csdnimg.cn/direct/d664ac763dc2431baf14b78da53e90dd.jpeg#pic_center)