目录:

作者简介 :一只大皮卡丘,计算机专业学生,正在努力学习、努力敲代码中! 让我们一起继续努力学习!
该文章参考学习教材为:
《Spring Boot企业级开发教程》 黑马程序员 / 编著
文章以课本知识点 + 代码为主线,结合自己看书学习过程中的理解和感悟 ,最终成就了该文章文章用于本人学习使用 , 同时希望能帮助大家。
欢迎大家点赞👍 收藏⭐ 关注💖哦!!!(侵权可联系我,进行删除,如果雷同,纯属巧合)
一、SpringBoot 中 自定义 “用户授权管理” ( 总体内容介绍 ) :
当 一个系统建立之后,通常需要 适当地做一些权限控制,使得 不同用户 具有 不同的权限 操作系统。
例如,一般的项目中都会做一些简单的登录控制,只有特定用户才能登录访问。接下来将 针对 Web 应用中常见 的 自定义用户授权管理 进行 介绍。SpringBoot 中 自定义 “用户授权管理” 的 实现方式 :
① 创建类 继承(extens) WebSecurityConfigurerAdapter类② 重写 WebSecurityConfigurerAdapter类 中的 configure( HttpSecurity http )方法
③ 通过 HttpSecurity类中的 Xxx方法 来 实现自定义 “用户授权管理”。
( 通过 configure( HttpSecurity http ) 方法 中的 HttpSecurity 类 实现/进行 “用户授权管理” )
HttpSecurity类 的 主要方法 及 说明 ( 通过 该类中的方法 来实现 "用户授权管理"):
方法 描述 authorizeRequests( ) :
授权请求开启基于 “HttpServletRequest” 请求访问 的 限制。
ps :
用于实现 “自定义用户访问控制”。
( 通过configure( HttpSecurity http)方法 中的 HttpSecurity类 的 authorizeRequests( )方法来实现 “自定义用户访问控制” ,其他方法则是以此类推。)formLogin( ) 开启基于表单的用户登录。
ps :
① 用于实现 “自定义用户登录页面”。
② 使用该方法就是 使用 security提供的"默认登录"页面进行"登录验证" ( 如果没有指定 "自定义的登录页面" 的话 )httpBasic( ) 开启基于 HTTP 请求的 Basic 认证登录。 logout( ) 开启退出登录 的 支持。 sessionManagement( ) 开启 Session 管理配置。 rememberMe( ) 开启 记住我 功能。 csrf( ) 配置 “CSRF” 跨站请求伪造防护功能。 补充 :
configure ( HttpSecurity http )方法的 参数类型是 HttpSecurity 类 ,HttpSecurity 类提供了 Http请求的限制 、权限、Session 管理配置、CSRF跨站请求问题等方法。
二、 自定义 “用户访问控制” ( 通过 “HttpSecurity类” 的 authorizeRequests( )方法来实现 “自定义用户访问控制” ) :
实际生产中,网站访问多是 基于 HTTP 请求,通过 WebSecurityConfigurerAdapter 类 的 configure( HttpSecurity http )方法 中的 HttpSecurity 类中的 authorizeRequests( )方法可以实现 "自定义用户访问控制" 。
authorizeRequests( )方法 中 的 主要方法 及 说明如下表所示 :
方法 ( 实现 “用户访问控制” 的效果的 方法 ) 描述 antMatchers ( java.lang.String … antPatterns ) 方法 开启 Ant风格 的 路径匹配。 mvcMatchers ( java.lang.String … patterns )方法 开启 MVC风格 的 路径匹配。( 与Ant风格类似 ) regexMatchers ( java.lang.String … regexPatterns )方法 开启 “正则表达式” 风格 的 路径匹配。 and( ) 方法 功能连接符。 anyRequest( ) 方法 匹配任何请求。 rememberMe( ) 方法 开启 记住我功能。 access( String attribute )方法 匹配 给定的 SpEL 表达式计算结果是否为 true。 hasRole( String role )方法 匹配 “用户” 是否有 “某一个角色”。 hasAnyRole( String … roles )方法 匹配 “用户” 是否有参数中的 “任意角色”。
更多操作方法 描述 hasAuthority( String authority )方法 匹配 “用户” 是否有 “某一个权限”。 hasAnyAuthority( String … authorities )方法 匹配 “用户” 是否有参数中的 “任意权限” authenticated( ) 方法 匹配 已经登录认证 的 用户。 fullyAuthenticated( ) 方法 匹配 完整登录认证的 用户 ( 非rememberMe 登录用户 )。 haslpAddress( String ipaddressExpression )方法 匹配 某IP 地址的 访问请求。 permitAll( ) 方法 无条件 对请求 进行 放行。 自定义 "用户访问控制" - 案例 代码如下所示。
1.基础项目文件准备
创建项目 :
项目结构 :
pom.xml :
<?xml version="1.0" encoding="UTF-8"?>
<project xmlns="http://maven.apache.org/POM/4.0.0" xmlns:xsi="http://www.w3.org/2001/XMLSchema-instance"
         xsi:schemaLocation="http://maven.apache.org/POM/4.0.0 http://maven.apache.org/xsd/maven-4.0.0.xsd">
    <modelVersion>4.0.0</modelVersion>
    <parent>
        <groupId>org.springframework.boot</groupId>
        <artifactId>spring-boot-starter-parent</artifactId>
        <version>2.1.3.RELEASE</version>
        <relativePath/> <!-- lookup parent from repository -->
    </parent>
    <groupId>com.itheima</groupId>
    <artifactId>chapter07</artifactId>
    <version>0.0.1-SNAPSHOT</version>
    <name>chapter07</name>
    <description>Demo project for Spring Boot</description>

    <properties>
        <java.version>1.8</java.version>
    </properties>

    <dependencies>
        <!-- Security与Thymeleaf整合实现前端页面安全访问控制 -->
        <dependency>
            <groupId>org.thymeleaf.extras</groupId>
            <artifactId>thymeleaf-extras-springsecurity5</artifactId>
        </dependency>

        <!-- JDBC数据库连接启动器 -->
        <dependency>
            <groupId>org.springframework.boot</groupId>
            <artifactId>spring-boot-starter-jdbc</artifactId>
        </dependency>

        <!-- MySQL数据连接驱动 -->
        <dependency>
            <groupId>mysql</groupId>
            <artifactId>mysql-connector-java</artifactId>
            <scope>runtime</scope>
        </dependency>

        <!-- Redis缓存启动器-->
        <dependency>
            <groupId>org.springframework.boot</groupId>
            <artifactId>spring-boot-starter-data-redis</artifactId>
        </dependency>

        <!-- Spring Data JPA操作数据库  -->
        <dependency>
            <groupId>org.springframework.boot</groupId>
            <artifactId>spring-boot-starter-data-jpa</artifactId>
        </dependency>

              <!-- Spring Security提供的安全管理依赖启动器 -->
      <dependency>
          <groupId>org.springframework.boot</groupId>
          <artifactId>spring-boot-starter-security</artifactId>
      </dependency>

      <dependency>
          <groupId>org.springframework.boot</groupId>
          <artifactId>spring-boot-starter-thymeleaf</artifactId>
      </dependency>

      <dependency>
          <groupId>org.springframework.boot</groupId>
          <artifactId>spring-boot-starter-web</artifactId>
      </dependency>

      <dependency>
          <groupId>org.springframework.boot</groupId>
          <artifactId>spring-boot-starter-test</artifactId>
          <scope>test</scope>
      </dependency>
  </dependencies>

      <!--    <build>-->
  <!--        <plugins>-->
  <!--            <plugin>-->
  <!--                <groupId>org.springframework.boot</groupId>-->
  <!--                <artifactId>spring-boot-maven-plugin</artifactId>-->
  <!--            </plugin>-->
  <!--        </plugins>-->
  <!--    </build>-->
      </project>
导入 Sql文件 ( 创建数据库表 ) :
security.sql创建实体类 :
Customer.java :
import javax.persistence.*;
  @Entity(name = "t_customer")
  public class Customer {
      @Id
      @GeneratedValue(strategy = GenerationType.IDENTITY) //主键自增
      private Integer id;
      private String username;
      private String password;
        public Integer getId() {
      return id;
  }

  public void setId(Integer id) {
      this.id = id;
  }

  public String getUsername() {
      return username;
  }

  public void setUsername(String username) {
      this.username = username;
  }

  public String getPassword() {
      return password;
  }

  public void setPassword(String password) {
      this.password = password;
  }

  @Override
  public String toString() {
      return "Customer{" +
              "id=" + id +
              ", username='" + username + '\'' +
              ", password=" + password +
                   '}';
        }
}
Authority.java :
import javax.persistence.Entity;
import javax.persistence.GeneratedValue;
import javax.persistence.GenerationType;
import javax.persistence.Id;

@Entity(name = "t_authority ")
public class Authority {
    @Id
    @GeneratedValue(strategy = GenerationType.IDENTITY) //主键自增
    private Integer id;
    private String authority ;

    public Integer getId() {
        return id;
    }

    public void setId(Integer id) {
        this.id = id;
    }

    public String getAuthority() {
        return authority;
    }

    public void setAuthority(String authority) {
        this.authority = authority;
    }

    @Override
    public String toString() {
        return "Authority{" +
                "id=" + id +
                ", authority='" + authority + '\'' +
                '}';
    }
}
创建Repository接口文件 : ( 通过该接口的方法来操作数据 ) :
CustomerRepository.java :
import org.springframework.data.jpa.repository.JpaRepository;

public interface CustomerRepository extends JpaRepository<Customer,Integer> {
    //根据username查询Customer对象信息
    Customer findByUsername(String username);
}
AuthorityRepository.java ( 接口文件 ) :
import org.springframework.data.jpa.repository.JpaRepository;
import org.springframework.data.jpa.repository.Query;

import java.util.List;

public interface AuthorityRepository extends JpaRepository<Authority,Integer> {

    //根据 username 来查询"权限信息"
    @Query(value = "select a.* from t_customer c,t_authority a,t_customer_authority ca where ca.customer_id=c.id and ca.authority_id=a.id and c.username =?1",nativeQuery = true)
    public List<Authority> findAuthoritiesByUsername(String username);

}
自定义序列化机制 :
RedisConfig.java :
package com.itheima.config;

import com.fasterxml.jackson.annotation.JsonAutoDetect;
import com.fasterxml.jackson.annotation.PropertyAccessor;
import com.fasterxml.jackson.databind.ObjectMapper;
import org.springframework.context.annotation.Bean;
import org.springframework.context.annotation.Configuration;
import org.springframework.data.redis.cache.RedisCacheConfiguration;
import org.springframework.data.redis.cache.RedisCacheManager;
import org.springframework.data.redis.connection.RedisConnectionFactory;
import org.springframework.data.redis.core.RedisTemplate;
import org.springframework.data.redis.serializer.Jackson2JsonRedisSerializer;
import org.springframework.data.redis.serializer.RedisSerializationContext;
import org.springframework.data.redis.serializer.RedisSerializer;
import org.springframework.data.redis.serializer.StringRedisSerializer;

import java.time.Duration;

@Configuration
public class RedisConfig { //在该配置类中 自定义存储到Redis数据库的数据的 "序列化机制"
    /**
     *  定制Redis API模板RedisTemplate
     * @param redisConnectionFactory
     * @return
     */
    @Bean
    public RedisTemplate<Object, Object> redisTemplate(RedisConnectionFactory redisConnectionFactory) {
        RedisTemplate<Object, Object> template = new RedisTemplate();
        template.setConnectionFactory(redisConnectionFactory);
        // 使用JSON格式序列化对象,对缓存数据key和value进行转换
        Jackson2JsonRedisSerializer jacksonSeial = new Jackson2JsonRedisSerializer(Object.class);
        // 解决查询缓存转换异常的问题
        ObjectMapper om = new ObjectMapper();
        // 指定要序列化的域,field,get和set,以及修饰符范围,ANY是都有包括private和public
        om.setVisibility(PropertyAccessor.ALL, JsonAutoDetect.Visibility.ANY);
        // 指定序列化输入的类型,类必须是非final修饰的,final修饰的类,比如String,Integer等会跑出异常
        om.enableDefaultTyping(ObjectMapper.DefaultTyping.NON_FINAL);
        jacksonSeial.setObjectMapper(om);
        // 设置RedisTemplate模板API的序列化方式为JSON
        template.setDefaultSerializer(jacksonSeial);
        return template;
    }
}
application.properties :
spring.datasource.url=jdbc:mysql://localhost:3306/springbootdata?serverTimezone=UTC
spring.datasource.username=root
spring.datasource.password=root

spring.redis.host=127.0.0.1
spring.redis.port=6379
spring.redis.password=123456

spring.thymeleaf.cache=false
创建 html资源文件 :
index.html 页面是 项目首页页面,common和vip文件夹中分别对应的普通用户 和 VIP用户可访问的页面。index.html :
<!DOCTYPE html>
<!-- 配置开启thymeleaf模板引擎页面配置 -->
<html lang="en" xmlns:th="http://www.thymeleaf.org">
<head>
    <meta charset="UTF-8">
    <title>影视直播厅</title>
</head>
<body>

<!-- index.html页面是项目首页页面,common和vip文件夹中分别对应的普通用户 和 VIP用户可访问的页面 -->
<h1 align="center">欢迎进入电影网站首页</h1>
<hr>
<h3>普通电影</h3>
<ul>
    <li><a th:href="@{/detail/common/1}">飞驰人生</a></li>
    <li><a th:href="@{/detail/common/2}">夏洛特烦恼</a></li>
</ul>
<h3>VIP专享</h3>
<ul>
    <li><a th:href="@{/detail/vip/1}">速度与激情</a></li>
    <li><a th:href="@{/detail/vip/2}">猩球崛起</a></li>
</ul>
</body>
</html>
1.html : ( 其他三个页面 以此类推 )
<!DOCTYPE html>
<html lang="en" xmlns:th="http://www.thymeleaf.org">
<head>
    <meta charset="UTF-8">
    <title>Title</title>
</head>
<body>
<!-- th:href="@{/}" : 返回项目首页-->
<a th:href="@{/}">返回</a>
<h1>飞驰人生</h1>
.....
</body>
</html>


2.实现 “自定义身份认证” ( UserDetailsService身份认证 )
① service层中类 获取 “用户基本信息” 和 “用户权限信息”
在 service层 类中来从 Redis中 获取 “缓存数据”,如没找到缓存数据,则从Mysql数据库查询数据 : ( 获取 ① “用户基本信息” 和 ② “用户权限信息” )
CustomerService.java :
import org.springframework.beans.factory.annotation.Autowired;
import org.springframework.data.redis.core.RedisTemplate;
import org.springframework.stereotype.Service;

import java.util.List;

/**
 * 该Service层类中实现的代码效果为:
 * 在Reids数据库中查找是否有指定"缓存数据",有则从其中获取,没有则在Mysql数据库中查找,同时还将查找到的数据也在Redis中进行"缓存"
 */
@Service //加入到IOC容器中
public class CustomerService {
    @Autowired
    private CustomerRepository customerRepository;
    @Autowired
    private AuthorityRepository authorityRepository;

    @Autowired
    private RedisTemplate redisTemplate;  //通过 Redis API 的方式来进行 "Redis缓存"

    /**
     * 业务控制 : 使用唯一用户名查询用户信息
     */
    public Customer getCustomer(String username){
        Customer customer=null;
        //从Redis数据库中获取"缓存数据"
        Object o = redisTemplate.opsForValue().get("customer_"+username);
        //判断是否有该缓存数据
        if(o!=null){
            customer=(Customer)o;
        }else { //不存在该缓存数据,则从数据库中查询缓存数据
            customer = customerRepository.findByUsername(username); //根据username来在数据库中查询数据
            if(customer!=null){
                redisTemplate.opsForValue().set("customer_"+username,customer);
            }
        }
        return customer;
    }

    /**
     * 业务控制 : 使用"唯一用户名"查询用户权限
     */
    public List<Authority> getCustomerAuthority(String username){
        List<Authority> authorities=null;
        //尝试从Redis数据库中获得缓存数据
        Object o = redisTemplate.opsForValue().get("authorities_"+username);
        if(o!=null){
            authorities=(List<Authority>)o;
        }else {
            //没找到缓存数据则从Mysql数据库中查询数据
            authorities=authorityRepository.findAuthoritiesByUsername(username);
            if(authorities.size()>0){
                redisTemplate.opsForValue().set("authorities_"+username,authorities);
            }
        }
        return authorities;
    }
}
② “自定义类” 实现 “UserDetailsService接口” , 在该类中 封装 “用户身份认证信息”
自定义一个 类 , 该类 实现了 UserDetailsService接口 , 用该接口的 loadUserByUsername( )方法 来封装 "用户认证信息" , 该类最终被用于 configure ( AuthenticationManagerBuilder auth ) 方法中,被最终用于 "UserDetailsService"身份认证。
UserDetailsServiceImpl.java :
import org.springframework.beans.factory.annotation.Autowired;
import org.springframework.security.core.GrantedAuthority;
import org.springframework.security.core.authority.SimpleGrantedAuthority;
import org.springframework.security.core.userdetails.*;
import org.springframework.stereotype.Service;
import java.util.ArrayList;
import java.util.List;
import java.util.stream.Collectors;

/**
 *   自定义一个类, 该类实现了UserDetailsService接口 , 用该接口的 loadUserByUsername()方法来封装"用户认证信息" ,
 *   该类最终被用于 configure(AuthenticationManagerBuilder auth)方法中,被最终用于 "UserDetailsService"身份认证。
 */
@Service
public class UserDetailsServiceImpl implements UserDetailsService { //实现 UserDetailsService接口
    @Autowired
    private CustomerService customerService;

    @Override
    public UserDetails loadUserByUsername(String s) throws UsernameNotFoundException { //辅助进行"用户身份认证"的方法

        //通过业务方法(业务层类)获取用户以及权限信息
        //根据username获得Customer对象信息
        Customer customer = customerService.getCustomer(s);
        List<Authority> authorities = customerService.getCustomerAuthority(s);

        /**
         *  .stream() : 将"权限信息"集合 转换为一个流(Stream) , 以便进行后续的流式操作
         *
         *  .map(authority -> new SimpleGrantedAuthority(authority.getAuthority())) :
         *     使用map操作 / map()函数 来转换流中的每个元素 (将流中的"每一个元素"转换为 "另一种形式")
         *     具体分析:
         *     authority -> 获得流中的每一个元素,将其转换为另一种形式
         *     authority.getAuthority() : 获得 authority 这个元素对象的"权限信息" ( 是一个"权限信息"的字符串 )
         *     new SimpleGrantedAuthority(authority.getAuthority())) : 使用这个 "权限信息字符串" 创建一个 SimpleGrantedAuthority对象,
         *     该对象 是 Spring Security框架中用于表示 "授权信息" 的类
         *
         *   .collect(Collectors.toList()); : 是一个终端操作,它告诉流如何收集其元素以生成一个结果。
         *     具体分析:
         *     .collect(Collectors.toList()) : 收集转换后的 SimpleGrantedAuthority对象,并将其放入一个新的列表中
         */
        // 对"用户权限信息"进行封装
        List<SimpleGrantedAuthority> list = authorities.stream().map(authority -> new SimpleGrantedAuthority(authority.getAuthority())).collect(Collectors.toList());

        /*
          创建 UserDetails (用户详情) 对象,并将该对象进行返回
         */
        if(customer!=null){
            //用 username 、password 、权限信息集合 作为参数创建 UserDetails对象 ( 用户详情对象 )
            UserDetails userDetails= new User(customer.getUsername(),customer.getPassword(),list);
            return userDetails;
        } else {
            //如果查询的用户不存在 (用户名不存在 ) , 必须抛出异常
            throw new UsernameNotFoundException("当前用户不存在!");
        }
    }
}
③ “SecurityConfig配置类” 中 实现 “自定义 身份认证”
“SecurityConfig配置类” 中 实现 “自定义身份认证” :
SecurityConfig.java :
import org.springframework.beans.factory.annotation.Autowired;
import org.springframework.security.config.annotation.authentication.builders.AuthenticationManagerBuilder;
import org.springframework.security.config.annotation.web.builders.HttpSecurity;
import org.springframework.security.config.annotation.web.configuration.EnableWebSecurity;
import org.springframework.security.config.annotation.web.configuration.WebSecurityConfigurerAdapter;
import org.springframework.security.crypto.bcrypt.BCryptPasswordEncoder;

@EnableWebSecurity  // 开启MVC security安全支持
public class SecurityConfig extends WebSecurityConfigurerAdapter { //在该配置类中 配置①自定义用户认证(UserDetailsService) 和 ②用户授权管理自定义配置(自定义用户访问控制)

    /*
     该类为 配置好了 "UserDetailsService"身份认证信息 的类 ,
     使用该类来在 configure(AuthenticationManagerBuilder auth)方法中进行 "UserDetailsService"身份认证。
     */
    @Autowired
    private UserDetailsServiceImpl userDetailsService;
      /**
   * 用户身份认证自定义配置 ( 通过UserDetailsService的方式实现 )
   *
   * 重写configure(AuthenticationManagerBuilder auth)方法 : 自定义用户认证
   */
  @Override
  protected void configure(AuthenticationManagerBuilder auth) throws Exception {
      //密码需要设置编码器 ( 添加"密码编辑器")
      BCryptPasswordEncoder encoder = new BCryptPasswordEncoder();
      //使用UserDetailService进行"身份认证"
      auth.userDetailsService(userDetailsService)
              //设置"密码编辑器"
              .passwordEncoder(encoder);
     }
}
3.实现 “自定义用户访问”
④ “SecurityConfig配置类” 中 实现 “自定义 用户访问控制”
“SecurityConfig配置类” 中 实现 自定义 “用户访问控制” :
SecurityConfig.java :
package com.itheima.config;

import com.itheima.service.Impl.UserDetailsServiceImpl;
import org.springframework.beans.factory.annotation.Autowired;
import org.springframework.security.config.annotation.authentication.builders.AuthenticationManagerBuilder;
import org.springframework.security.config.annotation.web.builders.HttpSecurity;
import org.springframework.security.config.annotation.web.configuration.EnableWebSecurity;
import org.springframework.security.config.annotation.web.configuration.WebSecurityConfigurerAdapter;
import org.springframework.security.crypto.bcrypt.BCryptPasswordEncoder;

@EnableWebSecurity  // 开启MVC security安全支持
public class SecurityConfig extends WebSecurityConfigurerAdapter { //在该配置类中 配置①自定义用户认证(UserDetailsService) 和 ②用户授权管理自定义配置(自定义用户访问控制)

    /**
     * 用户授权管理自定义配置 ( 自定义用户访问控制 )
     *
     * 重写configure(HttpSecurity http)方法 : 自定义用户访问控制
     */
    @Override
    protected void configure(HttpSecurity http) throws Exception {
        /**
         *  .antMatchers : 开启Ant风格的路径匹配
         *  .permitAll() : 无条件对请求进行放行
         *  .antMatchers("/").permitAll() : //对/请求进行放行
         *
         *  .hasRole() : 匹配用户是否是"某一个角色"
         *  .hasAnyRole() : 匹配用户是否是"某一个角色" 或 是 "另一个角色" ( 匹配"用户"是否有参数中的"任意角色" )
         *  .antMatchers("detail/common/**").hasAnyRole("common","vip") :  表示 detail/common/** 请求只有用户角色common或用户vip才允许访问/才能访问
         *    ---( 即ROLE_common权限 和 (即ROLE_vip权限才能访问该路径 )
         *  .antMatchers("/detail/vip/**").hasRole("vip") :  表示 detail/vip/** 请求只有用户vip才允许访问/才能访问
         *
         *  .anyRequest() :    匹配任何请求
         *  .authenticated() : 匹配已经登陆认证的用户
         *  .and() //功能连接符
         *  .formLogin() : 启用Spring Security的基于"HTML表单"的 用户登录功能/用户登录页面, 同时通过该页面来进行"登录验证"
         *    ---简而言之 : 使用security提供的"默认登录"页面进行"登录验证" (如果没有指定"自定义的登录页面"的话)
         *
         */
        // 自定义用户访问控制
        http.authorizeRequests()
                .antMatchers("/").permitAll()  //对/请求进行放行
                .antMatchers("/detail/common/**").hasAnyRole("common","vip") //普通电影,则是common和vip用户都能看
                .antMatchers("/detail/vip/**").hasRole("vip")  //vip电影则是vip用户才能看
                .anyRequest()  //匹配任何请求
                .authenticated()  //匹配已经登陆认证的用户
                .and() //功能连接符
                .formLogin(); //使用security提供的"默认登录"页面进行"登录验证" (如果没有指定"自定义的登录页面"的话)
    }

}
⑤ controller层中 实现 “路径访问跳转”
controller层中 实现 "路径访问跳转" :
LoginController.java :
import org.springframework.stereotype.Controller;
import org.springframework.web.bind.annotation.GetMapping;
import org.springframework.web.bind.annotation.PathVariable;
import org.springframework.web.bind.annotation.ResponseBody;

@Controller //加入IOC容器中
public class LoginController {  //关于跳转到登录页面有关的controller类

     /*
       跳转到Detail文件夹下的"视图页面"
     */
    @GetMapping("/detail/{type}/{path}") //其中的变量为"路径变量"
    // @PathVariable注解获得"路径变量"的值
    public String toDetail( @PathVariable("type") String type ,@PathVariable("path") String path ) {
        //返回值为String,可用于返回一个视图页面
        return "/detail/"+type+"/"+path;
    }

}
⑥ 效果测试
项目启动成功后,通过浏览器访问 http://localhost:8080/ 项目首页,效果如下图所示 :
从上图可以看出,直接访问 “http://localhost:8080/”可以进入 项目首页 ,这是因为 自定义 的 用户访问控制中 ,对 "/" 的请求是 直接放行的,此图也说明了 "自定义的用户访问控制 生效 了。
在项目首页 单击普通电影 或者 VIP 专享电影 名称 査询电影详情,效果如下图所示 :
从上图可以看出,在项目首页访 问影片详情 (实质是请求 URL 跳转,如“/detai/common/1”),会直接被 自定义的访问控制拦截并跳转到 默认用户登录界面 ( 没有没对该请求进行放行,所以肯定是要进入登录页面验证登录信息的 )。在此登录界面输入正确的用户名和密码信息 (如果访问的是普通电影,可以输入用户名shitou,密码 123456),效果如下图所示 :
shitou,123456 ,能访问到 飞驰人生这个电影,说明其有 common的 用户权限,此时点击左上角的“返回”链接,会再次回到项目首页。此时,之前登录的普通用户 shitou 还处于登录状态,再次单击 VIP 专享电影名称查看影片详情,效果如下图所示 :
从上图可以看出,登录后的 普通用户 shitou,在查看 VIP 电影 详情时,页面会出现 403 Forbidden(禁止访问)的错误信息 ( 因为账户权限不足 ),而控制台不会报错。
上述演示结果,说明了示例中配置的用户访问控制对不同的请求拦截也生效了。另外,当前示例没有配置完善的用户注销功能,所以登录一个用户后要切换其他用户的话将浏览器重启,再次使用新账号登录即可。


三、 自定义 “用户登录控制” ( 通过 “HttpSecurity类” 的 formLogin( )方法来实现 “自定义用户用户登录控制” ) :
通过前面几个示例演示可以发现,项目中并没有配置 用户登录页面 和 登录处理方法 ( Security框架中 并没有对 “用户登录控制” 进行 自定义 ),但是 演示过程 中却 提供了一个默认的 用户登录页面,并且进行了自动登录处理,这就是 Spring Security 提供的 默认登录处理机制 ( 默认的 “用户登录” 机制 )。
实际开发中,通常要求 定制更美观 的 用户登录页面,并 配置有更好 的 错误提示信息,此时需要 自定义 “用户登录控制”。
自定义 “用户登录控制” 的 具体实际操作为 : 通过 WebSecurityConfigurerAdapter 类 的 configure( HttpSecurity http )方法 中的 HttpSecurity 类中的 formLogin( )方法可以实现 "自定义用户访问控制" 。
formLogin( )方法 中 的 主要方法 及 说明如下表所示 :
方法 ( 实现 “用户登录控制” 的效果的 方法 ) 描述 loginPage( String loginPage )方法 设置 用户登录页面 的 跳转路径,默认为 get请求的 /ogin 。
( 可自定义 “设置” “跳转路径” , 来 跳转 到 自定义的"登录界面" )successForwardUrl( String forwardUrl )方法 用户登录成功 后的 重定向地址。 successHandler( AuthenticationSuccessHandler successHandler )方法 设置 用户登录成功后的处理。 defaultSuccessUrl( String defaultSuccessUrl )方法 设置 用户登录成功后 默认跳转地址。
如 : .defaultSuccessUrl(“/”) :指定了用户登录成功后默认跳转到 “项目首页” 。failureForwardUrl( String forwardUrl )方法 设置 用户登录失败 后的 重定向地址。 failureUrl( String authenticationFailureUrl )方法 设置 用户登录失败 后的 跳转地址,默认 为
/ogin?errorfailureHandler( AuthenticationFailureHandler authenticationFailureHandler )方法 设置 用户登录失败 后的 错误处理。 usernameParameter( String usernameParameter )方法 设置 登录用户的用户名参数,默认 为 username。 passwordParameter( String passwordParameter )方法 设置 登录用户 的 密码参数,默认 为 password。
更多方法 loginProcessingUrl( String loginProcessingUrl )方法 设置 登录表单提交的 路径,默认 为 post 请求的 /login permitAll( )方法 设置 无条件对请求进行放行。
1.基础项目文件准备
创建项目 :
项目结构 :
pom.xml :
<?xml version="1.0" encoding="UTF-8"?>
<project xmlns="http://maven.apache.org/POM/4.0.0" xmlns:xsi="http://www.w3.org/2001/XMLSchema-instance"
         xsi:schemaLocation="http://maven.apache.org/POM/4.0.0 http://maven.apache.org/xsd/maven-4.0.0.xsd">
    <modelVersion>4.0.0</modelVersion>
    <parent>
        <groupId>org.springframework.boot</groupId>
        <artifactId>spring-boot-starter-parent</artifactId>
        <version>2.1.3.RELEASE</version>
        <relativePath/> <!-- lookup parent from repository -->
    </parent>
    <groupId>com.itheima</groupId>
    <artifactId>chapter07</artifactId>
    <version>0.0.1-SNAPSHOT</version>
    <name>chapter07</name>
    <description>Demo project for Spring Boot</description>

    <properties>
        <java.version>1.8</java.version>
    </properties>

    <dependencies>
        <!-- Security与Thymeleaf整合实现前端页面安全访问控制 -->
        <dependency>
            <groupId>org.thymeleaf.extras</groupId>
            <artifactId>thymeleaf-extras-springsecurity5</artifactId>
        </dependency>

        <!-- JDBC数据库连接启动器 -->
        <dependency>
            <groupId>org.springframework.boot</groupId>
            <artifactId>spring-boot-starter-jdbc</artifactId>
        </dependency>

        <!-- MySQL数据连接驱动 -->
        <dependency>
            <groupId>mysql</groupId>
            <artifactId>mysql-connector-java</artifactId>
            <scope>runtime</scope>
        </dependency>

        <!-- Redis缓存启动器-->
        <dependency>
            <groupId>org.springframework.boot</groupId>
            <artifactId>spring-boot-starter-data-redis</artifactId>
        </dependency>

        <!-- Spring Data JPA操作数据库  -->
        <dependency>
            <groupId>org.springframework.boot</groupId>
            <artifactId>spring-boot-starter-data-jpa</artifactId>
        </dependency>

              <!-- Spring Security提供的安全管理依赖启动器 -->
      <dependency>
          <groupId>org.springframework.boot</groupId>
          <artifactId>spring-boot-starter-security</artifactId>
      </dependency>

      <dependency>
          <groupId>org.springframework.boot</groupId>
          <artifactId>spring-boot-starter-thymeleaf</artifactId>
      </dependency>

      <dependency>
          <groupId>org.springframework.boot</groupId>
          <artifactId>spring-boot-starter-web</artifactId>
      </dependency>

      <dependency>
          <groupId>org.springframework.boot</groupId>
          <artifactId>spring-boot-starter-test</artifactId>
          <scope>test</scope>
      </dependency>
  </dependencies>

      <!--    <build>-->
  <!--        <plugins>-->
  <!--            <plugin>-->
  <!--                <groupId>org.springframework.boot</groupId>-->
  <!--                <artifactId>spring-boot-maven-plugin</artifactId>-->
  <!--            </plugin>-->
  <!--        </plugins>-->
  <!--    </build>-->
      </project>
导入 Sql文件 ( 创建数据库表 ) :
security.sql创建实体类 :
Customer.java :
import javax.persistence.*;
  @Entity(name = "t_customer")
  public class Customer {
      @Id
      @GeneratedValue(strategy = GenerationType.IDENTITY) //主键自增
      private Integer id;
      private String username;
      private String password;
        public Integer getId() {
      return id;
  }

  public void setId(Integer id) {
      this.id = id;
  }

  public String getUsername() {
      return username;
  }

  public void setUsername(String username) {
      this.username = username;
  }

  public String getPassword() {
      return password;
  }

  public void setPassword(String password) {
      this.password = password;
  }

  @Override
  public String toString() {
      return "Customer{" +
              "id=" + id +
              ", username='" + username + '\'' +
              ", password=" + password +
                   '}';
        }
}
Authority.java :
import javax.persistence.Entity;
import javax.persistence.GeneratedValue;
import javax.persistence.GenerationType;
import javax.persistence.Id;

@Entity(name = "t_authority ")
public class Authority {
    @Id
    @GeneratedValue(strategy = GenerationType.IDENTITY) //主键自增
    private Integer id;
    private String authority ;

    public Integer getId() {
        return id;
    }

    public void setId(Integer id) {
        this.id = id;
    }

    public String getAuthority() {
        return authority;
    }

    public void setAuthority(String authority) {
        this.authority = authority;
    }

    @Override
    public String toString() {
        return "Authority{" +
                "id=" + id +
                ", authority='" + authority + '\'' +
                '}';
    }
}
创建Repository接口文件 : ( 通过该接口的方法来操作数据 ) :
CustomerRepository.java :
import org.springframework.data.jpa.repository.JpaRepository;

public interface CustomerRepository extends JpaRepository<Customer,Integer> {
    //根据username查询Customer对象信息
    Customer findByUsername(String username);
}
AuthorityRepository.java ( 接口文件 ) :
import org.springframework.data.jpa.repository.JpaRepository;
import org.springframework.data.jpa.repository.Query;

import java.util.List;

public interface AuthorityRepository extends JpaRepository<Authority,Integer> {

    //根据 username 来查询"权限信息"
    @Query(value = "select a.* from t_customer c,t_authority a,t_customer_authority ca where ca.customer_id=c.id and ca.authority_id=a.id and c.username =?1",nativeQuery = true)
    public List<Authority> findAuthoritiesByUsername(String username);

}
自定义序列化机制 :
RedisConfig.java :
package com.itheima.config;

import com.fasterxml.jackson.annotation.JsonAutoDetect;
import com.fasterxml.jackson.annotation.PropertyAccessor;
import com.fasterxml.jackson.databind.ObjectMapper;
import org.springframework.context.annotation.Bean;
import org.springframework.context.annotation.Configuration;
import org.springframework.data.redis.cache.RedisCacheConfiguration;
import org.springframework.data.redis.cache.RedisCacheManager;
import org.springframework.data.redis.connection.RedisConnectionFactory;
import org.springframework.data.redis.core.RedisTemplate;
import org.springframework.data.redis.serializer.Jackson2JsonRedisSerializer;
import org.springframework.data.redis.serializer.RedisSerializationContext;
import org.springframework.data.redis.serializer.RedisSerializer;
import org.springframework.data.redis.serializer.StringRedisSerializer;

import java.time.Duration;

@Configuration
public class RedisConfig { //在该配置类中 自定义存储到Redis数据库的数据的 "序列化机制"
    /**
     *  定制Redis API模板RedisTemplate
     * @param redisConnectionFactory
     * @return
     */
    @Bean
    public RedisTemplate<Object, Object> redisTemplate(RedisConnectionFactory redisConnectionFactory) {
        RedisTemplate<Object, Object> template = new RedisTemplate();
        template.setConnectionFactory(redisConnectionFactory);
        // 使用JSON格式序列化对象,对缓存数据key和value进行转换
        Jackson2JsonRedisSerializer jacksonSeial = new Jackson2JsonRedisSerializer(Object.class);
        // 解决查询缓存转换异常的问题
        ObjectMapper om = new ObjectMapper();
        // 指定要序列化的域,field,get和set,以及修饰符范围,ANY是都有包括private和public
        om.setVisibility(PropertyAccessor.ALL, JsonAutoDetect.Visibility.ANY);
        // 指定序列化输入的类型,类必须是非final修饰的,final修饰的类,比如String,Integer等会跑出异常
        om.enableDefaultTyping(ObjectMapper.DefaultTyping.NON_FINAL);
        jacksonSeial.setObjectMapper(om);
        // 设置RedisTemplate模板API的序列化方式为JSON
        template.setDefaultSerializer(jacksonSeial);
        return template;
    }
}
application.properties :
spring.datasource.url=jdbc:mysql://localhost:3306/springbootdata?serverTimezone=UTC
spring.datasource.username=root
spring.datasource.password=root

spring.redis.host=127.0.0.1
spring.redis.port=6379
spring.redis.password=123456

spring.thymeleaf.cache=false
创建 html资源文件 :
index.html 页面是 项目首页页面,common和vip文件夹中分别对应的普通用户 和 VIP用户可访问的页面。index.html :
<!DOCTYPE html>
<!-- 配置开启thymeleaf模板引擎页面配置 -->
<html lang="en" xmlns:th="http://www.thymeleaf.org">
<head>
    <meta charset="UTF-8">
    <title>影视直播厅</title>
</head>
<body>

<!-- index.html页面是项目首页页面,common和vip文件夹中分别对应的普通用户 和 VIP用户可访问的页面 -->
<h1 align="center">欢迎进入电影网站首页</h1>
<hr>
<h3>普通电影</h3>
<ul>
    <li><a th:href="@{/detail/common/1}">飞驰人生</a></li>
    <li><a th:href="@{/detail/common/2}">夏洛特烦恼</a></li>
</ul>
<h3>VIP专享</h3>
<ul>
    <li><a th:href="@{/detail/vip/1}">速度与激情</a></li>
    <li><a th:href="@{/detail/vip/2}">猩球崛起</a></li>
</ul>
</body>
</html>
1.html : ( 其他三个页面 以此类推 )
<!DOCTYPE html>
<html lang="en" xmlns:th="http://www.thymeleaf.org">
<head>
    <meta charset="UTF-8">
    <title>Title</title>
</head>
<body>
<!-- th:href="@{/}" : 返回项目首页-->
<a th:href="@{/}">返回</a>
<h1>飞驰人生</h1>
.....
</body>
</html>


2.实现 “自定义身份认证” ( UserDetailsService身份认证 )
① service层中类 获取 “用户基本信息” 和 “用户权限信息”
在 service层 类中来从 Redis中 获取 “缓存数据”,如没找到缓存数据,则从Mysql数据库查询数据 : ( 获取 ① “用户基本信息” 和 ② “用户权限信息” )
CustomerService.java :
import org.springframework.beans.factory.annotation.Autowired;
import org.springframework.data.redis.core.RedisTemplate;
import org.springframework.stereotype.Service;

import java.util.List;

/**
 * 该Service层类中实现的代码效果为:
 * 在Reids数据库中查找是否有指定"缓存数据",有则从其中获取,没有则在Mysql数据库中查找,同时还将查找到的数据也在Redis中进行"缓存"
 */
@Service //加入到IOC容器中
public class CustomerService {
    @Autowired
    private CustomerRepository customerRepository;
    @Autowired
    private AuthorityRepository authorityRepository;

    @Autowired
    private RedisTemplate redisTemplate;  //通过 Redis API 的方式来进行 "Redis缓存"

    /**
     * 业务控制 : 使用唯一用户名查询用户信息
     */
    public Customer getCustomer(String username){
        Customer customer=null;
        //从Redis数据库中获取"缓存数据"
        Object o = redisTemplate.opsForValue().get("customer_"+username);
        //判断是否有该缓存数据
        if(o!=null){
            customer=(Customer)o;
        }else { //不存在该缓存数据,则从数据库中查询缓存数据
            customer = customerRepository.findByUsername(username); //根据username来在数据库中查询数据
            if(customer!=null){
                redisTemplate.opsForValue().set("customer_"+username,customer);
            }
        }
        return customer;
    }

    /**
     * 业务控制 : 使用"唯一用户名"查询用户权限
     */
    public List<Authority> getCustomerAuthority(String username){
        List<Authority> authorities=null;
        //尝试从Redis数据库中获得缓存数据
        Object o = redisTemplate.opsForValue().get("authorities_"+username);
        if(o!=null){
            authorities=(List<Authority>)o;
        }else {
            //没找到缓存数据则从Mysql数据库中查询数据
            authorities=authorityRepository.findAuthoritiesByUsername(username);
            if(authorities.size()>0){
                redisTemplate.opsForValue().set("authorities_"+username,authorities);
            }
        }
        return authorities;
    }
}
② “自定义类” 实现 “UserDetailsService接口” , 在该类中 封装 “用户身份认证信息”
自定义一个类 , 该 类 实现 了 UserDetailsService接口 , 用该接口的 loadUserByUsername( )方法 来封装 "用户认证信息" , 该类最终被用于 configure ( AuthenticationManagerBuilder auth ) 方法中,被最终用于 "UserDetailsService"身份认证。
UserDetailsServiceImpl.java :
import org.springframework.beans.factory.annotation.Autowired;
import org.springframework.security.core.GrantedAuthority;
import org.springframework.security.core.authority.SimpleGrantedAuthority;
import org.springframework.security.core.userdetails.*;
import org.springframework.stereotype.Service;
import java.util.ArrayList;
import java.util.List;
import java.util.stream.Collectors;

/**
 *   自定义一个类, 该类实现了UserDetailsService接口 , 用该接口的 loadUserByUsername()方法来封装"用户认证信息" ,
 *   该类最终被用于 configure(AuthenticationManagerBuilder auth)方法中,被最终用于 "UserDetailsService"身份认证。
 */
@Service
public class UserDetailsServiceImpl implements UserDetailsService { //实现 UserDetailsService接口
    @Autowired
    private CustomerService customerService;

    @Override
    public UserDetails loadUserByUsername(String s) throws UsernameNotFoundException { //辅助进行"用户身份认证"的方法

        //通过业务方法(业务层类)获取用户以及权限信息
        //根据username获得Customer对象信息
        Customer customer = customerService.getCustomer(s);
        List<Authority> authorities = customerService.getCustomerAuthority(s);

        /**
         *  .stream() : 将"权限信息"集合 转换为一个流(Stream) , 以便进行后续的流式操作
         *
         *  .map(authority -> new SimpleGrantedAuthority(authority.getAuthority())) :
         *     使用map操作 / map()函数 来转换流中的每个元素 (将流中的"每一个元素"转换为 "另一种形式")
         *     具体分析:
         *     authority -> 获得流中的每一个元素,将其转换为另一种形式
         *     authority.getAuthority() : 获得 authority 这个元素对象的"权限信息" ( 是一个"权限信息"的字符串 )
         *     new SimpleGrantedAuthority(authority.getAuthority())) : 使用这个 "权限信息字符串" 创建一个 SimpleGrantedAuthority对象,
         *     该对象 是 Spring Security框架中用于表示 "授权信息" 的类
         *
         *   .collect(Collectors.toList()); : 是一个终端操作,它告诉流如何收集其元素以生成一个结果。
         *     具体分析:
         *     .collect(Collectors.toList()) : 收集转换后的 SimpleGrantedAuthority对象,并将其放入一个新的列表中
         */
        // 对"用户权限信息"进行封装
        List<SimpleGrantedAuthority> list = authorities.stream().map(authority -> new SimpleGrantedAuthority(authority.getAuthority())).collect(Collectors.toList());

        /*
          创建 UserDetails (用户详情) 对象,并将该对象进行返回
         */
        if(customer!=null){
            //用 username 、password 、权限信息集合 作为参数创建 UserDetails对象 ( 用户详情对象 )
            UserDetails userDetails= new User(customer.getUsername(),customer.getPassword(),list);
            return userDetails;
        } else {
            //如果查询的用户不存在 (用户名不存在 ) , 必须抛出异常
            throw new UsernameNotFoundException("当前用户不存在!");
        }
    }
}
③ “SecurityConfig配置类” 中 实现 “自定义 身份认证”
“SecurityConfig配置类” 中 实现 “自定义身份认证” :
SecurityConfig.java :
import org.springframework.beans.factory.annotation.Autowired;
import org.springframework.security.config.annotation.authentication.builders.AuthenticationManagerBuilder;
import org.springframework.security.config.annotation.web.builders.HttpSecurity;
import org.springframework.security.config.annotation.web.configuration.EnableWebSecurity;
import org.springframework.security.config.annotation.web.configuration.WebSecurityConfigurerAdapter;
import org.springframework.security.crypto.bcrypt.BCryptPasswordEncoder;

@EnableWebSecurity  // 开启MVC security安全支持
public class SecurityConfig extends WebSecurityConfigurerAdapter { //在该配置类中 配置①自定义用户认证(UserDetailsService) 和 ②用户授权管理自定义配置(自定义用户访问控制)

    /*
     该类为 配置好了 "UserDetailsService"身份认证信息 的类 ,
     使用该类来在 configure(AuthenticationManagerBuilder auth)方法中进行 "UserDetailsService"身份认证。
     */
    @Autowired
    private UserDetailsServiceImpl userDetailsService;
      /**
   * 用户身份认证自定义配置 ( 通过UserDetailsService的方式实现 )
   *
   * 重写configure(AuthenticationManagerBuilder auth)方法 : 自定义用户认证
   */
  @Override
  protected void configure(AuthenticationManagerBuilder auth) throws Exception {
      //密码需要设置编码器 ( 添加"密码编辑器")
      BCryptPasswordEncoder encoder = new BCryptPasswordEncoder();
      //使用UserDetailService进行"身份认证"
      auth.userDetailsService(userDetailsService)
              //设置"密码编辑器"
              .passwordEncoder(encoder);
     }
}
3.实现 “自定义用户访问”
④ “SecurityConfig配置类” 中 实现 “自定义 用户访问控制”
“SecurityConfig配置类” 中 实现 自定义 “用户访问控制” :
SecurityConfig.java :
package com.itheima.config;

import com.itheima.service.Impl.UserDetailsServiceImpl;
import org.springframework.beans.factory.annotation.Autowired;
import org.springframework.security.config.annotation.authentication.builders.AuthenticationManagerBuilder;
import org.springframework.security.config.annotation.web.builders.HttpSecurity;
import org.springframework.security.config.annotation.web.configuration.EnableWebSecurity;
import org.springframework.security.config.annotation.web.configuration.WebSecurityConfigurerAdapter;
import org.springframework.security.crypto.bcrypt.BCryptPasswordEncoder;

@EnableWebSecurity  // 开启MVC security安全支持
public class SecurityConfig extends WebSecurityConfigurerAdapter { //在该配置类中 配置①自定义用户认证(UserDetailsService) 和 ②用户授权管理自定义配置(自定义用户访问控制)

    /**
     * 用户授权管理自定义配置 ( 自定义用户访问控制 )
     *
     * 重写configure(HttpSecurity http)方法 : 自定义用户访问控制
     */
    @Override
    protected void configure(HttpSecurity http) throws Exception {
        /**
         *  .antMatchers : 开启Ant风格的路径匹配
         *  .permitAll() : 无条件对请求进行放行
         *  .antMatchers("/").permitAll() : //对/请求进行放行
         *
         *  .hasRole() : 匹配用户是否是"某一个角色"
         *  .hasAnyRole() : 匹配用户是否是"某一个角色" 或 是 "另一个角色" ( 匹配"用户"是否有参数中的"任意角色" )
         *  .antMatchers("detail/common/**").hasAnyRole("common","vip") :  表示 detail/common/** 请求只有用户角色common或用户vip才允许访问/才能访问
         *    ---( 即ROLE_common权限 和 (即ROLE_vip权限才能访问该路径 )
         *  .antMatchers("/detail/vip/**").hasRole("vip") :  表示 detail/vip/** 请求只有用户vip才允许访问/才能访问
         *
         *  .anyRequest() :    匹配任何请求
         *  .authenticated() : 匹配已经登陆认证的用户
         *  .and() //功能连接符
         *  .formLogin() : 启用Spring Security的基于"HTML表单"的 用户登录功能/用户登录页面, 同时通过该页面来进行"登录验证"
         *    ---简而言之 : 使用security提供的"默认登录"页面进行"登录验证" (如果没有指定"自定义的登录页面"的话)
         *
         */
        // 自定义用户访问控制
        http.authorizeRequests()
                .antMatchers("/").permitAll()  //对/请求进行放行
                .antMatchers("/detail/common/**").hasAnyRole("common","vip") //普通电影,则是common和vip用户都能看
                .antMatchers("/detail/vip/**").hasRole("vip")  //vip电影则是vip用户才能看
                .anyRequest()  //匹配任何请求
                .authenticated()  //匹配已经登陆认证的用户
                .and() //功能连接符
                .formLogin(); //使用security提供的"默认登录"页面进行"登录验证" (如果没有指定"自定义的登录页面"的话)
    }

}
⑤ controller层中 实现 “路径访问跳转”
controller层中 实现 "路径访问跳转" :
LoginController.java :
import org.springframework.stereotype.Controller;
import org.springframework.web.bind.annotation.GetMapping;
import org.springframework.web.bind.annotation.PathVariable;
import org.springframework.web.bind.annotation.ResponseBody;

@Controller //加入IOC容器中
public class LoginController {  //关于跳转到登录页面有关的controller类

     /*
       跳转到Detail文件夹下的"视图页面"
     */
    @GetMapping("/detail/{type}/{path}") //其中的变量为"路径变量"
    // @PathVariable注解获得"路径变量"的值
    public String toDetail( @PathVariable("type") String type ,@PathVariable("path") String path ) {
        //返回值为String,可用于返回一个视图页面
        return "/detail/"+type+"/"+path;
    }

}
4.实现 “自定义用户登录”
⑥ 自定义 用户登录 “页面”
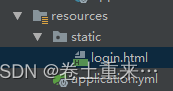
要实现 自定义用户登录功能,首先必须根据需要自定义一个用户登录页面。在项目的 resources/templates 目录下新创建一个名为 login 的 文件夹( 专门处理用户登录 ),在该文件夹中创建一个 用户登录页面 : login.html 。
login.html :
<!DOCTYPE html> <!-- 配置开启thymeleaf"模板引擎"页面配置 --> <html xmlns="http://www.w3.org/1999/xhtml" xmlns:th="http://www.thymeleaf.org"> <head> <meta http-equiv="Content-Type" content="text/html; charset=UTF-8"> <title>用户登录界面</title> <link th:href="@{/login/css/bootstrap.min.css}" rel="stylesheet"> <link th:href="@{/login/css/signin.css}" rel="stylesheet"> </head> <body class="text-center"> <!-- form表单请求跳转路径为 : /userLogin --> <form class="form-signin" th:action="@{/userLogin}" th:method="post" > <!-- img标签--> <img class="mb-4" th:src="@{/login/img/login.jpg}" width="72px" height="72px"> <h1 class="h3 mb-3 font-weight-normal">请登录</h1> <!-- 用户登录错误信息提示框 --> <!-- th:if 根据条件的真假决定是否渲染 HTML 元素 ,真则渲染,假则不渲染 (有该参数值则渲染,没有该参数值则不渲染) --> <!-- 有该参数值则渲染该div,否则就不渲染该div --> <div th:if="${param.error}" style="color: red;height: 40px;text-align: left;font-size: 1.1em"> <!-- img标签 --> <img th:src="@{/login/img/loginError.jpg}" width="20px">用户名或密码错误,请重新登录! </div> <!-- 用户名参数名为 : name , 密码的参数名为: pws --> <input type="text" name="name" class="form-control" placeholder="用户名" required="" autofocus=""> <input type="password" name="pwd" class="form-control" placeholder="密码" required=""> <button class="btn btn-lg btn-primary btn-block" type="submit" >登录</button> <p class="mt-5 mb-3 text-muted">Copyright© 2024-2025</p> </form> </body> </html>上面代码中还引入了两个 CSS 样式文件和两个 img图片文件,用来渲染用户登录页面,它们都存在于 /ogin/** 目录下,需要提前引入这些静态资源文件目录中。引入这些静态资源文件后,结构如下图所示 :

⑦ 自定义 用户登录 “跳转”
自定义 “用户登录跳转” :
import org.springframework.stereotype.Controller;
import org.springframework.web.bind.annotation.GetMapping;
import org.springframework.web.bind.annotation.PathVariable;
import org.springframework.web.bind.annotation.ResponseBody;

@Controller //加入IOC容器中
public class LoginController {  //关于跳转到登录页面有关的controller类

    /**
     * 跳转到自定义的 "登录页面"
     */
    @GetMapping("/userLogin")
    public String toLoginPage() {
        return "/login/login";
    }
}
Spring Security 默认采用 Get 方式的 “/ogin”请求 用于向 “登录页面” 跳转 ( 可自定义跳转的 "登录页面"的路径,来指定”登录页面“ ),使用 Post 方式的 “/ogin”请求用于对登录后的数据处理。
⑧ 自定义 用户登录 “控制”
完成上面的准备工作后,打开 SecurityConfig 类,重写 configure( HttpSecurity http )方法,实现 用户登录控制,
示例代码如下 :SecurityConfig.java :
import org.springframework.beans.factory.annotation.Autowired;
import org.springframework.security.config.annotation.authentication.builders.AuthenticationManagerBuilder;
import org.springframework.security.config.annotation.web.builders.HttpSecurity;
import org.springframework.security.config.annotation.web.configuration.EnableWebSecurity;
import org.springframework.security.config.annotation.web.configuration.WebSecurityConfigurerAdapter;
import org.springframework.security.crypto.bcrypt.BCryptPasswordEncoder;

@EnableWebSecurity  // 开启MVC security安全支持
public class SecurityConfig extends WebSecurityConfigurerAdapter { //在该配置类中 配置①自定义用户认证(UserDetailsService) 和 ②用户授权管理自定义配置(自定义用户访问控制)

    /*
     该类为 配置好了 "UserDetailsService"身份认证信息 的类 ,
     使用该类来在 configure(AuthenticationManagerBuilder auth)方法中进行 "UserDetailsService"身份认证。
     */
    @Autowired
    private UserDetailsServiceImpl userDetailsService;

      /**
   * 用户身份认证自定义配置 ( 通过UserDetailsService的方式实现 )
   *
   * 重写configure(AuthenticationManagerBuilder auth)方法 : 自定义用户认证
   */
  @Override
  protected void configure(AuthenticationManagerBuilder auth) throws Exception {
      //密码需要设置编码器 ( 添加"密码编辑器")
      BCryptPasswordEncoder encoder = new BCryptPasswordEncoder();
      //使用UserDetailService进行"身份认证"
      auth.userDetailsService(userDetailsService)
              //设置"密码编辑器"
              .passwordEncoder(encoder);
  }

        /**
 * 用户授权管理自定义配置 ( 自定义用户访问控制 )
 *
 * 重写configure(HttpSecurity http)方法 : 自定义用户访问控制 ( 权限管理 )
 */
@Override
protected void configure(HttpSecurity http) throws Exception {
    /**
     *  .antMatchers : 开启Ant风格的路径匹配
     *  .permitAll() : 无条件对请求进行放行
     *  .antMatchers("/").permitAll() : //对/请求进行放行
     *
     *  .hasRole() : 匹配用户是否是"某一个角色"
     *  .hasAnyRole() : 匹配用户是否是"某一个角色" 或 是 "另一个角色" ( 匹配"用户"是否有参数中的"任意角色" )
     *  .antMatchers("detail/common/**").hasAnyRole("common","vip") :  表示 detail/common/** 请求只有用户角色common或用户vip才允许访问/才能访问
     *    ---( 即ROLE_common权限 和 (即ROLE_vip权限才能访问该路径 )
     *  .antMatchers("/detail/vip/**").hasRole("vip") :  表示 detail/vip/** 请求只有用户vip才允许访问/才能访问
     *
     *  .anyRequest() :    匹配任何请求
     *  .authenticated() : 匹配已经登陆认证的用户
     *  .and() //功能连接符
     *  .formLogin() : 启用Spring Security的基于"HTML表单"的 用户登录功能/用户登录页面, 同时通过该页面来进行"登录验证"
     *    ---简而言之 : 使用security提供的"默认登录"页面进行"登录验证" (如果没有指定"自定义的登录页面"的话)
     *
     */
    // 自定义用户授权管理 (自定义用户访问控制 )
    http.authorizeRequests()
            .antMatchers("/").permitAll()  //对 "/"请求 进行放行 (进入到项目首页)
            //对static文件夹下的静态资源进行统一放行 (如果没有对静态资源放行,未登录的用户访问项目首页时就无法加载页面关联的静态资源文件 )
            .antMatchers("/login/**").permitAll()
            .antMatchers("/detail/common/**").hasAnyRole("common","vip") //普通电影,则是common和vip用户都能看
            .antMatchers("/detail/vip/**").hasRole("vip")  //vip电影则是vip用户才能看
            .anyRequest()  //匹配任何请求
            .authenticated()  //匹配已经登陆认证的用户
            .and() //功能连接符
            .formLogin(); //使用security提供的"默认登录"页面进行"登录验证" (如果没有指定"自定义的登录页面"的话)

   /**
     * 自定义"用户登录控制" :
     *   .loginPage() : 自定义登录页面的"跳转路径" , 跳转到自己定制的"登录页面"
     *   .permitAll() : 无条件对请求进行放行
     *   .usernameParameter("name").passwordParameter("pwd") : 设置登录用户的"用户名参数" 和 "密码参数" (接受登录时提交的"用户名"和"密码")
     *   .defaultSuccessUrl() : 指定用户登录成功后的默认跳转地址
     *   .failureUrl() : 指定用户登录失败后的"跳转地址",默认跳转到 /login?error
     *     ---error时一个错误标识,作用是在登录失败后在登录页面进行接收判断,例如login.html示例中的${param.error},这两者必须保持一直。
     */
    //自定义"用户登录控制"
    http.formLogin()
            .loginPage("/userLogin").permitAll() //自定义登录页面的"跳转路径"
            .usernameParameter("name").passwordParameter("pwd")  //设置登录用户的"用户名参数" 和 "密码参数"
            .defaultSuccessUrl("/") //用户登录成功后默认跳转到"项目首页"
            .failureUrl("/userLogin?error"); //用户登录失败后默认跳转到"项目首页"
  }
}
⑨ 效果测试
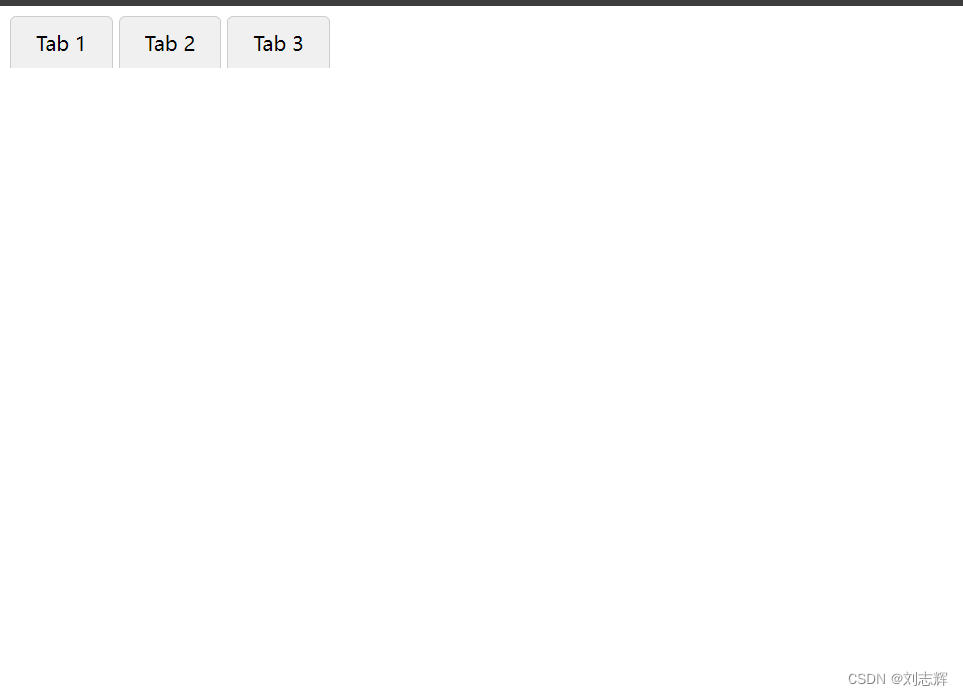
重启项目,项目 启动成功后,通过浏览器访问“http://localhost8080/”,会直接进入到 项目首页。在项目首页,单击普通电影或者 VIP 专享电影名称查询电影详情,效果如下图所示 :
此时输入错误的用户名和,会返回到了当前登录页面,此时的请求路径上已经携带了 error 错误标识,并且 登录页面也有 错误信息提示,说明自定义登录失败设置成功。