1.前端
1.1 tableHTML
      <el-table :data="userList" style="width: 100%; margin-top: 20px" border @selection-change="selectionChange">
        <el-table-column type="selection" width="50px"/>
        <el-table-column label="序号" type="index" align="center" width="50px"/>
        <el-table-column label="用户名" prop="name" align="center"/>
        <el-table-column label="昵称" prop="nick_name" align="center"/>
        <el-table-column label="邮箱" prop="email" align="center"/>
        <el-table-column label="电话" prop="phone" align="center"/>
        <el-table-column label="角色名称" prop="role" align="center">
          <template #default="scope">
            <el-tag v-for="item in scope.row.role" :key="item.id" style="margin-right: 10px">{{ item.name }}</el-tag>
          </template>
        </el-table-column>
        <el-table-column label="操作" align="center" width="200px">
          <template v-slot="scope">
            <el-button type="primary" icon="el-icon-edit" circle @click="handleEdit(scope.row)"/>
            <el-button type="success" icon="el-icon-refresh" circle @click="handleReset(scope.row)"/>
            <el-button type="danger" icon="el-icon-delete" circle @click="handleDel(scope.row)"/>
          </template>
        </el-table-column>
      </el-table>
1.2 table事件
    // table选择项变化的回调
    selectionChange(selection) {
      selection.forEach(item =>
        this.selectChecked.push(item.id)
      )
    },
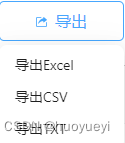
1.3 导出的按钮
      <el-button type="primary" icon="el-icon-upload2" style="margin-left: 20px" @click="handleExportUser">导出
      </el-button>
1.4 导出的api
// 导出用户
export function exportUser(params) {
  return request({
    url: '/users/export/all',
    method: 'get',
    params,
    responseType: 'blob'
  })
}
1.5 导出按钮事件
    // 导出接口
    async handleExportUser() {
      try {
        // 调用导出的接口
        const res = await exportUser({ids: this.selectChecked.join(',')})
        // 处理导出的Excel文件

        const blob = new Blob([res], {type: 'application/vnd.ms-excel;charset=utf-8'});
        const url = window.URL.createObjectURL(blob);
        const link = document.createElement('a');

        link.href = url;
        link.setAttribute('download', '用户导出表');
        document.body.appendChild(link);
        link.click();

        document.body.removeChild(link);
        window.URL.revokeObjectURL(url);
      } catch (error) {
        console.error(error)
      }
    },
2. 后端
@user_router.get('/export/all', summary='导出用户')
async def user_export(ids: str = Query(None)):
    if ids:
        products = await User.filter(id__in=eval(ids)).all().values()
    else:
        products = await User.all().values()
    wb = Workbook()
    ws = wb.active

    ws.sheet_properties.tabColor = "1072BA"
    # 设置表头样式
    header = ws.cell(row=1, column=1)
    header.value = '用户表'
    header.alignment = Alignment(horizontal='center', vertical='center')
    header.font = Font(bold=True, color='FF0000')
    ws.merge_cells(start_row=1, start_column=1, end_row=1, end_column=3)

    # 设置列宽
    ws.column_dimensions['A'].width = 20  # 设置第一列的宽度为20
    ws.column_dimensions['C'].width = 20  # 设置第一列的宽度为20
    # 设置列宽
    ws.row_dimensions[1].height = 50  # 设置第一行的高度为20

    # 写入数据
    ws.append(["姓名", "昵称", "手机号码"])
    for product in products:
        ws.append([product["name"], product["nick_name"], product["phone"]])

    # 添加边框
    for row in ws.iter_rows(min_row=1, max_row=ws.max_row, min_col=1, max_col=3):
        for cell in row:
            cell.border = Border(left=Side(style='thin'), right=Side(style='thin'), top=Side(style='thin'),
                                 bottom=Side(style='thin'))

    # 遍历所有列,设置列的对其方式
    for col in ws.columns:
        for cell in col:
            # 设置单元格的对齐方式
            cell.style = 'Pandas'
            cell.alignment = Alignment(horizontal='center', vertical='center')

    # 遍历所有行,包括空行,从第二行开始,因为第一行是标题
    for row_idx in range(2, ws.max_row + 1):
        # 设置行高
        ws.row_dimensions[row_idx].height = 30  # 设置行高为50

    file_path = "products.xlsx"
    wb.save(file_path)
    return FileResponse(file_path, filename="products.xlsx",
                        media_type="application/vnd.openxmlformats-officedocument.spreadsheetml.sheet")

