1.概述
在Android中,在处理UI中的各种元素的时候,两个程序中的要点为:
得到布局文件(XML)中的控件句柄
设置控件的行为
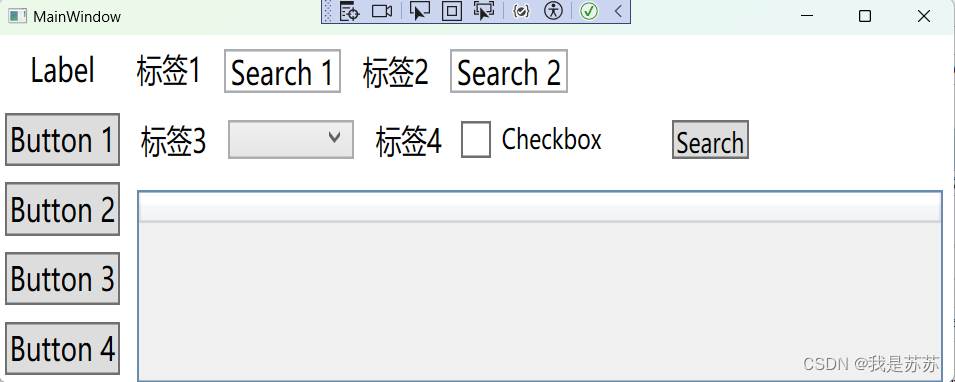
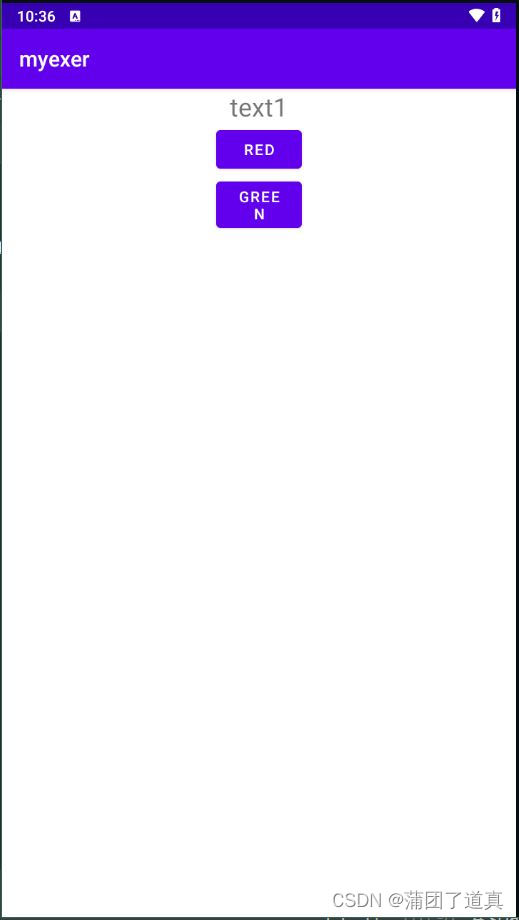
本篇文章将介绍在 Android 中几种基本的程序控制方法,要获得的效果是通过 2 个按钮来控制一个文本框的背景颜色,其运行结果如图所示:
2.目录
目录
3.事件响应方法
本例构建一个应用程序,其在 AndroidManifest.xml 描述文件中的内容如下所示:
<?xml version="1.0" encoding="utf-8"?>
<manifest xmlns:android="http://schemas.android.com/apk/res/android">

    <application
        android:allowBackup="true"
        android:icon="@mipmap/ic_launcher"
        android:label="@string/app_name"
        android:supportsRtl="true"
        android:theme="@style/Theme.Noback">
        <activity
            android:name=".MainActivity"
            android:exported="true">
            <intent-filter>
                <action android:name="android.intent.action.MAIN" />

                <category android:name="android.intent.category.LAUNCHER" />
            </intent-filter>
        </activity>
    </application>

</manifest>
本例定义了一个 Android 中基本的活动,布局文件(layout)的代码片段如下所示:
<LinearLayout xmlns:android="http://schemas.android.com/apk/res/android"
    android:id="@+id/screen"
    android:layout_width="fill_parent"
    android:layout_height="fill_parent"
    android:orientation="vertical">
    <TextView android:id="@+id/text1"
        android:layout_width="wrap_content"
        android:layout_height="wrap_content"
        android:layout_gravity="center"
        android:textSize="24sp"
        android:text="@string/text1" />
    <Button android:id="@+id/button1"
        android:layout_width="80sp"
        android:layout_height="wrap_content"
        android:layout_gravity="center"
        android:text="@string/red"/>
    <Button android:id="@+id/button2"
        android:layout_width="80sp"
        android:layout_height="wrap_content"
        android:layout_gravity="center"
        android:text="@string/green"/>
</LinearLayout>
根据以上的布局文件中定义的两个按钮和一个文本框,这个布局文件被活动设置为 View 后,显示的内容就如上图所示,只是行为还没有实现。行为将在源代码文件 MainActivity.java 中实现,这部分的代码如下所示:
package xyz.dritrtj.myexer;

import androidx.appcompat.app.AppCompatActivity;

import android.graphics.Color;
import android.os.Bundle;
import android.view.View;
import android.widget.Button;
import android.widget.TextView;

public class MainActivity extends AppCompatActivity {
    private static final String TAG = "TestEvent1";
    @Override
    protected void onCreate(Bundle savedInstanceState) {
        super.onCreate(savedInstanceState);
        setContentView(R.layout.activity_main);
        final TextView Text = findViewById(R.id.text1); // 获得句柄
        final Button Button1 = findViewById(R.id.button1);
        final Button Button2 = findViewById(R.id.button2);
        Button1.setOnClickListener(new View.OnClickListener() { // 实现行为功能
            public void onClick(View v) {
                Text.setBackgroundColor(Color.RED);
            }
        });
        Button2.setOnClickListener(new View.OnClickListener() {
            public void onClick(View v) {
                Text.setBackgroundColor(Color.GREEN);
            }
        });
    }
}
在创建的过程中,通过 findViewById 获得各个屏幕上面的控件(控件)的背景,这里使用的 R.id.button1 等和布局文件中各个元素的 id 是对应的。实际上,在布局文件中,各个控件即使不写 android:id 这一项也可以正常显示,但是如果需要在代码中进行控制,则必须设置这一项。
根 据 Button 控件的 setOnClickListener() 设置了其中的点击行为,这个方法的参数实际上是一个View.OnClickListener 类型的接口,这个接口需要被实现才能够使用,因此在本例的设置中,实现了其中的 onClick()函数。这样既可实现点击的时候实现相应的功能,在点击的函数中,将通过 Text 的句柄对其进行控制。
在 Android 的控件使用方面,这两个编程方面要点是:
使用 findViewById()获取布局文件(XML)中控件的句柄;
使用 setOnXXXListener()设置事件处理函数。
SetOnXXXListener()等函数是 android.view.View 类的函数,各种控件(包括 Button、EditText)都扩展这个类,同族的函数包括:
void setOnClickListener(View.OnClickListener l);
void setOnFocusChangeListener(View.OnFocusChangeListener l);
void setOnKeyListener(View.OnKeyListener l);
void setOnLongClickListener(View.OnLongClickListener l);
void setOnTouchListener(View.OnTouchListener l);
这些函数用于事件处理,它们由程序实现,通过设置这些内容也就设置了控件的行为。这些函数的参数都是所对应的 android.view.View 类中的方法。
Android 中 UI 基本控制内容:使用 findViewById()联系布局文件中控件和句柄,并通过 OnClickListener()等定制句柄的行为。
4.第二种响应方法
除了上述的使用方法,在使用同样的布局文件和应用程序的情况下,实现同样的功能。本例中使用的是另外的一种方式实现,本例使用的源代码文件如下所示:
package xyz.dritrtj.myexer;

import androidx.appcompat.app.AppCompatActivity;

import android.annotation.SuppressLint;
import android.graphics.Color;
import android.os.Bundle;
import android.util.Log;
import android.view.View;
import android.widget.Button;
import android.widget.TextView;
// 实现相关的接口
public class MainActivity extends AppCompatActivity implements View.OnClickListener {
    private static final String TAG = "TestEvent2";
    private TextView mText;
    private Button mButton1;
    private Button mButton2;
    @Override
    protected void onCreate(Bundle savedInstanceState) {
        super.onCreate(savedInstanceState);
        setContentView(R.layout.activity_main);
        mText = findViewById(R.id.text1);
        mButton1 = findViewById(R.id.button1);
        mButton1.setOnClickListener(this); // 设置监听的类
        mButton2 = findViewById(R.id.button2);
        mButton2.setOnClickListener(this); // 设置监听的类
    }

    @SuppressLint("NonConstantResourceId")
    @Override
    public void onClick(View v) {
        Log.v(TAG, "onClick()");
        switch(v.getId()){ // 区分不同的控件
            case R.id.button1:
                mText.setBackgroundColor(Color.RED);
                break;
            case R.id.button2:
                mText.setBackgroundColor(Color.GREEN);
                break;
            default:
                Log.v(TAG, "other");
                break;
        }
    }
}
这个例子的主要变化是让活动实现(implements)了 OnClickListener()这个进口,也就是需要实现其中的 onClick()方法。然后通过 setOnClickListener()将其设置到按钮中的 参数就是 this,表示了当前的活动。
通过这种方式的设置,如果程序中有多个控件需要设置,那么所设置的也都是一个函数。为了保证对不同控件具有不同的处理,可以由 onClick()函数的参数进行判断,参数是一个 View 类型,通过 getId()获得它们的 ID,使用switch…case 分别进行处理。
在本例中,通过将需要将文本框(TextView)句柄保存为类的成员(mText),这样就可以在类的各个函数中都能获得这个句柄进行处理。这和上一种方法是有区别的,因为上一个例子实现的接口和获得的 TextView 在同一个函数中,因此不需要保存 TextView 的句柄。
5.第三种响应方法
本例介绍同样功能实现的第三种方法,区别也仅仅在于 JAVA 源代码中,实现的内容如下所示。
package xyz.dritrtj.myexer;

import androidx.appcompat.app.AppCompatActivity;

import android.annotation.SuppressLint;
import android.graphics.Color;
import android.os.Bundle;
import android.util.Log;
import android.view.View;
import android.widget.Button;
import android.widget.TextView;
// 实现相关的接口
public class MainActivity extends AppCompatActivity{
    private static final String TAG = "TestEvent3";
    private TextView mText;
    private Button1_OnClickListener mListener1 = new Button1_OnClickListener();
    private Button2_OnClickListener mListener2 = new Button2_OnClickListener();
    class Button1_OnClickListener implements View.OnClickListener { // 接口的第一个实现
        public void onClick(View v) {
            mText.setBackgroundColor(Color.RED);
        }
    }
    class Button2_OnClickListener implements View.OnClickListener { // 接口的第二个实现
        public void onClick(View v) {
            mText.setBackgroundColor(Color.GREEN);
        }
    }
    @Override
    protected void onCreate(Bundle savedInstanceState) {
        super.onCreate(savedInstanceState);
        setContentView(R.layout.activity_main);
        mText = findViewById(R.id.text1);
        final Button mButton1 = findViewById(R.id.button1);
        final Button mButton2 = findViewById(R.id.button2);
        mButton1.setOnClickListener(mListener1); // 设置监听者的类
        mButton2.setOnClickListener(mListener2); // 设置监听者的类
    }

}
本例通过定义实现活动类中的 2 个子类,来实现 View.OnClickListener 这个接口,这种方式是一种最为直接的方式,即为不同的控件单独实现它的相应类。
6.扩展
更多详情可通过下方的链接,下载电子书-------《Android Studio开发实战:从零基础到App上线》进行参考研究。
http://code.drjtrtj.xyz/downCode?id=4021