文章目录
1.数据集制作
1.1 数据集准备
- 自制数据集
- 公开数据集:极市平台

1.2 数据标注
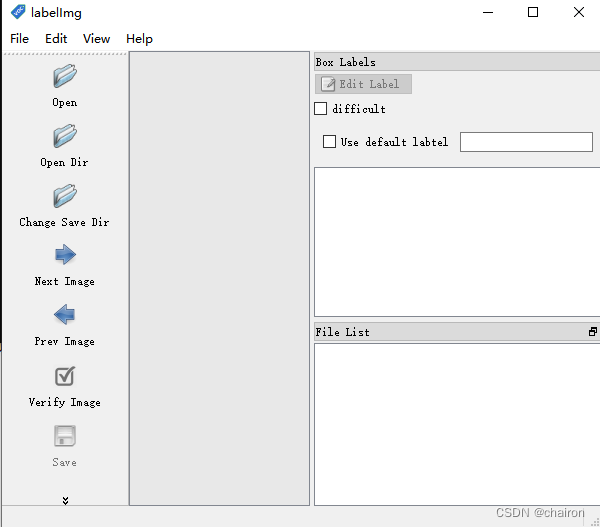
下载安装Labelimg:Labelimg
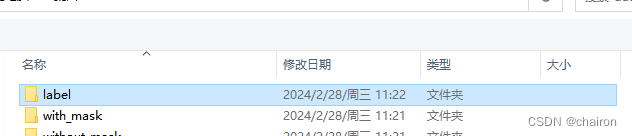
新建label文件夹保持标签
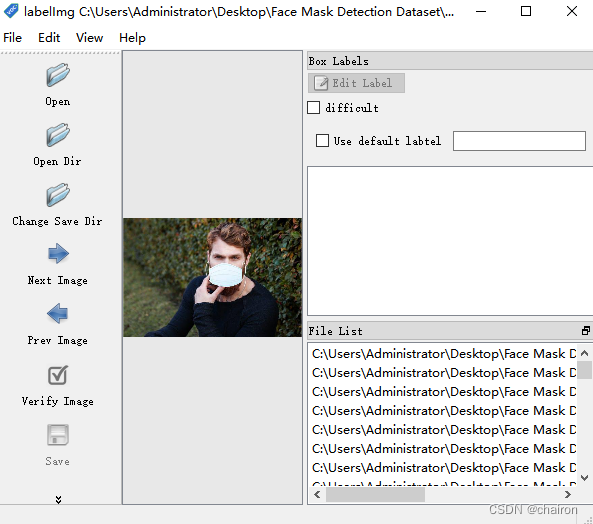
打开数据集文件进行标注
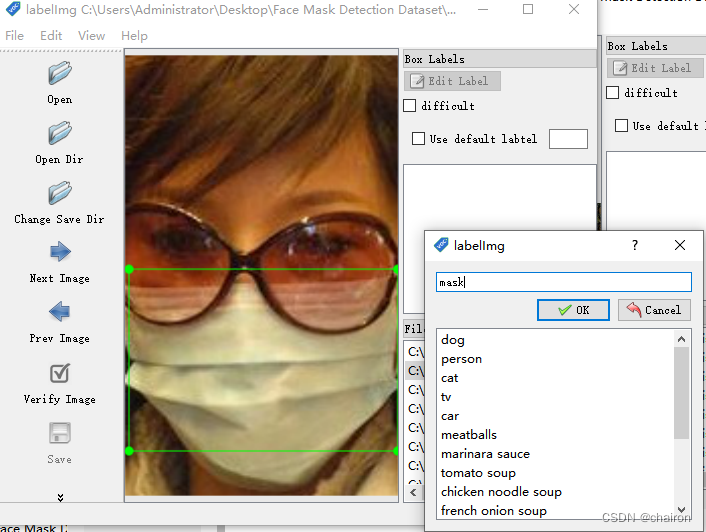
快捷键w进行标注,输入标签名,保存,继续下一张
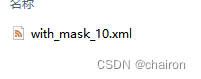
生成的标签文件为xml文件:
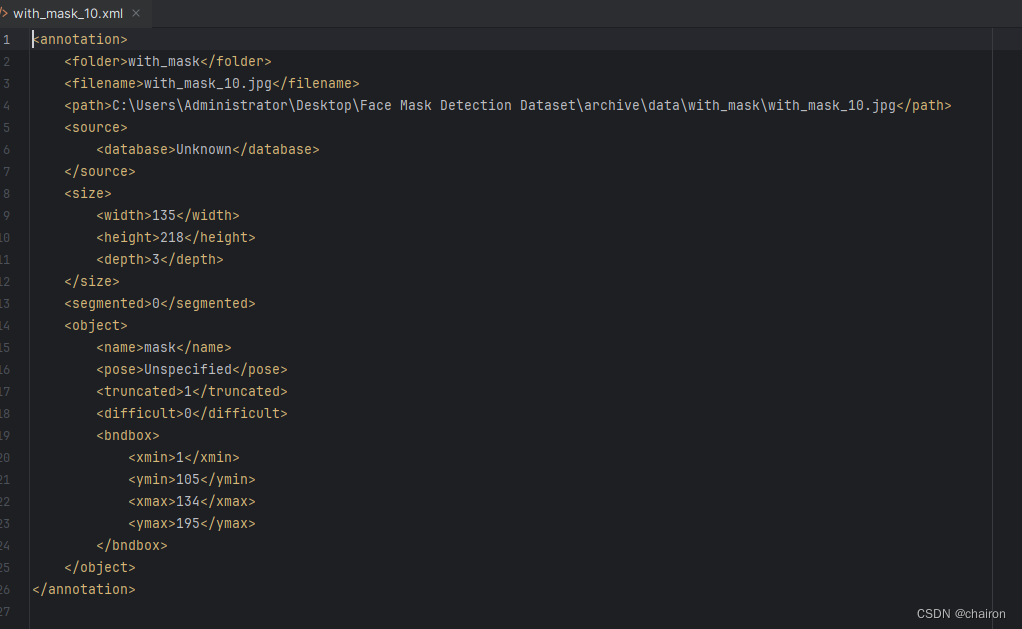
包含图片信息和标注的object信息(坐标、类别)
1.3数据集划分
将数据集划分为训练集、测试集、验证集。训练集:验证集:测试集=8:1:1
在YOLOv8代码ultralytics/目录下新建data.py文件,将数据集的data和label文件夹进行拆分:
import os
import random
import shutil

# 原数据集目录(相对目录)
root_dir = 'datasets'
# 划分比例:训练集:验证集:测试集=8:1:1
train_ratio = 0.8
valid_ratio = 0.1
test_ratio = 0.1

# 设置随机种子
random.seed(42)

# 拆分后数据集目录
split_dir = 'datasets/traffic'
os.makedirs(os.path.join(split_dir, 'train/images'), exist_ok=True)
os.makedirs(os.path.join(split_dir, 'train/labels'), exist_ok=True)
os.makedirs(os.path.join(split_dir, 'valid/images'), exist_ok=True)
os.makedirs(os.path.join(split_dir, 'valid/labels'), exist_ok=True)
os.makedirs(os.path.join(split_dir, 'test/images'), exist_ok=True)
os.makedirs(os.path.join(split_dir, 'test/labels'), exist_ok=True)

# 获取图片文件列表
image_files = os.listdir(os.path.join(root_dir, 'images'))
label_files = os.listdir(os.path.join(root_dir, 'labels'))

# 随机打乱文件列表
combined_files = list(zip(image_files, label_files))#图片、标签转化为列表
random.shuffle(combined_files)#打乱
image_files_shuffled, label_files_shuffled = zip(*combined_files)#重新获取

# 根据比例计算划分的边界索引
train_bound = int(train_ratio * len(image_files_shuffled))#图片总数*训练集比例
valid_bound = int((train_ratio + valid_ratio) * len(image_files_shuffled))

# 将图片和标签文件移动到相应的目录
for i, (image_file, label_file) in enumerate(zip(image_files_shuffled, label_files_shuffled)):
    if i < train_bound:
        shutil.copy(os.path.join(root_dir, 'images', image_file), os.path.join(split_dir, 'train/images', image_file))
        shutil.copy(os.path.join(root_dir, 'labels', label_file), os.path.join(split_dir, 'train/labels', label_file))
    elif i < valid_bound:
        shutil.copy(os.path.join(root_dir, 'images', image_file), os.path.join(split_dir, 'valid/images', image_file))
        shutil.copy(os.path.join(root_dir, 'labels', label_file), os.path.join(split_dir, 'valid/labels', label_file))
    else:
        shutil.copy(os.path.join(root_dir, 'images', image_file), os.path.join(split_dir, 'test/images', image_file))
        shutil.copy(os.path.join(root_dir, 'labels', label_file), os.path.join(split_dir, 'test/labels', label_file))
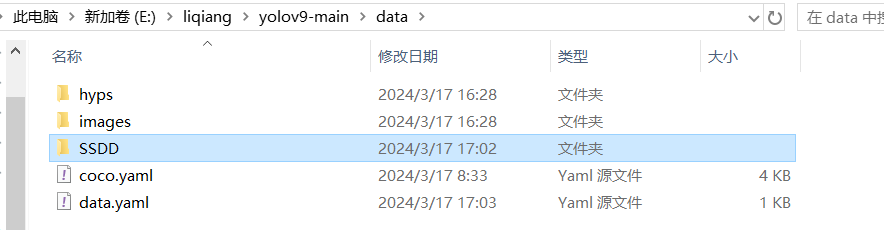
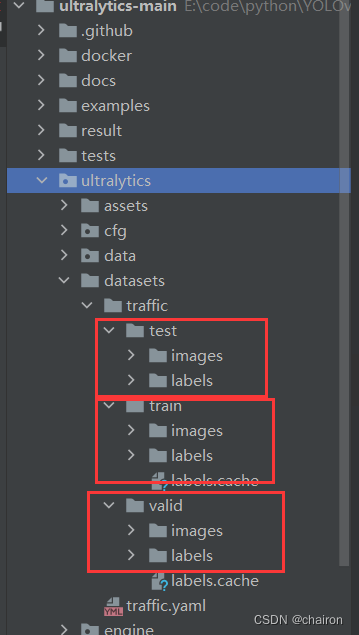
最后生成的目录文件:
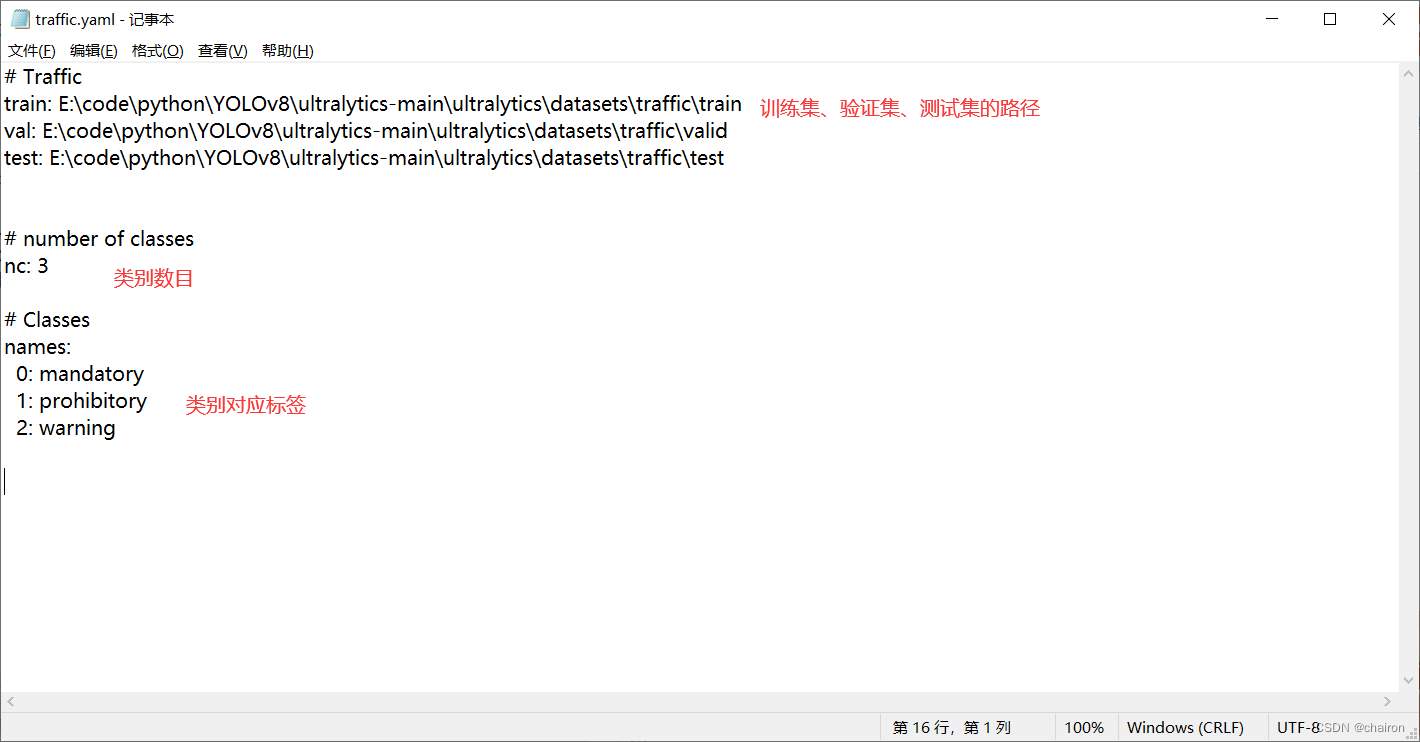
1.4 新建.yaml文件
在ultralytics/datasets/下新建xx.yaml文件。
2.网络训练
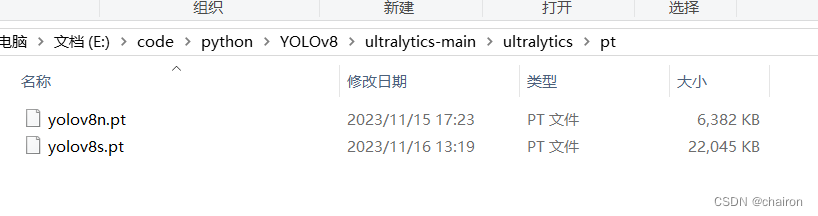
- 新建文件夹,放置下载的yolov8权重文件。下载链接

2.直接训练:
- 修改后的参数需要在ultralytics/cfg/default.yaml里更新,这个文件里保存了我们模型训练的所有超参数。
- 可以直接通过YOLO 命令来进行训练。
- 参数必须以 arg=val 对,用等号分割 = 符号,每对之间用空格分隔。不要使用 – 参数 , 参数之间。
yolo predict model=yolov8n.pt imgsz=640 conf=0.25
# Ultralytics YOLO 🚀, AGPL-3.0 license
# Default training settings and hyperparameters for medium-augmentation COCO training

task: detect  # (str) YOLO task, i.e. detect, segment, classify, pose
mode: train  # (str) YOLO mode, i.e. train, val, predict, export, track, benchmark

# Train settings -------------------------------------------------------------------------------------------------------
model: cfg/models/v8/yolov8n.yaml # (str, optional) path to model file, i.e. yolov8n.pt, yolov8n.yaml
data: datasets/traffic.yaml # (str, optional) path to data file, i.e. coco128.yaml
epochs: 200  # (int) number of epochs to train for
patience: 50  # (int) epochs to wait for no observable improvement for early stopping of training
batch: 4  # (int) number of images per batch
imgsz: 640  # (int | list) input images size as int for train and val modes, or list[w,h] for predict and export modes
save: True  # (bool) save train checkpoints and predict results
save_period: -1 # (int) Save checkpoint every x epochs (disabled if < 1)
cache: False  # (bool) True/ram, disk or False. Use cache for data loading
device: 0 # (int | str | list, optional) device to run on, i.e. cuda device=0 or device=0,1,2,3 or device=cpu
workers: 2 #8  # (int) number of worker threads for data loading (per RANK if DDP)
project:  # (str, optional) project name
name:  # (str, optional) experiment name, results saved to 'project/name' directory
exist_ok: False  # (bool) whether to overwrite existing experiment
pretrained: False  # (bool | str) whether to use a pretrained model (bool) or a model to load weights from (str)
optimizer: auto  # (str) optimizer to use, choices=[SGD, Adam, Adamax, AdamW, NAdam, RAdam, RMSProp, auto]
verbose: True  # (bool) whether to print verbose output
seed: 0  # (int) random seed for reproducibility
deterministic: True  # (bool) whether to enable deterministic mode
single_cls: False  # (bool) train multi-class data as single-class
rect: False  # (bool) rectangular training if mode='train' or rectangular validation if mode='val'
cos_lr: False  # (bool) use cosine learning rate scheduler
close_mosaic: 10  # (int) disable mosaic augmentation for final epochs (0 to disable)
resume: True  # (bool) resume training from last checkpoint
amp: False  # (bool) Automatic Mixed Precision (AMP) training, choices=[True, False], True runs AMP check
fraction: 1.0  # (float) dataset fraction to train on (default is 1.0, all images in train set)
profile: False  # (bool) profile ONNX and TensorRT speeds during training for loggers
freeze: None  # (int | list, optional) freeze first n layers, or freeze list of layer indices during training
# Segmentation
overlap_mask: True  # (bool) masks should overlap during training (segment train only)
mask_ratio: 4  # (int) mask downsample ratio (segment train only)
# Classification
dropout: 0.0  # (float) use dropout regularization (classify train only)

# Val/Test settings ----------------------------------------------------------------------------------------------------
val: True  # (bool) validate/test during training
split: val  # (str) dataset split to use for validation, i.e. 'val', 'test' or 'train'
save_json: False  # (bool) save results to JSON file
save_hybrid: False  # (bool) save hybrid version of labels (labels + additional predictions)
conf:  # (float, optional) object confidence threshold for detection (default 0.25 predict, 0.001 val)
iou: 0.7  # (float) intersection over union (IoU) threshold for NMS
max_det: 300  # (int) maximum number of detections per image
half: False  # (bool) use half precision (FP16)
dnn: False  # (bool) use OpenCV DNN for ONNX inference
plots: True  # (bool) save plots during train/val

# Prediction settings --------------------------------------------------------------------------------------------------
source: datasets/traffic/test/images/  # (str, optional) source directory for images or videos
show: False  # (bool) show results if possible
save_txt: False  # (bool) save results as .txt file
save_conf: False  # (bool) save results with confidence scores
save_crop: False  # (bool) save cropped images with results
show_labels: True  # (bool) show object labels in plots
show_conf: True  # (bool) show object confidence scores in plots
vid_stride: 1  # (int) video frame-rate stride
stream_buffer: False  # (bool) buffer all streaming frames (True) or return the most recent frame (False)
line_width:   # (int, optional) line width of the bounding boxes, auto if missing
visualize: False  # (bool) visualize model features
augment: False  # (bool) apply image augmentation to prediction sources
agnostic_nms: False  # (bool) class-agnostic NMS
classes:  # (int | list[int], optional) filter results by class, i.e. classes=0, or classes=[0,2,3]
retina_masks: False  # (bool) use high-resolution segmentation masks
boxes: True  # (bool) Show boxes in segmentation predictions

# Export settings ------------------------------------------------------------------------------------------------------
format: torchscript  # (str) format to export to, choices at https://docs.ultralytics.com/modes/export/#export-formats
keras: False  # (bool) use Kera=s
optimize: False  # (bool) TorchScript: optimize for mobile
int8: False  # (bool) CoreML/TF INT8 quantization
dynamic: False  # (bool) ONNX/TF/TensorRT: dynamic axes
simplify: False  # (bool) ONNX: simplify model
opset:  # (int, optional) ONNX: opset version
workspace: 4  # (int) TensorRT: workspace size (GB)
nms: False  # (bool) CoreML: add NMS

# Hyperparameters ------------------------------------------------------------------------------------------------------
lr0: 0.01  # (float) initial learning rate (i.e. SGD=1E-2, Adam=1E-3)
lrf: 0.01  # (float) final learning rate (lr0 * lrf)
momentum: 0.937  # (float) SGD momentum/Adam beta1
weight_decay: 0.0005  # (float) optimizer weight decay 5e-4
warmup_epochs: 3.0  # (float) warmup epochs (fractions ok)
warmup_momentum: 0.8  # (float) warmup initial momentum
warmup_bias_lr: 0.1  # (float) warmup initial bias lr
box: 7.5  # (float) box loss gain
cls: 0.5  # (float) cls loss gain (scale with pixels)
dfl: 1.5  # (float) dfl loss gain
pose: 12.0  # (float) pose loss gain
kobj: 1.0  # (float) keypoint obj loss gain
label_smoothing: 0.0  # (float) label smoothing (fraction)
nbs: 64  # (int) nominal batch size
hsv_h: 0.015  # (float) image HSV-Hue augmentation (fraction)
hsv_s: 0.7  # (float) image HSV-Saturation augmentation (fraction)
hsv_v: 0.4  # (float) image HSV-Value augmentation (fraction)
degrees: 0.0  # (float) image rotation (+/- deg)
translate: 0.1  # (float) image translation (+/- fraction)
scale: 0.5  # (float) image scale (+/- gain)
shear: 0.0  # (float) image shear (+/- deg)
perspective: 0.0  # (float) image perspective (+/- fraction), range 0-0.001
flipud: 0.0  # (float) image flip up-down (probability)
fliplr: 0.5  # (float) image flip left-right (probability)
mosaic: 1.0  # (float) image mosaic (probability)
mixup: 0.0  # (float) image mixup (probability)
copy_paste: 0.0  # (float) segment copy-paste (probability)

# Custom config.yaml ---------------------------------------------------------------------------------------------------
cfg:  # (str, optional) for overriding defaults.yaml

# Tracker settings ------------------------------------------------------------------------------------------------------
tracker: botsort.yaml  # (str) tracker type, choices=[botsort.yaml, bytetrack.yaml]
- 新建yolov8.py进行训练。
- 在代码根目录新建yolov8.py,直接在代码里重写参数,会默认覆盖ultralytics/cfg/default.yaml里面的参数。
- 推荐这种方式,这样可以对网络结构进行修改。
from ultralytics import YOLO

if __name__ == '__main__':
    # 直接使用预训练模型创建模型.
    # model = YOLO('yolov8n.pt')
    # model.train(**{'cfg': 'ultralytics/cfg/exp1.yaml', 'data': 'dataset/data.yaml'})

    # 使用yaml配置文件来创建模型,并导入预训练权重.
    model = YOLO('ultralytics/cfg/models/v8/yolov8n-CoordConv.yaml')
    model.train(cfg="ultralytics/cfg/default.yaml",data="ultralytics/datasets/traffic.yaml",
                epochs=200,batch=2,workers=2)

    # # 模型验证
    # model = YOLO('runs/detect/yolov8n_exp/weights/best.pt')
    # model.val(**{'data': 'dataset/data.yaml'})
    #
    # # 模型推理
    # model = YOLO('runs/detect/yolov8n_exp/weights/best.pt')
    # model.predict(source='dataset/images/test', **{'save': True})
3.模型修改
- 将想要用的卷积或者模块代码复制粘贴到
ultralytics/nn/modules/conv.py或者ultralytics/nn/modules/block.py。比如说新加一个CoordConv
###################################################
class AddCoords(nn.Module):
    def __init__(self, with_r=False):
        super().__init__()
        self.with_r = with_r

    def forward(self, input_tensor):
        """
        Args:
            input_tensor: shape(batch, channel, x_dim, y_dim)
        """
        batch_size, _, x_dim, y_dim = input_tensor.size()

        xx_channel = torch.arange(x_dim).repeat(1, y_dim, 1)
        yy_channel = torch.arange(y_dim).repeat(1, x_dim, 1).transpose(1, 2)

        xx_channel = xx_channel.float() / (x_dim - 1)
        yy_channel = yy_channel.float() / (y_dim - 1)

        xx_channel = xx_channel * 2 - 1
        yy_channel = yy_channel * 2 - 1

        xx_channel = xx_channel.repeat(batch_size, 1, 1, 1).transpose(2, 3)
        yy_channel = yy_channel.repeat(batch_size, 1, 1, 1).transpose(2, 3)

        ret = torch.cat([
            input_tensor,
            xx_channel.type_as(input_tensor),
            yy_channel.type_as(input_tensor)], dim=1)

        if self.with_r:
            rr = torch.sqrt(torch.pow(xx_channel.type_as(input_tensor) - 0.5, 2) + torch.pow(yy_channel.type_as(input_tensor) - 0.5, 2))
            ret = torch.cat([ret, rr], dim=1)

        return ret

class CoordConv(nn.Module):
    def __init__(self, in_channels, out_channels, kernel_size=1, stride=1, with_r=False):
        super().__init__()
        self.addcoords = AddCoords(with_r=with_r)
        in_channels += 2
        if with_r:
            in_channels += 1
        self.conv = Conv(in_channels, out_channels, k=kernel_size, s=stride)

    def forward(self, x):
        x = self.addcoords(x)
        x = self.conv(x)
        return x
    ########################################################
- 然后在
ultralytics/nn/tasks.py:将新模块加进去。
 if m in (Classify, Conv, ConvTranspose, GhostConv,RepConv,DeformConv2d,CoordConv, Bottleneck, GhostBottleneck, SPP, SPPF, DWConv, Focus,
                 BottleneckCSP, C1, C2, C2f, C3, C3TR, C3Ghost, nn.ConvTranspose2d, DWConvTranspose2d, C3x, RepC3):
            c1, c2 = ch[f], args[0]
            if c2 != nc:  # if c2 not equal to number of classes (i.e. for Classify() output)
                c2 = make_divisible(min(c2, max_channels) * width, 8)

            args = [c1, c2, *args[1:]]
            if m in (BottleneckCSP, C1, C2, C2f, C3, C3TR, C3Ghost, C3x, RepC3):
                args.insert(2, n)  # number of repeats
                n = 1

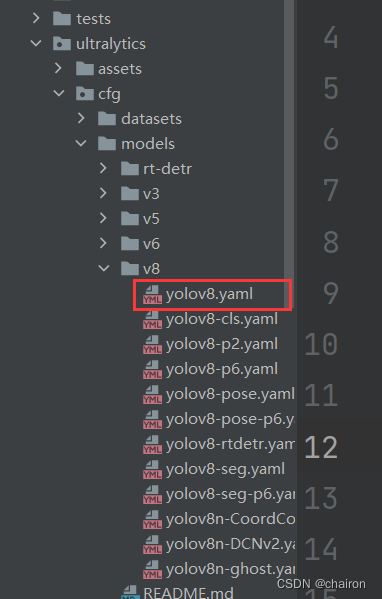
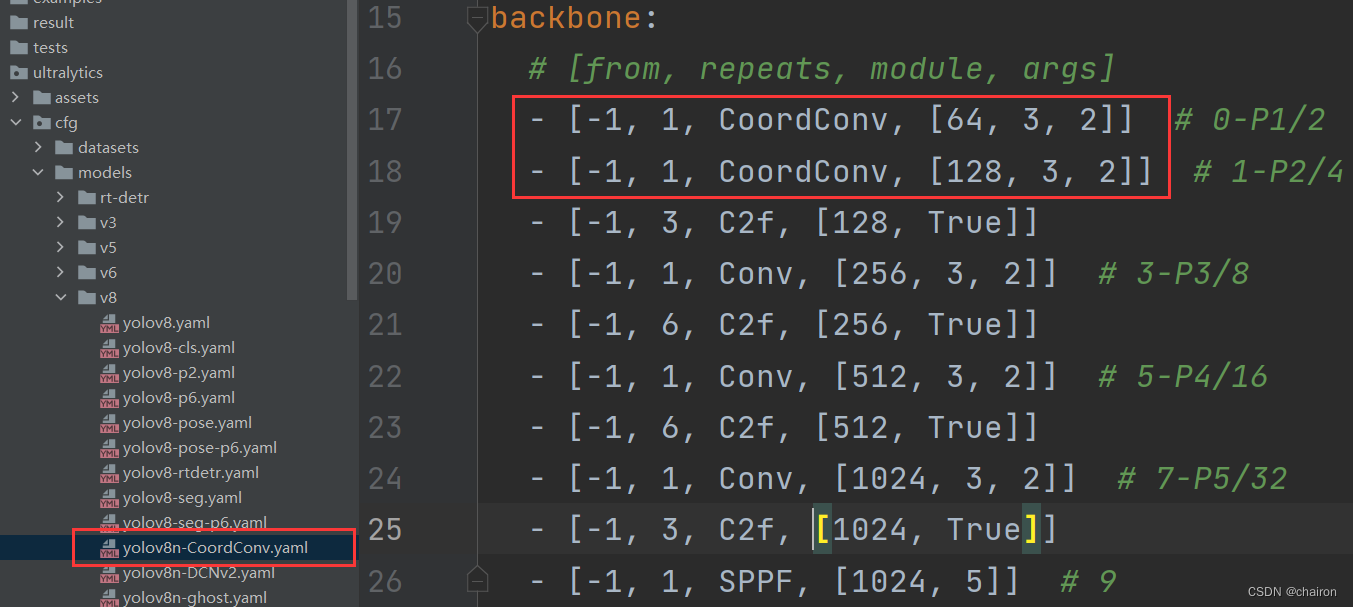
3. 在ultralytics/cfg/models/v8/yolov8.yaml保存着模型的网络结构,我们可以复制该yaml文件,重命名为yolov8n-CoordConv.yaml,可以在这使用CoorConv对卷积块进行替换。
4. 在yolov8.py文件里修改模型的yaml文件
    # 使用yaml配置文件来创建模型,并导入预训练权重.
    model = YOLO('ultralytics/cfg/models/v8/yolov8n-CoordConv.yaml')
    model.train(cfg="ultralytics/cfg/default.yaml",data="ultralytics/datasets/traffic.yaml",
                epochs=200,batch=2,workers=2)
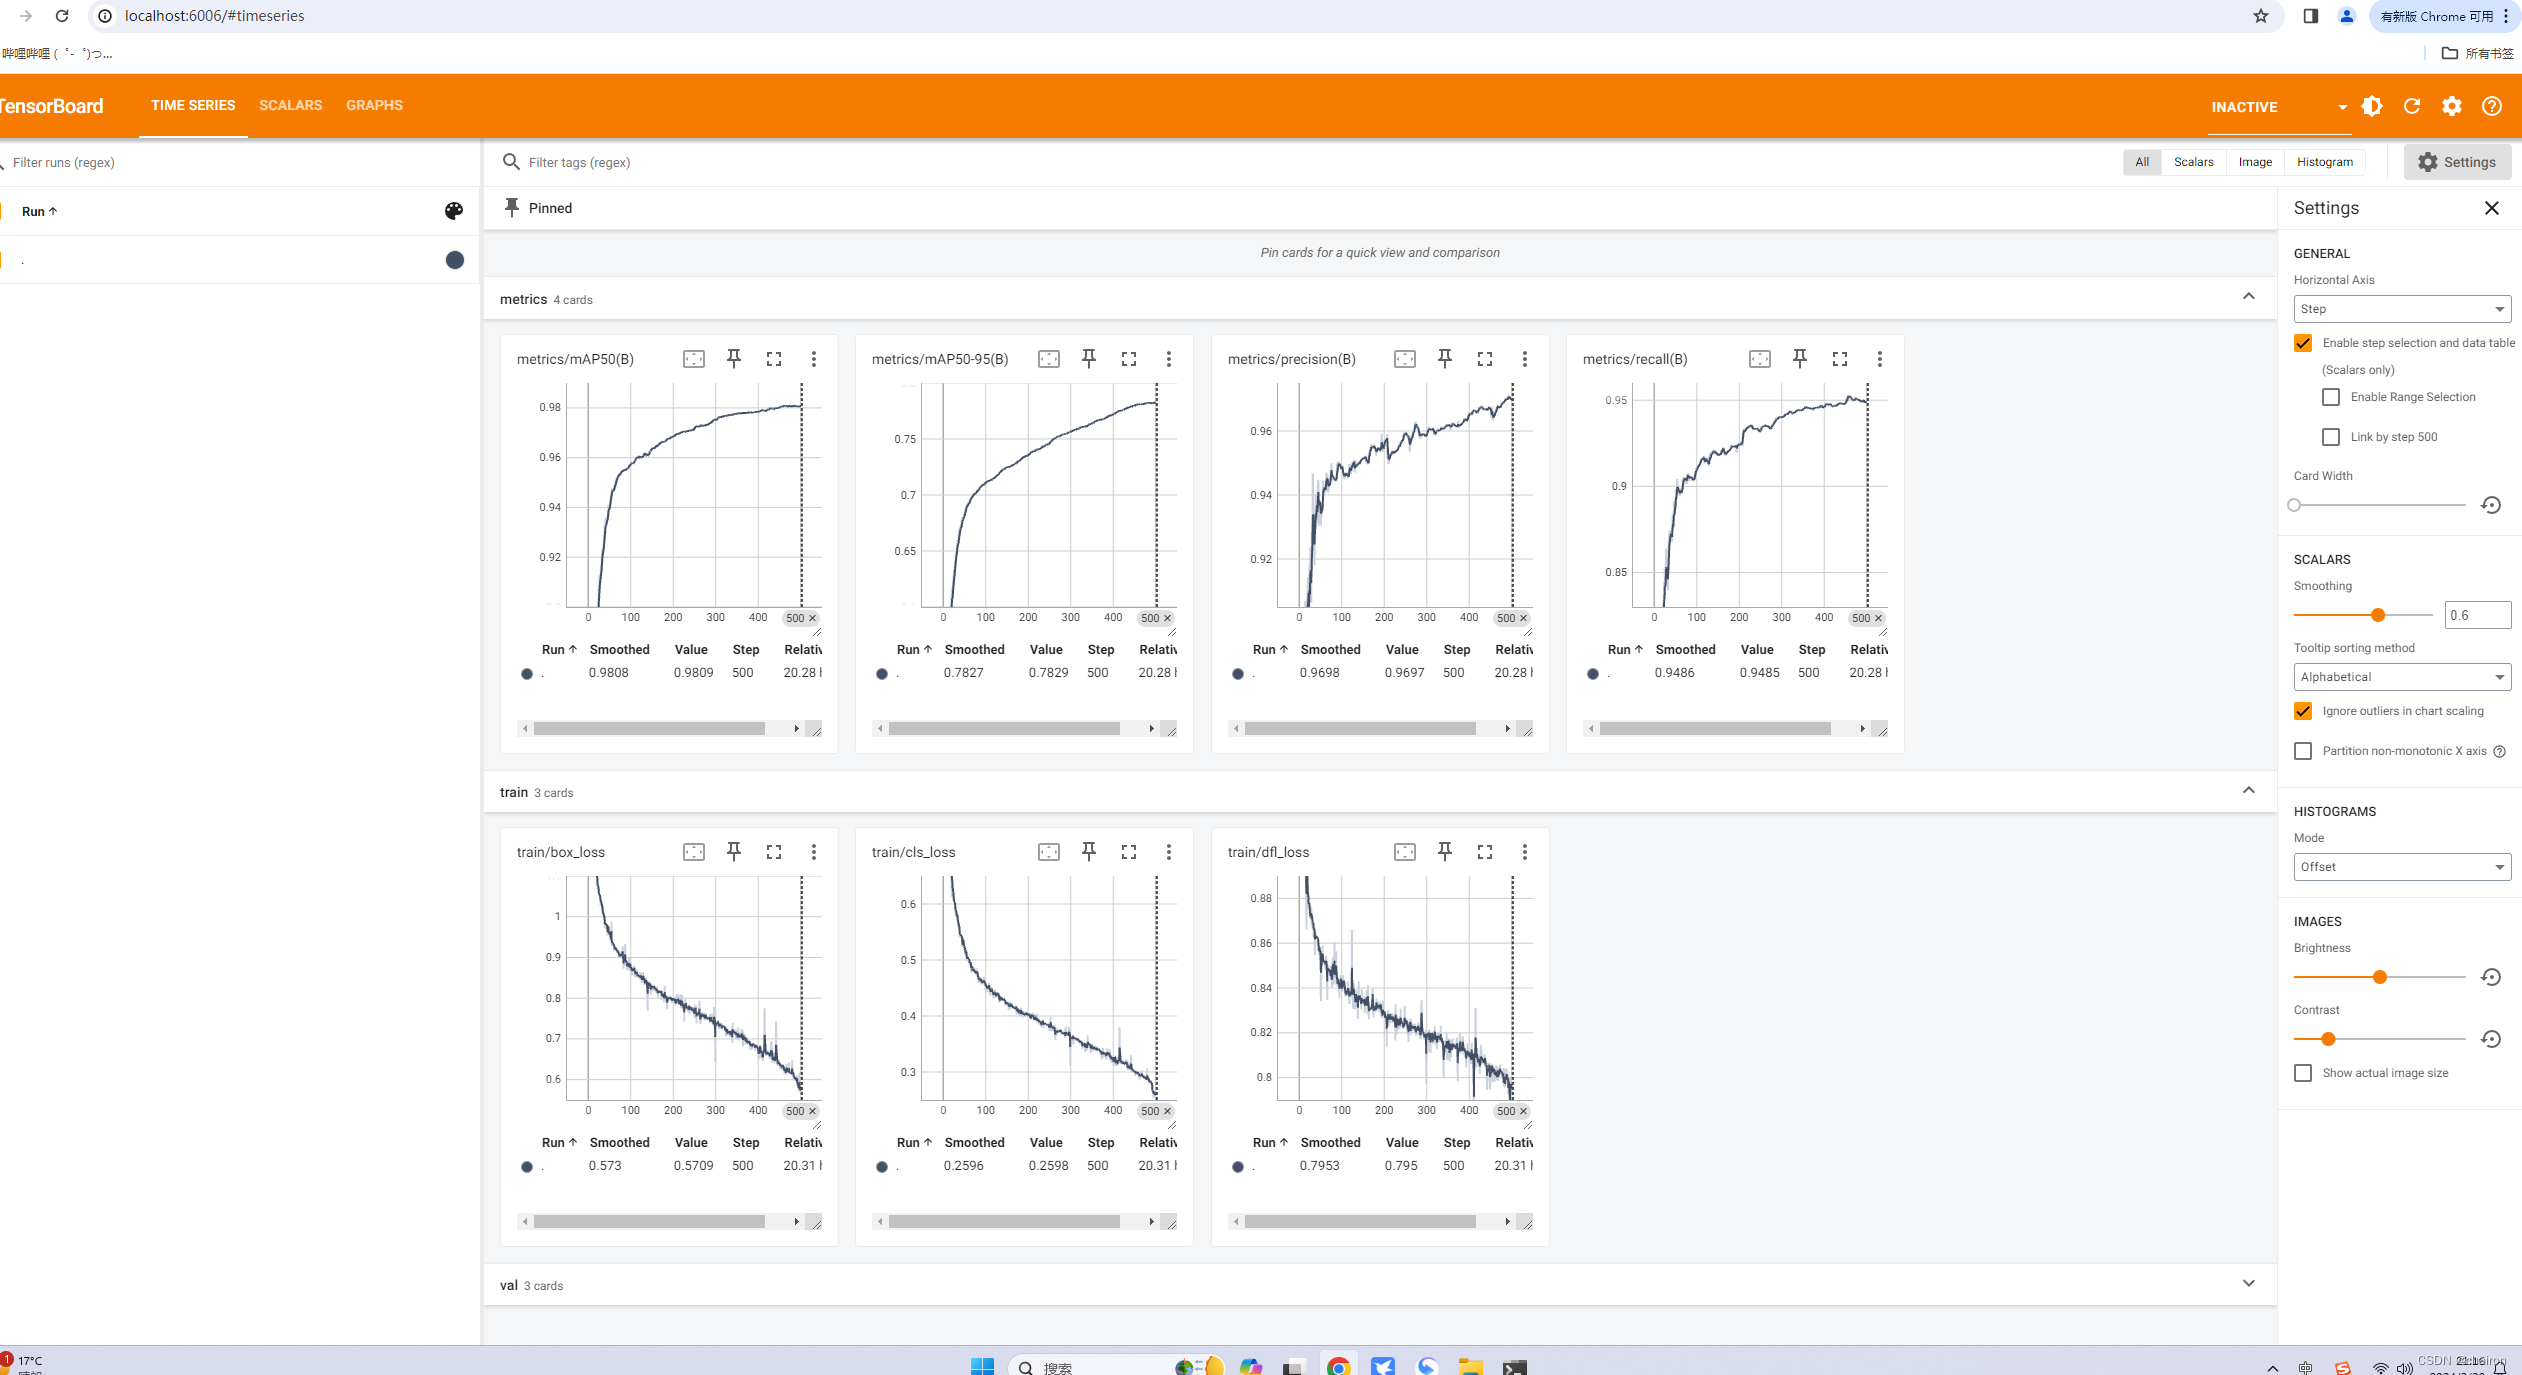
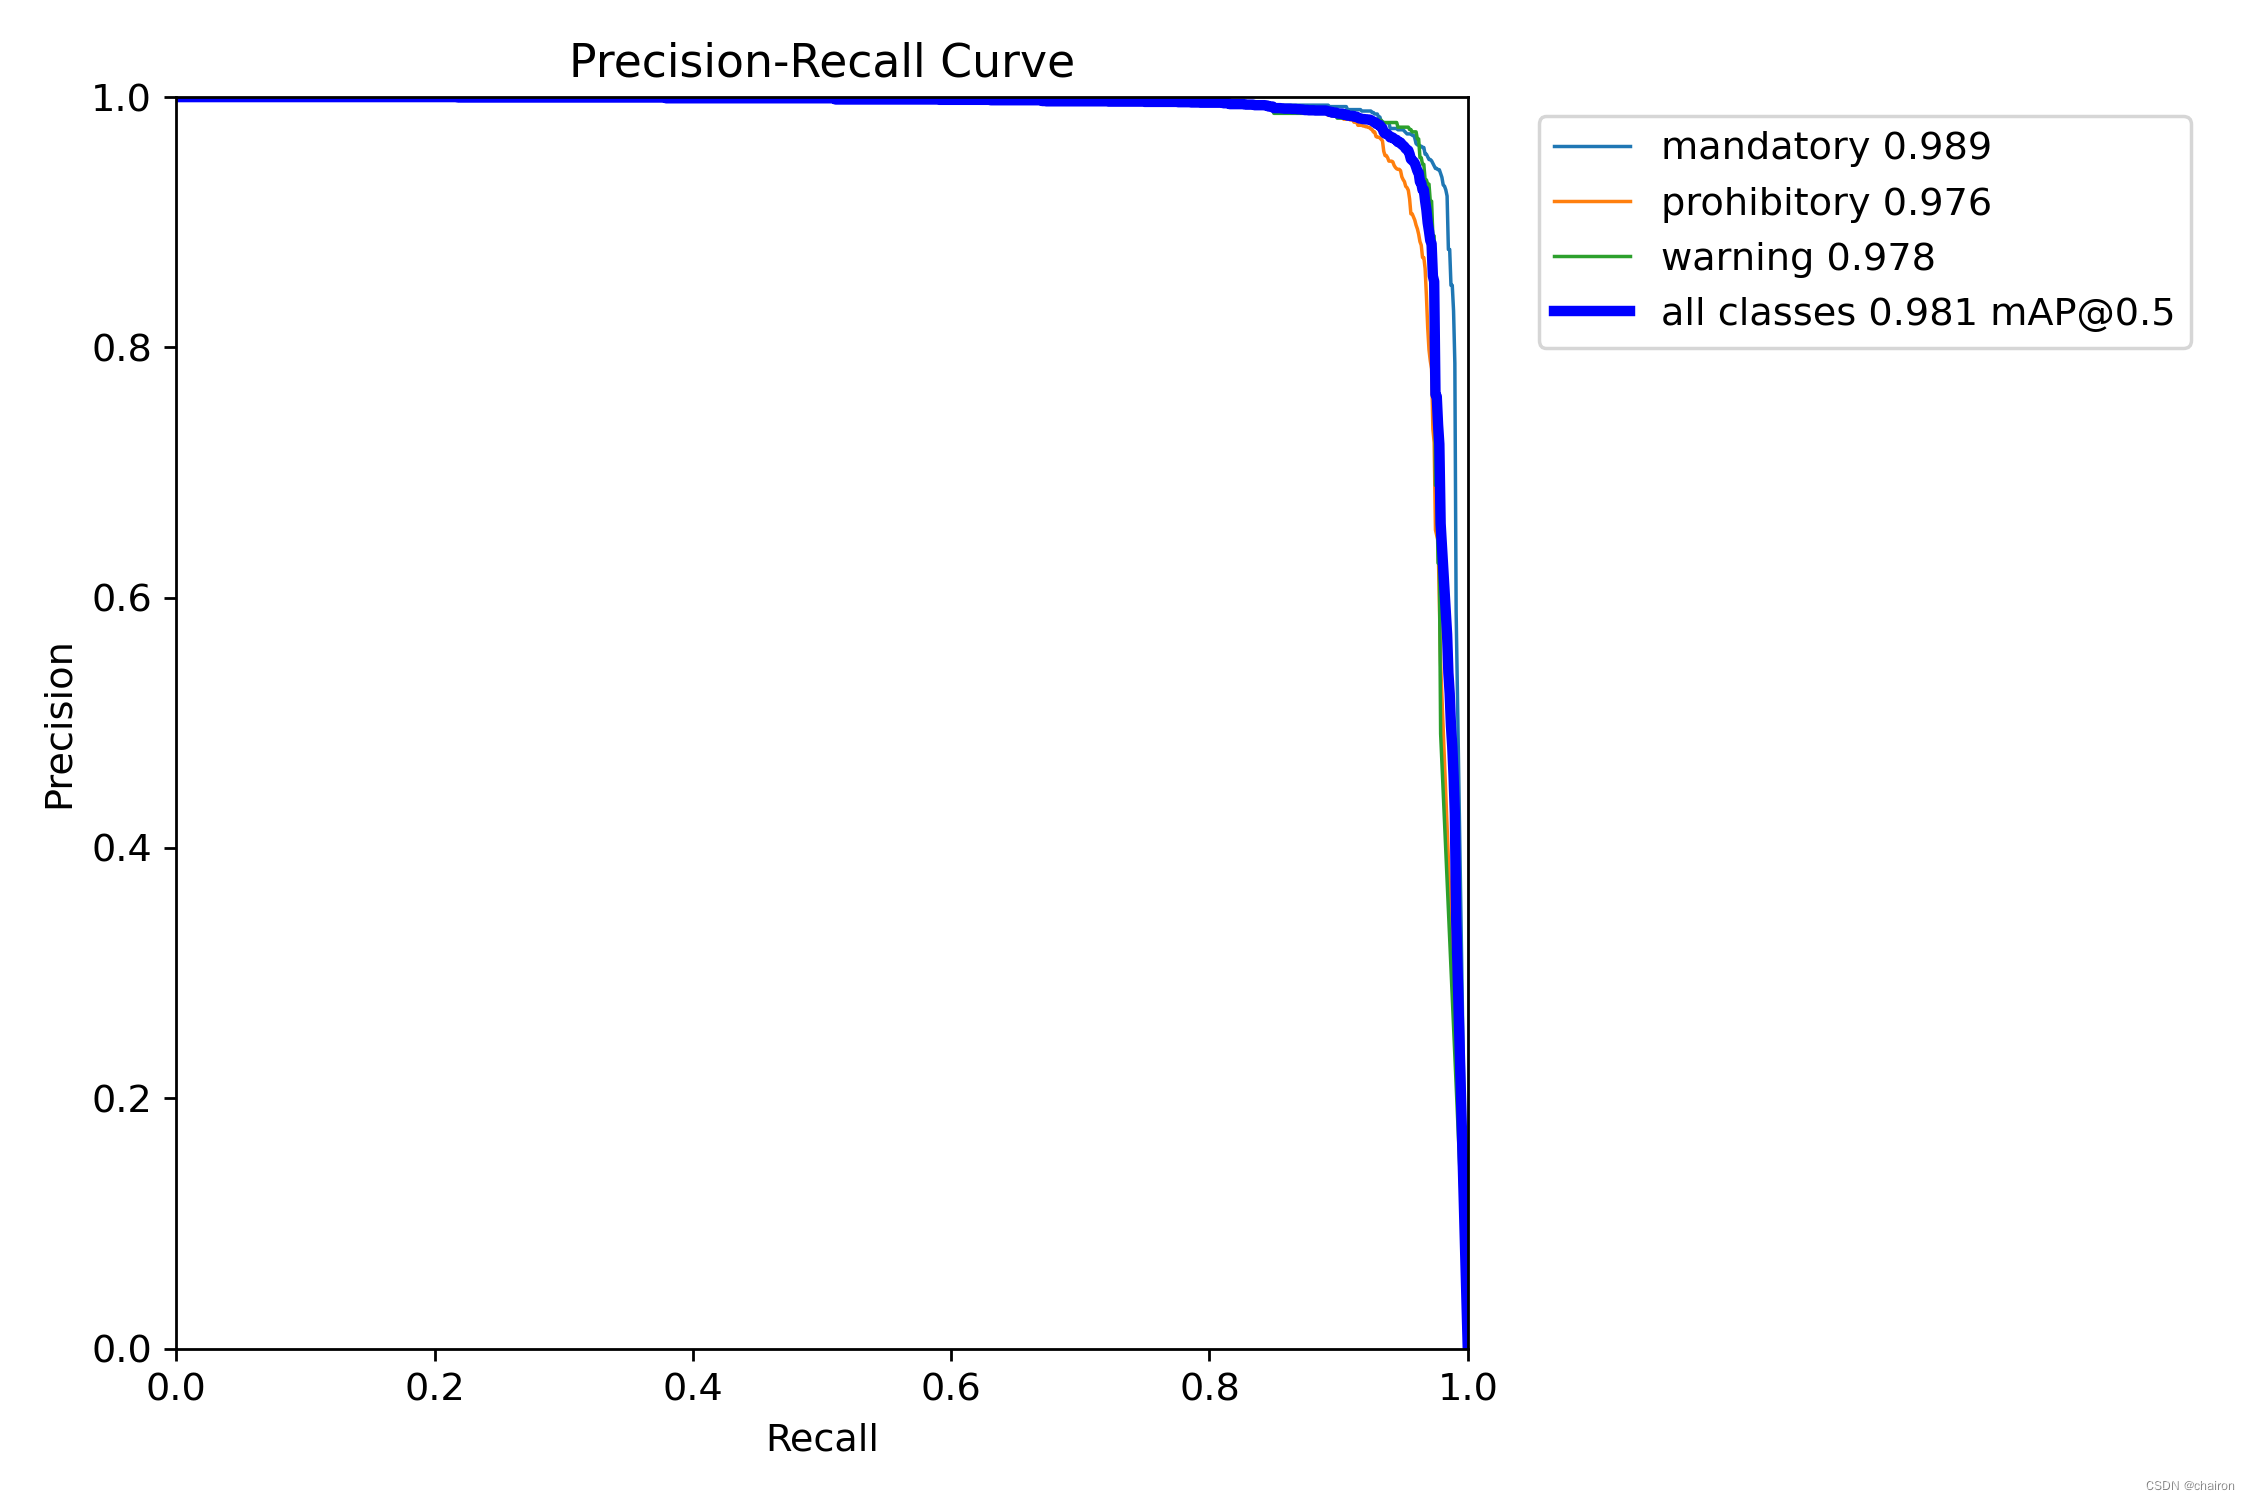
训练结果
tensorboard
- 查看训练命令:
tensorboard --logdir=E:\python\YOLOv8\ultralytics-main\runs\detect\yolov8n_GSConv - tensorboard记录了很多训练曲线,可以直接下载图片,也可以导出数据为csv格式,自己通过python绘图绘制曲线(推荐)
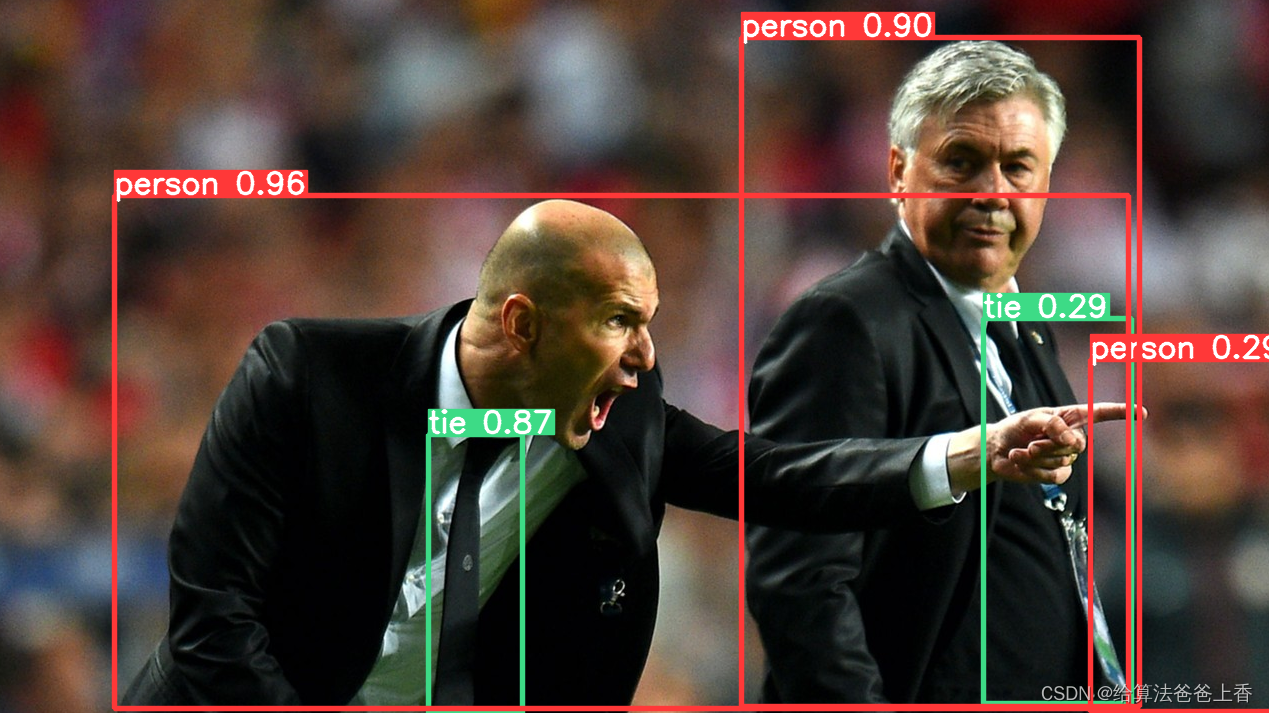
Yolov8自带结果


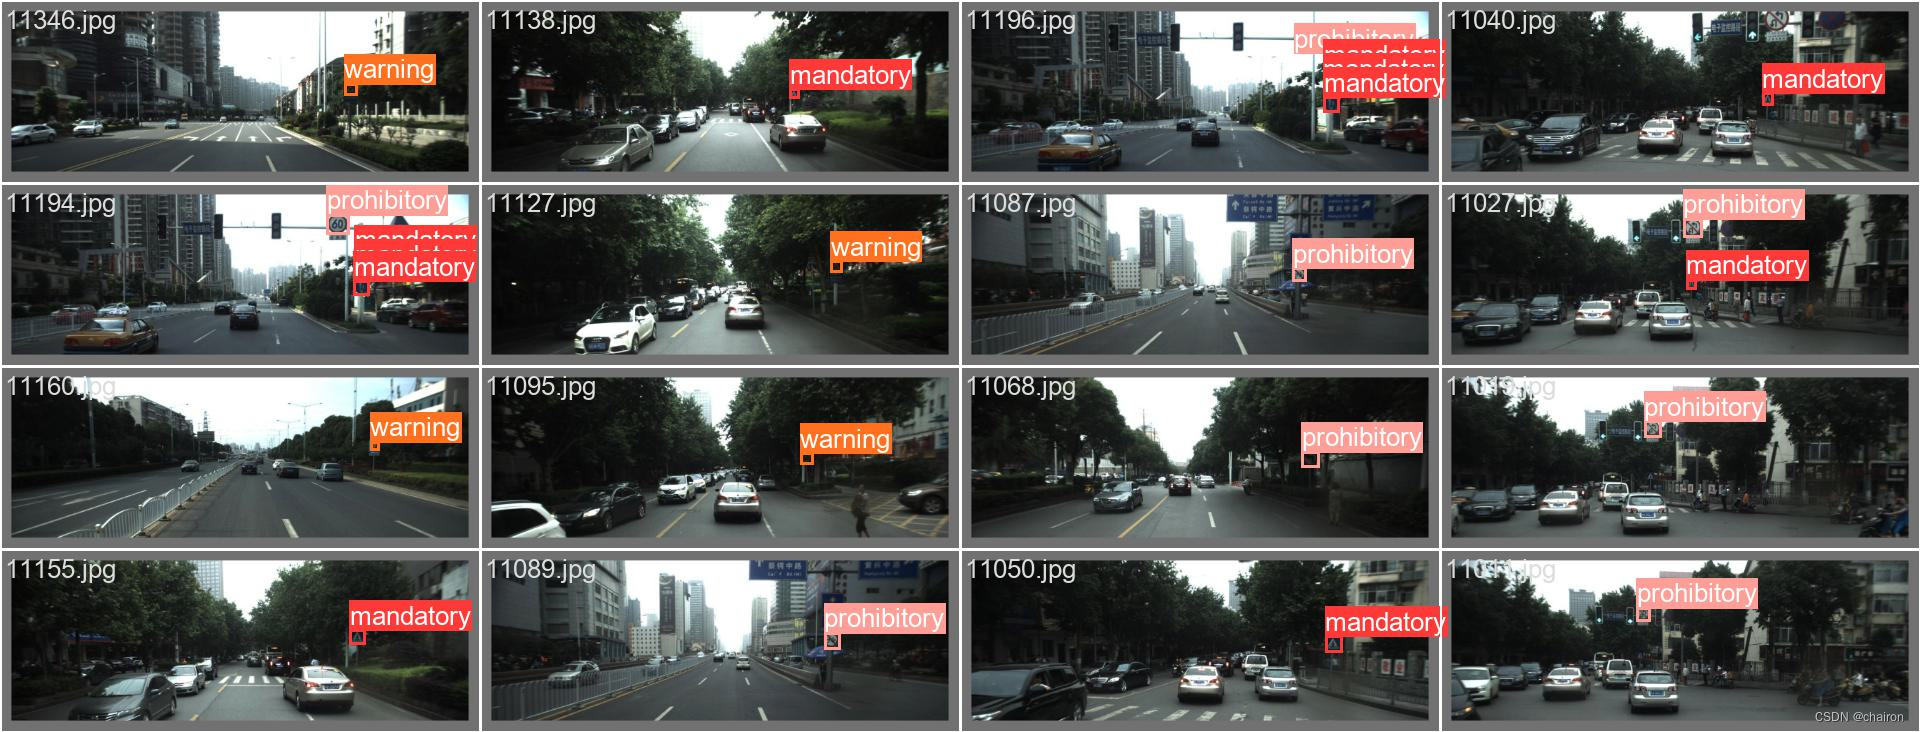
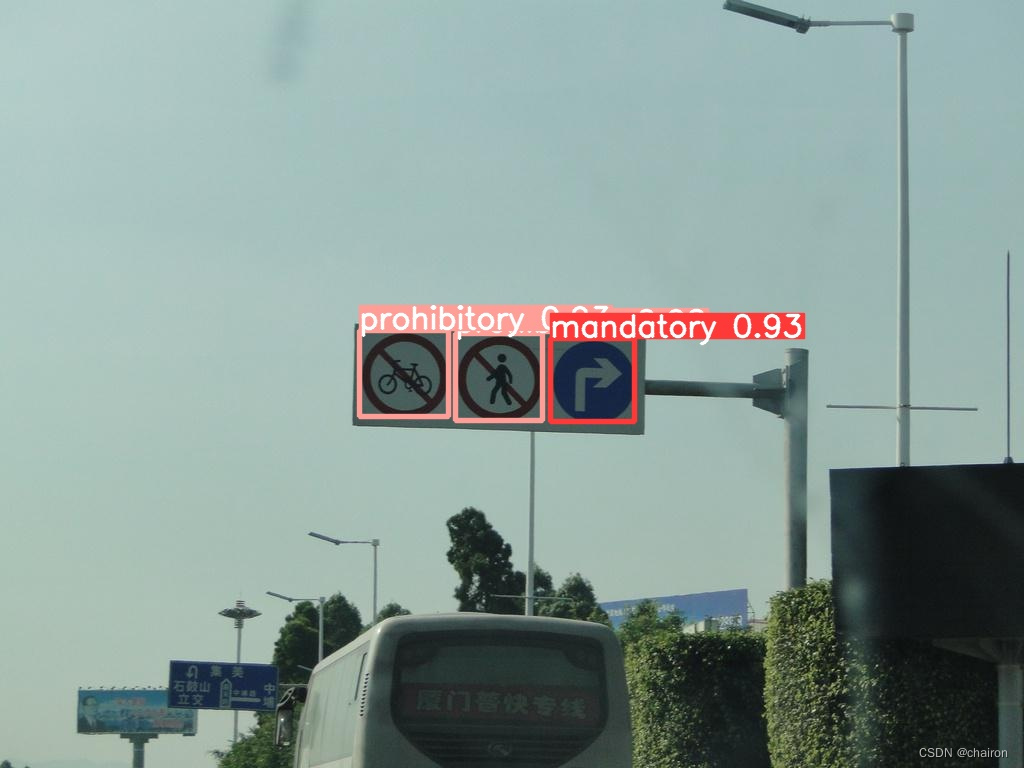
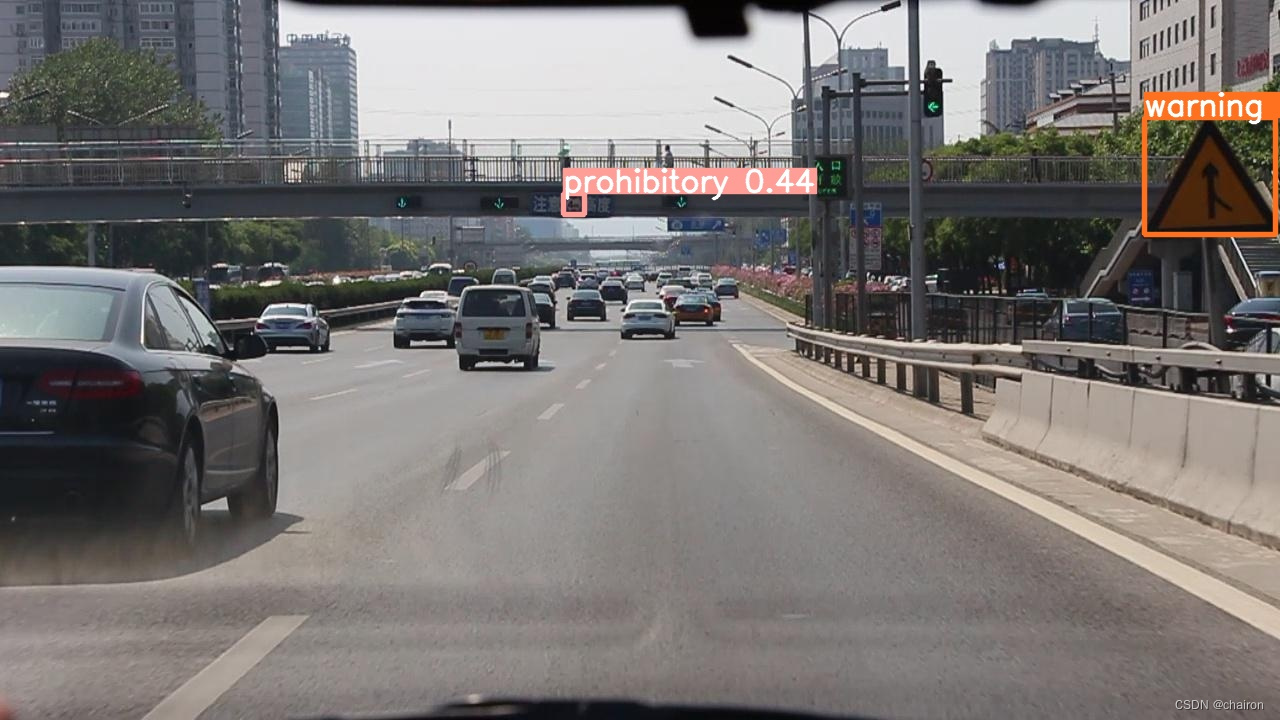
预测图片效果