一、图像缩放
1.API
cv2.resize(src, dsize, fx=0,fy=0,interpolation = cv2.INTER_LINEAR)参数:
①src :输入图像
②dsize:绝对尺寸
③fx,fy:相对尺寸
④interpolation:插值方法
2.代码演示
import cv2 as cv
import numpy as np
import matplotlib.pyplot as plt

img = cv.imread('Genshin.jpeg', -1)
cv.imshow('image', img)
[rows, cols] = img.shape[:2]
res_1 = cv.resize(img, (2*cols, 2*rows), interpolation=cv.INTER_CUBIC)
cv.imshow('image', res_1)
cv.waitKey()
res_2 = cv.resize(img, None, fx=0.5, fy=0.5)
cv.imshow('image', res_1)
cv.waitKey()
二、图像平移
1.API
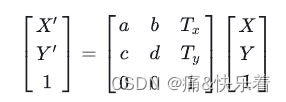
cv2.warpAffine(img, M, dsize)参数:
①img:输入图像
②M:2×3移动矩阵,为np.float32类型
③dsize:输出图像的大小
2.代码演示
import cv2 as cv
import numpy as np
import matplotlib.pyplot as plt

img = cv.imread('Genshin.jpeg', -1)
cv.imshow('image', img)
[rows, cols] = img.shape[:2]
M = np.float32([[1, 0, 100], [0, 1, 50]])
dst = cv.warpAffine(img, M, (cols, rows))
cv.imshow('image', dst)
cv.waitKey()
三、图像旋转
1.API
cv2.getRotationMatrix2D(center, angle, scale)
cv.warpAffine()
参数:
①center:旋转中心
②angle:旋转角度
③scale:缩放比例
返回值:
M:旋转矩阵
2.代码演示
import cv2 as cv
import numpy as np
import matplotlib.pyplot as plt

img = cv.imread('Genshin.jpeg', -1)
cv.imshow('image', img)
[rows, cols] = img.shape[:2]
M = cv.getRotationMatrix2D((cols/2, rows/2), 120, 1)
dst = cv.warpAffine(img, M, (cols, rows))
cv.imshow('image', dst)
cv.waitKey()

四、仿射变换
1.API
cv2.getAffineTransform()
cv2.warpAffine()
2.代码演示
import cv2 as cv
import numpy as np
import matplotlib.pyplot as plt

img = cv.imread('Genshin.jpeg', -1)
cv.imshow('image', img)
[rows, cols] = img.shape[:2]
pts1 = np.float32([[50, 50], [200, 50], [50, 200]])
pts2 = np.float32([[100, 100], [200, 50], [100, 250]])
M = cv.getAffineTransform(pts1, pts2)
dst = cv.warpAffine(img, M, (cols, rows))
cv.imshow('image', dst)
cv.waitKey()

五、透射变换
1.API
cv2.getPerspectiveTransform()
cv2.warpPerspective()
2.代码演示
import cv2 as cv
import numpy as np
import matplotlib.pyplot as plt

img = cv.imread('Genshin.jpeg', -1)
cv.imshow('image', img)
img = cv.resize(img, None, fx=0.5, fy=0.5)
[rows, cols] = img.shape[:2]
pts1 = np.float32([[56, 65], [368, 52], [28, 138], [389, 390]])
pts2 = np.float32([[100, 145], [300, 100], [80, 290], [310, 300]])
T = cv.getPerspectiveTransform(pts1, pts2)
dst = cv.warpPerspective(img, T, (cols, rows))
cv.imshow('image', dst)
cv.waitKey()

六、图像金字塔
1.API
cv2.pyrUp(img) #对图像进行上采样
cv2.pyrDown(img) #对图像进行下采样
2.代码演示
import cv2 as cv
import numpy as np
import matplotlib.pyplot as plt

img = cv.imread('Genshin.jpeg', -1)
cv.imshow('image', img)
img = cv.pyrDown(img)
img = cv.pyrDown(img)
img = cv.pyrDown(img)
cv.imshow('image', img)
cv.waitKey()