chatgpt的接口是一个标准的http请求,请求的url为
POST https://api.openai.com/v1/chat/completions
官方的接口文档地址为:https://platform.openai.com/docs/api-reference/chat/create
Example request
curl https://api.openai.com/v1/chat/completions \
  -H "Content-Type: application/json" \
  -H "Authorization: Bearer $OPENAI_API_KEY" \
  -d '{
    "model": "gpt-3.5-turbo",
    "messages": [
      {
        "role": "system",
        "content": "You are a helpful assistant."
      },
      {
        "role": "user",
        "content": "Hello!"
      }
    ]
  }'
response
{
  "id": "chatcmpl-123",
  "object": "chat.completion",
  "created": 1677652288,
  "model": "gpt-3.5-turbo-0613",
  "system_fingerprint": "fp_44709d6fcb",
  "choices": [{
    "index": 0,
    "message": {
      "role": "assistant",
      "content": "\n\nHello there, how may I assist you today?",
    },
    "finish_reason": "stop"
  }],
  "usage": {
    "prompt_tokens": 9,
    "completion_tokens": 12,
    "total_tokens": 21
  }
}
ChatGPT 最近十分火爆,今天我也来让 ChatGPT 帮我阅读一下 Vue3 的源代码。
都知道 Vue3 组件有一个 setup函数。那么它内部做了什么呢,今天跟随 ChatGPT 来一探究竟。
实战
1.setup
setup 函数在什么位置呢,我们不知道他的实现函数名称,于是问一下 ChatGPT:
ChatGPT 告诉我,setup 函数在packages/runtime-core/src/component.ts 文件中。众所周知,runtime-core是 Vue3 的运行时核心代码。我们进去看一眼。
按照它所说的,我们找到了 setupComponent 和 createComponentInstance 函数,并没有找到 setupRenderEffect 函数,ChatGPT 的只知道 2021 年以前的知识,Vue3 代码经过了很多变动,不过没关系,这不影响太多。
ChatGPT 告诉我,setupComponent 函数是在createComponentInstance函数中执行的,createComponentInstance看名字是创建组件实例,看一下详细代码。
直接复制给 ChatGPT:
我们根据 ChatGPT 的解释来阅读代码,发现createComponentInstance只是创建了组件的实例并返回。并没有像它上面说的在函数中执行了 setupComponent,笨笨的 ChatGPT。
那就自己找一下setupComponent是在哪里被调用的。
可以packages/runtime-core/搜一下函数名,很快就找到了。在packages/runtime-core/src/renderer.ts文件中的mountComponent函数中。
mountComponent 是挂载组件的方法,前面还有一堆自定义渲染器的逻辑,不在此篇展开。
const mountComponent: MountComponentFn = (…args) => {
const instance: ComponentInternalInstance =
compatMountInstance ||
(initialVNode.component = createComponentInstance(
initialVNode,
parentComponent,
parentSuspense
))
// … 省略代码
// resolve props and slots for setup context
if (!(COMPAT && compatMountInstance)) {
// …这里调用了setupComponent,传入了实例,还写了注释,感人
setupComponent(instance)
}
// setupRenderEffect 居然也在这
setupRenderEffect(
instance,
initialVNode,
container,
anchor,
parentSuspense,
isSVG,
optimized
)
}
复制代码
mountComponent函数先调用了createComponentInstance, 返回个组件实例,又把实例当作参数传给了 setupComponent。顺便我们还在这发现了 ChatGPT 搞丢的setupRenderEffect函数,它是用来处理一些渲染副作用的。
回到 setupComponent函数,Evan 的注释告诉我们它是处理 props 和 slots 的。
export function setupComponent(
instance: ComponentInternalInstance,
isSSR = false) {
isInSSRComponentSetup = isSSR
const { props, children } = instance.vnode
const isStateful = isStatefulComponent(instance)
initProps(instance, props, isStateful, isSSR)
initSlots(instance, children)
const setupResult = isStateful
? setupStatefulComponent(instance, isSSR)
: undefined
isInSSRComponentSetup = false
return setupResult
}复制代码
2.把代码喂给 ChatGPT:
setupComponent 函数中,处理完 props 和 slots 后,根据是否是有状态组件调用了setupStatefulComponent。
3.直接整个 setupStatefulComponent喂给 ChatGPT:
太长了,大概意思:
创建了代理缓存accessCache,干嘛用的咱也不知道,可以问 ChatGPT
创建公共实例代理对象(proxy)
执行组件的 setup()
后续操作是调用 handleSetupResult 和 finishComponentSetup 返回渲染函数。开始走渲染逻辑了。
小结
小结一下setup的始末:
从组件挂载开始调用createComponentInstance创建组件实例
传递组件实例给setupComponent
setupComponent内部初始化 props 和 slots
setupStatefulComponent 执行组件的setup
完成 setup 流程
返回渲染函数
…
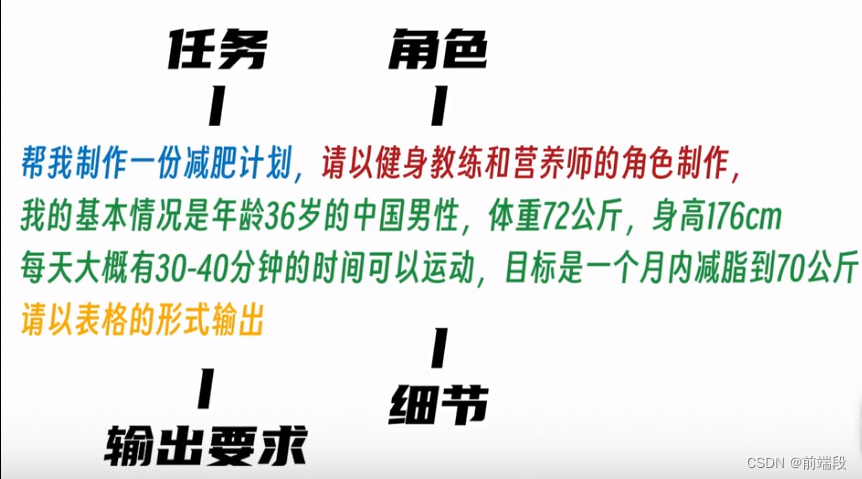
4.前端如何规范提问promopt
我希望你能充当一名高级前端开发者。我将描述一个项目的细节,你将使用以下工具编写该项目:vue、yarn、elementUI、List、vuex、route、markdown、axios。你应该将文件合并为一个单独的 index.vue 文件,不要写解释。我的第一个请求是“创建一个宝可梦应用,该应用列出了从 PokeAPI 精灵端点获取的带有图像的宝可梦”。
5.前端简历
为了申请工作,我想写一封新的求职信。请写一封描述我的技术技能的求职信。我已经从事网络技术工作两年了。我曾经担任过8个月的前端开发工作。通过使用一些工具,我有所成长。这些工具包括"[…Tech Stack]"等等。我希望能够发展自己的全栈开发技能。我渴望过上一种"T形人才"的生活。你能为我撰写一封关于自己的求职信吗?
6.补全下列代码;
“”“const animals = [“dogs”, “cats”, “birds”, “fish”]; let animal = animals[Math.floor(Math.random() * animals.length)]; switch (animal) { case “dogs”: console.log( “Dogs are wonderful companions that bring joy and loyalty into our lives. Their wagging tails and wet noses never fail to make us smile.” ); break; }”“”
一般来说,你最好以冒号结束提示,并另起一行粘贴你的代码块。用三个反引号 [代码 code] 或三个引号 “”“[代码(code)]”“” 分隔开代码块也是个不错的选择。
7.将下列代码片段从 JavaScript 转换为 TypeScript;
“”“function nonRepeatingWords(str1, str2) {
const map = new Map();
const res = [];
// Concatenate the strings
const str = str1 + " " + str2;
// Count the occurrence of each word
str.split(” “).forEach((word) => {
map.has(word) ? map.set(word, map.get(word) + 1) : map.set(word, 1);
});
// Select words which occur only once
for (let [key, val] of map) {
if (val === 1) {
res.push(key);
}
}
return res;
}”“”
8.我希望你能充当一名高级前端开发者。将下列代码片段优化;
“”“
- { { user.name }}
9.加注释
我希望你能充当一名高级前端开发者。将下列vue代码加注释;
要求:
1.换行写注释,
2.用中文写注释,
3.注释率100%,
4.每一句代码加注释,
5.用双斜杠写注释,
6.css样式也需要加注释,
7.每行css都加注释;
“”"
return {
onVerifyNumberPercentage,
onVerifyNumberPercentageFloat,
onVerifyNumberIntegerAndFloat,
onVerifiyNumberInteger,
onVerifyCnAndSpace,
onVerifyEnAndSpace,
onVerifyAndSpace,
onVerifyNumberComma,
onVerifyTextColor,
onVerifyNumberCnUppercase,
onVerifyPhone,
onVerifyTelPhone,
onVerifyAccount,
onVerifyPassword,
onVerifyPasswordPowerful,
onVerifyPasswordStrength,
onVerifyIPAddress,
onVerifyEmail,
onVerifyIDCard,
onVerifyFullName,
onVerifyPostalCode,
onVerifyUrl,
onVerifyCarNum,
…toRefs(state),
};
“”"
8.充当校对员
我希望你充当校对员。我会给你一些文本,我希望你审查其中的拼写、语法或标点错误。完成文本审查后,请提供任何必要的更正或对改进文本的建议。
总结
ChatGPT 很强大,也很笨,毕竟它不联网,且只有 2021 年以前的数据。可用来帮助我们读一下晦涩的源码还是可以的,但也只能辅助作用,还需要自己的思考。


