文章目录
概要
代码入口
//标识启动类,它是一个复合注解,标识使用自动装配、通过扫描注解注入bean
@SpringBootApplication
public class Hibernate52Application {
	public static void main(String[] args)  {
		SpringApplication.run(Hibernate52Application.class, args);
	}
}
整体流程

启动流程
public static ConfigurableApplicationContext run(Class<?>[] primarySources, String[] args) {
	return new SpringApplication(primarySources).run(args);   // ===> 先看new出的啥,再看run
}
先看其中的new SpringApplication(primarySources)部分
//SpringApplication构造器(五大步骤)
//1、初始化资源加载器(classloader)
//2、处理primarySources
//3、web应用类型推断 (web、reactive、servlet)
//4、通过spring.factories加载配置类并初始化监听器
//5、提取主类
@SuppressWarnings({"unchecked", "rawtypes"})
public SpringApplication(ResourceLoader resourceLoader, Class<?>... primarySources) {
	//null;资源加载器,用来获取 Resource 和 classLoader 以及加载资源
	this.resourceLoader = resourceLoader;
	Assert.notNull(primarySources, "PrimarySources must not be null");
	//存放主加载类 在这里是Hibernate52Application.class
	// set中可同时创建多个Application,  其实目的就是要解析这个来源上的那些注解
	this.primarySources = new LinkedHashSet<>(Arrays.asList(primarySources));
	//推断 web 类型:servlet 或 reactive,根据classpath里有没有react的class信息
	this.webApplicationType = WebApplicationType.deduceFromClasspath();
	//从spring.factories中开始load类信息,Bootstrapper:0个,下面3步方法一样
	this.bootstrappers = new ArrayList<>(getSpringFactoriesInstances(Bootstrapper.class));
   // 同上,找出ApplicationContextInitializer的
	setInitializers((Collection) getSpringFactoriesInstances(ApplicationContextInitializer.class));
   // 同上,找出ApplicationListener
	setListeners((Collection) getSpringFactoriesInstances(ApplicationListener.class));
	//推断主函数main所在的类 ,它不一定就是你run参数传过来的,
	// 也就是说,当前main来启动的boot,但是run的参数可以是另一个打了注解的类。
	this.mainApplicationClass = deduceMainApplicationClass();
}
上面的代码会调用到getSpringFactoriesInstances,从spring.factories加载属性配置加载。核心源码如下
private <T> Collection<T> getSpringFactoriesInstances(Class<T> type, Class<?>[] parameterTypes, Object... args) {
	ClassLoader classLoader = getClassLoader();
	// loadFactoryNames去所有类路径(包括jar)的META-INF/spring.factories查找类名
	// 它内部搞了个Map<ClassLoader, Map<String, List<String>>> cache 来缓存
	// 不会造成重复的扫描文件去,提升性能。然后每次调用根据需要的type过滤这个map即可
	Set<String> names = new LinkedHashSet<>(SpringFactoriesLoader.loadFactoryNames(type, classLoader));
	// 通过限定名创建实例
	List<T> instances = createSpringFactoriesInstances(type, parameterTypes, classLoader, args, names); //实例化
	// 排序
	AnnotationAwareOrderComparator.sort(instances);
	return instances;
}
主要的文件有:
spring-boot/autoconfigure/build/resources/main/META-INF/spring.factories
sspring-boot/build/resources/main/METAINF/spring.factories
spring-beans-5.3.4.jar!/META-INF/spring.factories
自己的定义的spring.factories中得类也会被加载到
小结构造器流程:
- 处理资源加载器、主要资源primarySources
- web应用类型推断
- 从spring.factories中找出引导包装器、初始化器、监听器
- 设置应用程序主类
boot运行(run)
//	run方法(七大步骤)
//1、获取并启动监听器从spring.factories文件中加载
//2、准备应用程序环境
//3、打印banner
//4、创建应用上下文  AnnotationConfigServletWebServerApplicationContext
//5、准备 applicationContext
//6、刷新context-- call  refresh  mothod(核心)
//7、上下文刷新后触发(空方法)
public ConfigurableApplicationContext run(String... args) {
	//计时器
	StopWatch stopWatch = new StopWatch();
	stopWatch.start(); //开始计时
	//  创建启动上下文对象,存放配置参数环境信息等
	DefaultBootstrapContext bootstrapContext = createBootstrapContext();
	// 定义容器
	ConfigurableApplicationContext context = null;
	// awt
	configureHeadlessProperty();
	// 第一步:获取并启动监听器    已经在上面new的步骤放到缓存中了,现在取出来
	SpringApplicationRunListeners listeners = getRunListeners(args);  // ===>  自定义listener
	//向监听器发布start事件,【发布订阅模式,也叫生产者消费者模式】
	// 默认会有一个EventPublishingRunListener
	listeners.starting(bootstrapContext, this.mainApplicationClass);
	try {
		// 对命令行参数包装成一个对象(ApplicationArguments),比如:--spring.profiles.active=dev
		ApplicationArguments applicationArguments = new DefaultApplicationArguments(args);  // ===>
		//第二步:准备应用程序环境(配置文件application.yml就是这里加载的)
		ConfigurableEnvironment environment = prepareEnvironment(listeners, bootstrapContext, applicationArguments);  // ===>
		// 配置要忽略哪些bean
		configureIgnoreBeanInfo(environment);
		//第三步: 打印banner
		Banner printedBanner = printBanner(environment); // ===>
		// 第四步:【重点】创建应用上下文 servlet对应的是 AnnotationConfigServletWebServerApplicationContext
		context = createApplicationContext(); // ===>
		context.setApplicationStartup(this.applicationStartup);
		//第五步:准备 applicationContext
		// refresh将会使用Annotation方式扫描启动main上的@ComponentScan。
		prepareContext(bootstrapContext, context, environment, listeners, applicationArguments, printedBanner);
		//第六步:context,ioc的领地。bean在这里被创建起来
		// tomcat容器被启动起来~~~~
		// 它藏在 ioc 的 onRefresh 这一步里
		refreshContext(context);// ===>  进入ioc的领地,刷新 spring ioc 容器, 加载和扫描所有的bean
		//第七步:创建完成后的扫尾工作
		afterRefresh(context, applicationArguments);
		stopWatch.stop();//停止计时
		if (this.logStartupInfo) {
			new StartupInfoLogger(this.mainApplicationClass).logStarted(getApplicationLog(), stopWatch);
		}
		// 发布started事件
		listeners.started(context);
		//执行runner的run方法,它允许你在容器启动后做一些事情
		callRunners(context, applicationArguments); //===>
	} catch (Throwable ex) {
		// 异常处理
		handleRunFailure(context, ex, listeners);
		throw new IllegalStateException(ex);
	}

	try {
		// 触发running事件
		listeners.running(context);
	} catch (Throwable ex) {
		handleRunFailure(context, ex, null);
		throw new IllegalStateException(ex);
	}
	// 返回最终构建的容器对象
	return context;
}
其中在第五步,会调注册BeanDefinition的初始化流程org.springframework.boot.SpringApplication#prepareContext
/**
* Spring容器准备
*/
private void prepareContext(DefaultBootstrapContext bootstrapContext, ConfigurableApplicationContext context,
ConfigurableEnvironment environment, SpringApplicationRunListeners listeners,
ApplicationArguments applicationArguments, Banner printedBanner) {
context.setEnvironment(environment);//设置环境
postProcessApplicationContext(context);//设置上下文
// 执行所有ApplicationContextInitializer对象的initialize方法(这些对象是通过读取spring.factories加载),在new阶段已经放到缓存中
applyInitializers(context);//设置初始化工作(前面定义的initializer被触发)
// 发布上下文准备完成事件到所有监听器
listeners.contextPrepared(context);//触发监听器
// 这句容易误解,其实是关闭bootstrap,启用ApplicationContext
// 前期bootstrapContext用来处理yml等配置文件和环境,现在它的使命已经完成
// 下面交给ApplicationContext去加载bean,进入了spring ioc的领地。
// https://docs.spring.io/spring-boot/docs/current/api/org/springframework/boot/DefaultBootstrapContext.html
// "when the BootstrapContext is closed and the ApplicationContext has been prepared"
bootstrapContext.close(context);
if (this.logStartupInfo) { //日志操作
logStartupInfo(context.getParent() == null);
logStartupProfileInfo(context); // The following profiles are active: dev
}
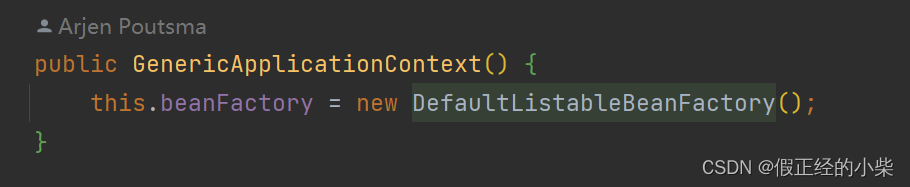
// 获取工厂 DefaultListableBeanFactory
ConfigurableListableBeanFactory beanFactory = context.getBeanFactory();
//参数对象
beanFactory.registerSingleton("springApplicationArguments", applicationArguments);
if (printedBanner != null) {
//banner对象
beanFactory.registerSingleton("springBootBanner", printedBanner);
}
if (beanFactory instanceof DefaultListableBeanFactory) {
//是否覆盖bean
((DefaultListableBeanFactory) beanFactory)
.setAllowBeanDefinitionOverriding(this.allowBeanDefinitionOverriding);
}
if (this.lazyInitialization) { //是否懒加载
context.addBeanFactoryPostProcessor(new LazyInitializationBeanFactoryPostProcessor());
}
// Load the sources
Set<Object> sources = getAllSources(); // 所有的启动类,其实也就这一个main (primarySources)
Assert.notEmpty(sources, "Sources must not be empty");
//注解加载 【关键节点】
load(context, sources.toArray(new Object[0])); // ===> 加载完看下context里的BD!
// 发送上下文加载完成事件
listeners.contextLoaded(context);
}
在第六步中会进入到ico的refresh方法:org.springframework.boot.SpringApplication#refresh(org.springframework.context.ConfigurableApplicationContext)
protected void refresh(ConfigurableApplicationContext applicationContext) {
	// (模板方法)AbstractApplicationContext.refresh
	applicationContext.refresh(); // ===>
}
最后进入到org.springframework.context.support.AbstractApplicationContext#refresh
在org.springframework.boot.web.servlet.context.ServletWebServerApplicationContext#onRefresh中会启动tomcat容器
@Override
protected void onRefresh() {
	super.onRefresh();
	try {
		createWebServer(); // ===>  创建server容器!
	}
	catch (Throwable ex) {
		throw new ApplicationContextException("Unable to start web server", ex);
	}
}
private void createWebServer() {
	WebServer webServer = this.webServer;
	ServletContext servletContext = getServletContext();
	if (webServer == null && servletContext == null) {
		StartupStep createWebServer = this.getApplicationStartup().start("spring.boot.webserver.create");
		ServletWebServerFactory factory = getWebServerFactory();
		createWebServer.tag("factory", factory.getClass().toString());
		//getSelfInitializer,一系列initializer,包含了我们的DS
		this.webServer = factory.getWebServer(getSelfInitializer());  // ===> 创建各种容器,jetty,tomcat……
		createWebServer.end();
		getBeanFactory().registerSingleton("webServerGracefulShutdown",
				new WebServerGracefulShutdownLifecycle(this.webServer));
		getBeanFactory().registerSingleton("webServerStartStop",
				new WebServerStartStopLifecycle(this, this.webServer));
	}
	else if (servletContext != null) {
		try {
			getSelfInitializer().onStartup(servletContext);
		}
		catch (ServletException ex) {
			throw new ApplicationContextException("Cannot initialize servlet context", ex);
		}
	}
	initPropertySources();
}
ConfigurableApplicationContext 类关系如如下