目录
Python + OpenCV 简单车辆统计
IDE : PyChram
1 源码
函数 car_count() 简单车辆统计
# 这是一个示例 Python 脚本。

# 按 Shift+F10 执行或将其替换为您的代码。
# 按 双击 Shift 在所有地方搜索类、文件、工具窗口、操作和设置。
import cv2
import numpy
import time


def mouse_callback(event, x, y, flags, userdata):
    print(event, x, y, flags, userdata)


def mouse_control():
    cv2.namedWindow('mouse', cv2.WINDOW_NORMAL)
    cv2.resizeWindow('mouse', 640, 360)
    img = numpy.zeros((360, 640, 3), numpy.uint8)
    cv2.setMouseCallback('mouse', mouse_callback, '123')
    while True:
        cv2.imshow('mouse', img)
        key = cv2.waitKey(1)
        if key == ord('q'):
            break
    cv2.destroyAllWindows()


def test():
    """

    :return:
    """
    print("hello test")
    win_name = "frame"
    cv2.namedWindow(win_name, cv2.WINDOW_NORMAL)
    cv2.resizeWindow(win_name, 640, 480)
    cap = cv2.VideoCapture(0)
    fourcc = cv2.VideoWriter_fourcc(*'mp4v')
    vm = cv2.VideoWriter('output.mp4', fourcc, 20, (640, 480))

    if not cap.isOpened():
        print("video capture err")
        exit()
    while True:
        ret, frame = cap.read()

        if ret:
            vm.write(frame)
            cv2.imshow(win_name, frame)

            if cv2.waitKey(1) & 0xff == ord('q'):
                break
        else:
            break
    cap.release()
    vm.release()
    cv2.destroyAllWindows()


def test_split_merge():
    img = numpy.zeros((480, 640, 3), numpy.uint8)
    b, g, r = cv2.split(img)
    b[10:100, 10:100] = 255
    g[10:100, 10:100] = 255

    img2 = cv2.merge((b, g, r))
    # 在图像上绘制文本
    font = cv2.FONT_HERSHEY_SIMPLEX
    text = 'Hello, OpenCV!'
    org = (50, 50)
    font_scale = 1

    color = (255, 0, 0)  # BGR
    thickness = 2
    cv2.putText(img, text, org, font, font_scale, color, thickness, cv2.LINE_AA)
    cv2.line(img, (10, 10), (100, 100), (255, 111, 222))
    cv2.imshow("img", numpy.hstack((img, img2)))
    cv2.waitKey(0)
    cv2.destroyAllWindows()


def image_flip(flip_code):
    image = cv2.imread('dog.png')
    image = cv2.flip(image, flip_code)
    image = cv2.rotate(image, cv2.ROTATE_180)
    cv2.imshow('image', image)
    cv2.waitKey(0)


def warp_affine():
    dog = cv2.imread('dog.png')
    h, w, ch = dog.shape
    # m = numpy.float32([[1, 0, 100], [0, 1, 0]])
    m = cv2.getRotationMatrix2D((w / 2, h / 2,), 15, 1.0)
    new = cv2.warpAffine(dog, m, (w, h))
    cv2.imshow('new', new)
    cv2.waitKey(0)


def print_hi(name):
    # 在下面的代码行中使用断点来调试脚本。
    print(f'Hi, {name}')  # 按 Ctrl+F8 切换断点。
    warp_affine()


def calculate_rectangle_center(x, y, width, height):
    """
    根据矩形的起点坐标、宽和高计算中心点的函数

    参数:
    x, y -- 矩形起点的坐标
    width -- 矩形的宽度
    height -- 矩形的高度

    返回:
    cx, cy -- 矩形中心点的坐标
    """
    cx = int(x + width / 2)
    cy = int(y + height / 2)
    return cx, cy


def car_count():
    print('car count')
    count = 0
    cap = cv2.VideoCapture('./car.mp4')
    if not cap.isOpened():
        print('video open fail')
        exit()
    # 创建一个基于高斯混合模型(Gaussian Mixture Model, GMM)的背景减法器对象
    bgs = cv2.createBackgroundSubtractorMOG2()
    kernel = cv2.getStructuringElement(cv2.MORPH_RECT, (3, 3))

    while True:

        ret, frame = cap.read()

        if not ret:
            # 如果到达视频末尾,则重置视频捕获对象以从头开始播放
            cap.set(cv2.CAP_PROP_POS_FRAMES, 0)
            # 重新读取第一帧
            ret, frame = cap.read()
            count = 0
            # 可选:如果不想立刻重头播放,可以在这里添加一些延时
            time.sleep(2)  # 等待2秒

        if ret is True:
            if frame is None:
                break
            f_w = 640
            f_h = 480
            # 调整帧的大小
            resized_frame = cv2.resize(frame, (f_w, f_h), interpolation=cv2.INTER_AREA)
            # 灰度化处理
            gray = cv2.cvtColor(resized_frame, cv2.COLOR_BGR2GRAY)

            # 去噪
            blur = cv2.GaussianBlur(gray, (3, 3), 5)
            # 使用前面创建的背景减法器对象bgs来对一个视频帧frame进行处理
            fg_mask = bgs.apply(blur)
            # 腐蚀
            erode = cv2.erode(fg_mask, kernel)
            # 膨胀
            dilate = cv2.dilate(erode, kernel)
            # 闭运算
            close = cv2.morphologyEx(dilate, cv2.MORPH_CLOSE, kernel)
            # 查找轮廓
            contours, hierarchy = cv2.findContours(close, cv2.RETR_EXTERNAL, cv2.CHAIN_APPROX_SIMPLE)
            # 绘制轮廓
            # 你可以调整第三个参数来绘制所有轮廓或只绘制特定级别的轮廓
            # -1 表示绘制所有轮廓
            # cv2.drawContours(resized_frame, contours, -1, (0, 255, 0), 3)
            # 限制宽高
            w_limit = 40
            h_limit = 40
            # 画线的起点和终点
            line_sx = 10
            line_sy = f_h - 100
            line_ex = f_w - 10
            line_ey = line_sy
            offset = 3
            # 画线
            cv2.line(resized_frame, (line_sx, line_sy), (line_ex, line_ey), (0, 0, 255), 2)
            cars = []
            for contour in contours:
                # 最大外接矩形
                (x, y, w, h) = cv2.boundingRect(contour)
                # 过滤掉小矩形
                if w < w_limit or h < h_limit:
                    continue
                if y < (f_h / 2):
                    continue
                # print(f"Contour: x={x}, y={y}, width={w}, height={h}")
                cv2.rectangle(resized_frame, (x, y), (x + w, y + h), (0, 255, 0), 2)
                cen_point = calculate_rectangle_center(x, y, w, h)
                cars.append(cen_point)
                cv2.circle(resized_frame, cen_point, 2, (0, 255, 0), -1)
            for (x, y) in cars:
                if (line_ey - offset) < y < (line_ey + offset):
                    count += 1
                    cars.remove((x, y))
                    # print(count)
            cv2.putText(resized_frame, 'Cars Count:' + str(count), (50, 50), cv2.FONT_HERSHEY_SIMPLEX, 1, (0, 0, 255), 2)
            cv2.imshow('resized_frame', resized_frame)

        if cv2.waitKey(2) & 0xFF == 27:
            break

    cap.release()
    cv2.destroyAllWindows()


# 按装订区域中的绿色按钮以运行脚本。
if __name__ == '__main__':
    car_count()

# 访问 https://www.jetbrains.com/help/pycharm/ 获取 PyCharm 帮助
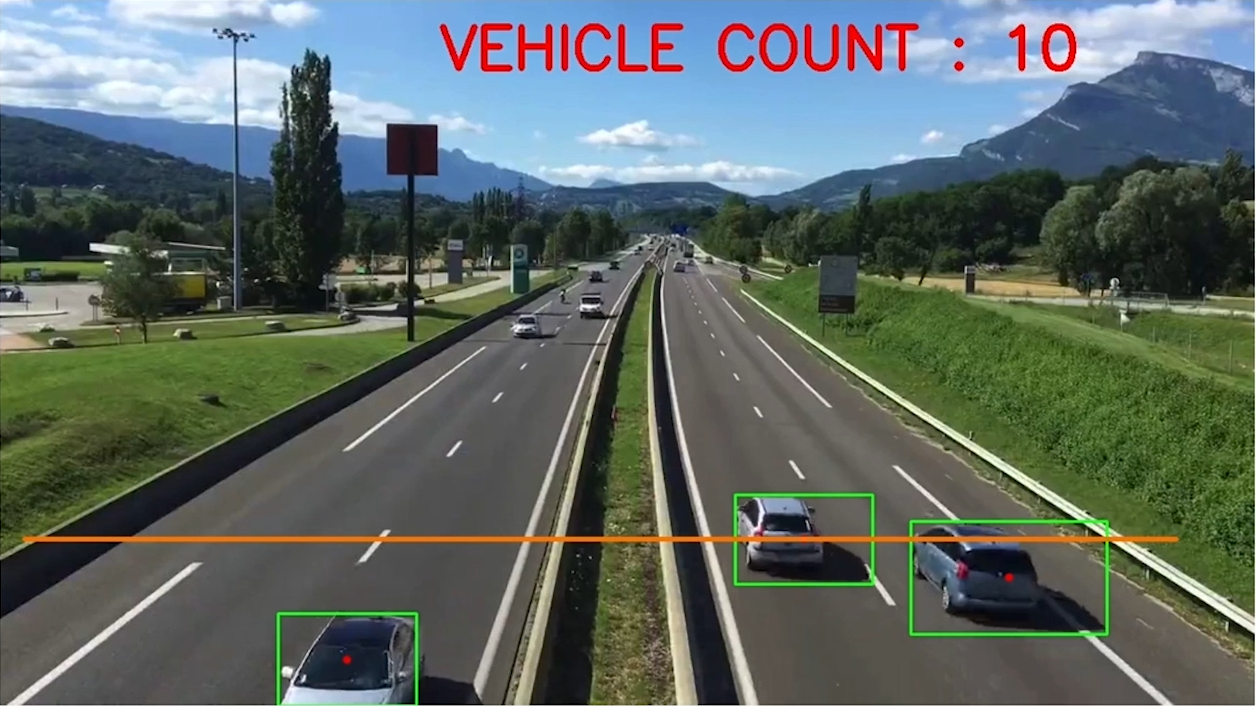
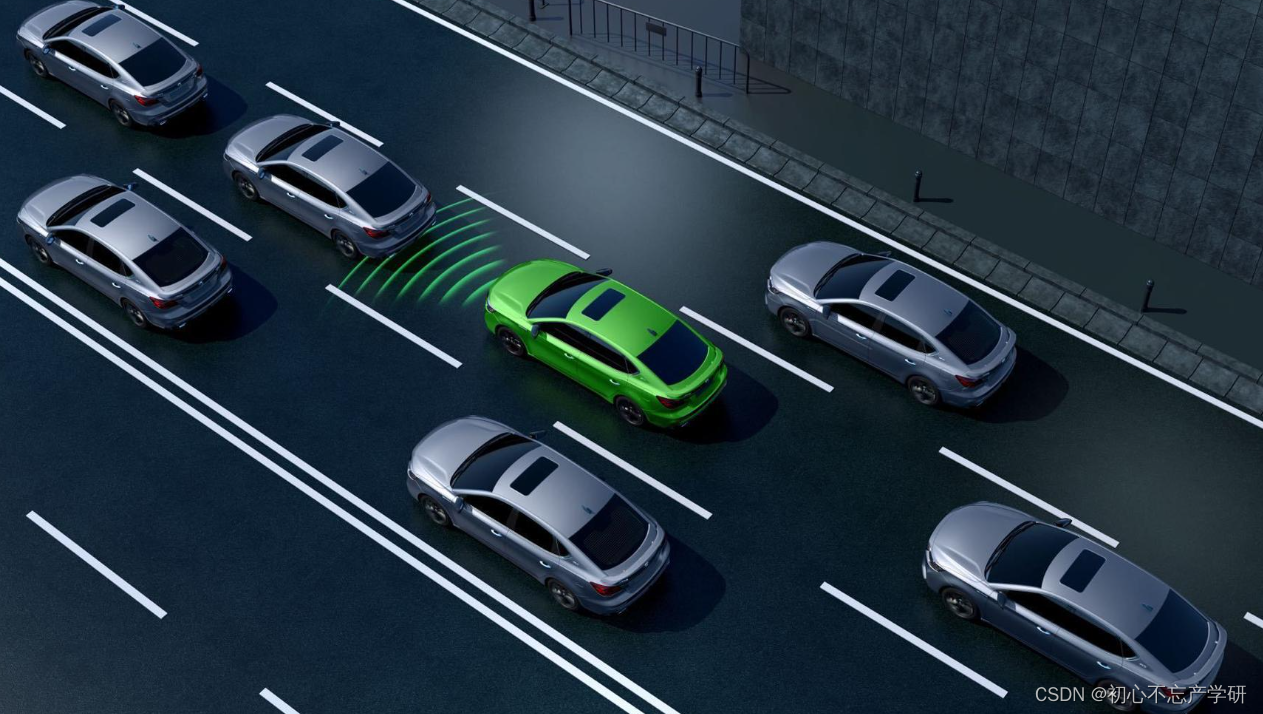
2 运行结果


![[网鼎杯 2020 朱雀组]phpweb](https://i-blog.csdnimg.cn/direct/e189c50ce5ef47fda1285f70f06d9d6b.png)