今日内容:
目录
一、文本控制属性(续)
1. 行高
作用:设置文本间距
属性名:line-height
属性值:这里的属性值有两种输入方式
- 数字+px
- 数字(这里的数字为当前字体大小的倍数)
line-height: 30px;

/* 当前标签字体大小为16px */
line-height: 2;
可以用 line-height 给文字垂直居中(需要设置盒子(块级元素)的高度(height)和行高(line-height)设置的像素值相等)
height: 30px;
line-height: 30px;注意事项:给文字设置垂直居中只对单行文本生效
<!DOCTYPE html>
<html lang="en">
<head>
  <meta charset="UTF-8">
  <meta name="viewport" content="width=device-width, initial-scale=1.0">
  <title>Document</title>
  <style>
    .d {
      width: 200px;
      height: 200px;
      /* 设置背景颜色为粉色 */
      background-color: pink;
      line-height: 200px;
    }
  </style>
</head>
<body>
    <div class="d">
      111
      <br>
      222
    </div>
  </div>
</body>
</html>
效果如下:

2. 文本对齐方式
作用:用来控制盒子内容的对齐方式
属性名:text-align
属性值:left,center,right(左,中,右对齐)
text-align: center;可以用来和行高配合使用,实现水平、垂直居中效果
<!DOCTYPE html>
<html lang="en">
<head>
  <meta charset="UTF-8">
  <meta name="viewport" content="width=device-width, initial-scale=1.0">
  <title>Document</title>
  <style>
    .d {
      width: 200px;
      height: 200px;
      text-align: center;
      background-color: pink;
      line-height: 200px;
    }
  </style>
</head>
<body>
    <div class="d">
      我是文本
    </div>
  </div>
</body>
</html>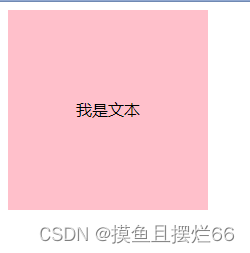
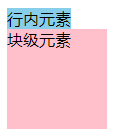
注意事项:
- text-align 只对于行内元素、行内块元素生效,对于块级元素不起作用,如果要对块级元素使用此属性,需要先对块级元素转换为行内块元素(使用display: inline-block;)
- text-align 属性只能对需要设置对齐方式的元素的父级元素使用
3. 文本修饰线
属性名:text-decoration
属性值:
- none: 无
- underline:下划线
- line-through:删除线
- overline:上划线
<p style="text-decoration: none;">无</p>
<p style="text-decoration: underline;">下划线</p>
<p style="text-decoration: line-through;">删除线</p>
<p style="text-decoration: overline;">上划线</p>
效果如下:

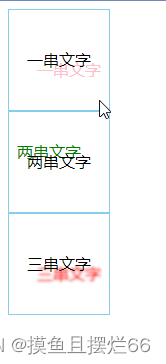
4. 文字阴影
属性名:text-shadow
属性值:
- h-shadow:必需,水平阴影的位置,允许为负值
- v-shadow:必需,垂直阴影的位置,允许为负值
- blur:可选,模糊距离
- color:可选,阴影颜色
<!DOCTYPE html>
<html lang="en">
<head>
  <meta charset="UTF-8">
  <meta name="viewport" content="width=device-width, initial-scale=1.0">
  <title>Document</title>
  <style>
    div {
      width: 100px;
      height: 100px;
      line-height: 100px;
      text-align: center;
      border: 1px solid skyblue
    }
    .shadow1 {
      text-shadow: 10px 10px pink;
    }
    .shadow2 {
      text-shadow: -10px -10px green;
    }
    .shadow3 {
      text-shadow: 10px 10px 3px red;
    }
  </style>
</head>
<body>
    <div class="shadow1">一串文字</div>
    <div class="shadow2">两串文字</div>
    <div class="shadow3">三串文字</div>
</body>
</html>
效果如下:
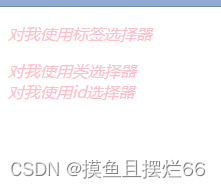
二、CSS选择器
1. 基本选择器
| 基本选择器 | 说明 | 举例 |
| 标签选择器 | 选择页面中同名标签 | div {color: pink;} |
| 类选择器 | 可对一个或者多个共同使用 | .red {color: pink;} |
| id选择器 | 唯一的,单页面只能使用一次 | #red {color: pink;} |
| 通配符选择器 | 选择页面中所有的标签 | * {color: pink;} |
<!DOCTYPE html>
<html lang="en">
<head>
  <meta charset="UTF-8">
  <meta name="viewport" content="width=device-width, initial-scale=1.0">
  <title>Document</title>
  <style>
    p {
      color: pink;
    }
    .text-color {
      color: pink;
    }
    #d {
      color: pink;
    }
    * {
      /* 字体设置为斜体 */
      font-style: italic;
    }
  </style>
</head>
<body>
    <p>对我使用标签选择器</p>
    <div class="text-color">对我使用类选择器</div>
    <div id="d">对我使用id选择器</div>
</body>
</html>
效果如下:
2. 复合选择器
| 复合选择器 | 说明 | 举例 |
| 后代选择器 | 选择当前标签的子级元素,用空格隔开 | div span {color: pink;} |
| 子代选择器 | 只选最近一级的子级元素, 用 > 符号隔开 |
div>span{color: pink;} |
| 并集选择器 | 选择多个标签/类名, 用逗号隔开 | div, span, p {color: pink;} |
| 交集选择器 | 既又的关系,既是某标签,又是某类名 | p.one {color: pink;} |
| 伪类选择器 | 状态关系, :hover 鼠标经过 | div:hover {color: pink;} |
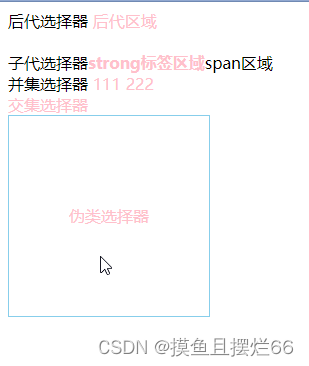
<!-- body区域 -->
<body>
    <div class="one">后代选择器 <span>后代区域</span></div>
    <br>
    <div class="two">子代选择器<strong>strong标签区域</strong><span>span区域</span></div>
    <div class="three">并集选择器  <span class="three1">111  </span><span class="three2">222</span></div>
    <div class="four">交集选择器</div>
    <div class="five">伪类选择器</div>
</body>
<style>
.one span {
color: pink;
}
.two>strong {
color: pink;
}
.three1,
.three2 {
color: pink;
}
div.four {
color: pink;
}
.five {
width: 200px;
height: 200px;
line-height: 200px;
text-align: center;
border: 1px solid skyblue;
}
.five:hover {
color: pink;
}
</style>效果如下: