在第一讲中,我们讲到了条纹的生成,这一讲,我们将实现条纹的解码。我们这里的解码技术很简单,即高低频倍数解码,详细的论文可以参考:《Temporal phase unwrapping algorithms for fringe projection profilometry a comparative review》。
简单介绍如下:
1. 根据相位结算公式,计算每个像素相位值:
2. 根据相位倍数,对当前包裹相位进行展开:


3. 利用展开后的相位,继续对后续包裹相位进行展开。
对着上面的公式,我们编辑代码如下(对着代码看,再加上些调试,很容易就懂了):
#include <iostream>
#include <vector>
#include <opencv2/opencv.hpp>

#define PROJECTOR_WIDTH_720P    1280          //这里定义的是720P投影仪的分辨率
#define PROJECTOR_HEIGHT_720P   720

#define PROJECTOR_WIDTH_480P    854          //这里定义的是480P投影仪的分辨率
#define PROJECTOR_HEIGHT_480P   480
#define PI 3.1415926

// Absolute phase from 4 frames
cv::Mat get_phase4(const cv::Mat I1, const cv::Mat I2, const cv::Mat I3, const cv::Mat I4) {
	cv::Mat_<float> I1_(I1);
	cv::Mat_<float> I2_(I2);
	cv::Mat_<float> I3_(I3);
	cv::Mat_<float> I4_(I4);

	//获取wrap相位
	int m_nHeight = I1.rows;
	int m_nWidth = I1.cols;
	cv::Mat phase = cv::Mat::zeros(m_nHeight, m_nWidth, CV_32FC1);
	//#pragma omp parallel for
	for (int i = 0; i < m_nHeight; i++)
	{
		for (int j = 0; j < m_nWidth; j++)
		{
			int a1 = I1_.at<float>(i, j);
			int a2 = I2_.at<float>(i, j);
			int a3 = I3_.at<float>(i, j);
			int a4 = I4_.at<float>(i, j);
			phase.at<float>(i, j) = (float)atan2((a2 - a4), (a1 - a3));
			if (phase.at<float>(i, j) < 0)
				phase.at<float>(i, j) += (2 * PI);
		}
	}
	return phase;
}
cv::Mat unwrap_with_cue(const cv::Mat up, const cv::Mat upCue, float nPhase)
{
	// Determine number of jumps
	cv::Mat P = ((upCue)*nPhase - up) / (2 * PI);
	cv::Mat tmp(P.rows, P.cols, CV_32FC1);
	for (int i = 0; i < up.rows; i++) {
		for (int j = 0; j < up.cols; j++) {
			tmp.at<float>(i, j) = round(P.at<float>(i, j));
		}
	}
	// Add to phase
	cv::Mat upUnwrapped = up + tmp * 2 * PI;
	// Scale to range [0; 2pi]
	upUnwrapped *= 1.0 / nPhase;
	return upUnwrapped;
}

cv::Mat decode_pattern(const std::vector<cv::Mat>& encode_images, const std::vector<float>& phases, const int projector_lens)
{
	//前面四组图案最低频率的编码(频率为1),所以不需要进行相位展开
	std::vector<cv::Mat> frames_low_freq(encode_images.begin(), encode_images.begin() + 4);
	cv::Mat upCue = get_phase4(frames_low_freq[0], frames_low_freq[1], frames_low_freq[2], frames_low_freq[3]);
	for (int index = 1; index < phases.size(); index++)  //两两求解双频
	{
		std::vector<cv::Mat> frames_high_freq(encode_images.begin() + 4 * (index), encode_images.begin() + 4 * (index + 1));
		cv::Mat unPhase = get_phase4(frames_high_freq[0], frames_high_freq[1], frames_high_freq[2], frames_high_freq[3]);
		upCue = unwrap_with_cue(unPhase, upCue, phases[index]);
	}
	cv::Mat decode_phase_img = projector_lens * ((upCue) / (2 * PI));
	return decode_phase_img;
}

void generate_freqs(std::vector <float>& freq_array, int length, int min_T)
{
	freq_array[4] = (double)length / min_T;     //我们需要生成五个频率,第五个频率为[投影宽度/周期]
	double x = sqrtf(sqrtf(freq_array[4]));    //第二个频率定义为第五个频率的开四次根号
	freq_array[3] = x * x * x; //第四个频率
	freq_array[2] = x * x;     //第三个频率
	freq_array[1] = x;         //第二个频率
	freq_array[0] = 1;         //第一个频率
}

bool read_images(std::string img_prefix, std::string img_suffix, std::vector<cv::Mat>& encode_images)
{
	for (int index = 0; index < 20; index++)   //获取竖条纹(图像水平方向)图像
	{
		std::string fileNameBmp = img_prefix + std::to_string(index+1) + img_suffix;
		cv::Mat encode_image = cv::imread(fileNameBmp, 0);
		if (encode_image.empty())
		{
			std::cout << "img file is error, please check the filename: " << fileNameBmp << std::endl;
			return 0;
		}
		encode_images.push_back(encode_image);
	}
	return 1;
}

int main()
{
	//1. 解码的频率就是之前编码的频率,一定要一一对应
	std::vector<float> h_freq_array, v_freq_array;
	v_freq_array.resize(5);
	generate_freqs(v_freq_array, PROJECTOR_HEIGHT_720P, 10);        //图像垂直方向——横条纹频率
	h_freq_array.resize(5);
	generate_freqs(h_freq_array, PROJECTOR_WIDTH_720P, 10);         //图像水平方向——竖条纹频率
	//2. 读取本地图像
	std::vector<cv::Mat> encode_images_H, encode_images_V;
	std::string img_prefix = "..//class1//pattern_H//imagecode_H";
	std::string img_suffix = ".bmp";
	read_images(img_prefix, img_suffix,encode_images_H);
	img_prefix = "..//class1//pattern_V//imagecode_V";
	read_images(img_prefix, img_suffix, encode_images_V);
	//3. 对编码图像进行解码
	cv::Mat decode_img_H = decode_pattern(encode_images_H, h_freq_array, PROJECTOR_WIDTH_720P);
	cv::Mat decode_img_V = decode_pattern(encode_images_V, v_freq_array, PROJECTOR_HEIGHT_720P);

	//4. 测试一组采集的标定图像,我这里使用480P的投影仪采集的,所以需要更换分辨率并重新计算编码频率
	generate_freqs(v_freq_array, PROJECTOR_HEIGHT_480P, 10);
	generate_freqs(h_freq_array, PROJECTOR_WIDTH_480P, 10);
	std::vector<cv::Mat> calib_images_H, calib_images_V;
	img_prefix = ".//test_data//calib_images_H//calibImg_";
	read_images(img_prefix, img_suffix, calib_images_H);
	img_prefix = ".//test_data//calib_images_V//calibImg_";
	read_images(img_prefix, img_suffix, calib_images_V);

	decode_img_H = decode_pattern(calib_images_H, h_freq_array, PROJECTOR_WIDTH_480P);
	decode_img_V = decode_pattern(calib_images_V, v_freq_array, PROJECTOR_HEIGHT_480P);
	return 0;
}
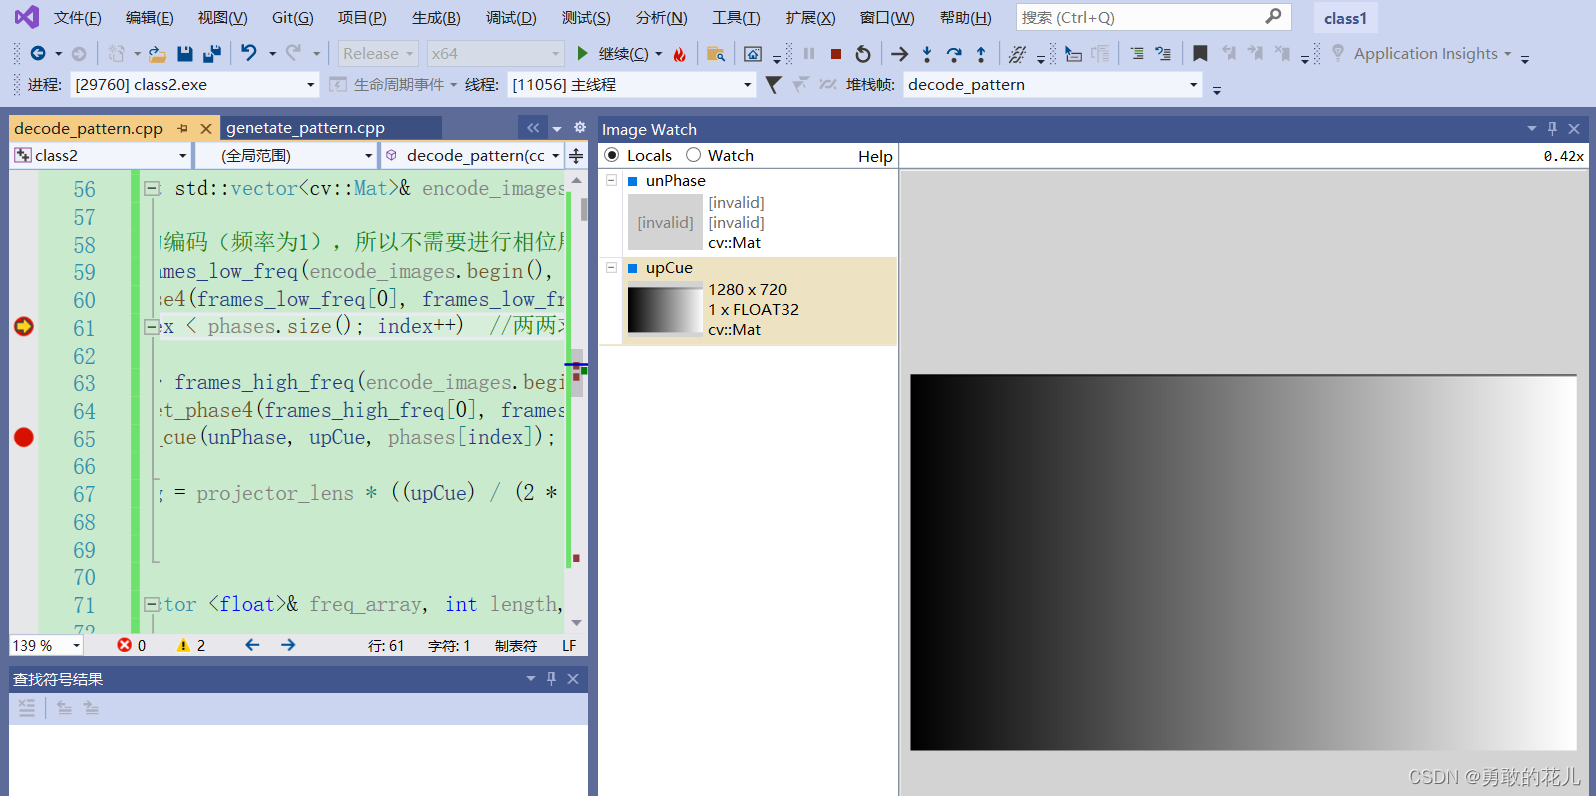
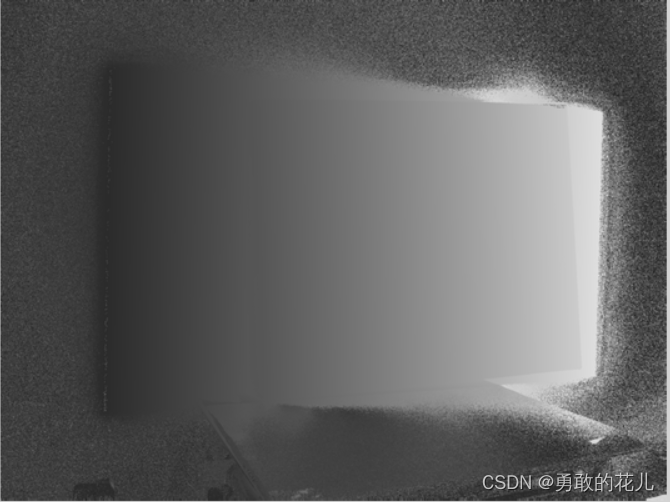
我们看下每个频率的展开相位,我喜欢用vs的image_watch插件,看图像很方便,效果如下:
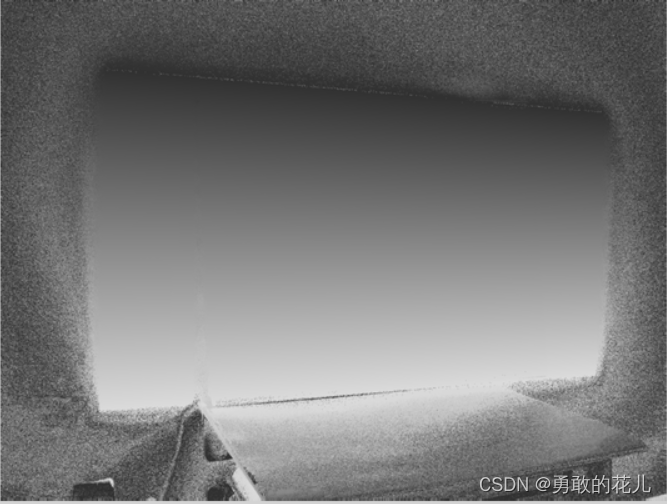
另外几个频率展开的包裹相位分别如下:


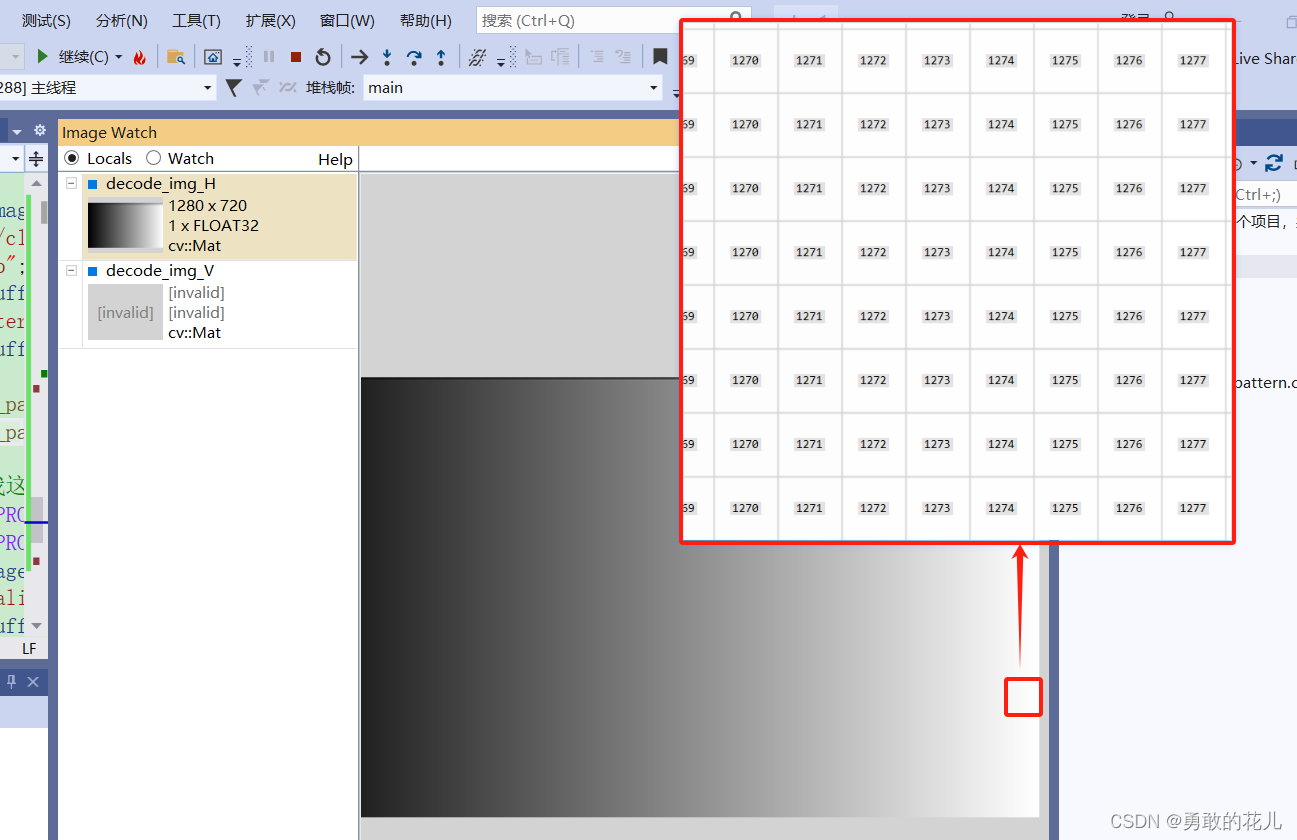
最终的展开相位,我们可以利用image watch放大图像,看到其像素值
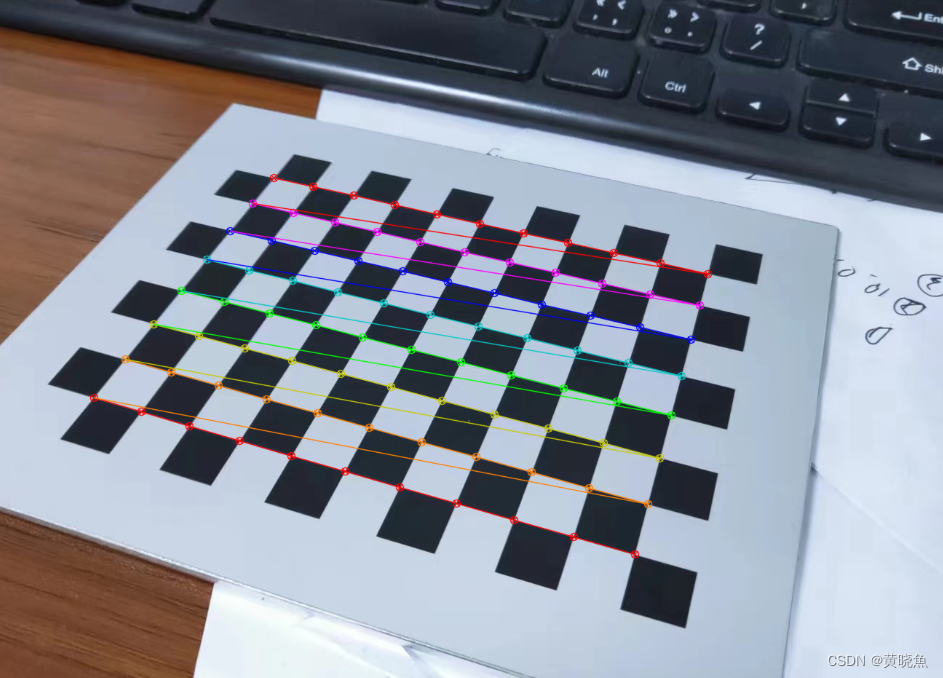
代码后面,我们对一组真实的标定图像进行了解码,由于采集图像时用的是480P的投影仪,所以需要重新计算解码频率,效果如下:
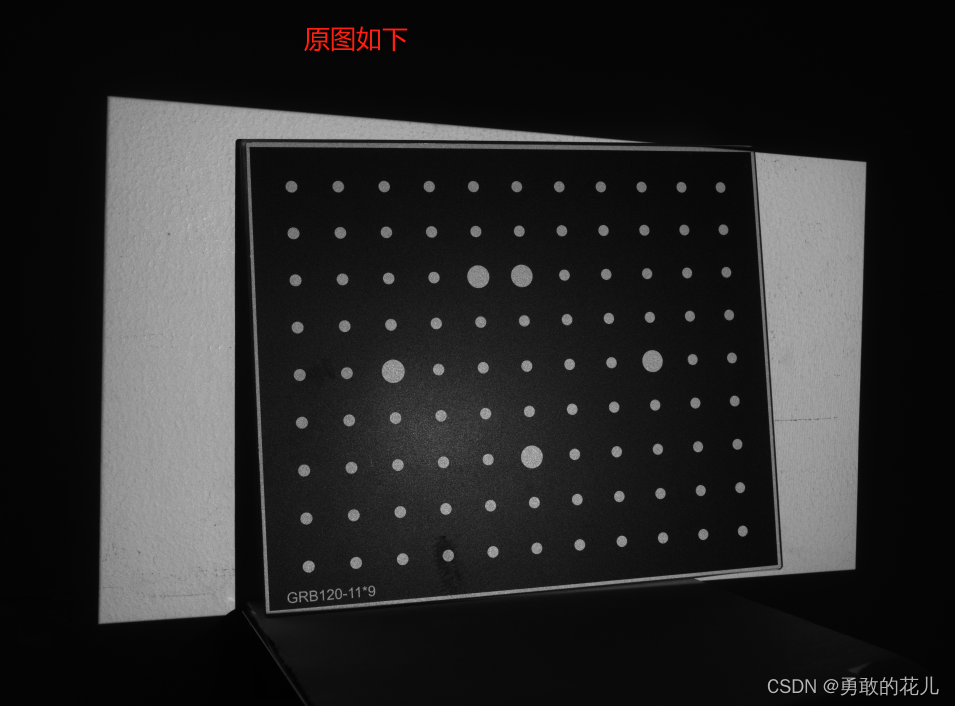
需要测试图像的朋友可以私信我。


![[工具] png图片打包plist工具,<span style='color:red;'>手把手</span><span style='color:red;'>教</span><span style='color:red;'>你</span>使用pngPackerGUI_V<span style='color:red;'>2</span>.0](https://img-blog.csdnimg.cn/img_convert/eab7e1934d557549ab28314ebeb72680.jpeg)