前言
本文使用的是jdk17,mysql8。
以下用两个服务做演示:
订单服务:提供订单ID,获取订单详细信息。
商品服务:提供商品ID,获取商品详细信息。
对于订单服务和商品服务分别建立数据库:
-- 订单服务

-- 建库
create database if not exists cloud_order charset utf8mb4;
use cloud_order;
-- 订单表
DROP TABLE IF EXISTS order_detail;
CREATE TABLE order_detail (
        `id` INT NOT NULL AUTO_INCREMENT COMMENT '订单id',
        `user_id` BIGINT ( 20 ) NOT NULL COMMENT '用户ID',
        `product_id` BIGINT ( 20 ) NULL COMMENT '产品id',
        `num` INT ( 10 ) NULL DEFAULT 0 COMMENT '下单数量',
        `price` BIGINT ( 20 ) NOT NULL COMMENT '实付款',
        `delete_flag` TINYINT ( 4 ) NULL DEFAULT 0,
        `create_time` DATETIME DEFAULT now(),
        `update_time` DATETIME DEFAULT now(),
PRIMARY KEY ( id )) ENGINE = INNODB DEFAULT CHARACTER
SET = utf8mb4 COMMENT = '订单表';

-- 数据初始化
insert into order_detail (user_id,product_id,num,price)
values
(2001, 1001,1,99), (2002, 1002,1,30), (2001, 1003,1,40),
(2003, 1004,3,58), (2004, 1005,7,85), (2005, 1006,7,94);


-- 产品服务
create database if not exists cloud_product charset utf8mb4;

-- 产品表
use cloud_product;
DROP TABLE IF EXISTS product_detail;
CREATE TABLE product_detail (
        `id` INT NOT NULL AUTO_INCREMENT COMMENT '产品id',
        `product_name` varchar ( 128 ) NULL COMMENT '产品名称',
        `product_price` BIGINT ( 20 ) NOT NULL COMMENT '产品价格',
        `state` TINYINT ( 4 ) NULL DEFAULT 0 COMMENT '产品状态 0-有效 1-下架',
        `create_time` DATETIME DEFAULT now(),
        `update_time` DATETIME DEFAULT now(),
PRIMARY KEY ( id )) ENGINE = INNODB DEFAULT CHARACTER
SET = utf8mb4 COMMENT = '产品表';

-- 数据初始化
insert into product_detail (id, product_name,product_price,state)
values
(1001,"T恤", 101, 0), (1002, "短袖",30, 0), (1003, "短裤",44, 0),
(1004, "卫衣",58, 0), (1005, "马甲",98, 0),(1006,"羽绒服", 101, 0),
(1007, "冲锋衣",30, 0), (1008, "袜子",44, 0), (1009, "鞋子",58, 0),
(10010, "毛衣",98, 0);
服务拆分
微服务到底多小才算“微”,这个在业界并没有明确的标准。微服务并不是越小越好,服务越小,微服务架构的优点和缺点都会越来越明显。
服务越小,微服务的独立性就会越来越高,但同时,微服务的数量也会越多,管理这些微服务的难度也会提高。所以服务拆分也要考虑场景。
服务拆分原则
单一职责原则
在微服务架构中意味着每个微服务应该只负责一个功能或业务领域,每个服务应该有清晰的定义和边界,只关注自己的特定业务领域。
服务自治
指的是每个微服务都应该具备高度自治的能力,即每个服务要能做到独立开发、独立测试、独立构建、独立部署、独立运行。
单向依赖
意味着微服务之间需要做到单向依赖,严禁循环依赖和双向依赖。循环依赖示例:A -> B -> C -> A;双向依赖示例:A -> B, B -> A。如果一些场景确实无法避免循环依赖或者双向依赖,可以考虑使用消息队列等其他方式来实现。
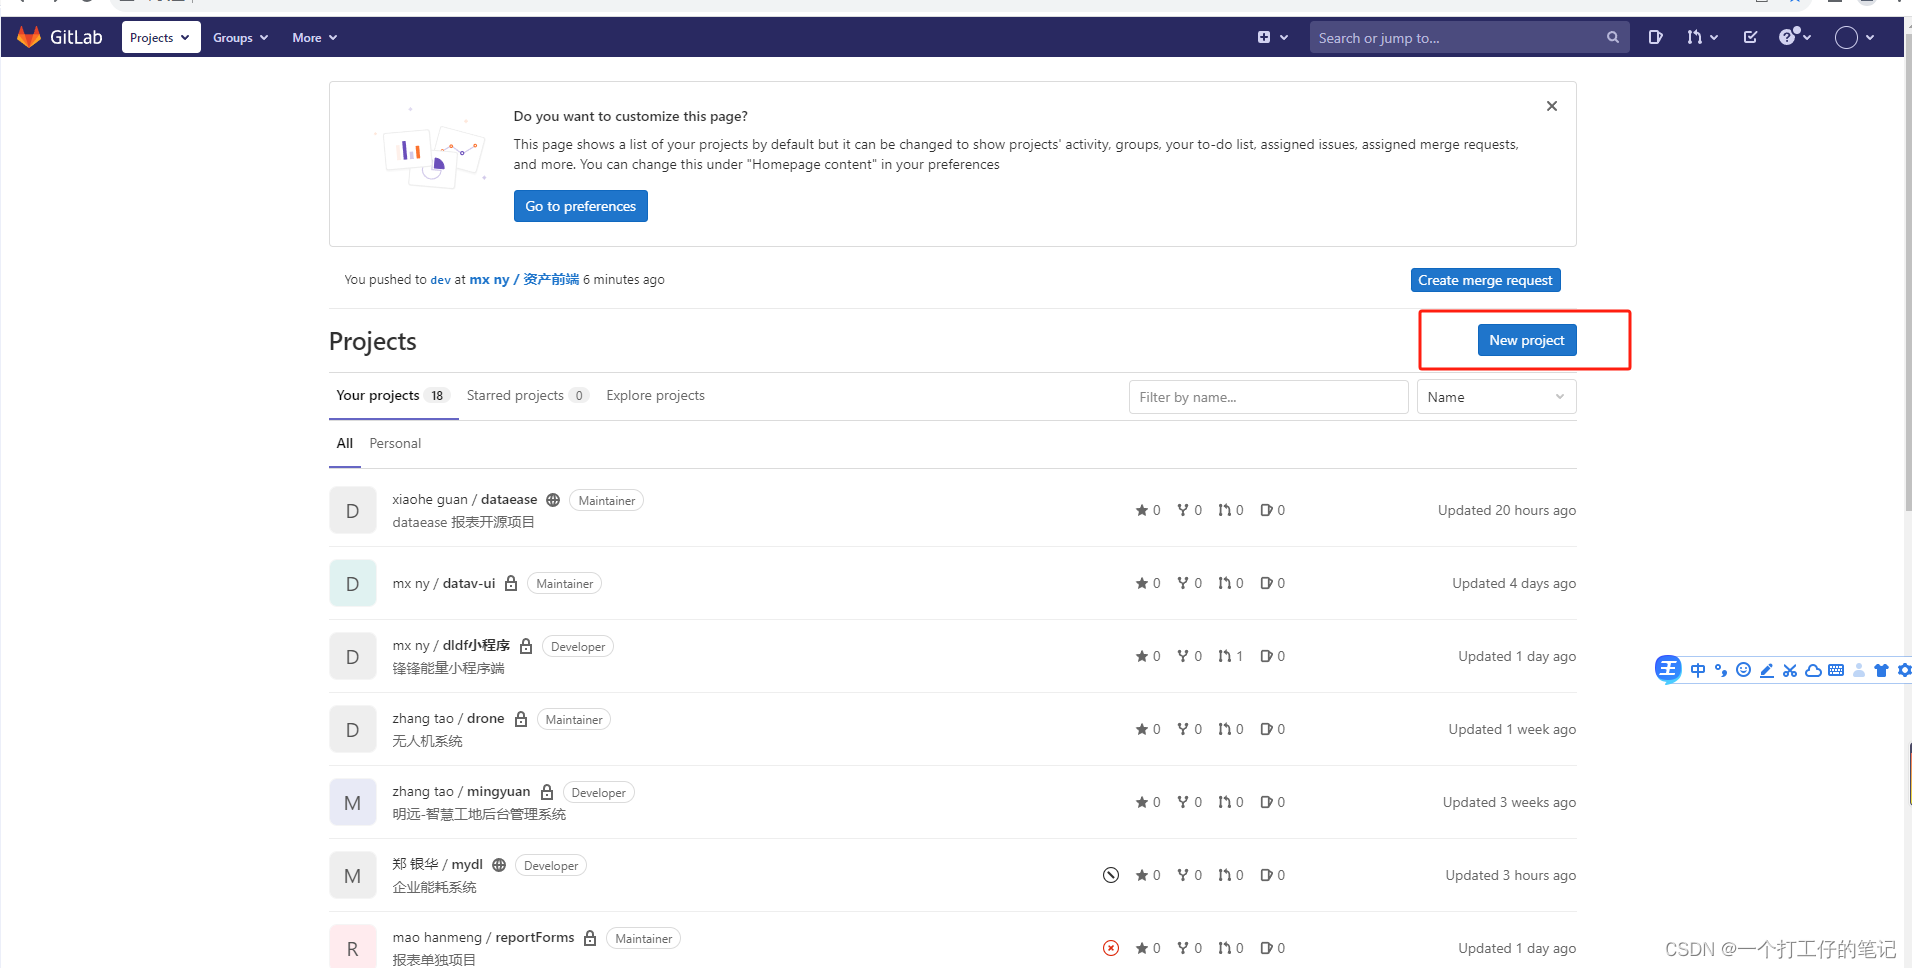
工程搭建
这里使用的父子项目来创建。
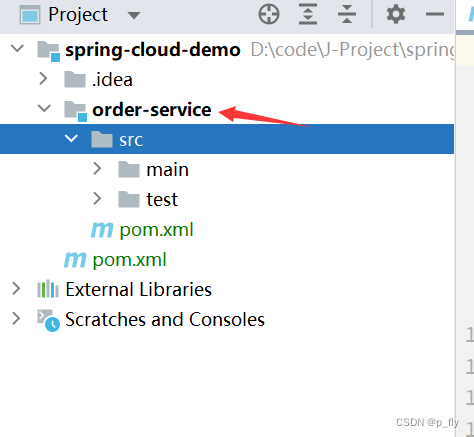
创建父项目
选择Maven项目
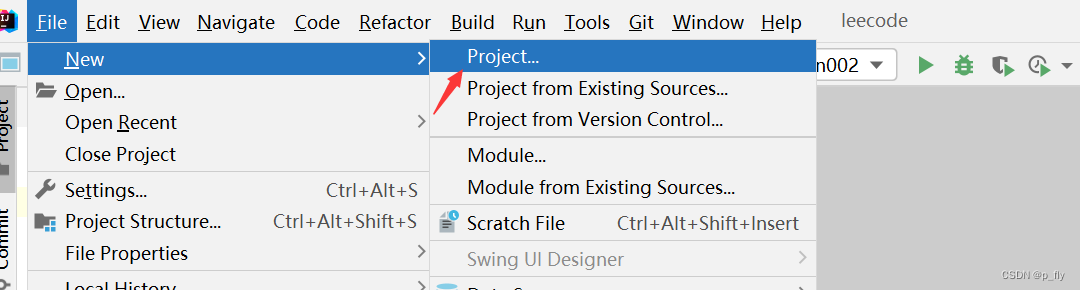
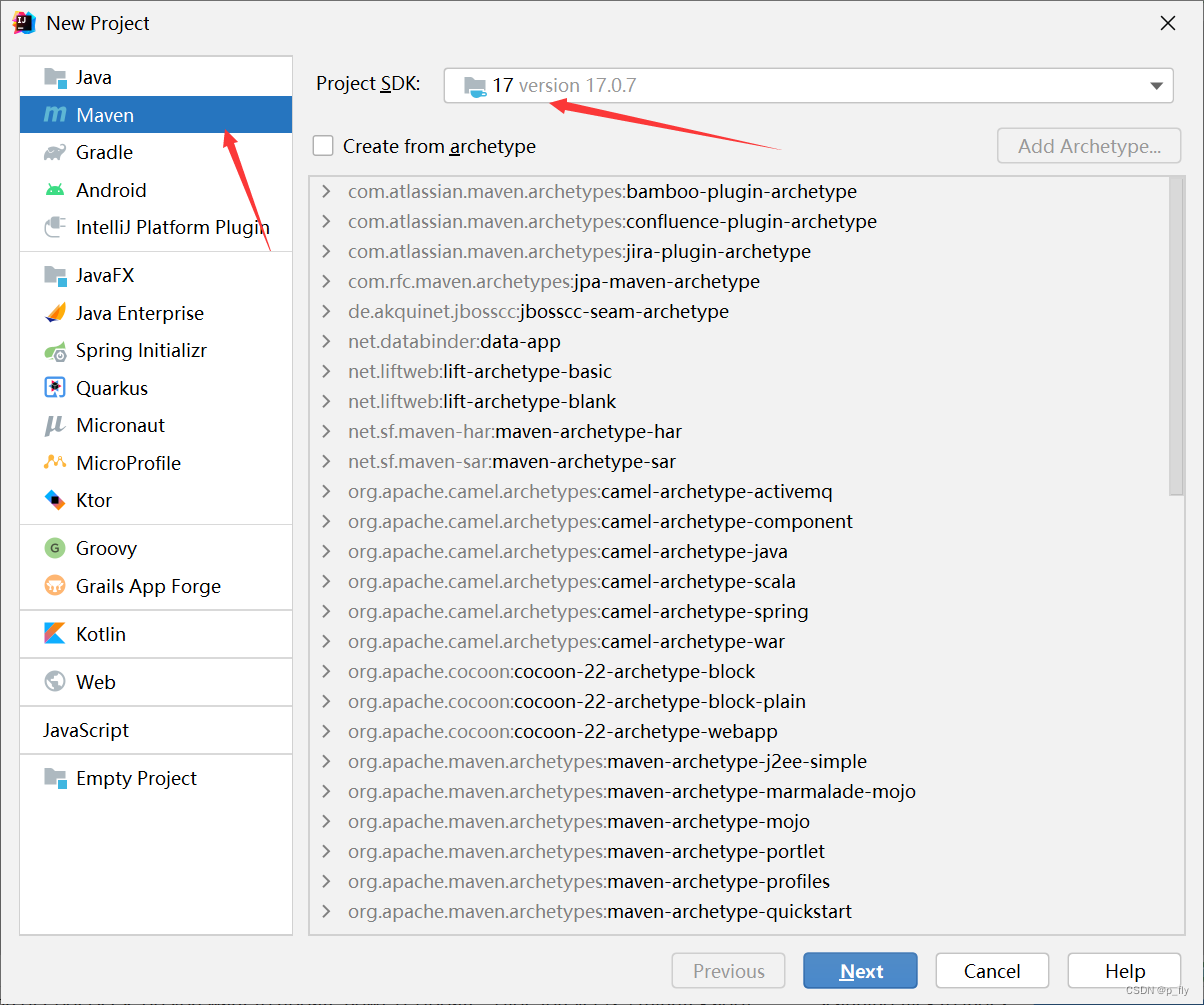
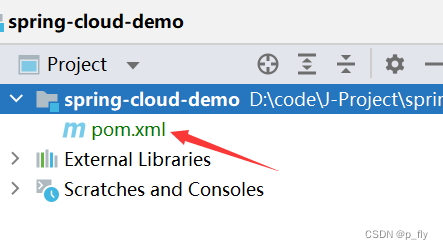
一路next完成即可。
创建完成后,删除所有的代码,仅保留pom.xml文件。
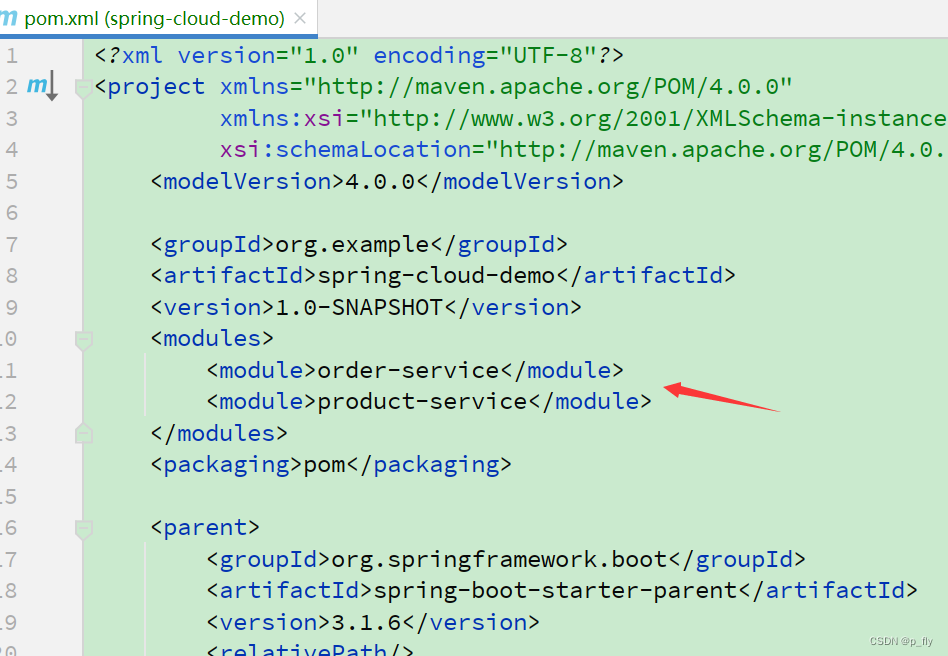
完善pom文件
使用 properties 来统一管理版本号,使用 dependencyManagement 来管理依赖,父工程的打包方式为 pom。
<?xml version="1.0" encoding="UTF-8"?>
<project xmlns="http://maven.apache.org/POM/4.0.0"
         xmlns:xsi="http://www.w3.org/2001/XMLSchema-instance"
         xsi:schemaLocation="http://maven.apache.org/POM/4.0.0 http://maven.apache.org/xsd/maven-4.0.0.xsd">
    <modelVersion>4.0.0</modelVersion>

    <groupId>org.example</groupId>
    <artifactId>spring-cloud-demo</artifactId>
    <version>1.0-SNAPSHOT</version>
    <packaging>pom</packaging>

    <parent>
        <groupId>org.springframework.boot</groupId>
        <artifactId>spring-boot-starter-parent</artifactId>
        <version>3.1.6</version>
        <relativePath/>
    </parent>
    <properties>
        <maven.compiler.source>17</maven.compiler.source>
        <maven.compiler.target>17</maven.compiler.target>
        <java.version>17</java.version>
        <mybatis.version>3.0.3</mybatis.version>
        <mysql.version>8.0.33</mysql.version>
        <spring-cloud.version>2022.0.3</spring-cloud.version>
    </properties>

    <dependencies>
        <dependency>
            <!-- 使用lombok基本都会使用到,所以直接引入到项目,被子项目继承 -->
            <groupId>org.projectlombok</groupId>
            <artifactId>lombok</artifactId>
            <optional>true</optional>
        </dependency>
    </dependencies>

    <dependencyManagement>
        <dependencies>
            <dependency>
                <groupId>org.springframework.cloud</groupId>
                <artifactId>spring-cloud-dependencies</artifactId>
                <version>${spring-cloud.version}</version>
                <type>pom</type>
                <scope>import</scope>
            </dependency>
            <dependency>
                <groupId>org.mybatis.spring.boot</groupId>
                <artifactId>mybatis-spring-boot-starter</artifactId>
                <version>${mybatis.version}</version>
            </dependency>
            <dependency>
                <groupId>com.mysql</groupId>
                <artifactId>mysql-connector-j</artifactId>
                <version>${mysql.version}</version>
            </dependency>
            <dependency>
                <groupId>org.mybatis.spring.boot</groupId>
                <artifactId>mybatis-spring-boot-starter-test</artifactId>
                <version>${mybatis.version}</version>
                <scope>test</scope>
            </dependency>
        </dependencies>
    </dependencyManagement>

</project>
dependencies:将所依赖的 JAR 直接加到项目中。子项目也会继承该依赖。
dependencyManagement:只是声明依赖,并不实现 JAR 包引入。如果子项目需要用到相关依赖,需要显式声明。如果子项目没有指定具体版本,会从父项目中读取 version。如果子项目中指定了版本号,就会使用子项目中指定的 JAR 版本。此外,父工程的打包方式应该是 pom,不是 jar,这里需要手动使用 packaging 来声明。
创建子项目
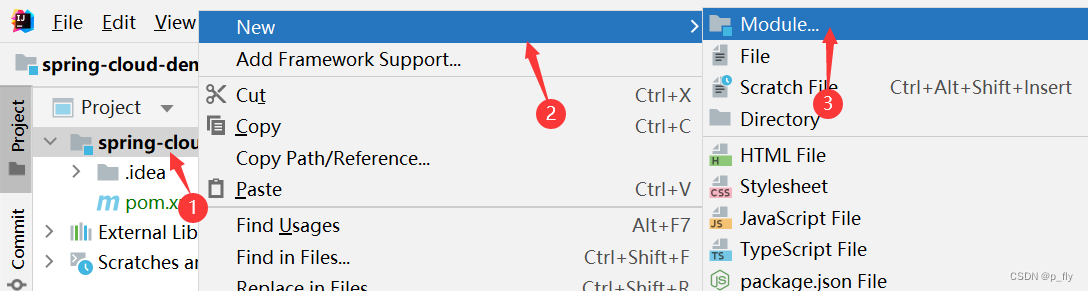


创建另一个项目也是同理。
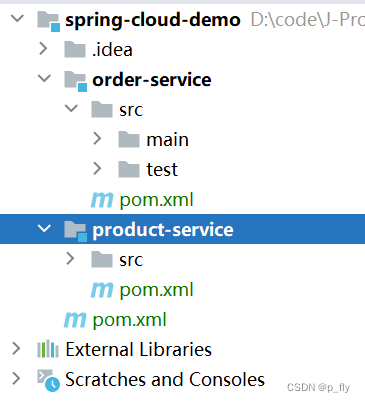
创建完两个子项目后,观察父项目的pom文件,这里会自动添加两个模块。
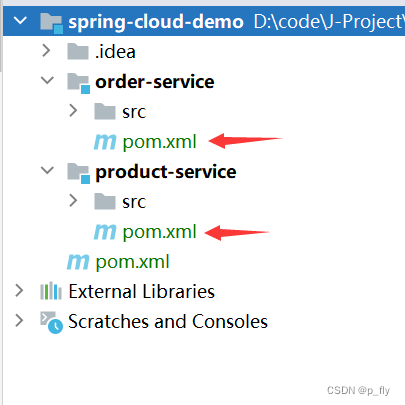
完善子项目
pom文件
在两个子项目中的pom文件中分别添加我们所需要依赖。
    <dependencies>
        <dependency>
            <groupId>org.springframework.boot</groupId>
            <artifactId>spring-boot-starter-web</artifactId>
        </dependency>
        <dependency>
            <groupId>com.mysql</groupId>
            <artifactId>mysql-connector-j</artifactId>
        </dependency>
        <!--mybatis-->
        <dependency>
            <groupId>org.mybatis.spring.boot</groupId>
            <artifactId>mybatis-spring-boot-starter</artifactId>
        </dependency>
    </dependencies>

    <build>
        <plugins>
            <plugin>
                <groupId>org.springframework.boot</groupId>
                <artifactId>spring-boot-maven-plugin</artifactId>
            </plugin>
        </plugins>
    </build>
下面是order-service完整的pom文件
<?xml version="1.0" encoding="UTF-8"?>
<project xmlns="http://maven.apache.org/POM/4.0.0"
         xmlns:xsi="http://www.w3.org/2001/XMLSchema-instance"
         xsi:schemaLocation="http://maven.apache.org/POM/4.0.0 http://maven.apache.org/xsd/maven-4.0.0.xsd">
    <parent>
        <artifactId>spring-cloud-demo</artifactId>
        <groupId>org.example</groupId>
        <version>1.0-SNAPSHOT</version>
    </parent>
    <modelVersion>4.0.0</modelVersion>

    <artifactId>order-service</artifactId>

    <properties>
        <maven.compiler.source>17</maven.compiler.source>
        <maven.compiler.target>17</maven.compiler.target>
    </properties>

    <dependencies>
        <dependency>
            <groupId>org.springframework.boot</groupId>
            <artifactId>spring-boot-starter-web</artifactId>
        </dependency>
        <dependency>
            <groupId>com.mysql</groupId>
            <artifactId>mysql-connector-j</artifactId>
        </dependency>
        <!--mybatis-->
        <dependency>
            <groupId>org.mybatis.spring.boot</groupId>
            <artifactId>mybatis-spring-boot-starter</artifactId>
        </dependency>
    </dependencies>

    <build>
        <plugins>
            <plugin>
                <groupId>org.springframework.boot</groupId>
                <artifactId>spring-boot-maven-plugin</artifactId>
            </plugin>
        </plugins>
    </build>

</project>
启动类
创建好包和启动类。
order-service:
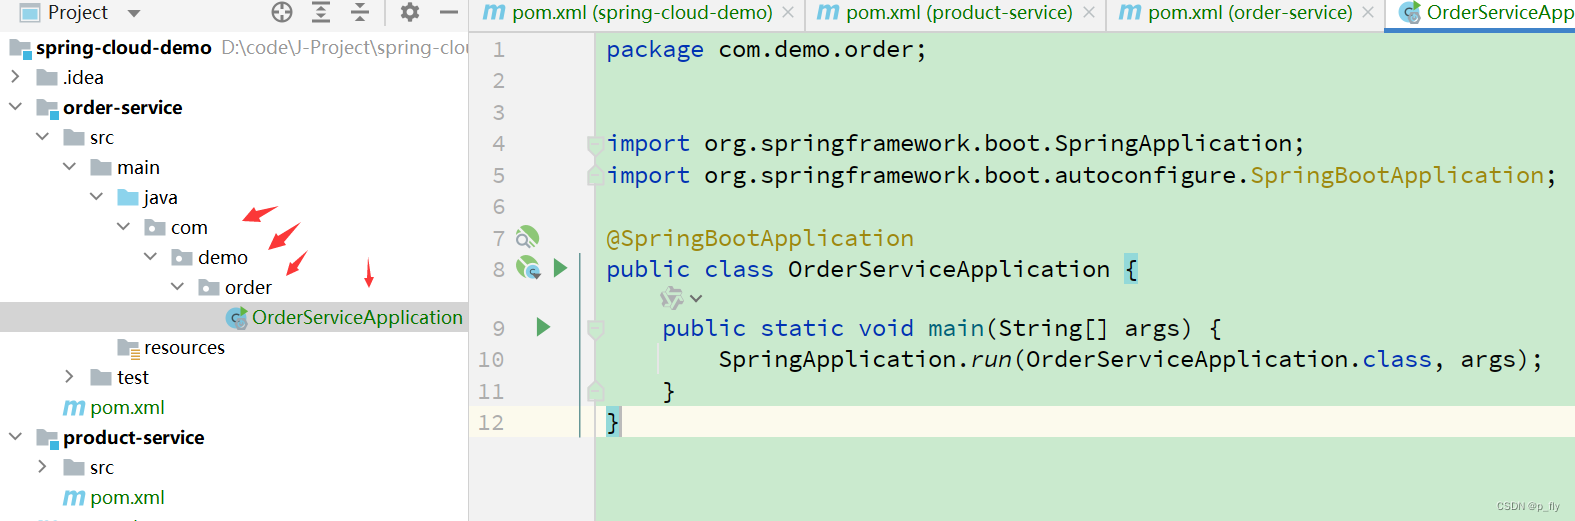
import org.springframework.boot.SpringApplication;
import org.springframework.boot.autoconfigure.SpringBootApplication;

@SpringBootApplication
public class OrderServiceApplication {
    public static void main(String[] args) {
        SpringApplication.run(OrderServiceApplication.class, args);
    }
}
product-service:
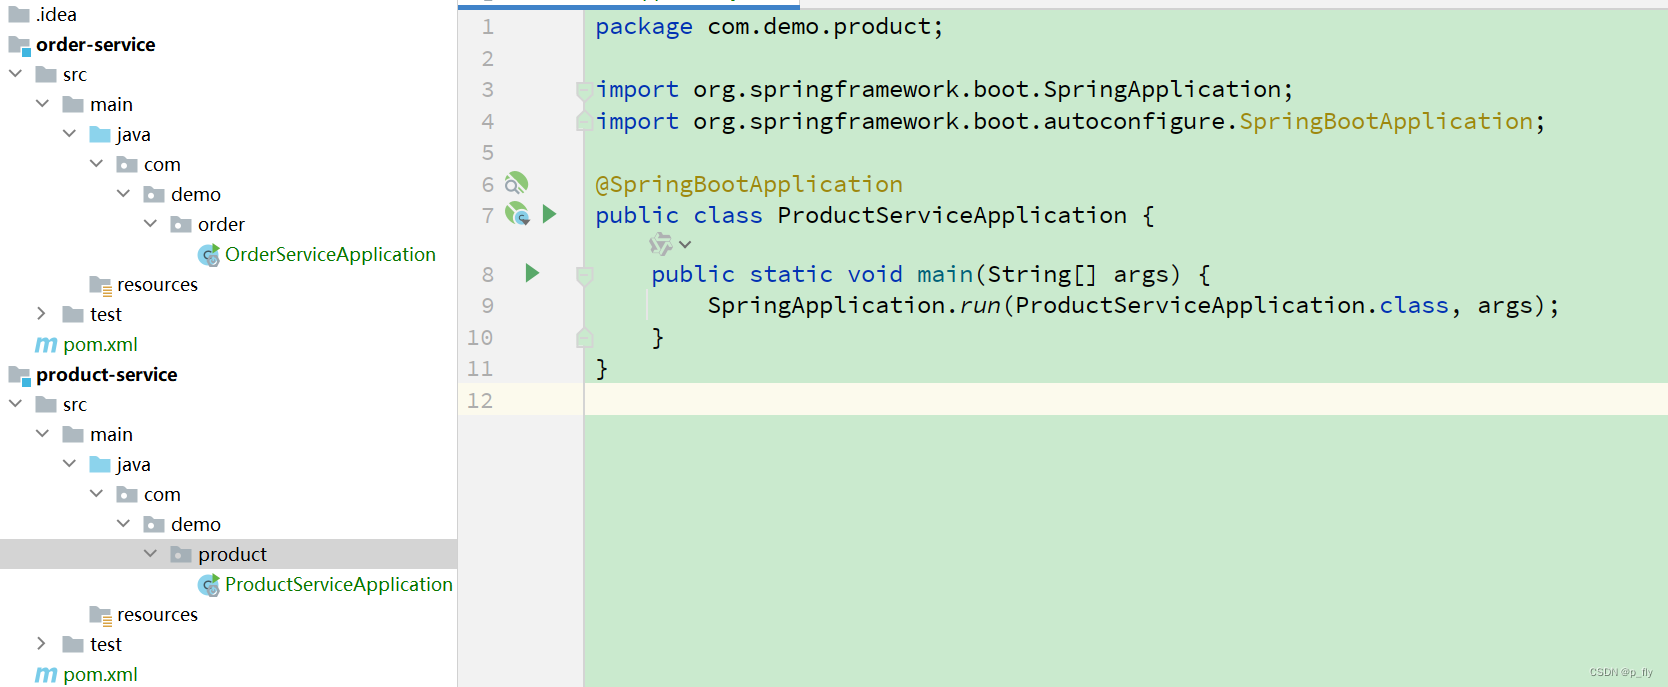
import org.springframework.boot.SpringApplication;
import org.springframework.boot.autoconfigure.SpringBootApplication;

@SpringBootApplication
public class ProductServiceApplication {
    public static void main(String[] args) {
        SpringApplication.run(ProductServiceApplication.class, args);
    }
}
配置文件
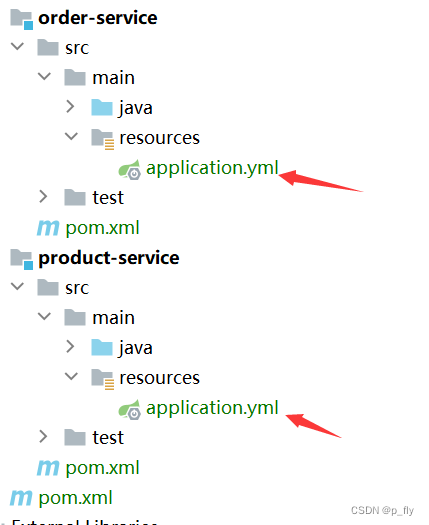
order_service:
server:
  port: 8240
spring:
  datasource:
    url: jdbc:mysql://ip:端口号/cloud_order?characterEncoding=utf8&useSSL=false
    username: 用户名
    password: 密码
    driver-class-name: com.mysql.cj.jdbc.Driver

# 设置 Mybatis 的 xml 保存路径
mybatis:
  configuration: # 配置打印 MyBatis 执行的 SQL
    log-impl: org.apache.ibatis.logging.stdout.StdOutImpl
    map-underscore-to-camel-case: true  #自动驼峰转换

# 配置打印 MyBatis 执行的 SQL
logging:
  file:
    name: logs/springboot.log
  logback:
    rollingpolicy:
      max-file-size: 1KB
      file-name-pattern: ${LOG_FILE}.%d{yyyy-MM-dd}.%i
  level:
    com:
      example:
        demo: debug
product_service:
server:
  port: 8250
spring:
  datasource:
    url: jdbc:mysql://ip:端口号/cloud_product?characterEncoding=utf8&useSSL=false
    username: 用户名
    password: 密码
    driver-class-name: com.mysql.cj.jdbc.Driver

# 设置 Mybatis 的 xml 保存路径
mybatis:
  configuration: # 配置打印 MyBatis 执行的 SQL
    log-impl: org.apache.ibatis.logging.stdout.StdOutImpl
    map-underscore-to-camel-case: true  #自动驼峰转换

# 配置打印 MyBatis 执行的 SQL
logging:
  file:
    name: logs/springboot.log
  logback:
    rollingpolicy:
      max-file-size: 1KB
      file-name-pattern: ${LOG_FILE}.%d{yyyy-MM-dd}.%i
  level:
    com:
      example:
        demo: debug
业务代码
对于order_service:
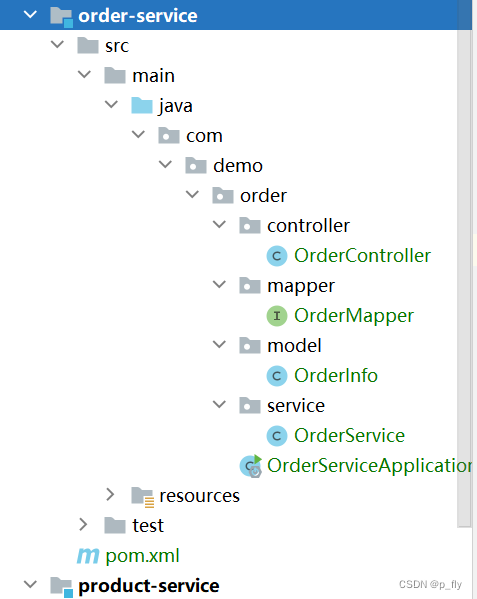
controller层:
package com.demo.order.controller;

import com.demo.order.model.OrderInfo;
import com.demo.order.service.OrderService;
import org.springframework.beans.factory.annotation.Autowired;
import org.springframework.web.bind.annotation.PathVariable;
import org.springframework.web.bind.annotation.RequestMapping;
import org.springframework.web.bind.annotation.RestController;

@RequestMapping("/order")
@RestController
public class OrderController {
    @Autowired
    private OrderService orderService;

    @RequestMapping("/{orderId}")
    public OrderInfo getOrderById(@PathVariable("orderId") Integer orderId){
        return orderService.selectOrderById(orderId);
    }
}
service层:
package com.demo.order.service;

import com.demo.order.mapper.OrderMapper;
import com.demo.order.model.OrderInfo;
import org.springframework.beans.factory.annotation.Autowired;
import org.springframework.stereotype.Service;

@Service
public class OrderService {
    @Autowired
    private OrderMapper orderMapper;

    public OrderInfo selectOrderById(Integer orderId){
        OrderInfo orderInfo = orderMapper.selectOrderById(orderId);
        return orderInfo;
    }
}
model层:
package com.demo.order.model;

import lombok.Data;

import java.util.Date;

@Data
public class OrderInfo {
    private Integer id;
    private Integer userId;
    private Integer productId;
    private Integer num;
    private Integer price;
    private Integer deleteFlag;
    private Date createTime;
    private Date updateTime;
}
mapper层:
package com.demo.order.mapper;

import com.demo.order.model.OrderInfo;
import org.apache.ibatis.annotations.Mapper;
import org.apache.ibatis.annotations.Select;

@Mapper
public interface OrderMapper {
    @Select("select * from order_detail where id=#{orderId}")
    OrderInfo selectOrderById(Integer orderId);
}
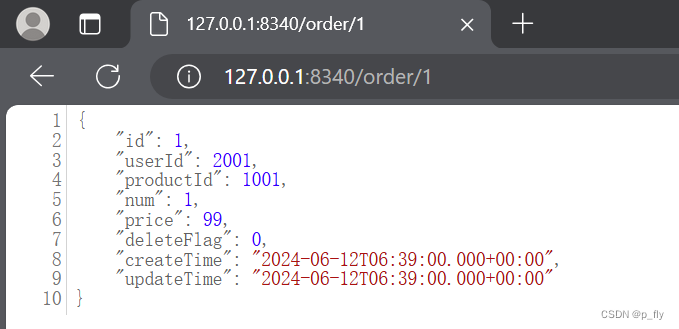
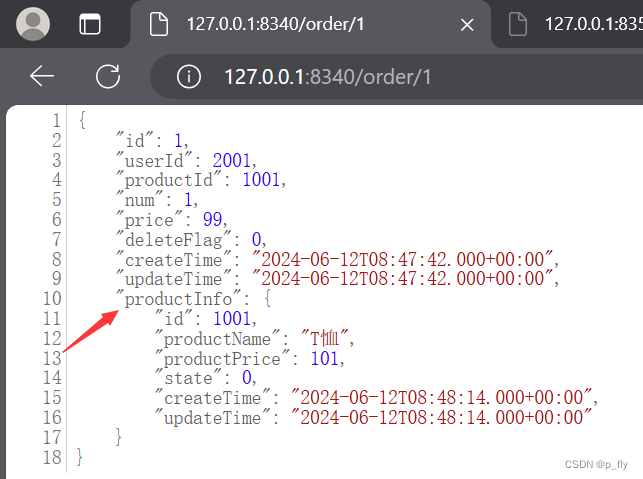
启动后查看:
对于product-service:
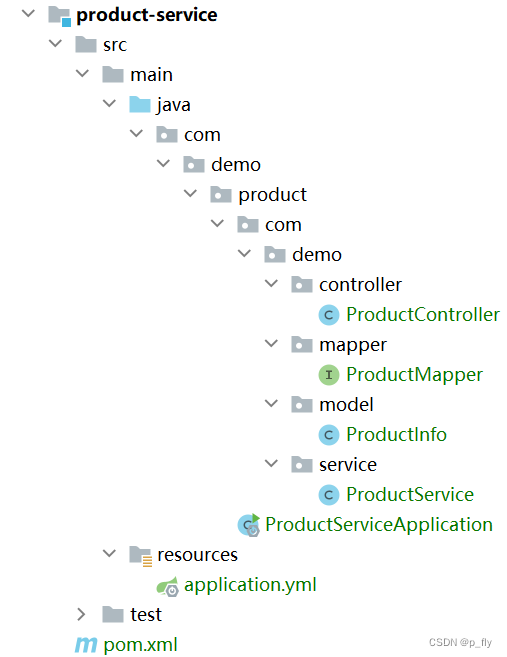
controller层:
package com.demo.product.com.demo.controller;

import com.demo.product.com.demo.model.ProductInfo;
import com.demo.product.com.demo.service.ProductService;
import org.springframework.beans.factory.annotation.Autowired;
import org.springframework.web.bind.annotation.PathVariable;
import org.springframework.web.bind.annotation.RequestMapping;
import org.springframework.web.bind.annotation.RestController;

@RequestMapping("/product")
@RestController
public class ProductController {
    @Autowired
    ProductService productService;
    @RequestMapping("/{productId}")
    public ProductInfo getProductById(@PathVariable("productId") Integer productId) {
        return productService.selectProductById(productId);
    }
}
service层:
package com.demo.product.com.demo.service;

import com.demo.product.com.demo.mapper.ProductMapper;
import com.demo.product.com.demo.model.ProductInfo;
import org.springframework.beans.factory.annotation.Autowired;
import org.springframework.stereotype.Service;

@Service
public class ProductService {
    @Autowired
    private ProductMapper productMapper;
    public ProductInfo selectProductById(Integer productId) {
        return productMapper.selectProductById(productId);
    }
}
model层:
package com.demo.product.com.demo.model;

import lombok.Data;
import java.util.Date;
@Data
public class ProductInfo {
    private Integer id;
    private String productName;
    private Integer productPrice;
    private Integer state;
    private Date createTime;
    private Date updateTime;
}
mapper层:
package com.demo.product.com.demo.mapper;
import com.demo.product.com.demo.model.ProductInfo;
import org.apache.ibatis.annotations.Mapper;
import org.apache.ibatis.annotations.Select;
@Mapper
public interface ProductMapper {
@Select("select * from product_detail where id=#{id}")
ProductInfo selectProductById(Integer id);
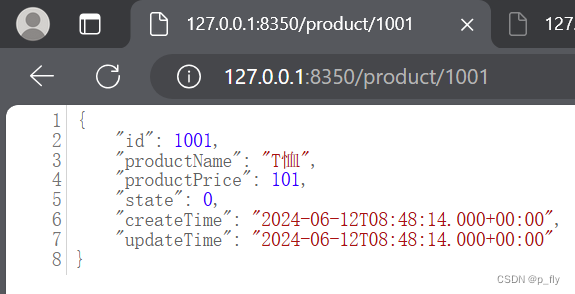
}启动后查看:
远程调用
需求:根据订单查询订单信息时,要使用订单信息中的产品ID获取产品详细信息。
实现思路:order-service服务像product-service服务发送一个http请求,把得到的结果和订单结合一起返回。
实现方法:使用Spring提供的RestTemplate
修改代码
在model中添加product实体类。把product-service中的product复制过去即可。
同时在order-service中的order实体类中添加上product最为字段。
在order-server中配置文件中注入RestTemplate
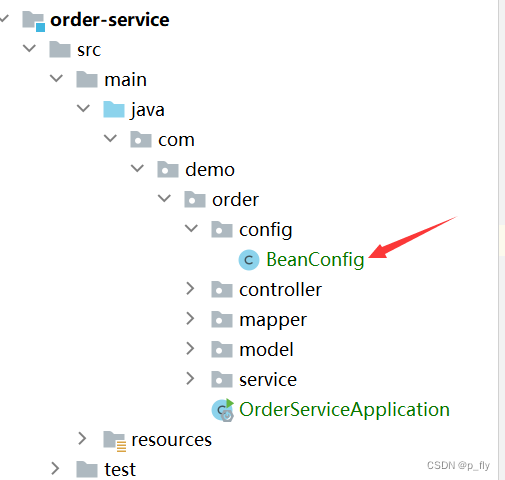
@Configuration
public class BeanConfig {
    @Bean
    public RestTemplate restTemplate(){
        return new RestTemplate();
    }
}
修改order-server中的OrderService
package com.demo.order.service;

import com.demo.order.mapper.OrderMapper;
import com.demo.order.model.OrderInfo;
import com.demo.order.model.ProductInfo;
import org.springframework.beans.factory.annotation.Autowired;
import org.springframework.stereotype.Service;
import org.springframework.web.client.RestTemplate;

@Service
public class OrderService {
    @Autowired
    private OrderMapper orderMapper;
    @Autowired
    private RestTemplate restTemplate;

    public OrderInfo selectOrderById(Integer orderId){
        OrderInfo orderInfo = orderMapper.selectOrderById(orderId);
        String url = "http://127.0.0.1:8350/product/"+ orderInfo.getProductId();
        ProductInfo productInfo = restTemplate.getForObject(url, ProductInfo.class);
        orderInfo.setProductInfo(productInfo);
        return orderInfo;
    }
}
测试
启动两个服务。
上面的代码是最简单的实现,代码还存在很多问题,后续还需要继续解决。


![[大模型]Llama-3-8B-Instruct FastApi 部署调用](https://img-blog.csdnimg.cn/direct/3703f65aaf774a8a93e74155039644de.png#pic_center)