最近有一个开发桌面端的业务,考虑到跨平台就使用了electron。
引用官网:Electron是一个使用 JavaScript、HTML 和 CSS 构建桌面应用程序的框架。 嵌入 Chromium 和 Node.js 到 二进制的 Electron 允许您保持一个 JavaScript 代码代码库并创建 在Windows上运行的跨平台应用 macOS和Linux。
简单说就是你会前端就能开发,无非是学一点api。官网入口
1.脚手架创建
正文
#创建文件夹
mkdir my-electron-app && cd my-electron-app

#初始化
npm init

#下载electron
npm i electron -S
在package.json里面加一个任务 “electron”: “electron .”
{
  "name": "electrondemo",
  "version": "1.0.0",
  "description": "",
  "main": "main.js",//主程序入口
  "scripts": {
    "test": "echo \"Error: no test specified\" && exit 1",
    "electron": "electron ." //就是这个
  },
  "author": "",
  "license": "ISC",
  "dependencies": {
    "@electron/remote": "^2.1.2",
    "electron": "^30.0.9"
  },
  "devDependencies": {
    "electron-reloader": "^1.2.3"
  }
}
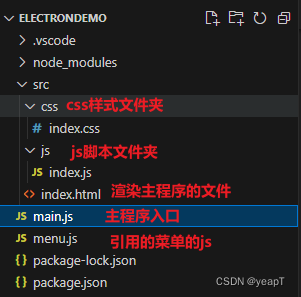
2.文件介绍
在electron项目中,最重要的就是main.js,这是主程序的入口。
3.代码粘贴
我这里会把我项目中的代码全部贴出来,个人理解就是主程序为核心,然后渲染主页面,页面上可以做各种交互。
main.js
const { app, BrowserWindow, Menu, globalShortcut, ipcMain } = require('electron')
//热加载
const reloader = require('electron-reloader')
reloader(module)
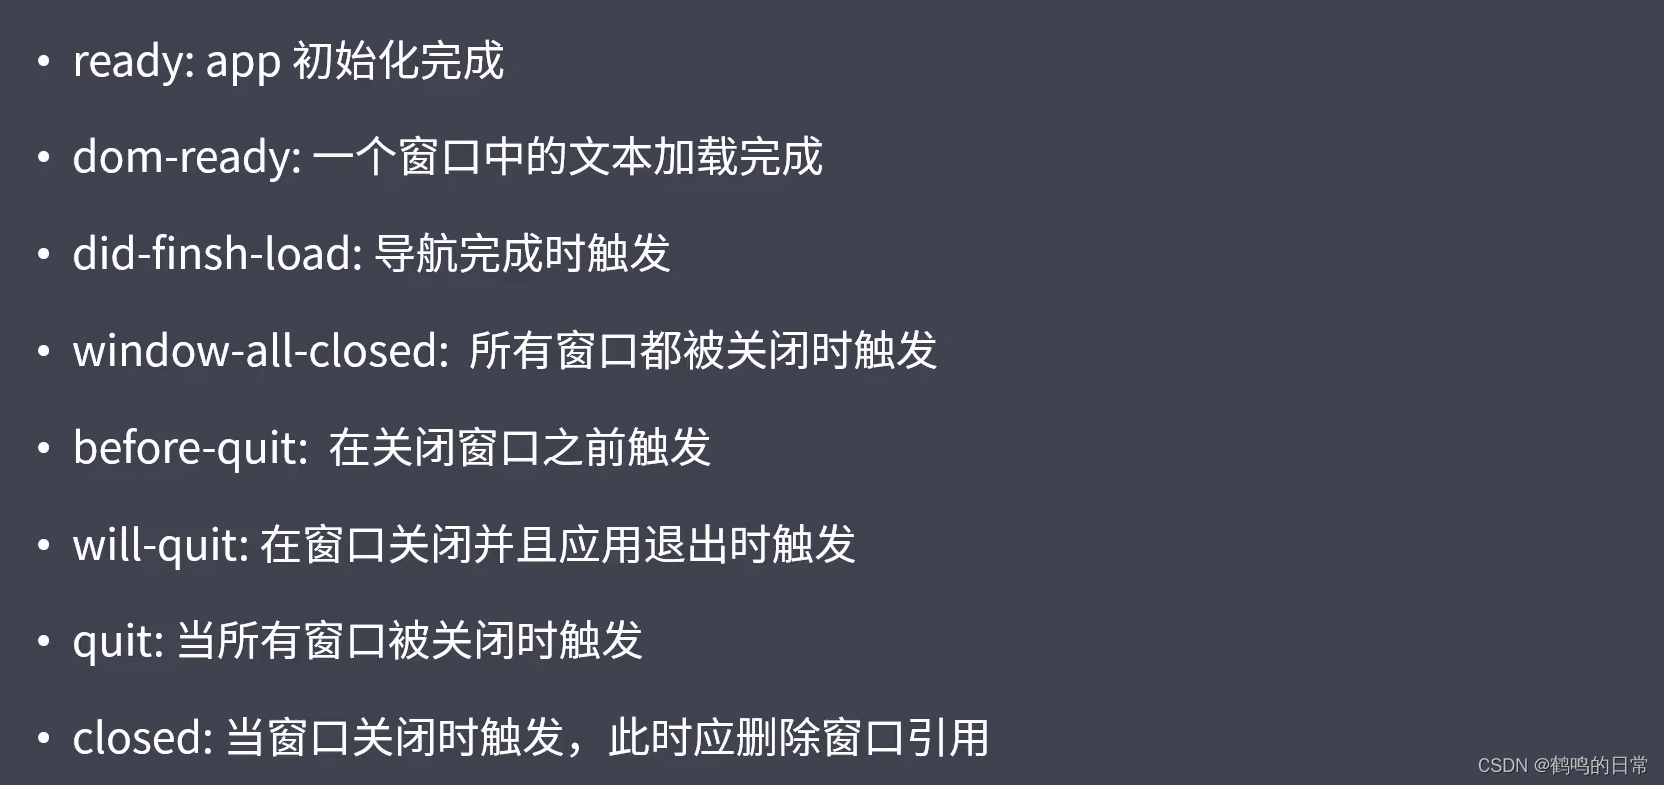
// 监听初始化完成的生命周期
app.on('ready', () => {
const createWindow = () => {
const mainWindow = new BrowserWindow({
width: 700,
height: 700,
frame: false, //无边框窗口
webPreferences: {
nodeIntegration: true,//开启渲染进程使用node模块
contextIsolation: false,//开启渲染进程使用node模块
enableRemoteModule: true,//开启渲染进程remote模块
}
})
mainWindow.loadFile('./src/index.html')
//默认打开调试
mainWindow.webContents.openDevTools()
//引入菜单js
require('./menu.js')
//引入remote
const remote = require('@electron/remote/main')
remote.initialize()
remote.enable(mainWindow.webContents)
//快捷键窗口最大化
globalShortcut.register('CommandOrControl+M', () => {
mainWindow.maximize()
})
//定义自定义事件(渲染进程和主进程通讯)
ipcMain.on('max-window',()=>{
mainWindow.maximize()
})
}
app.whenReady().then(() => {
createWindow()
app.on('activate', () => {
if (BrowserWindow.getAllWindows().length === 0) {
createWindow()
}
})
})
app.on('window-all-closed', () => {
if (process.platform !== 'darwin') app.quit()
})
})
index.html
<!DOCTYPE html>
<html lang="en">
<head>
    <meta charset="UTF-8">
    <meta name="viewport" content="width=device-width, initial-scale=1.0">
    <title>Document</title>
    <link rel="stylesheet" href="./css/index.css">
</head>
<body>
    <div class="custom-menu">
            <button style="-webkit-app-region: no-drag" onclick="maxWindow()">最大</button>
            <ul>
                <li>最大</li>
                <li class="new-window">新建窗口</li>
                <li><a href="http://www.baidu.com">关于我们</a></li>
            </ul>
    </div>
    <h1>hello electron 汗滴禾下土</h1>
    <button onclick="openFile()">打开文件</button>
    <button onclick="saveFile()">保存文件</button>
    <textarea></textarea>
    <script src="./js/index.js"></script>
</body>
</html>
menu.js
const { app, BrowserWindow, Menu } = require('electron')

//定义菜单模版
const template = [
    {
        label: '文件',
        submenu: [
            {
                label: '新建窗口',
                click() {
                    new BrowserWindow({
                        width: 200,
                        height: 200
                    })
                }
            }
        ]
    },
    {
        label: '关于我们'
    }
]

//编译模版
const menu = Menu.buildFromTemplate(template)
//设置菜单
Menu.setApplicationMenu(menu)
index.css
* {
    margin: 0;
    padding: 0;
}

.custom-menu{
    height: 50px;
    width: 100%;
    background: pink;
    -webkit-app-region: drag; /*支持拖拽*/
}

.custom-menu ul{
    list-style: none;
}

.custom-menu ul li{
    float: left;
    width: 80px;
    line-height: 50px;
    text-align: center;
    margin-left: 10px;
    -webkit-app-region: no-drag;
}
index.js
const { shell, ipcRenderer } = require("electron");
const { BrowserWindow, dialog } = require("@electron/remote");
const fs = require("fs")

// 点击新建窗口
const newWindow = document.querySelector('.new-window')
newWindow.onclick = function () {
    new BrowserWindow({
        width: 300,
        height: 300
    })
}

// 点击a跳转
const allA = document.querySelectorAll('a')
allA.forEach(item => {
    item.onclick = function (e) {
        e.preventDefault();
        shell.openExternal(item.href)
    }
})

// 打开文件
const textArea1 = document.querySelector('textarea')
function openFile() {
    const res = dialog.showOpenDialogSync({
        title: '读取',
        buttonLabel: '读取文件',
        filters: [
            { name: 'Custom File Type', extensions: ['js'] },
        ]
    })

    const fileContent = fs.readFileSync(res[0]).toString
    console.log(fileContent)
    textArea1.value = fileContent
}

// 保存文件
function saveFile() {
    const res = dialog.showSaveDialogSync({
        title: '保存',
        buttonLabel: '保存文件',
        filters: [
            { name: 'index', extensions: ['js'] },
        ]
    })

    fs.writeFileSync(res,textArea1.value)
}

// 渲染进程和主进程通讯
const maxWindow =function(){
    ipcRenderer.send('max-window')
}
4.拓展
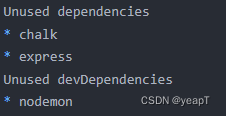
清理依赖
发现不知不觉引入了很多依赖,进行简单的清理。
npm install -g depcheck
depcheck
调试
碰到一个问题,开发环境弹出窗体渲染没有问题,但是打包之后弹出窗体渲染就异常。启动的时候用dos命令行启动,这样console的日志还可以看到,便于排查。
#进入exe路径
.\program.exe
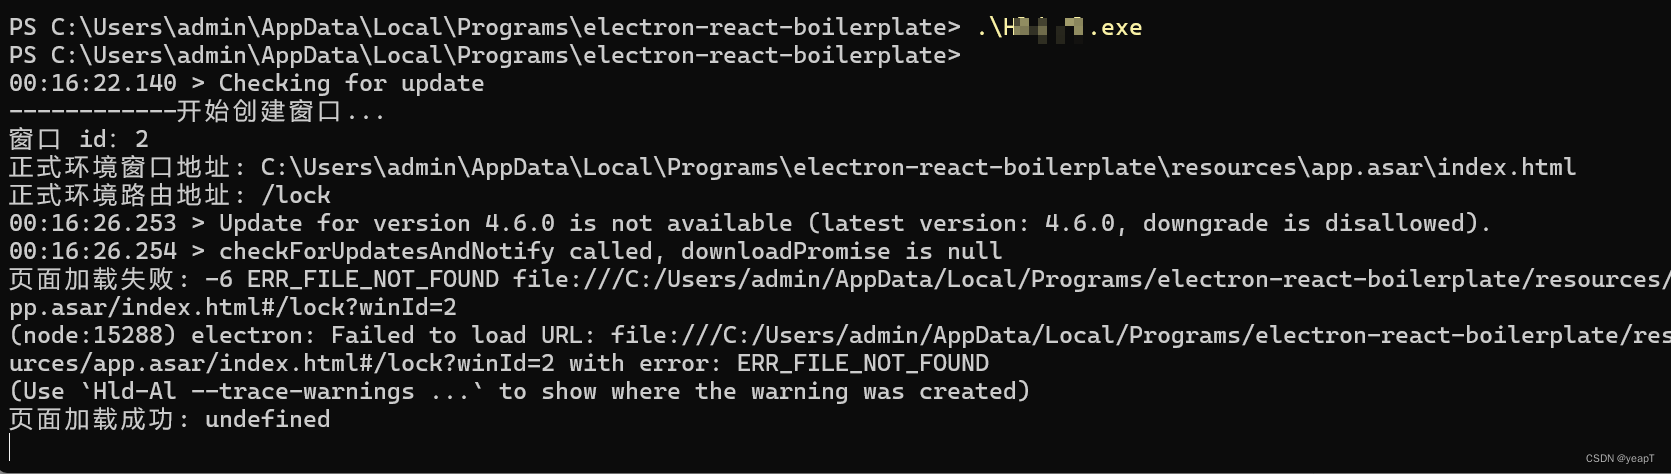
打开网址
// 打开网址(加载页面)
    let winURL: string;
    if (app.isPackaged) {
      // 已打包,正式环境(记住这里一定要去找程序入口页面)
      const html = path.join(
        path.join(__dirname, '../renderer/'),
        'index.html',
      );
      console.log('正式环境窗口地址:', html);
      console.log('正式环境路由地址:', args.route);
      win.loadFile(html, {
        hash: args.route ? `${args.route}?winId=${args.id}` : '',
      });
    } else {
      // 未打包,开发环境
      const html1 = path.join(
        path.join(__dirname, '../'),
        'renderer/index.tsx',
      );
      console.log('项目地址:', __dirname);
      console.log('正式环境窗口地址:', html1);

      winURL = args.route
        ? `http://localhost:1212/#${args.route}?winId=${args.id}`
        : `http://${process.env['VITE_DEV_SERVER_HOST']}:${process.env['VITE_DEV_SERVER_PORT']}?winId=${args.id}`;
      console.log('新窗口地址:', winURL);
      if (args.params) {
        winURL = addQueries(winURL, args.params);
      }
      win.loadURL(winURL);
    }