权限模块开发流程
- 前端login页面开发
- 后端SpringSecurity配置
- 后端login接口开发
- 前端页面框架搭建
- 前端路由守卫,状态管理开发
- 前后端完成认证流程
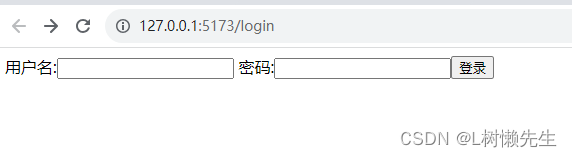
开发Login页面
- 创建Login页面
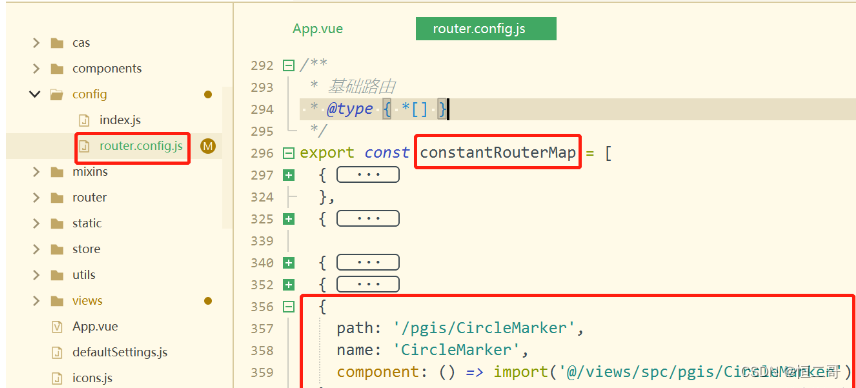
- 创建router,可以跳转到Login页面
Login页面
使用element-plus开发
认证功能流程
前端
- 集成axios,并对axios进行封装
- 配置路由守卫
- 对请求和响应的拦截
- 登录接口的调用
- 登录成功之后的页面跳转
- 跳转到首页
- 页面就是由左侧导航、头部导航、页面主体
后端
- 配置SpringScurity
- 写登录接口
- 返回用户的token、使用jwt生成token
- 返回用户的权限信息【路由页面】
配置Redis
引入依赖
<!--引入redis-->
<dependency>
    <groupId>org.springframework.boot</groupId>
    <artifactId>spring-boot-starter-data-redis</artifactId>
    <version>3.1.5</version>
</dependency>
配置连接
spring:
  datasource:
    driver-class-name: com.mysql.cj.jdbc.Driver
    url: jdbc:mysql://rm-2ze9013333m0paw8ywo.mysql.rds.aliyuncs.com:3306/daocao?useUnicode=true&characterEncoding=utf8&zeroDateTimeBehavior=convertToNull&useSSL=true&serverTimezone=GMT%2B8
    username: puhe_shitian
    password: Shitian@9527
  data:
    redis:
      # 地址
      host: localhost
      # 数据库索引
      database: 2
      # 密码
      password: $2a$10$4NR/
      # 连接超时时间
      timeout: 10s
      lettuce:
        pool:
          # 连接池中的最小空闲连接
          min-idle: 0
          # 连接池中的最大空闲连接
          max-idle: 8
          # 连接池的最大数据库连接数
          max-active: 8
          # #连接池最大阻塞等待时间(使用负值表示没有限制)
          max-wait: -1ms
配置Redis数据序列化
public class FastJson2JsonRedisSerializer<T> implements RedisSerializer<T>{
    public static final Charset DEFAULT_CHARSET = Charset.forName("UTF-8");

    private Class<T> clazz;

    public FastJson2JsonRedisSerializer(Class<T> clazz)
    {
        super();
        this.clazz = clazz;
    }

    @Override
    public byte[] serialize(T t) throws SerializationException
    {
        if (t == null)
        {
            return new byte[0];
        }
        return JSON.toJSONString(t, JSONWriter.Feature.WriteClassName).getBytes(DEFAULT_CHARSET);
    }

    @Override
    public T deserialize(byte[] bytes) throws SerializationException
    {
        if (bytes == null || bytes.length <= 0)
        {
            return null;
        }
        String str = new String(bytes, DEFAULT_CHARSET);

        return JSON.parseObject(str, clazz, JSONReader.Feature.SupportAutoType);
    }
}
package com.daocao.support.config.redis;

import org.springframework.cache.annotation.EnableCaching;
import org.springframework.context.annotation.Bean;
import org.springframework.context.annotation.Configuration;
import org.springframework.data.redis.connection.RedisConnectionFactory;
import org.springframework.data.redis.core.RedisTemplate;
import org.springframework.data.redis.core.script.DefaultRedisScript;
import org.springframework.data.redis.serializer.StringRedisSerializer;

/**
 * @author 石添
 * @date 2023/11/15 9:31
 */
@Configuration
@EnableCaching
public class RedisConfig {

    @Bean
    @SuppressWarnings(value = { "unchecked", "rawtypes" })
    public RedisTemplate<Object, Object> redisTemplate(RedisConnectionFactory connectionFactory) {
        RedisTemplate<Object, Object> template = new RedisTemplate<>();
        template.setConnectionFactory(connectionFactory);
        FastJson2JsonRedisSerializer serializer = new FastJson2JsonRedisSerializer(Object.class);
        // 使用StringRedisSerializer来序列化和反序列化redis的key值
        template.setKeySerializer(new StringRedisSerializer());
        template.setValueSerializer(serializer);
        // Hash的key也采用StringRedisSerializer的序列化方式
        template.setHashKeySerializer(new StringRedisSerializer());
        template.setHashValueSerializer(serializer);
        template.afterPropertiesSet();
        return template;
    }

    @Bean
    public DefaultRedisScript<Long> limitScript() {
        DefaultRedisScript<Long> redisScript = new DefaultRedisScript<>();
        redisScript.setScriptText(limitScriptText());
        redisScript.setResultType(Long.class);
        return redisScript;
    }

    /**
     * 限流脚本
     */
    private String limitScriptText() {
        return "local key = KEYS[1]\n" +
                "local count = tonumber(ARGV[1])\n" +
                "local time = tonumber(ARGV[2])\n" +
                "local current = redis.call('get', key);\n" +
                "if current and tonumber(current) > count then\n" +
                "    return tonumber(current);\n" +
                "end\n" +
                "current = redis.call('incr', key)\n" +
                "if tonumber(current) == 1 then\n" +
                "    redis.call('expire', key, time)\n" +
                "end\n" +
                "return tonumber(current);";
    }
}
工具类
package com.daocao.common.redis;

import org.springframework.beans.factory.annotation.Autowired;
import org.springframework.data.redis.core.BoundSetOperations;
import org.springframework.data.redis.core.HashOperations;
import org.springframework.data.redis.core.RedisTemplate;
import org.springframework.data.redis.core.ValueOperations;
import org.springframework.stereotype.Component;

import java.util.*;
import java.util.concurrent.TimeUnit;

/**
 * @author ShiTian
 * @date 2022/8/1 17:19
 */
@Component
public class RedisCache {

    @Autowired
    public RedisTemplate redisTemplate;

    /**
     * 缓存基本的对象,Integer、String、实体类等
     *
     * @param key 缓存的键值
     * @param value 缓存的值
     */
    public <T> void setCacheObject(final String key, final T value)
    {
        redisTemplate.opsForValue().set(key, value);
    }

    /**
     * 缓存基本的对象,Integer、String、实体类等
     *
     * @param key 缓存的键值
     * @param value 缓存的值
     * @param timeout 时间
     * @param timeUnit 时间颗粒度
     */
    public <T> void setCacheObject(final String key, final T value, final Integer timeout, final TimeUnit timeUnit)
    {
        redisTemplate.opsForValue().set(key, value, timeout, timeUnit);
    }

    /**
     * 设置有效时间
     *
     * @param key Redis键
     * @param timeout 超时时间
     * @return true=设置成功;false=设置失败
     */
    public boolean expire(final String key, final long timeout)
    {
        return expire(key, timeout, TimeUnit.SECONDS);
    }

    /**
     * 设置有效时间
     *
     * @param key Redis键
     * @param timeout 超时时间
     * @param unit 时间单位
     * @return true=设置成功;false=设置失败
     */
    public boolean expire(final String key, final long timeout, final TimeUnit unit)
    {
        return redisTemplate.expire(key, timeout, unit);
    }

    /**
     * 获得缓存的基本对象。
     *
     * @param key 缓存键值
     * @return 缓存键值对应的数据
     */
    public <T> T getCacheObject(final String key)
    {
        ValueOperations<String, T> operation = redisTemplate.opsForValue();
        return operation.get(key);
    }

    /**
     * 删除单个对象
     *
     * @param key
     */
    public boolean deleteObject(final String key)
    {
        return redisTemplate.delete(key);
    }

    /**
     * 删除集合对象
     *
     * @param collection 多个对象
     * @return
     */
    public long deleteObject(final Collection collection)
    {
        return redisTemplate.delete(collection);
    }

    /**
     * 缓存List数据
     *
     * @param key 缓存的键值
     * @param dataList 待缓存的List数据
     * @return 缓存的对象
     */
    public <T> long setCacheList(final String key, final List<T> dataList)
    {
        Long count = redisTemplate.opsForList().rightPushAll(key, dataList);
        return count == null ? 0 : count;
    }

    /**
     * 获得缓存的list对象
     *
     * @param key 缓存的键值
     * @return 缓存键值对应的数据
     */
    public <T> List<T> getCacheList(final String key)
    {
        return redisTemplate.opsForList().range(key, 0, -1);
    }

    /**
     * 缓存Set
     *
     * @param key 缓存键值
     * @param dataSet 缓存的数据
     * @return 缓存数据的对象
     */
    public <T> BoundSetOperations<String, T> setCacheSet(final String key, final Set<T> dataSet)
    {
        BoundSetOperations<String, T> setOperation = redisTemplate.boundSetOps(key);
        Iterator<T> it = dataSet.iterator();
        while (it.hasNext())
        {
            setOperation.add(it.next());
        }
        return setOperation;
    }

    /**
     * 获得缓存的set
     *
     * @param key
     * @return
     */
    public <T> Set<T> getCacheSet(final String key)
    {
        return redisTemplate.opsForSet().members(key);
    }

    /**
     * 缓存Map
     *
     * @param key
     * @param dataMap
     */
    public <T> void setCacheMap(final String key, final Map<String, T> dataMap)
    {
        if (dataMap != null) {
            redisTemplate.opsForHash().putAll(key, dataMap);
        }
    }

    /**
     * 获得缓存的Map
     *
     * @param key
     * @return
     */
    public <T> Map<String, T> getCacheMap(final String key)
    {
        return redisTemplate.opsForHash().entries(key);
    }

    /**
     * 往Hash中存入数据
     *
     * @param key Redis键
     * @param hKey Hash键
     * @param value 值
     */
    public <T> void setCacheMapValue(final String key, final String hKey, final T value)
    {
        redisTemplate.opsForHash().put(key, hKey, value);
    }

    /**
     * 获取Hash中的数据
     *
     * @param key Redis键
     * @param hKey Hash键
     * @return Hash中的对象
     */
    public <T> T getCacheMapValue(final String key, final String hKey)
    {
        HashOperations<String, String, T> opsForHash = redisTemplate.opsForHash();
        return opsForHash.get(key, hKey);
    }

    /**
     * 删除Hash中的数据
     *
     * @param key
     * @param hKey
     */
    public void delCacheMapValue(final String key, final String hKey)
    {
        HashOperations hashOperations = redisTemplate.opsForHash();
        hashOperations.delete(key, hKey);
    }

    /**
     * 获取多个Hash中的数据
     *
     * @param key Redis键
     * @param hKeys Hash键集合
     * @return Hash对象集合
     */
    public <T> List<T> getMultiCacheMapValue(final String key, final Collection<Object> hKeys)
    {
        return redisTemplate.opsForHash().multiGet(key, hKeys);
    }

    /**
     * 获得缓存的基本对象列表
     *
     * @param pattern 字符串前缀
     * @return 对象列表
     */
    public Collection<String> keys(final String pattern)
    {
        return redisTemplate.keys(pattern);
    }
}
认证功能实现
认证功能主要由三部分组成:
- 根据用户名和密码登陆,获取返回的token保存下来
- 携带token请求用户的路由权限信息,跳转到项目首页
- 通过路由守卫,实现动态路由配置
登陆
登录方法中获取token,将token存储到sessionStorage中【或者pinia】。在axios请求中,获取token,将token传到后端
请求路由信息
后端:创建过滤器,获取request中的token,获取token之后,需要刷新token
获取路由数据,根据token获取用户信息,根据用户id查询对应的权限
存储路由数据
使用pinia进行全局存储【localstorage存储,sessionstorage存储】,前提保障项目中引入pinia
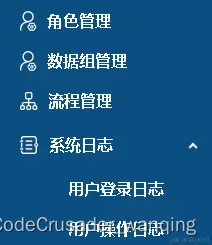
路由页面
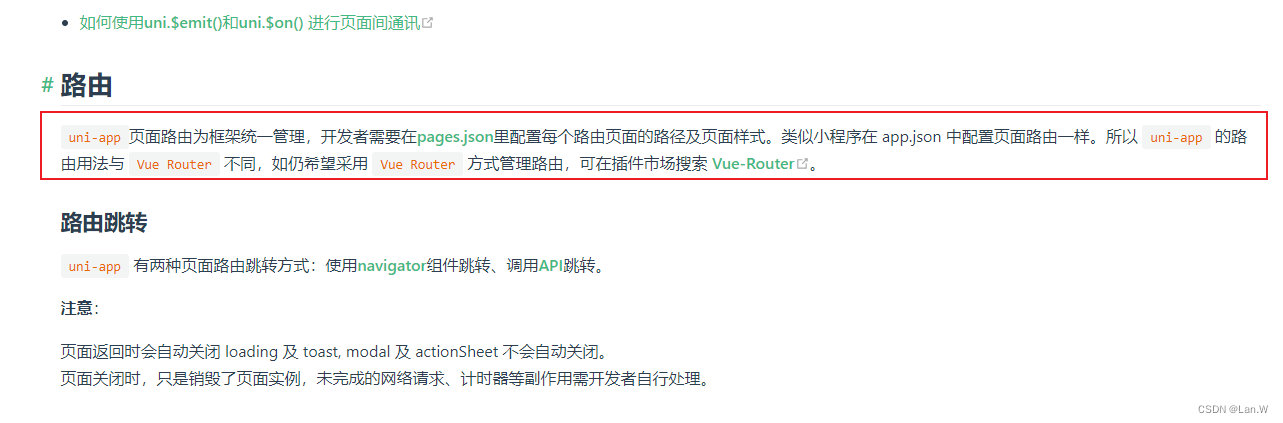
使用vue-router路由页面,保障项目中引入vue-router
创建核心页面
页面其实单页面,所有的路由都是跳转到同一个组件下的,只不过在main容器中,替换不同的vue文件【页面】就可以了
核心页面由三部分组成
- 左侧导航【Aside】
- 树形结构的菜单,里边包含了菜单名以及路由信息
- 头部【Header】
- 主体【Main】
可以使用element-plus实现
动态路由
两步走:
- 路由查询出来之后,需要渲染动态路由结构
- 在路由页面的时候,可以知道页面跳转的位置【通过路由守卫实现】
pinia持久化
安装持久化插件
npm install pinia-plugin-persistedstate
main.js配置
import piniaPluginPersistedstate from 'pinia-plugin-persistedstate'

const pinia = createPinia()
pinia.use(piniaPluginPersistedstate)
store文件
export const xxxx = defineStore('xxx', {
    state: () => ({ ...... }),
    getter: {},
    actions: {},
    // 持久化
    persist: {
    	enabled: true,
        storage: localStorage,
        key: 'useMenu',
        path: ['xxxx','xxxx']
    }
})
自定义icon
导入依赖
npm install fast-glob

npm install vite-plugin-svg-icons
vite.config.js
// 引入path
import path from 'path'
import { createSvgIconsPlugin } from 'vite-plugin-svg-icons'

export default defineConfig({
  plugins: [
    vue(),
    createSvgIconsPlugin({
        iconDirs: [path.resolve(process.cwd(), 'src/assets/icons/svg')],
        symbolId: '[name]'
    })
  ],
  resolve: {
    // 使用import导入文件时刻省略后缀
    extensions: ['.js', '.vue', '.json'],
    alias: {
      '@': fileURLToPath(new URL('./src', import.meta.url))
    }
  }
})
编写组件
在 components下创建 SvgIcon\index.vue
<template>
  <!-- svg:图标外层容器节点,内部需要与use标签结合使用 -->
  <svg :style="{ width, height }">
    <!-- xlink:href执行用哪一个图标,属性值务必#icon-图标名字 -->
    <!-- use标签fill属性可以设置图标的颜色 -->
    <use :xlink:href="prefix + name" :fill="color"></use>
  </svg>
</template>

<script setup>

//接受父组件传递过来的参数
defineProps({
  //xlink:href属性值前缀
  prefix: {
    type: String,
    default: "#",
  },
  //提供使用的图标名字
  name: String,
  //接受父组件传递颜色
  color: {
    type: String,
    default: "",
  },
  //接受父组件传递过来的图标的宽度
  width: {
    type: String,
    default: "16px",
  },
  //接受父组件传递过来的图标的高度
  height: {
    type: String,
    default: "16px",
  },
})
</script>

<style lang="scss" scoped>

</style>
全局注册,在main.js添加
import SvgIcon from '@/components/SvgIcon/index.vue';
import 'virtual:svg-icons-register';

app.component('svg-icon', SvgIcon);
使用
<template #prefix>
<svg-icon
          v-if="form.icon"
          slot="prefix"
          :name="form.icon"
          width="16px"
          height="25px"
          />
</template>
使用elemet-plus的icon
头部tabs开发
Main组件
Aside组件
配置省略后缀
在 vite.config.js文件中配置
export default defineConfig({
	......

    resolve: {
        extensions: ['.js','.vue','.json','.css'],
        alias: {
            '@': fileURLToPath(new URL('./src',import.meta.url))
        }
    }
})