目录
一、背景
作为一个后端程序员,Spring框架是在开发中必不可少的,相信很多人都学过Spring的底层原理并且看过很多源码。但是对我来说,实操是一个会加深对代码的理解和掌握程度的事情,所以在学习spring原理的时候,跟着视频写了下面的代码。
二、简易版Spring代码
注解里面都会涉及到两个注解,@Rentention 和 @Target,这两个注解的作用分别是:
@Retention(RetentionPolicy.RUNTIME): 这个注解指定了注解的保留策略为RUNTIME,意味着这个注解不仅会被编译到class文件中,而且在运行时通过反射还能够被程序读取。这是使得运行时动态处理注解成为可能的关键;
@Target(ElementType.TYPE): 这个注解指定了注解的应用目标为TYPE,意味着这个注解只能用于类、接口(包括注解类型)或枚举的声明上。
1、Autowired注解:用于依赖注入
package com.xxx.spring;

import java.lang.annotation.ElementType;
import java.lang.annotation.Retention;
import java.lang.annotation.RetentionPolicy;
import java.lang.annotation.Target;

@Retention(RetentionPolicy.RUNTIME)
@Target(ElementType.FIELD)
public @interface Autowired {

    boolean required() default true;
}
2、Component注解:声明当前类是一个bean对象,由Spring来管理生命周期
这里面value()方法的作用:在使用Component注解的时候可以指定当前bean的name,这里面value的作用是获取beanName。
package com.xxx.spring;

import java.lang.annotation.ElementType;
import java.lang.annotation.Retention;
import java.lang.annotation.RetentionPolicy;
import java.lang.annotation.Target;

@Retention(RetentionPolicy.RUNTIME)
@Target(ElementType.TYPE)
public @interface Component {
    String value() default "";
}
3、ComponentScan注解:用于指定bean的扫描路径
package com.xxx.spring;

import java.lang.annotation.ElementType;
import java.lang.annotation.Retention;
import java.lang.annotation.RetentionPolicy;
import java.lang.annotation.Target;

@Retention(RetentionPolicy.RUNTIME)
@Target(ElementType.TYPE)
public @interface ComponentScan {
    String value() default "";
}
4、Scope注解:指定当前bean是多例还是单例,多例是prototype,默认是单例
package com.xxx.spring;

import java.lang.annotation.ElementType;
import java.lang.annotation.Retention;
import java.lang.annotation.RetentionPolicy;
import java.lang.annotation.Target;

@Retention(RetentionPolicy.RUNTIME)
@Target(ElementType.TYPE)
public @interface Scope {

    String value() default "";
}
5、BeanDefinition类:保存一个bean的定义
package com.xxx.spring;

public class BeanDefinition {

    private Class clazz;
    private String scope;

    public Class getClazz() {
        return clazz;
    }

    public void setClazz(Class clazz) {
        this.clazz = clazz;
    }

    public String getScope() {
        return scope;
    }

    public void setScope(String scope) {
        this.scope = scope;
    }
}
6、BeanPostProcessor接口:接口中包含的是简易版的方法,可用于AOP,在生成bean对象以后,根据业务需求对bean对象进行进一步的处理
package com.xxx.spring;

public interface BeanPostProcessor {

    Object postProcessorBeforeInitialization(Object bean, String beanName);

    Object postProcessorAfterInitialization(Object bean, String beanName);
}
7、XXXApplicationContext类
package com.xxx.spring;
import java.io.File;
import java.lang.reflect.Field;
import java.net.URL;
import java.util.ArrayList;
import java.util.HashMap;
import java.util.List;
import java.util.Map;
public class XXXApplicationContext {
// 配置类
private Class configClass;
// 保存bean定义的map
private Map<String, BeanDefinition> beanDefinitionMap = new HashMap<>();
private Map<String, Object> singletonObjects = new HashMap<>(); // 单例池
// 保存bean后处理器,在初始化前后对指定bean进行特定的处理
private List<BeanPostProcessor> beanPostProcessorList = new ArrayList<>();
public XXXApplicationContext(Class configClass) {
this.configClass = configClass;
scan(configClass); // beanDefinition
preInstantiateSingletons(); // 实例化单例--->单例池
}
/**
* 遍历保存bean定义的map:
* 如果当前bean对象是单例,调用createBean方法,并且放入单例池;
*/
private void preInstantiateSingletons() {
for(Map.Entry<String, BeanDefinition> entry : beanDefinitionMap.entrySet()) {
BeanDefinition beanDefinition = entry.getValue();
String beanName = entry.getKey();
if (beanDefinition.getScope().equals("singleton")) {
Object bean = createBean(beanName, beanDefinition);
singletonObjects.put(beanName, bean);
}
}
}
/**
* 创建bean对象
* 1、根据bean定义创建一个bean的对象;
* 2、遍历当前对象里面的所有属性,如果当前属性使用了@Autowired注解,调用getBean()方法获取对应的bean对象,把bean对象
* 赋值给当前属性,其中一定要有filed.setAccessible(true);这行代码,作用是:设置当前字段可访问,这样就可以访问和修改
* 这个字段的值;
* 3、初始化前的代码,spring框架里面当前方法返回的是null。如果返回的是对象,就不会继续执行后面的代码,所以要返回null;
* 4、初始化代码;
* 5、初始化后的代码:其中代理可以在这里实现;
* 6、返回创建好的bean对象。
* @param beanName
* @param beanDefinition
* @return
*/
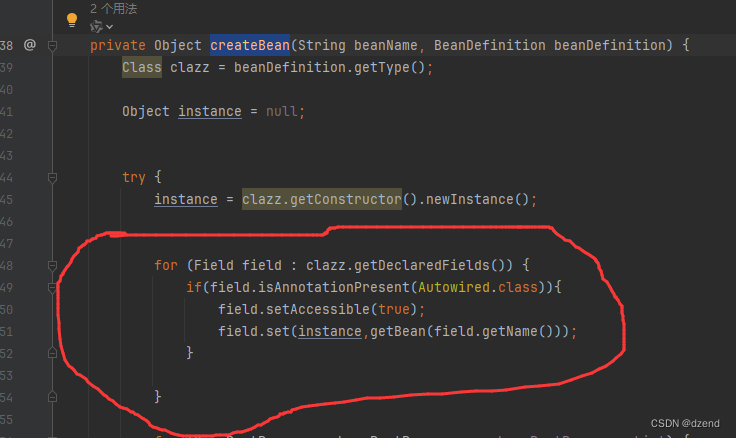
private Object createBean(String beanName, BeanDefinition beanDefinition) {
try {
Class clazz = beanDefinition.getClazz();
Object instance = clazz.newInstance();
// 依赖注入,这里Autowired注解如果required = true,如果getBean为null的话,就会报错,需要其他处理逻辑
for (Field filed : clazz.getDeclaredFields()) {
if (filed.isAnnotationPresent(Autowired.class)) {
String name = filed.getName();
Object bean = getBean(name);
filed.setAccessible(true);
filed.set(instance, bean);
}
}
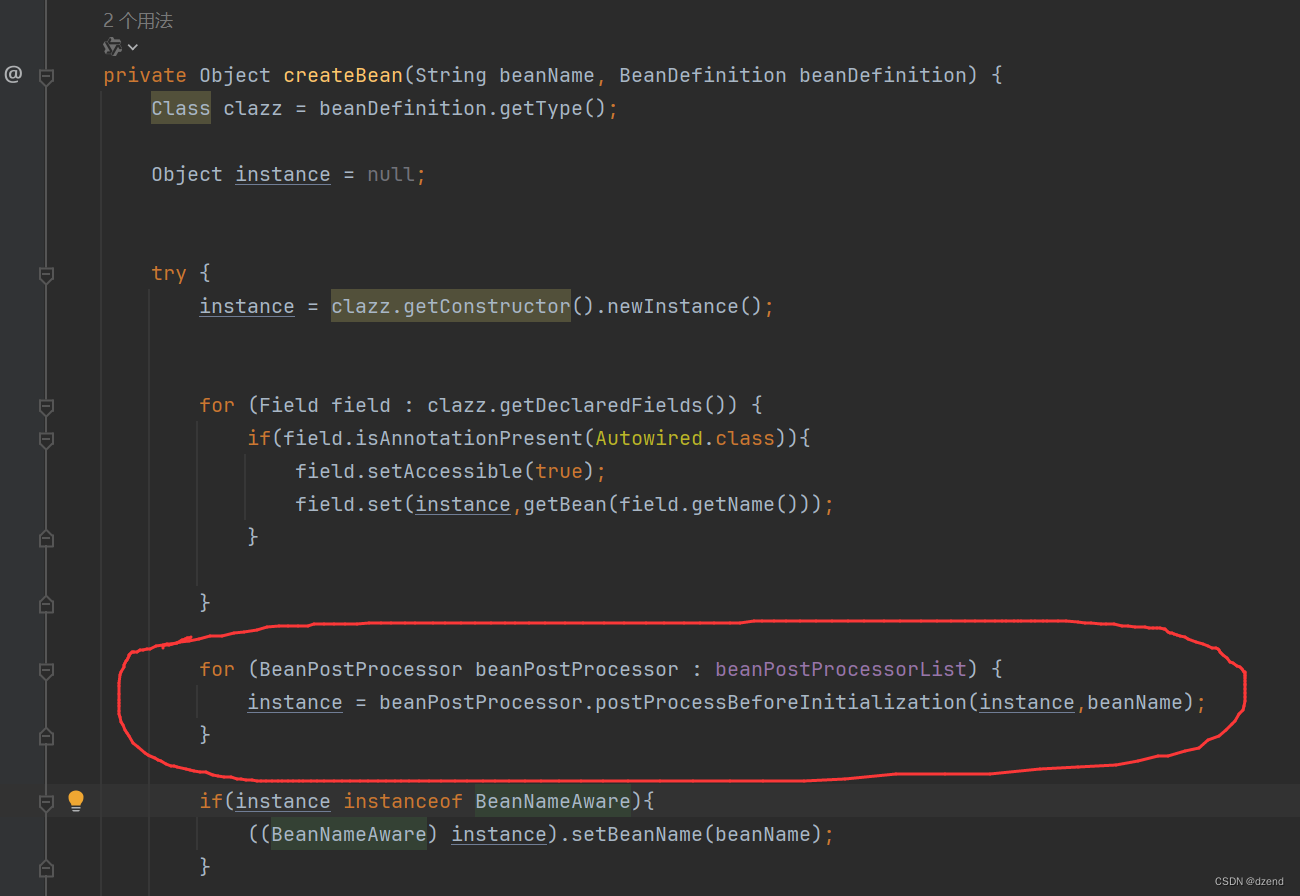
// 初始化前
for (BeanPostProcessor beanPostProcessor : beanPostProcessorList) {
beanPostProcessor.postProcessorBeforeInitialization(instance, beanName);
}
// 初始化
if (instance instanceof InitializingBean) {
// 这里的后处理方法可以给defaultUser赋值
((InitializingBean)instance).afterPropertiesSet();
}
// 初始化后
for (BeanPostProcessor beanPostProcessor : beanPostProcessorList) {
beanPostProcessor.postProcessorAfterInitialization(instance, beanName);
}
return instance;
} catch (InstantiationException e) {
throw new RuntimeException(e);
} catch (IllegalAccessException e) {
throw new RuntimeException(e);
} catch (Exception e) {
throw new RuntimeException(e);
}
}
/**
* 扫描指定路径下面的bean对象
* 1、从指定的配置类里面获取ComponentScan注解,得到要扫描的路径;
* 2、使用类加载器获取对应路径下面的所有文件;
* 3、遍历所有文件:
* 如果当前文件以.class结尾,那么获取以com开头,以类名结尾的字符串,比如:com/xxx/test/userService
* 用'.'替换字符串中的'/'
* 如果当前类里面包含Component注解,
* 如果是BeanPostProcessor的实现类,就放到对应的list里面;
* 获取Component里面的value,也就是beanName;
* 把当前clazz和beanName放到bean定义的map中,同时根据scope注解设置是singleton还是prototype
* @param configClass
*/
private void scan(Class configClass) {
// 解析配置类,获取扫描路径
ComponentScan annotation = (ComponentScan) configClass.getAnnotation(ComponentScan.class);
String path = annotation.value();
path = path.replace(".", "/");
// 扫描加了Component注解的类--->生成Bean对象(多例Bean还是单例Bean)
ClassLoader classLoader = BhlApplicationContext.class.getClassLoader();
// 这里是相对路径,对的是classPath
URL resource = classLoader.getResource(path);
File file = new File(resource.getFile());
File[] files = file.listFiles();
for(File f : files) {
String fileName = f.getAbsolutePath();
if (fileName.endsWith(".class")) {
String className = fileName.substring(fileName.indexOf("com"), fileName.indexOf(".class"));
className = className.replace("/", ".");
try {
Class clazz = classLoader.loadClass(className);
if (clazz.isAnnotationPresent(Component.class)) {
if (BeanPostProcessor.class.isAssignableFrom(clazz)) {
BeanPostProcessor beanPostProcessor = (BeanPostProcessor) clazz.newInstance();
beanPostProcessorList.add(beanPostProcessor);
}
Component component = (Component) clazz.getAnnotation(Component.class);
String beanName = component.value();
BeanDefinition beanDefinition = new BeanDefinition();
beanDefinition.setClazz(clazz);
if (clazz.isAnnotationPresent(Scope.class)) {
Scope scope = (Scope) clazz.getAnnotation(Scope.class);
beanDefinition.setScope(scope.value());
} else {
beanDefinition.setScope("singleton");
}
beanDefinitionMap.put(beanName, beanDefinition);
}
} catch (ClassNotFoundException e) {
throw new RuntimeException(e);
} catch (InstantiationException e) {
throw new RuntimeException(e);
} catch (IllegalAccessException e) {
throw new RuntimeException(e);
}
}
}
}
/**
* 根据name获取bean对象
* 判断bean定义map中是否包含当前beanName;
* 如果当前scope是singleton,从单例池里面获取直接返回;
* 如果scope是prototype,调用createBean创建对象并返回。
* @param beanName
* @return
*/
public Object getBean(String beanName) { // xxx--->Map--->BeanDefinition--->scope
if (beanDefinitionMap.containsKey(beanName)) {
BeanDefinition beanDefinition = beanDefinitionMap.get(beanName);
if (beanDefinition.getScope().equals("singleton")) {
Object singleObject = singletonObjects.get(beanName);
return singleObject;
} else {
Object prototypeObject = createBean(beanName, beanDefinition);
return prototypeObject;
}
} else {
throw new NullPointerException();
}
}
}
8、InitializingBean接口
package com.xxx.spring;

public interface InitializingBean {

    void afterPropertiesSet() throws Exception;
}
三、使用自定义Spring代码
1、AppConfig类
package com.xxx.test;

import com.xxx.spring.ComponentScan;

/**
 * ComponentScan里面的路径和JVM类加载器有关
 * JVM类加载器:BootstrapCLassLoader:最顶层的加载类,由 C++实现,通常表示为 null,并且没有父级,主要用来加载 JDK 内部的核心类库
 *                                ( %JAVA_HOME%/lib目录下的 rt.jar、resources.jar、charsets.jar等 jar 包和类)
 *                                 以及被 -Xbootclasspath参数指定的路径下的所有类
 *            ExtensionCLassLoader:主要负责加载 %JRE_HOME%/lib/ext 目录下的 jar 包和类以及被 java.ext.dirs
 *                                 系统变量所指定的路径下的所有类
 *            AppClassLoader:面向我们用户的加载器,负责加载当前应用 classpath 下的所有 jar 包和类。
 */
@ComponentScan("com.xxx.test")
public class AppConfig {
}
2、XXXBeanPostProcessor类
package com.xxx.test;

import com.xxx.spring.BeanPostProcessor;
import com.xxx.spring.Component;

/**
 * 根据业务中的需要对bean对象进行处理,
 * 如果只针对某一个特定的bean进行处理,使用 if 进行条件判断。
 *
 * 这里面方法的返回值是Object,如果需要的话,可以替换之前生成的bean对象。
 */
@Component
public class BhlBeanPostProcessor implements BeanPostProcessor {

    @Override
    public Object postProcessorBeforeInitialization(Object bean, String beanName) {
        System.out.println("before -->" + bean);
        return bean;
    }

    // 代理是在 after 方法里面实现的。
    @Override
    public Object postProcessorAfterInitialization(Object bean, String beanName) {
        System.out.println("after -->" + bean);
        return bean;
    }
}
3、Main类
package com.xxx.test;

import com.xxx.spring.BhlApplicationContext;

public class Main {
    public static void main(String[] args) {
        // 使用自定义Spring
        XXXApplicationContext applicationContext = new XXXApplicationContext(AppConfig.class);

        UserService userService = (UserService) applicationContext.getBean("userService");

        userService.test();
    }
}
4、OrderService类
package com.xxx.test;

import com.xxx.spring.Component;
import com.xxx.spring.Scope;

@Component("orderService")
@Scope("prototype") // prototype指定这是一个多例bean
public class OrderService {
}
5、UserService类
package com.xxx.test;

import com.xxx.spring.Autowired;
import com.xxx.spring.Component;
import com.xxx.spring.InitializingBean;

@Component("userService")
public class UserService implements InitializingBean { // BeanDefinition--->Map<beanName, BeanDefinition对象>--->scope属性

    @Autowired
    private OrderService orderService;

    private User defaultUser; // MySQL ---> User ----> defaultUser

    public void test() {
        System.out.println(orderService);
        System.out.println(defaultUser);
    }

    @Override
    public void afterPropertiesSet() throws Exception {
        // MySQL ---> User ----> defaultUser
        defaultUser = new User();
    }
}
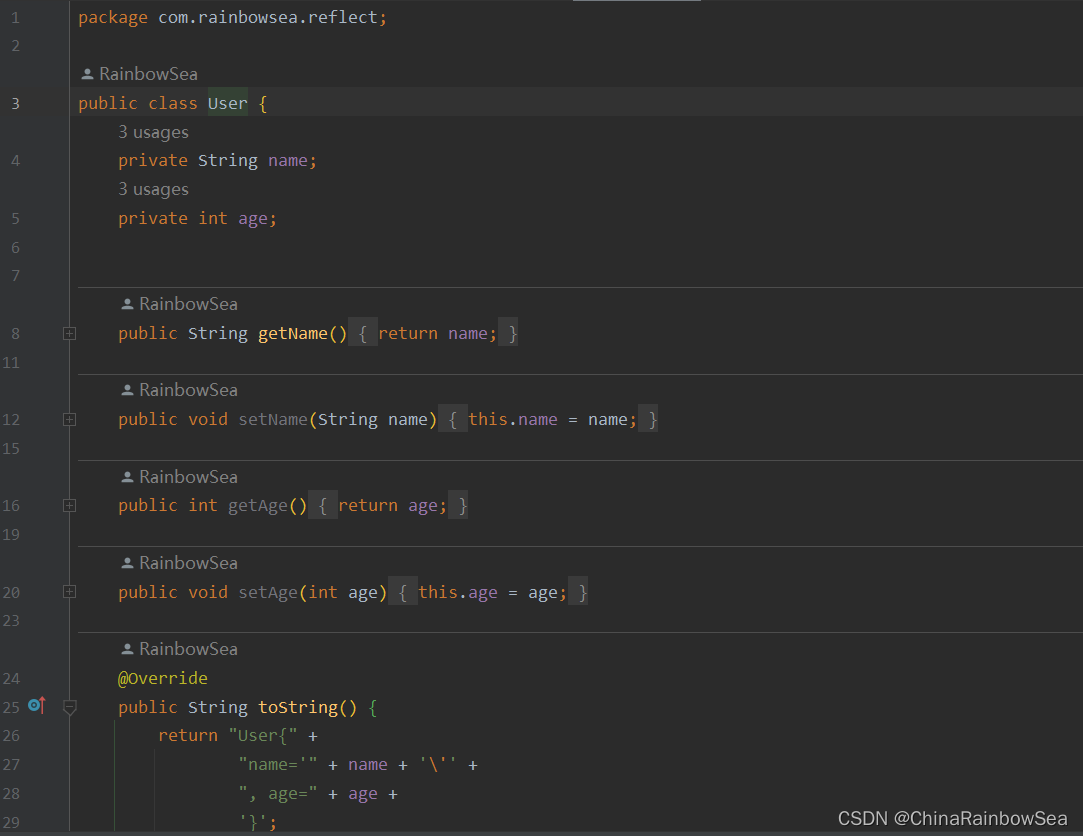
6、User类
UserService中实现了InitializingBean接口,实现了afterPropertiesSet方法,在该方法里面对bean对象中的其他字段进行了赋值。
package com.xxx.test;

public class User {
}
四、总结
这里只是简单写了一下spring框架里面的几个方法,其中很多逻辑都有欠缺的地方,没有涉及到的地方有很多,比如循环依赖的问题,在springboot中循环依赖涉及到了三个map对象,这里只有一个单例池,但是代码里面把大概的逻辑都讲了一下。
比如在启动Spring的时候,spring如何扫描的bean对象,如何把bean对象放到了容器里面,也稍微涉及了AOP的事情,可以在后处理器中进行实现。
AppConfig是启动类,通常在开发的时候main方法是写在AppConfig里面的,这里类里面指明了bean对象的扫描路径。


![NSSCTF Web方向的例题和相关知识点(一) [SWPUCTF 2021 新生赛]jicao](https://img-blog.csdnimg.cn/direct/0e9b2198282a4714b16a7ddbee6b507f.png)