一、导入相关库函数
import matplotlib.pyplot as plt
import tensorflow as tf
import keras
import numpy as np
二、载入mnist数据集
使用keras.中的mnist数据集
(train_images, train_labels), (test_images, test_labels)=\
keras.datasets.mnist.load_data()
三、测试数据的情况,数据集图像和label标签
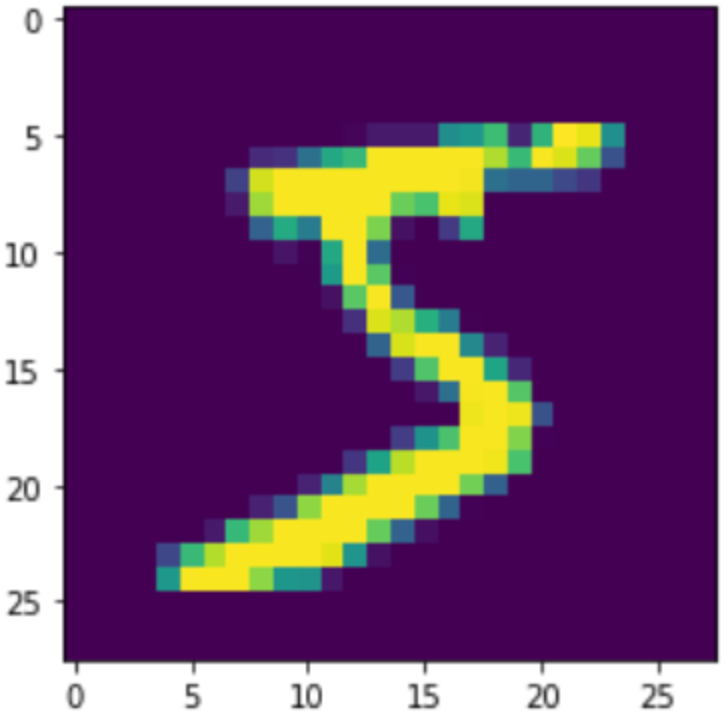
x = train_images[2]
y = train_labels[2]
plt.title('label: %i' % y)
plt.imshow(x, cmap=plt.cm.gray_r, interpolation='nearest')
四、建立神经网络模型
keras中有API帮助建立,用Sequential的AIP建立
model = keras.Sequential([
    #模型是多层的,底层是输入层,做Flatten,input_shape分辨率28*28
    keras.layers.Flatten(input_shape=(28,28)),
    #隐藏层,使用relu
    keras.layers.Dense(128, activation=tf.nn.relu),
    #输出层,10分类,数字从0~9,一共10种(选择softmax)
    keras.layers.Dense(10,activation=tf.nn.softmax)
])
五、将模型进行compile,优化器optimizers.Adam(),选择损失函数loss,用精度来度量
model.compile(optimizer=tf.optimizers.Adam(),
             loss='sparse_categorical_crossentropy',
             metrics=['accuracy'])
六、打印model,神经网络模型,三层结构
看一下神经网络模型结构:三层,输入层784,隐藏层128,输出层10
model.summary()七、训练神经网络模型,精度在增长,loss减少
epochs迭代次数,这里选择10次迭代
model.fit(train_images,train_labels,epochs=10)八、评估,测试模型性能
test_loss,test_acc = model.evaluate(test_images, test_labels)九、训练的模型进行预测
predictions = model.predict(test_images)十、测试模型,用测试集进行
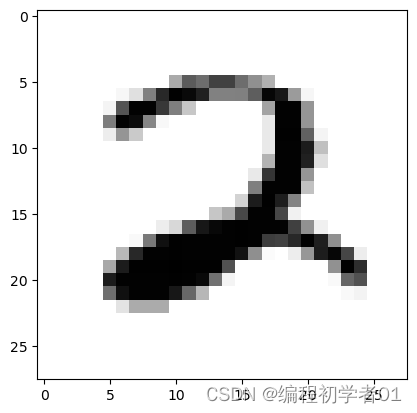
预测结果为
[0. 0. 1. 0. 0. 0. 0. 0. 0. 0.],1的index为2,预测值为2,和真实值一致,预测成功。
x_test = test_images[888]
y_test = test_labels[888]
y_pred = predictions[888]

#打印x_test图像
plt.imshow(x_test,cmap=plt.cm.gray_r,interpolation='nearest')

y_pred2 = np.around(
    y_pred,
    decimals=1
)
print(y_pred2)
output: [0. 0. 1. 0. 0. 0. 0. 0. 0. 0.]
十一、完整代码
import matplotlib.pyplot as plt
import tensorflow as tf
import keras
import numpy as np

#载入mnist数据集
(train_images, train_labels), (test_images, test_labels)=\
keras.datasets.mnist.load_data()

#建立神经网络模型
#keras中有API帮助建立,用Sequential的AIP建立
model = keras.Sequential([
    #模型是多层的,底层是输入层,做Flatten,input_shape分辨率28*28
    keras.layers.Flatten(input_shape=(28,28)),
    #隐藏层,使用relu
    keras.layers.Dense(128, activation=tf.nn.relu),
    #输出层,10分类,数字从0~9,一共10种(选择softmax)
    keras.layers.Dense(10,activation=tf.nn.softmax)
])

#将模型进行compile,优化器optimizers.Adam(),选择损失函数loss,用精度来度量
model.compile(optimizer=tf.optimizers.Adam(),
             loss='sparse_categorical_crossentropy',
             metrics=['accuracy'])

#训练神经网络模型,精度在增长,loss减少
#epochs迭代次数,这里选择10次迭代
model.fit(train_images,train_labels,epochs=10)

#评估,测试模型性能
#在测试数据集上进行评估
test_loss,test_acc = model.evaluate(test_images, test_labels)

#刚刚训练的模型进行预测
predictions = model.predict(test_images)

x_test = test_images[888]
y_test = test_labels[888]
y_pred = predictions[888]

#打印x_test图像
plt.imshow(x_test,cmap=plt.cm.gray_r,interpolation='nearest')

y_pred2 = np.around(
    y_pred,
    decimals=1
)
print(y_pred2)