部署Elasticsearch集群
这里介绍使用的是Elasticsearch 7.6.1的版本,配置两台服务器,一台部署主节点,一台部署两个从节点。
下载地址:https://artifacts.elastic.co/downloads/elasticsearch/elasticsearch-7.16.2-linux-x86_64.tar.gz
如果想下载安装其他版本,更改后面的版本号即可。
第一步:liunx系统安装环境
1.需要安装JDK8 或者 JDK11.es需要jdk环境进行启动。
2.需要安装nginx,两台服务器没有外网的情况下需要内网互联
3.服务器主节点的磁盘建议大一点,es也是非常消耗磁盘空间的
4.两台服务都需要同样的配置
第二步:将下载的ES的安装包放置服务器上
1.两台服务器都需要以下配置,多少个节点就配置多少个ES
解压压缩包:tar -xvf elasticsearch-7.6.1-linux-x86_64.tar.gz
主节点
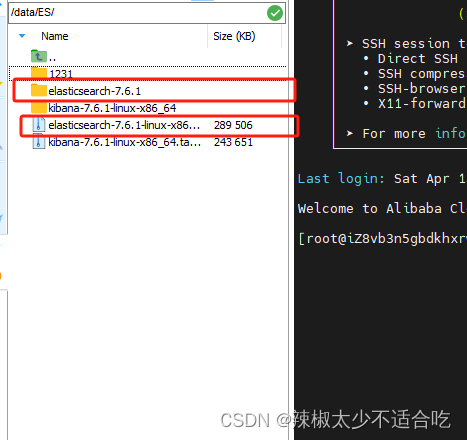
从节点,每个从节点都放置了一个压缩包,并进行解压

2.开通端口号9200 9201 9202,9300 9301 9302给ES使用。
第三步:创建ES启动账号,ES不允许root账号启动
第一步:liunx创建新用户:"adduser 账号",然后给创建的用户加密码:"passwd 密码",输入两次密码。
第二步:切换刚才创建的用户:"su 账号",然后启动elasticsearch。如果显示Permission denied权限不足,则继续进行第三步。
第三步:给新用户赋权限,因为这个用户本身就没有权限,肯定自己不能给自己付权限。所以要用root用户登录并赋予权限,chown -R 账号/你的elasticsearch安装目录。
第四步:启动ES
在ES的bin目录上一级,执行./bin/elasticsearch 进行执行。如果有报错,显示权限不足。直接执行以下命令:
启动命令:
执行前先切换为创建的ES账户 su 账号
./bin/elasticsearch
后台执行:nohup ./bin/elasticsearch &
查看执行:ps -ef|grep elasticsearch
给权限:chown -R elastic /你的elasticsearch安装目录
sudo chmod 777 /opt/ES/elasticsearch-7.6.1/config/elasticsearch.keystore
sudo chmod 777 /opt/ES/elasticsearch-7.6.1/config/jvm.options
验证es是否启动成功:curl http://192.168.1.2:9200
如果返回以下内容,则说明成功:

第五步:集群配置
以上验证了每个ES是否正常,配置集群需要更改每个ES的config目录下的 yml文件

主节点配置:
# ======================== Elasticsearch Configuration =========================
#
# NOTE: Elasticsearch comes with reasonable defaults for most settings.
#       Before you set out to tweak and tune the configuration, make sure you
#       understand what are you trying to accomplish and the consequences.
#
# The primary way of configuring a node is via this file. This template lists
# the most important settings you may want to configure for a production cluster.
#
# Please consult the documentation for further information on configuration options:
# https://www.elastic.co/guide/en/elasticsearch/reference/index.html
#
# ---------------------------------- Cluster -----------------------------------
#
# Use a descriptive name for your cluster:
#集群名称
cluster.name: es-cluster
#
# ------------------------------------ Node ------------------------------------
#
# Use a descriptive name for the node:
#节点名称
node.name: node-1
#作为数据节点
node.data: true

# 是否可以成为master节点

node.master: true
#
# 网络绑定,绑定 0.0.0.0,代表支持外网访问
network.host: 0.0.0.0

# 设置对外服务的http端口,默认为9200
http.port: 9200

# 设置节点间交互的tcp端口,默认是9300(---------必须不一致-------------)

transport.tcp.port: 9300
#当前服务器ip
network.publish_host: 172.29.1.123
#集群ip
discovery.zen.ping.unicast.hosts: ["172.29.1.123:9300", "172.29.1.124:9301","172.29.1.124:9302"]

#必须依据实际设置的集群名称配置
cluster.initial_master_nodes: ["node-1","node-2","node-3"]

#允许跨域访问
http.cors.enabled: true
http.cors.allow-origin: "*"
cluster.routing.allocation.disk.threshold_enabled: false


#更改缓冲区大小
http.max_content_length: 800mb
从节点第一个配置:
# ======================== Elasticsearch Configuration =========================
#
# NOTE: Elasticsearch comes with reasonable defaults for most settings.
#       Before you set out to tweak and tune the configuration, make sure you
#       understand what are you trying to accomplish and the consequences.
#
# The primary way of configuring a node is via this file. This template lists
# the most important settings you may want to configure for a production cluster.
#
# Please consult the documentation for further information on configuration options:
# https://www.elastic.co/guide/en/elasticsearch/reference/index.html
#
# ---------------------------------- Cluster -----------------------------------
#
# Use a descriptive name for your cluster:
#集群名称
cluster.name: es-cluster
#
# ------------------------------------ Node ------------------------------------
#
# Use a descriptive name for the node:
#节点名称
node.name: node-2
#作为数据节点
node.data: false

# 是否可以成为master节点

node.master: false

#
# 网络绑定,绑定 0.0.0.0,代表支持外网访问
network.host: 0.0.0.0
当前服务器ip
network.publish_host: 172.29.1.124
# 设置对外服务的http端口,默认为9200
http.port: 9201

# 设置节点间交互的tcp端口,默认是9300(---------必须不一致-------------)

transport.tcp.port: 9301

#集群ip
discovery.zen.ping.unicast.hosts: ["172.29.1.123:9300", "172.29.1.124:9301","172.29.1.124:9302"]

#必须依据实际设置的集群名称配置
cluster.initial_master_nodes: ["node-1","node-2","node-3"]

#允许跨域访问
http.cors.enabled: true
http.cors.allow-origin: "*"
cluster.routing.allocation.disk.threshold_enabled: false
从节点第二个配置:
# ======================== Elasticsearch Configuration =========================
#
# NOTE: Elasticsearch comes with reasonable defaults for most settings.
#       Before you set out to tweak and tune the configuration, make sure you
#       understand what are you trying to accomplish and the consequences.
#
# The primary way of configuring a node is via this file. This template lists
# the most important settings you may want to configure for a production cluster.
#
# Please consult the documentation for further information on configuration options:
# https://www.elastic.co/guide/en/elasticsearch/reference/index.html
#
# ---------------------------------- Cluster -----------------------------------
#
# Use a descriptive name for your cluster:
#集群名称
cluster.name: es-cluster
#
# ------------------------------------ Node ------------------------------------
#
# Use a descriptive name for the node:
#节点名称
node.name: node-3
#作为数据节点
node.data: false

# 是否可以成为master节点
node.master: false

#
# 网络绑定,绑定 0.0.0.0,代表支持外网访问
network.host: 0.0.0.0

# 设置对外服务的http端口,默认为9200
http.port: 9202

# 设置节点间交互的tcp端口,默认是9300(---------必须不一致-------------)

transport.tcp.port: 9302
#当前服务器ip
network.publish_host: 172.29.1.124
#集群ip
discovery.zen.ping.unicast.hosts: ["172.29.1.123:9300", "172.29.1.124:9301","172.29.1.124:9302"]

#必须依据实际设置的集群名称配置
cluster.initial_master_nodes: ["node-1","node-2","node-3"]

#允许跨域访问
http.cors.enabled: true
http.cors.allow-origin: "*"
cluster.routing.allocation.disk.threshold_enabled: false
以上每个ES的配置完毕,并重新启动即可
验证是否成功:curl http://172.29.1.123:9200/_cat/nodes
出现以下内容即表明集群创建成功

第六步:配置kibana
必选与es的版本一致,每个ES都需要配置一个kibana
下载后并解压,然后配置 kibana.yml的配置即可

配置kibana.yml
#端口号
server.port: 5602
#当前ip
server.host: "172.29.1.124"
#指定对应的es的端口号
elasticsearch.hosts: ["http://172.29.1.124:9201"]

# 通信的请求超时时间
elasticsearch.requestTimeout: 60000

# 指定Kibana界面的语言为中文
i18n.locale: "zh-CN"
启动命令:nohup ./bin/kibana --allow-root &
测试:
Reindex(数据迁移)
可以直接使用ES的 reindexAPI进行数据迁移
准备工作:需要在新ES的主节点的yml配置数据源白名单
如下:
#迁移数据的密度源。数据源的ip和es端口号
reindex.remote.whitelist: ["172.23.1.123:9200"]
 配置完,去新es的kibana进行调用api
POST _reindex?wait_for_completion=false
{
  "source": {
    "remote": {
      "host": "http://172.23.1.123:9200"
    },
	"size": 300,
    "index": "yq_data_202402",
    "query": {
      "range": {
        "createTime": {
          "gte": "1708876800000",
          "lte": "1709222399000"
        }
      }
    }
  },
  "dest": {
    "index": "yq_data_202402"
  }
}
size 参数指定了每次从远程主机获取的文档数量
query 参数用于指定查询条件。
host 参数指定数据源的ip和端口号
index 指数据源的索引库
dest.index 指新es的索引库
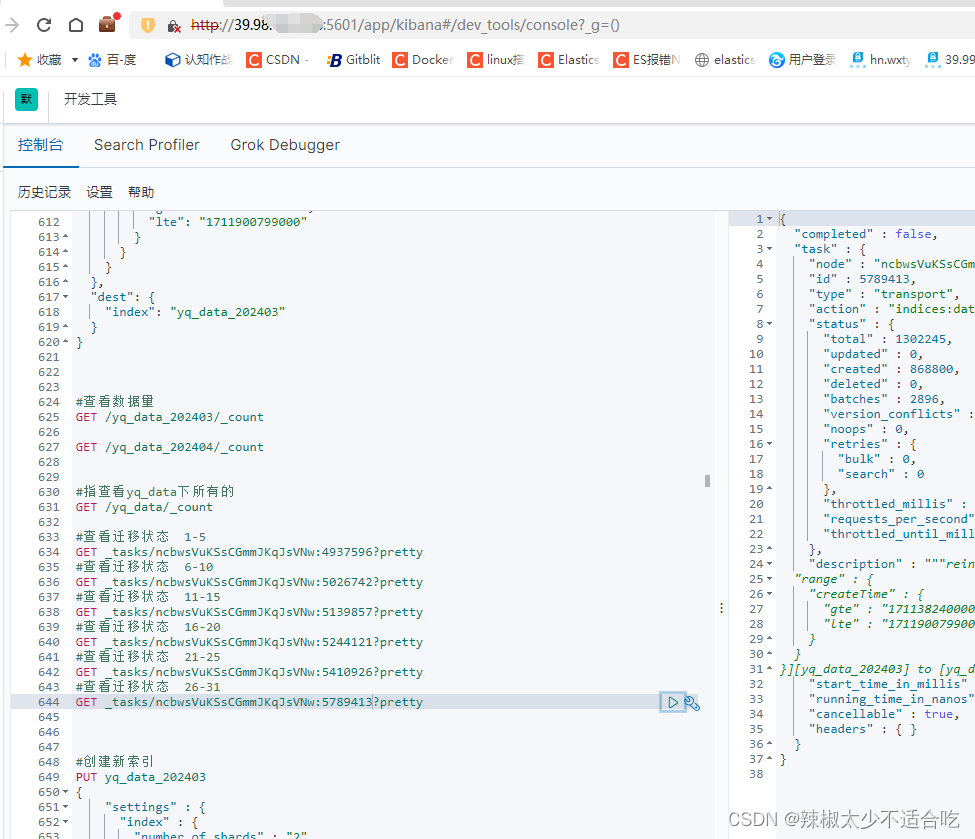
执行完后会返回一个id。可根据id查看进度
#查看迁移状态
GET _tasks/ncbwsVuKSsCGmmJKqJsVNw:5860330?pretty
 等待false变成true即可