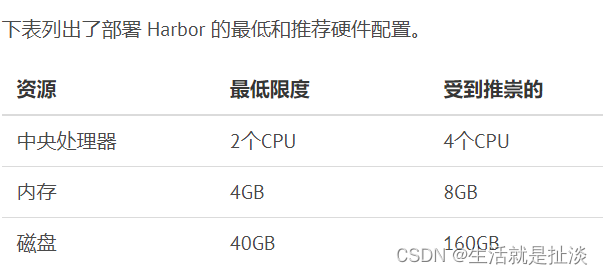
本次准备了3台机器:harbor-01、harbor-02、harbor-db,用于测试 单点模式、高可用模式 部署 harbor。
| ip | 主机名 | 规格 | 操作系统 | 说明 |
|---|---|---|---|---|
| 192.168.217.136 | harbor-01 | 2c4g | Centos7.9 | harbor 服务器,测试单点harbor |
| 192.168.217.135 | harbor-02 | 2c4g | Centos7.9 | harbor 服务器 |
| 192.168.217.137 | harbor-db | 2c4g | Centos7.9 | nginx、redis、mysql |
1 准备环境
# 本次测试部署到Centos7.9机器上,如下:
[root@harbor-01 ~]# cat /etc/redhat-release
CentOS Linux release 7.9.2009 (Core)

[root@harbor-01 ~]# uname -a
Linux harbor-01 3.10.0-1160.el7.x86_64 #1 SMP Mon Oct 19 16:18:59 UTC 2020 x86_64 x86_64 x86_64 GNU/Linux
重要的是,务必给服务器优化一些系统参数,具体请点击这里参见 [第2节 准备环境]。
2 安装docker
[root@harbor-01 ~]# yum install -y wget net-tools vim
[root@harbor-01 ~]# wget https://mirrors.aliyun.com/docker-ce/linux/centos/docker-ce.repo -O /etc/yum.repos.d/docker-ce.repo
[root@harbor-01 ~]# yum -y install docker-ce-24.0.5-1.el7
[root@harbor-01 ~]# systemctl enable docker && systemctl start docker
[root@harbor-01 ~]# docker --version


# 检查docker是否安装成功
[root@harbor-01 ~]# docker info
3 安装docker-compose
安装docker-compose, 我们可以从 Github 下载它的二进制包来使用,地址:
https://github.com/docker/compose/releases
[root@harbor-01 ~]# curl -L "https://github.com/docker/compose/releases/download/1.24.1/docker-compose-$(uname -s)-$(uname -m)"  -o  /usr/local/bin/docker-compose
[root@harbor-01 ~]# chmod  +x  /usr/local/bin/docker-compose
[root@harbor-01 ~]# ln -s /usr/local/bin/docker-compose /usr/bin/docker-compose

# 检查compose是否安装成功
[root@harbor-01 ~]# docker-compose --version
Docker Compose version v2.26.1
小知识:
/usr/bin 系统预装的一些可执行程序,随系统升级会改变;
/usr/local/bin 用户安装的可执行程序,推荐放在这里,不受系统升级影响。
4 离线安装harbor
harbor有两种部署/访问方式:http、https,下面分别进行演示。
4.1 http 方式部署harbor
4.1.1 下载安装包
Harbor 官方网站:
- 官网:https://goharbor.io/
- Github:https://github.com/goharbor/harbor
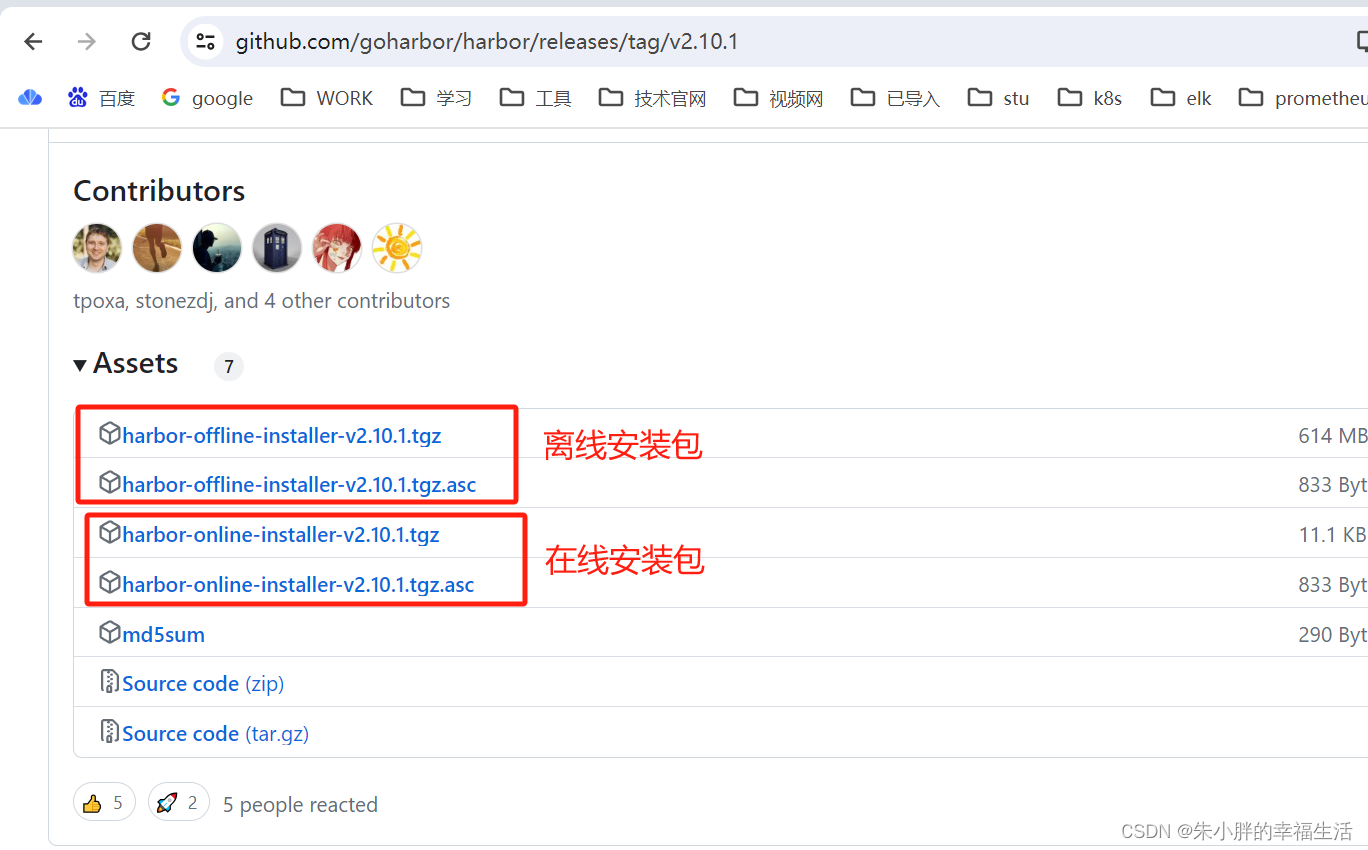
将此安装包下载到服务器上:

4.1.2 开始安装
第一步:解压配置文件
[root@harbor-01 ~]# tar -zvxf harbor-offline-installer-v2.10.1.tgz

#下载下来之后解压缩,目录下会有harbor.yml.tmpl (新版本是.yml文件,之前版本是.conf 或者 .cfg文件),就是Harbor的配置文件了。
[root@harbor-01 ~]# cd harbor
[root@harbor-01 harbor]# ls
common.sh  harbor.v2.10.1.tar.gz  harbor.yml.tmpl  install.sh  LICENSE  prepare


第二步:修改配置文件
# 主要修改三个地方
[root@harbor-01 harbor]# vi harbor.yml
hostname: reg.mydomain.com			      # 修改成Harbao部署机自身的ip地址
https: 					              # 注释https相关配置
harbor_admin_password: Harbor12345	      # harbor初始管理员密码为Harbor12345, 这里最好修改成自己的密码,默认密码至少8位,最好是大小写、数字和特殊字符。


第三步:开始安装
# 检查环境
[root@harbor-01 harbor]# ./prepare

# 执行完成后,会发现解压目录harbor下面多了一个docker-compose.yml文件,里面包含了harbor依赖的镜像和对应容器创建的信息。
[root@harbor-01 harbor]# ls
common  common.sh  docker-compose.yml  harbor.v2.10.1.tar.gz  harbor.yml  harbor.yml.tmpl  install.sh  LICENSE  prepare

# 开始安装
[root@harbor-01 harbor]# ./install.sh

# 检查运行情况
[root@harbor-01 harbor]# docker-compose ps  # "注意docker-compose"命令只能在当前harbor目录下使用(因为该目录下有harbor配置文件)
WARN[0000] /root/harbor/docker-compose.yml: `version` is obsolete
NAME                IMAGE                                 COMMAND                   SERVICE       CREATED          STATUS                    PORTS
harbor-core         goharbor/harbor-core:v2.10.1          "/harbor/entrypoint.…"   core          53 seconds ago   Up 52 seconds (healthy)
harbor-db           goharbor/harbor-db:v2.10.1            "/docker-entrypoint.…"   postgresql    53 seconds ago   Up 52 seconds (healthy)
harbor-jobservice   goharbor/harbor-jobservice:v2.10.1    "/harbor/entrypoint.…"   jobservice    53 seconds ago   Up 51 seconds (healthy)
harbor-log          goharbor/harbor-log:v2.10.1           "/bin/sh -c /usr/loc…"   log           53 seconds ago   Up 52 seconds (healthy)   127.0.0.1:1514->10514/tcp
harbor-portal       goharbor/harbor-portal:v2.10.1        "nginx -g 'daemon of…"   portal        53 seconds ago   Up 52 seconds (healthy)
nginx               goharbor/nginx-photon:v2.10.1         "nginx -g 'daemon of…"   proxy         53 seconds ago   Up 51 seconds (healthy)   0.0.0.0:80->8080/tcp, :::80->8080/tcp
redis               goharbor/redis-photon:v2.10.1         "redis-server /etc/r…"   redis         53 seconds ago   Up 52 seconds (healthy)
registry            goharbor/registry-photon:v2.10.1      "/home/harbor/entryp…"   registry      53 seconds ago   Up 52 seconds (healthy)
registryctl         goharbor/harbor-registryctl:v2.10.1   "/home/harbor/start.…"   registryctl   53 seconds ago   Up 52 seconds (healthy)
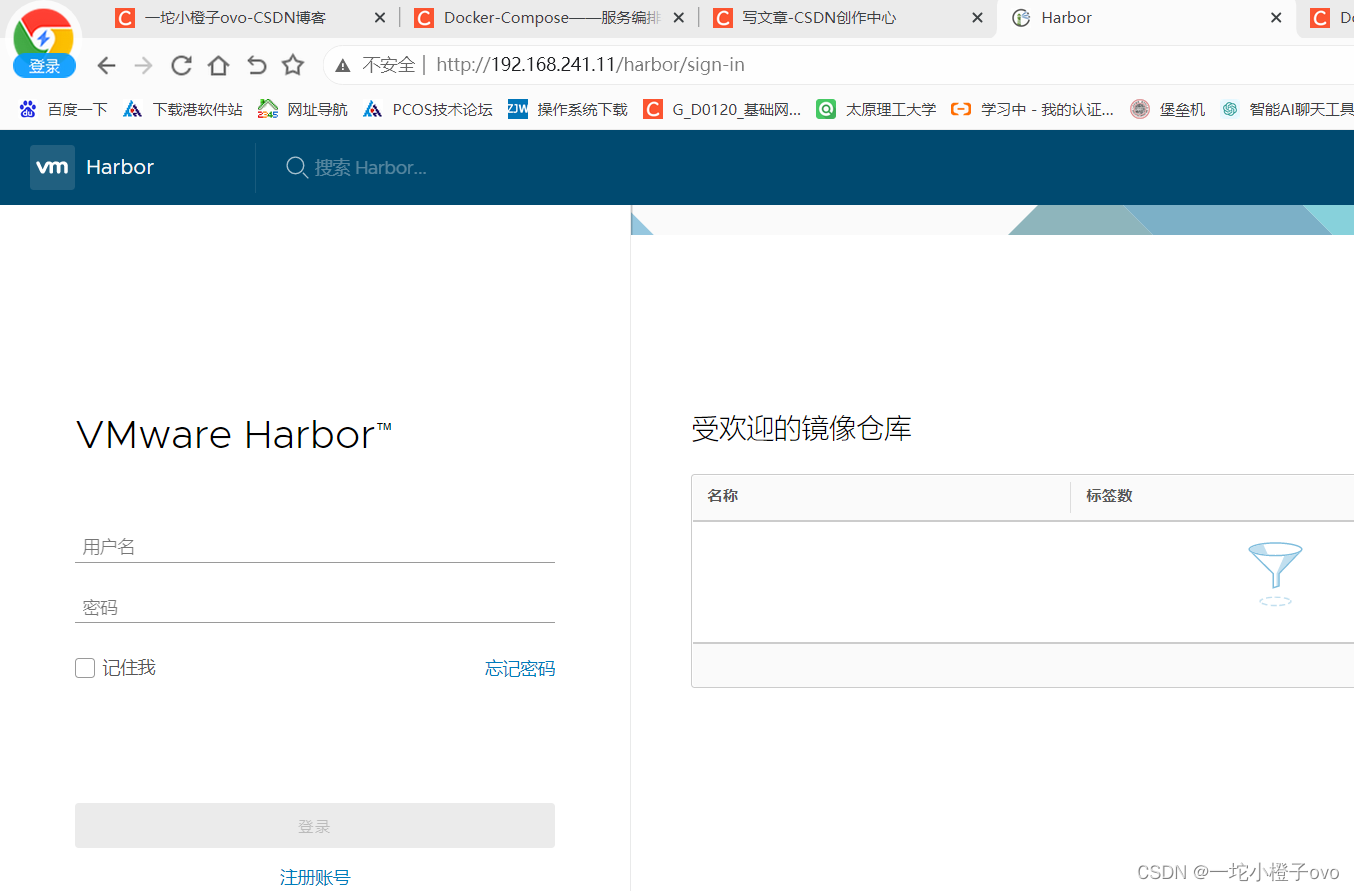
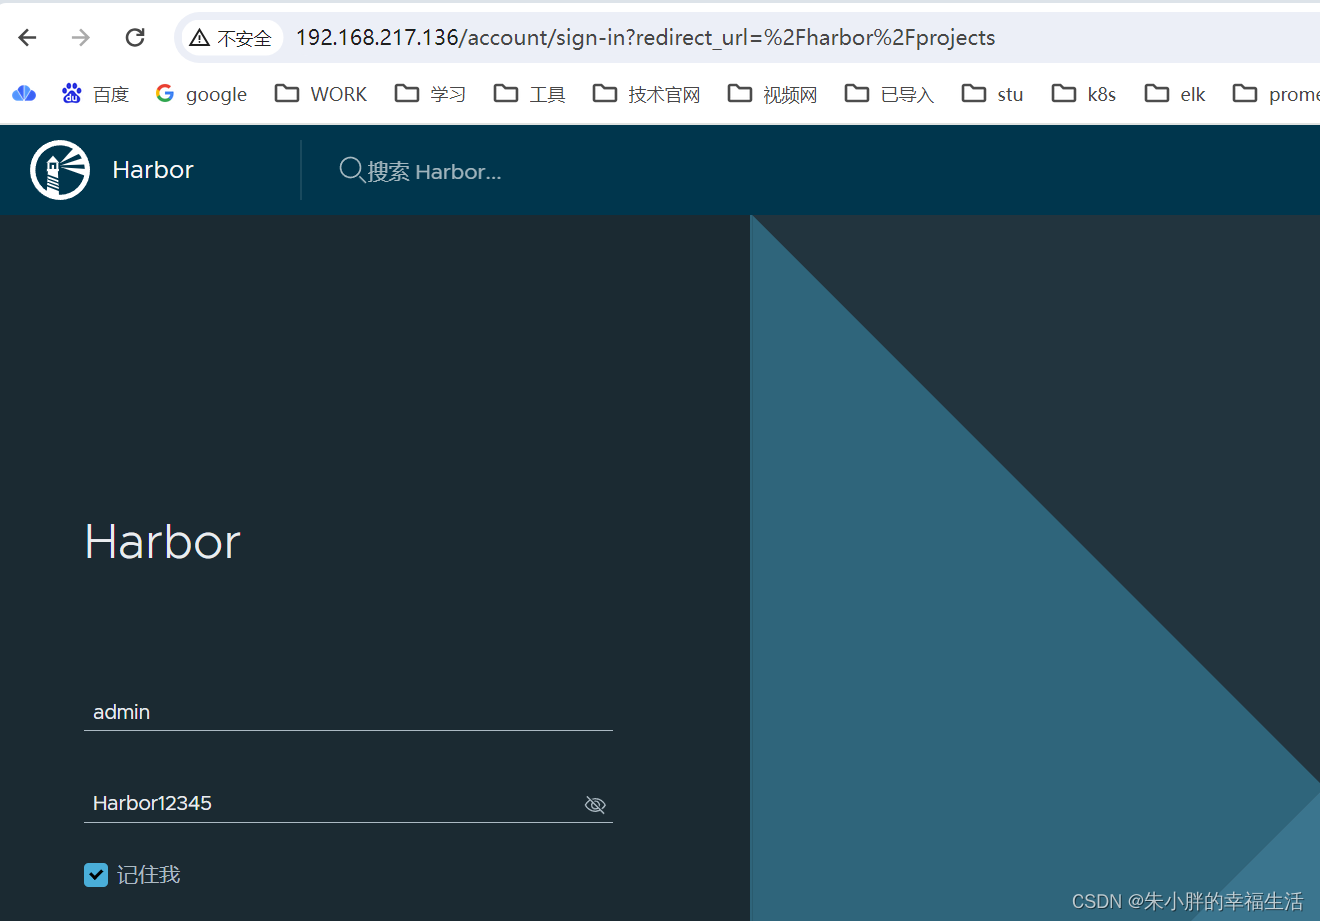
浏览器访问:
http://192.168.217.136 admin Harbor12345
4.1.3 Harbor 服务的关闭和启动
停止harbor: "docker-compose down -v"

[root@harbor-01 harbor]# docker-compose down -v
WARN[0000] /root/harbor/docker-compose.yml: `version` is obsolete
[+] Running 10/10
 ✔ Container harbor-jobservice  Removed                                                                                                         0.3s
 ✔ Container nginx              Removed                                                                                                         0.4s
 ✔ Container registryctl        Removed                                                                                                         0.3s
 ✔ Container harbor-portal      Removed                                                                                                         0.4s
 ✔ Container harbor-core        Removed                                                                                                         0.4s
 ✔ Container registry           Removed                                                                                                         0.3s
 ✔ Container redis              Removed                                                                                                         0.4s
 ✔ Container harbor-db          Removed                                                                                                         0.4s
 ✔ Container harbor-log         Removed                                                                                                        10.2s
 ✔ Network harbor_harbor        Removed                                                                                                         0.1s
[root@harbor-01 harbor]#
[root@harbor-01 harbor]# docker-compose ps
WARN[0000] /root/harbor/docker-compose.yml: `version` is obsolete
NAME      IMAGE     COMMAND   SERVICE   CREATED   STATUS    PORTS


启动harbor: "docker-compose up -d"
[root@harbor-01 harbor]# docker-compose -f docker-compose.yml up -d
WARN[0000] /root/harbor/docker-compose.yml: `version` is obsolete
[+] Running 10/10
 ✔ Network harbor_harbor        Created                                                                                                         0.0s
 ✔ Container harbor-log         Started                                                                                                         0.1s
 ✔ Container harbor-portal      Started                                                                                                         0.0s
 ✔ Container registry           Started                                                                                                         0.0s
 ✔ Container harbor-db          Started                                                                                                         0.0s
 ✔ Container registryctl        Started                                                                                                         0.0s
 ✔ Container redis              Started                                                                                                         0.0s
 ✔ Container harbor-core        Started                                                                                                         0.1s
 ✔ Container nginx              Started                                                                                                         0.0s
 ✔ Container harbor-jobservice  Started                                                                                                         0.0s


> docker-compose小知识:
> -f:指定使用的compose模板文件,默认为当前目录下的docker-compose.yaml文件,可以多次指定。
> -d:后台运行。
> -v:移除容器和网络,并且删除所有的数据卷,这对于彻底清理整个应用程序的运行环境非常有用。
4.1.4 修改harbor的web登录端口
修改harbor.yml文件:
[root@harbor-01 harbor]# vim harbor.yml
.........
http:
  # port for http, default is 80. If https enabled, this port will redirect to https port
  port: 8080


然后将harbor修改的配置更新到 docker-compose.yml 文件:
[root@harbor-01 harbor]# ./prepare


防止容器进程没有权限读取生成的配置:
[root@harbor-01 harbor]# chmod -R 777 common
特别注意: 这里的common权限如果设置太小,可能会导致harbor启动后报错。


最后,重新启动harbor即可:
[root@harbor-01 harbor]# docker-compose -f docker-compose.yml up -d
4.1.5 harbor的日志
Harbor的日志路径:var/log/harbor

[root@harbor-01 harbor]# cat harbor.yml|grep log
  job_loggers:
  logger_sweeper_duration: 1 #days
log:
  # configs for logs in local storage
    # Log files are rotated log_rotate_count times before being removed. If count is 0, old versions are removed rather than rotated.
    # Log files are rotated only if they grow bigger than log_rotate_size bytes. If size is followed by k, the size is assumed to be in kilobytes.
    # The directory on your host that store log
    location: /var/log/harbor
[root@harbor-01 harbor]# ls /var/log/harbor/
core.log  jobservice.log  portal.log  postgresql.log  proxy.log  redis.log  registryctl.log  registry.log

如果说哪一个容器没起来,或者说有其他问题,可以到/var/log/harbor目录下看看日志。
4.1.6 harbor的备份
容器数据持久化目录:	/data

[root@harbor-01 harbor]# cat harbor.yml | grep data_volume
data_volume: /data

该目录建议设置单独的分区,以保证存储空间的可用性、安全性,并且,这个数据目录建议做定期的备份。
4.1.7 修改harbor的登录密码
要是想修改harbor的登陆用户密码,则 最好在harbor web界面里直接修改,这样是最保险的!
如果是想通过修改harbor.yml文件来重置harbor用户密码,则不能单纯的修改后就执行"./prepare"和重启docker-compose,这样是不能修改harbor用户密码的!
这是因为harbor在这里用的是postgresql数据库,以pdkdf2算法保存的秘文密码!需要先进入"harbor-db"容器内部,执行相关postgresql命令行。而且postgresql的用户密码采用的是pbkdf2算法,需要提前计算好新密码的密钥值,pdkdf2算法需要"盐值","迭代次数"和密钥长度int型等,特别麻烦!!
所以,如果忘记harbor的web密码或者是admin密码需要重置,并且对于postgresql数据库 或者 pbkdf2算法操作不熟悉的话,建议删除data源数据的database,重新部署! 做法如下:
docker-compose down -v
rm -rf /data/database
vim harbor.yaml # 在这里重置或修改密码
docker-compose up -d
这样就可以使用重置后的新密码登陆harbor web界面了, 但是之前创建的用户和项目就都删除了。 这种情况最好适用于刚创建初期。
4.1.9 使用harbor仓库
注意一:
Docker 1.3.2版本开始,默认使用HTTPS与Docker registry交互,而Harbor默认设置的是http方式而不是https,所以当执行用docker login、pull、push等命令操作非https的docker regsitry的时就会报错:“http: server gave HTTP response to HTTPS client”。
解决办法: 如下,在/etc/docker/daemon.json文件里添加"insecure-registries"配置。
[root@harbor-01 ~]# cat /etc/docker/daemon.json
{
   "registry-mirrors": ["https://42h8kzrh.mirror.aliyuncs.com"],
   "insecure-registries": ["192.168.217.136:8080"]
}

[root@harbor-01 harbor]# systemctl daemon-reload
[root@harbor-01 harbor]# systemctl restart docker
注意二:
harbor中的项目(或者说仓库组)分为 公开、私有 两种:
- 公开:客户端的 push 操作需要先登录,pull不需要登录。
- 私有:客户端的pull、push操作,均需要先登录。
登录密码的保存:

其实,登录的账号信息都保存到/root/.docker/config.json文件里了
[root@harbor-02 ~]# cat /etc/docker/daemon.json
{
   "registry-mirrors": ["https://42h8kzrh.mirror.aliyuncs.com"],
   "insecure-registries": ["192.168.217.136:8080"]
}
[root@harbor-02 ~]# cat /root/.docker/config.json
{
        "auths": {
                "192.168.217.136:8080": {
                        "auth": "YWRtaW46SGFyYm9yMTIzNDU="
                }
        }
}
[root@harbor-02 ~]#
[root@harbor-02 ~]# echo "YWRtaW46SGFyYm9yMTIzNDU=" | base64 --decode
admin:Harbor12345[

只要/root/.docker/config.json里的信息不删除,后续再次登录的时候,就不用输入用户名和密码了。
4.1.10 安全相关设置
- 登录Harbor web界面,在"系统管理"->“配置管理”->“认证模式”->"允许自注册"这一项的对勾去掉,则登录的时候就不会有"用户注册"这一功能了。
- 可以在"配置管理"这一项进行认证模式,邮箱,标签等设置。
4.2 https 方式部署harbor
4.2.1 清除http登录相关信息
清除http登录相关信息:
[root@harbor-01 ~]# vim /etc/docker/daemon.json
[root@harbor-01 ~]# rm -rf /root/.docker/config.json


重启:
[root@harbor-01 ~]# systemctl daemon-reload
[root@harbor-01 ~]# systemctl restart docker


验证,可以看到已经需要使用https登录了:
[root@harbor-01 ~]# docker pull 192.168.217.136:8080/test02/registry-photon:v2.10.1
Error response from daemon: Get "https://192.168.217.136:8080/v2/": http: server gave HTTP response to HTTPS client
4.2.2 生成ssl证书
[root@harbor-01 ssl]# vim gencert.sh
[root@harbor-01 ssl]# ./gencert.sh eee.harbor-test.com 192.168.217.136

[root@harbor-01 ssl]# ls
eee.harbor-test.com  gencert.sh
[root@harbor-01 ssl]# ls eee.harbor-test.com/
server.crt  server.key
gencert.sh 脚本内容见这里。
4.2.3 修改harbor的配置文件 && 重启
修改配置文件,主要是放开https的参数,指定证书路径:
[root@harbor-01 ssl]# cd ../harbor
[root@harbor-01 harbor]# vim harbor.yml
https:
  # https port for harbor, default is 443
  port: 443
  # The path of cert and key files for nginx
  certificate: /root/ssl/eee.harbor-test.com/server.crt
  private_key: /root/ssl/eee.harbor-test.com/server.key


接着,执行prepare脚本,将harbor修改的配置更新到 docker-compose.yml 文件:
[root@harbor-01 harbor]# ./prepare


重启:
[root@harbor-01 harbor]# docker-compose down -v
[root@harbor-01 harbor]# docker-compose -f docker-compose.yml up -d
4.2.4 访问测试
使用harbor本机访问测试:
[root@harbor-01 ~]# docker pull eee.harbor-test.com/test02/registry-photon:v2.10.1
Error response from daemon: Get "https://eee.harbor-test.com/v2/": tls: failed to verify certificate: x509: certificate signed by unknown authority
[root@harbor-01 ~]#
[root@harbor-01 ~]# docker login eee.harbor-test.com
Username: admin
Password:
Error response from daemon: Get "https://eee.harbor-test.com/v2/": tls: failed to verify certificate: x509: certificate signed by unknown authority

如上,出现“tls: failed to verify certificate: x509: certificate signed by unknown authority”报错,此种情况多发生在自签名的证书,报错含义是签发证书机构未经认证,无法识别。


解决办法:
[root@harbor-01 ~]# chmod 644 /etc/pki/ca-trust/extracted/pem/tls-ca-bundle.pem
[root@harbor-01 ~]# cat /root/ssl/eee.harbor-test.com/server.crt  >> /etc/pki/tls/certs/ca-bundle.crt
[root@harbor-01 ~]# chmod 444 /etc/pki/ca-trust/extracted/pem/tls-ca-bundle.pem

由于证书是docker的daemon需要用到的,所以需要重启docker服务,进而也要重启docker-compose
[root@harbor-01 ~]# systemctl restart docker
[root@harbor-01 ~]# cd harbor
[root@harbor-01 harbor]# docker-compose down -v
[root@harbor-01 harbor]# docker-compose -f docker-compose.yml up -d


重新访问,可以看到已经访问成功了:
[root@harbor-01 harbor]# docker pull eee.harbor-test.com/test02/registry-photon:v2.10.1
v2.10.1: Pulling from test02/registry-photon
Digest: sha256:6b88b12beded26259cd040cfbec1ea8b17c49340412073381bf4abb9c0671a40
Status: Downloaded newer image for eee.harbor-test.com/test02/registry-photon:v2.10.1
eee.harbor-test.com/test02/registry-photon:v2.10.1
[root@harbor-01 harbor]#
[root@harbor-01 harbor]# docker login eee.harbor-test.com
Username: admin
Password:
WARNING! Your password will be stored unencrypted in /root/.docker/config.json.
Configure a credential helper to remove this warning. See
https://docs.docker.com/engine/reference/commandline/login/#credentials-store

Login Succeeded
使用远程客户机访问测试:
首先很重要的一步,这一步极其关键!一定不要忘记操作!!
就是需要将harbor服务端生成的CA证书拷贝到每个远程客户机上,其实主要是需要那个.crt文件。
拷贝:
root@harbor-01 ~]# scp -r ssl/ 192.168.217.135:/root/

[root@harbor-02 ~]# chmod 644 /etc/pki/ca-trust/extracted/pem/tls-ca-bundle.pem
[root@harbor-02 ~]# cat /root/ssl/eee.harbor-test.com/server.crt  >> /etc/pki/tls/certs/ca-bundle.crt
[root@harbor-02 ~]# chmod 444 /etc/pki/ca-trust/extracted/pem/tls-ca-bundle.pem

重启docker:
[root@harbor-02 ~]# systemctl restart docker

访问测试:
[root@harbor-02 ~]# docker pull eee.harbor-test.com/test02/registry-photon:v2.10.1
v2.10.1: Pulling from test02/registry-photon
Digest: sha256:6b88b12beded26259cd040cfbec1ea8b17c49340412073381bf4abb9c0671a40
Status: Downloaded newer image for eee.harbor-test.com/test02/registry-photon:v2.10.1
eee.harbor-test.com/test02/registry-photon:v2.10.1
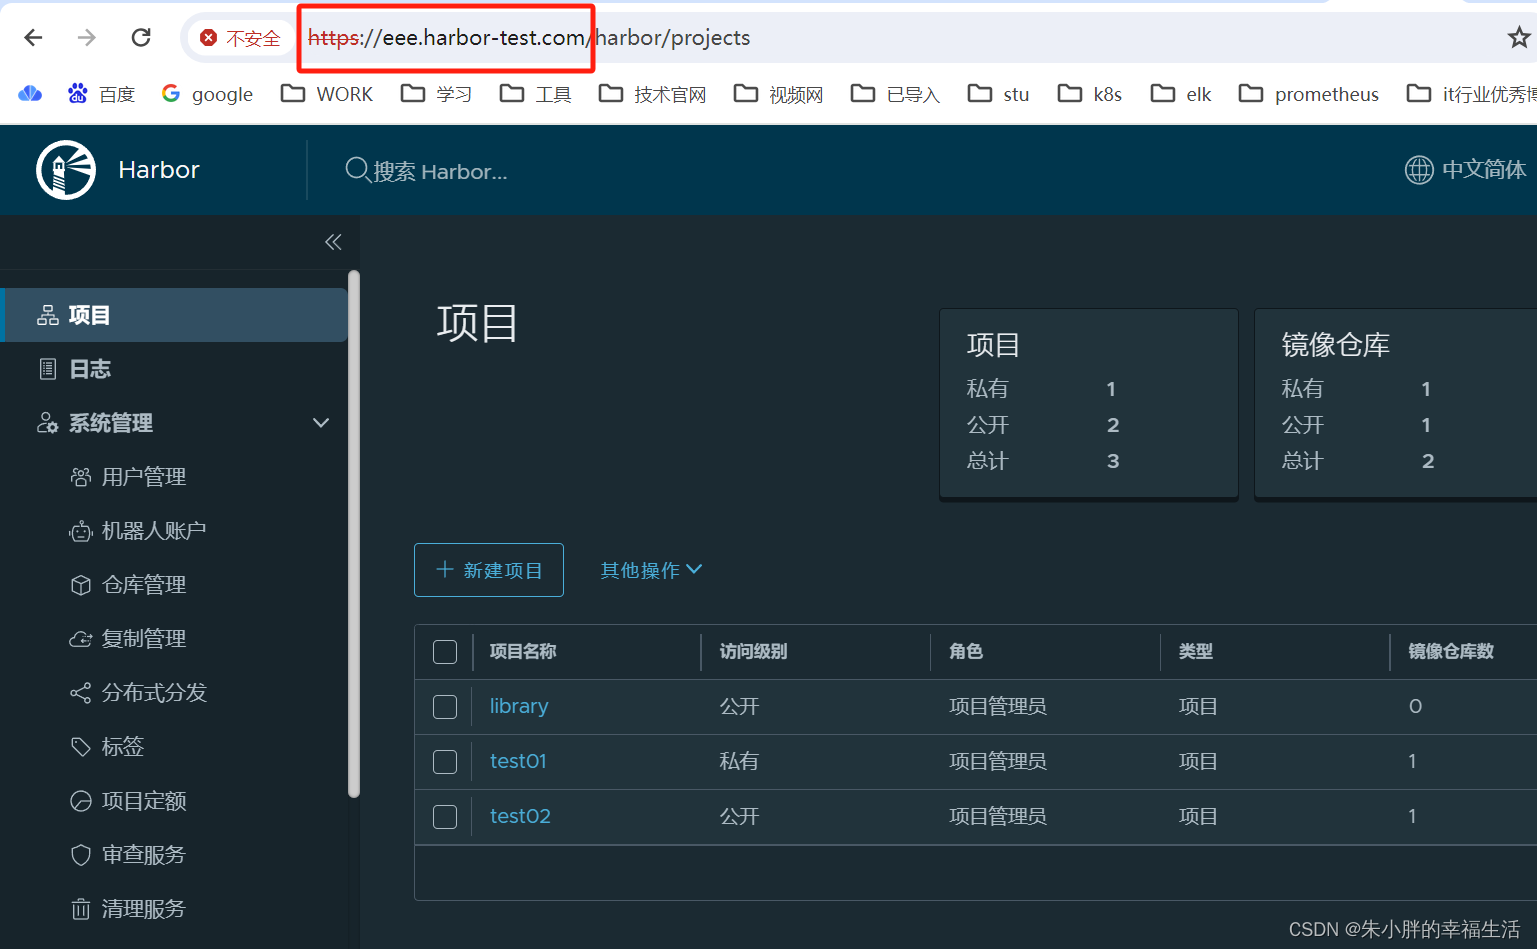
浏览器访问测试:
5 问题总结
5.1 linux内核版本问题
一般来说,安装docker的操作系统内核推荐3.10.0-1127.el7.x86_64及以上版本就可以,见dokcer官网。但有网友列出以下问题,作为参考吧。
部署harbor的时候(或者说,我们使用docker的时候),要首先查看下本机的docker版本,如果docker版本在18.90.1以上,建议升级内核版本到4.4.x 以上,否则可能会遇到一些问题,尽管可能性较低。
已知可能会遇到的问题:
1)harbor部署Harbor正常启动,端口正常监听,防火墙也已关闭,但是通过 http://ip:80 访问不了harbor,并且/var/log/harbor目录下没有任何日志产生!! 使用" telnet ip 80"查看发现不通或者闪退!!!
2)高版本的 docker(1.13 以后) 启用了3.10 kernel实验支持的 kernel memory account 功能(无法关闭),当docker节点压力大 (如频繁启动和停止容器) 时会导致 cgroup memory leak;
3)CentOS 7.x 系统自带的3.10.x内核存在一些Bugs,导致运行的Docker、Kubernetes不稳定
5.2 升级linux内核
[root@harbor-01 ~]# uname  -r
3.10.0-862.el7.x86_64

[root@harbor-01 ~]# rpm -Uvh http://www.elrepo.org/elrepo-release-7.0-3.el7.elrepo.noarch.rpm

安装完成后检查 /boot/grub2/grub.cfg 中对应内核 menuentry 中是否包含 initrd16 配置,如果没有,再安装一次!
[root@harbor-01 ~]# yum --enablerepo=elrepo-kernel install -y kernel-lt

设置开机从新内核启动
[root@harbor-01 ~]# grub2-set-default 0

重启机器
[root@harbor-01 ~]# init 6

安装内核源文件(在升级完内核并重启机器后执行,也可以不用执行这一步。可选):
[root@harbor-01 ~]# yum --enablerepo=elrepo-kernel install kernel-lt-devel-$(uname -r) kernel-lt-headers-$(uname -r)

[root@harbor-01 ~]# uname -r
4.4.180-2.el7.elrepo.x86_64