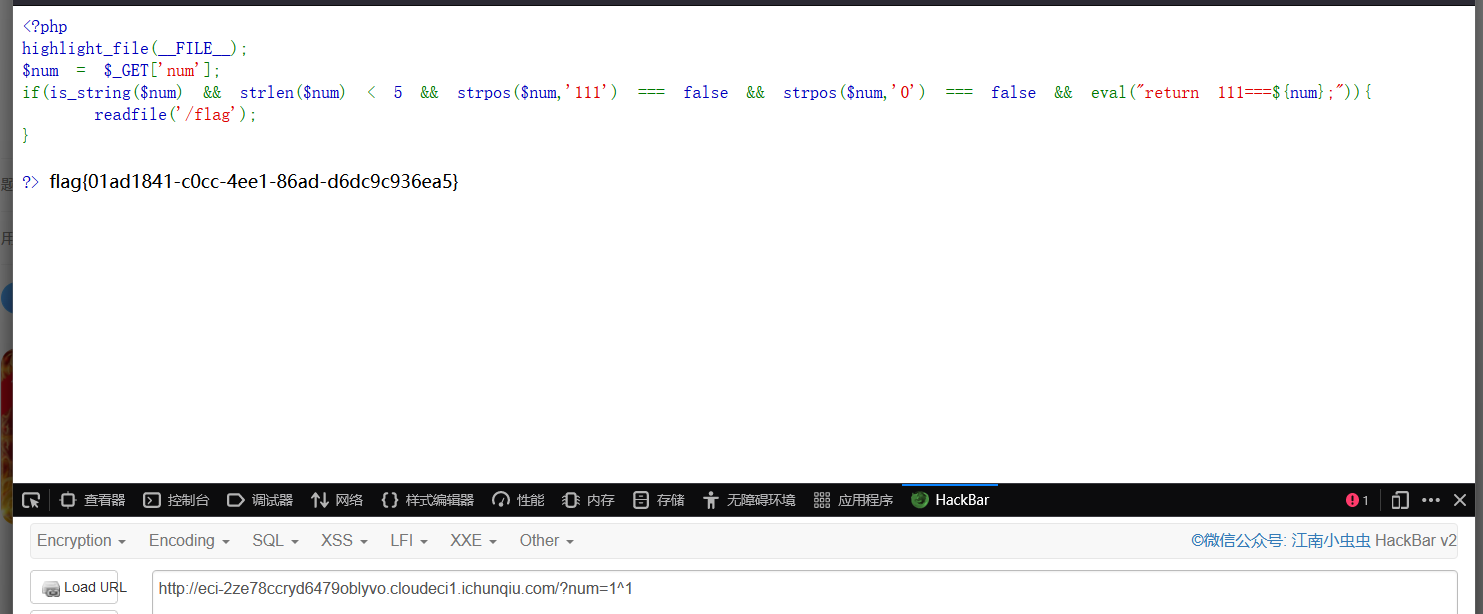
1.准备
• Linux | macOS | Windows
• Python 3.6+
• PyTorch 1.3+
• CUDA 9.2+ (If you build PyTorch from source, CUDA 9.0 is also compatible)
• GCC 5+
• MMCV
• MMDetection
兼容的MMTracking、MMCV和MMDetection版本如下所示。请安装正确的版本,以避免出现安装问题。
MMCV:
MMCV
MMDetection:
MMDetection:
2.安装
2.1 安装细节
官方文档上有个推荐的教程,我参考这个教程,结合网上其他的教程,自己在Linux服务器上面成果部署了一套环境
1.创建虚拟环境并激活
conda create -n open-mmlab python=3.9 -y
conda activate open-mmlab
2.安装Pytorch
注意要安装与自己电脑CUDA版本对应的Pytorch
对于CUDA11.X版本的 我建立安装Pytorch的1.8版本或者1.7
如果CUDA是10.X版本的,官方文档上建议安装1.5版本的Pytorch
# CUDA 11.3
conda install pytorch==1.10.0 torchvision==0.11.0 torchaudio==0.10.0 cudatoolkit=11.3 -c pytorch -c conda-forge
上面的代码是去Pytorch官网上找的,
找到官网首页
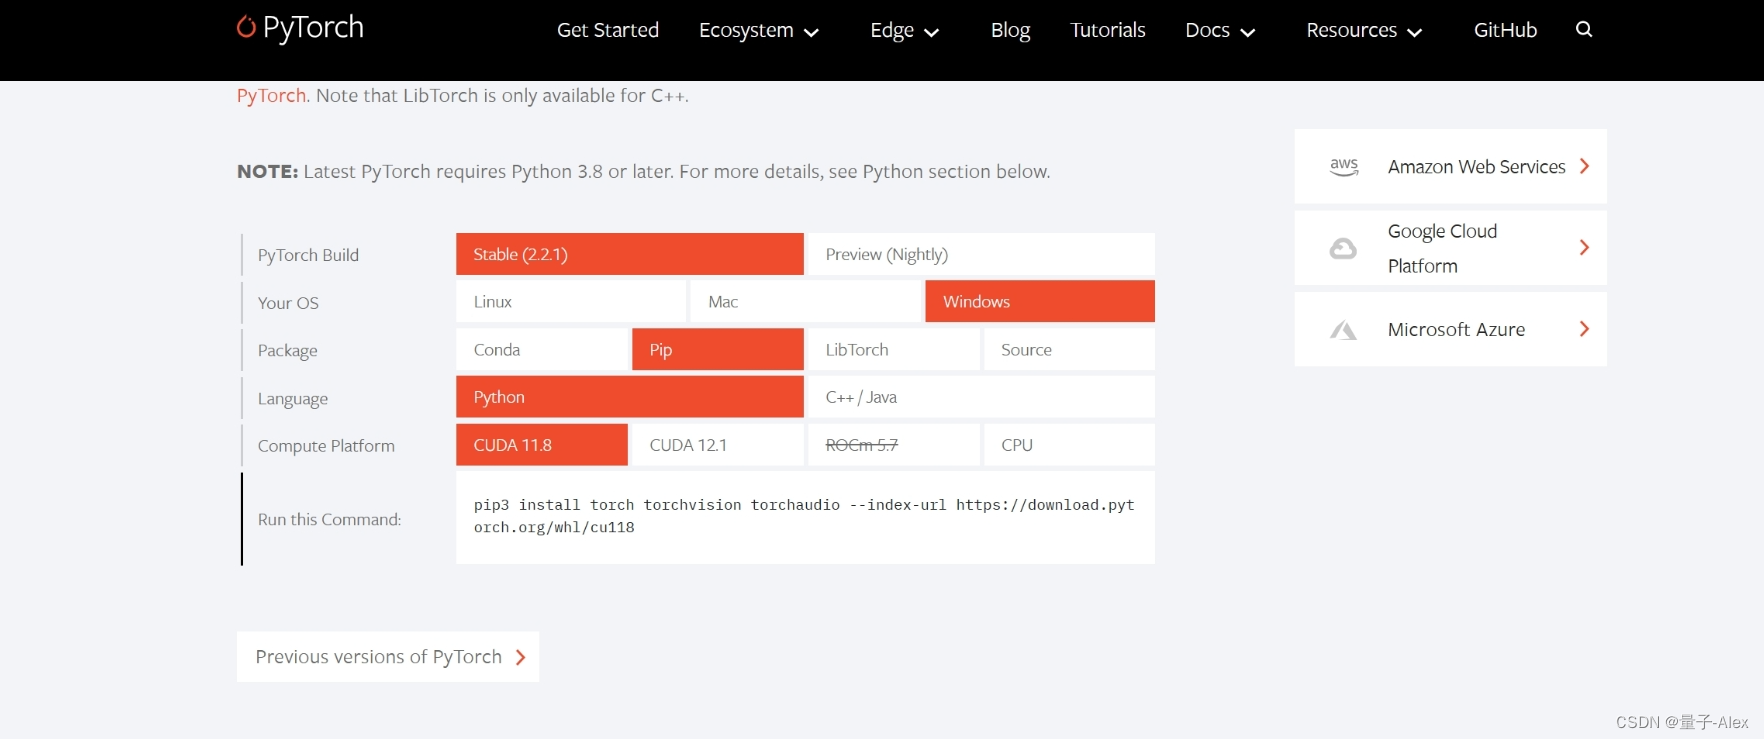
点击Previous versions of Pytorch
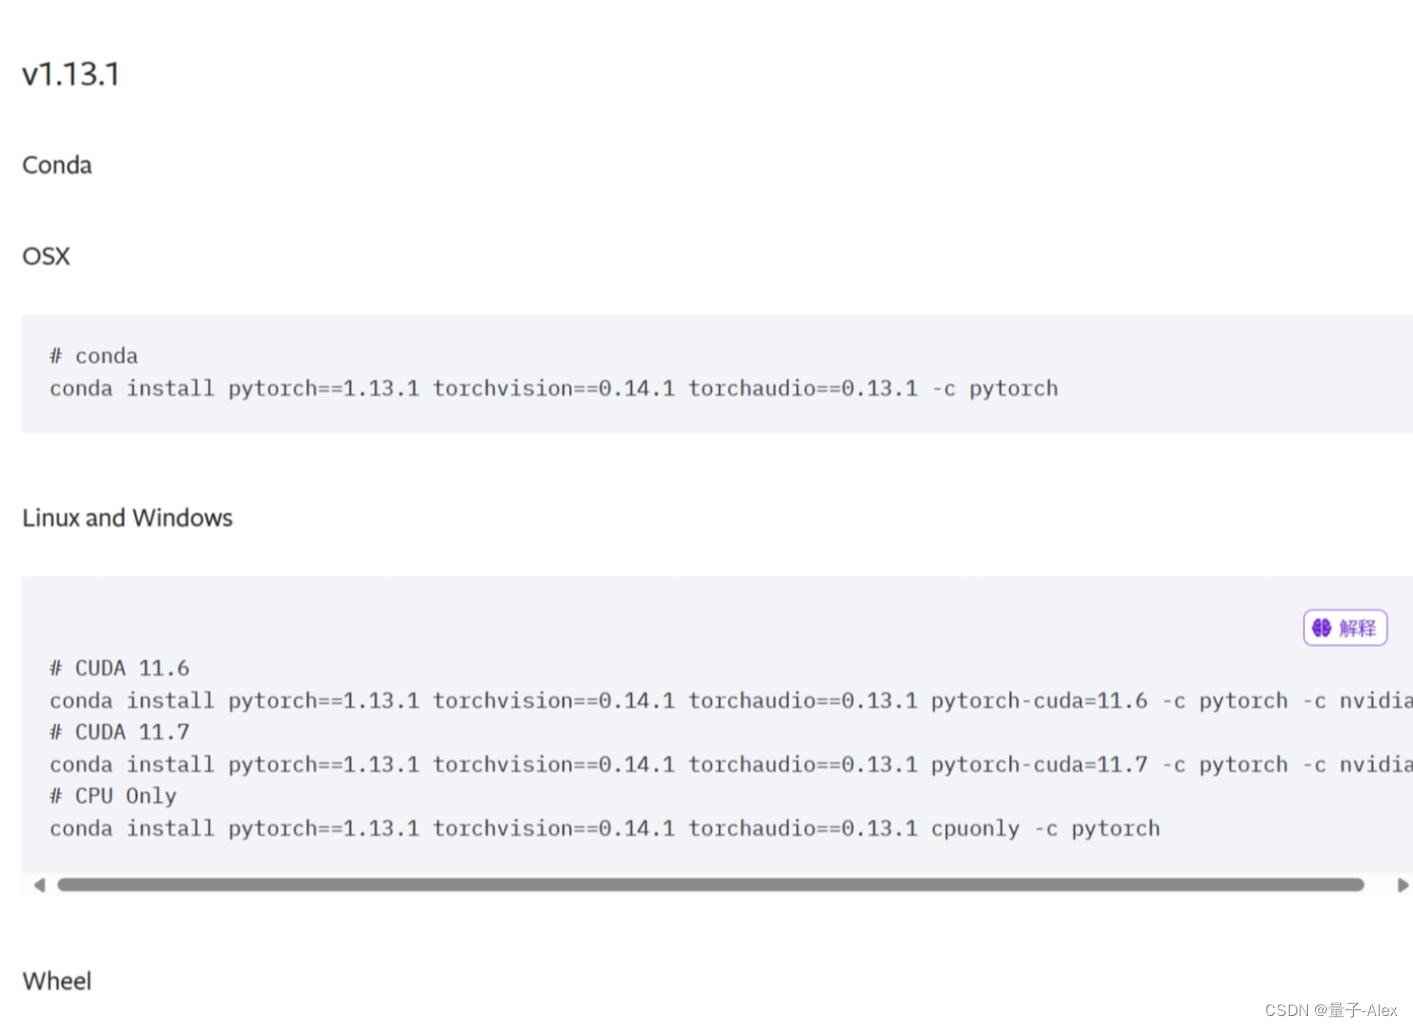
就可以根据自己操作系统和CUDA的版本情况来选择对应的Pytorch的安装指令
3.安装VOT视频目标跟踪评估需要的依赖库(这个是可选的)
如果您需要评估VOT挑战,请在安装mmcv和mmdetection之前安装虚拟工具包,以避免某些依赖项之间可能存在的numpy版本需求冲突
pip install git+https://github.com/votchallenge/toolkit.git
4.安装mmcv-full
推荐采用以下的安装方式:
# pip install mmcv-full -f https://download.openmmlab.com/mmcv/dist/{cu_version}/{torch_version}/index.html
cu_version是CUDA的版本,torch_version是Pytorch的版本
比如我的CUDA的版本是11.3,我的Pytorch的版本是1.10
我的mmcv-full的安装指定就是:
pip install mmcv-full==1.7.0 -f https://download.openmmlab.com/mmcv/dist/cu113/torch1.10.0/index.html
在这里我指定了mmcv-full的安装版本是1.7.0,我推荐使用1.5.0-2.0.0之间的版本
5.安装MMDetection
有两种安装方法:
一种是直接安装,或者先安装mim
pip install openmim
mim install mmdet==2.25.1
2.25.1是mmdetection的版本号,这个mmcv mmdetection和mmtracking之间都存在着版本兼容关系,建议大家查一下。
另外一种就是git clone
git clone https://github.com/open-mmlab/mmdetection.git
cd mmdetection
pip install -r requirements/build.txt
pip install -v -e .
# or "python setup.py develop"
6.git clone MMtracking
git clone https://github.com/open-mmlab/mmtracking.git
cd mmtracking
7.安装MMtracking
pip install -r requirements/build.txt
pip install -v -e .
# or "python setup.py develop"
8.安装额外的依赖库
对于MOTChallenge任务
pip install git+https://github.com/JonathonLuiten/TrackEval.git
对于LVIS evaluation
pip install git+https://github.com/lvis-dataset/lvis-api.git
对于TAO evaluation:
pip install git+https://github.com/TAO-Dataset/tao.git
需要说明的是,按照上述说明,MMTracking安装在开发模式下,对代码进行的任何本地修改都将生效,无需重新安装。
也就是说这样安装的话可以直接在上面做自己的修改