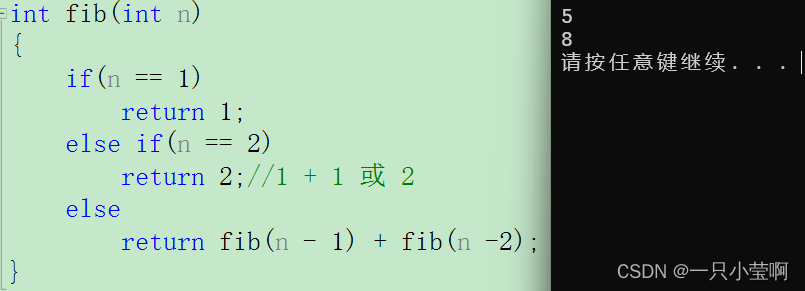
在搭建之前,我们需要做一些准备工作,这里我们需要使用 docker 搭建服务,所以需要提前安装 docker。
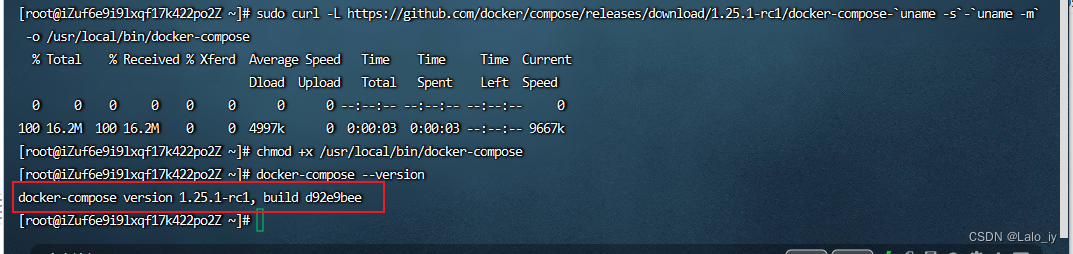
此外,由于 rocketmq 需要部署 broker 与 nameserver ,考虑到分开部署比较麻烦,这里将会使用docker-compose,如果还未安装docker-compose的可移步至此处:《Docker-Compose安装教程》
1.创建相关配置文件
创建三个目录/conf,/logs,/store,位置随意,自己能够找的到就可以,并在/conf该目录中创建:borker.conf,最后创建 docker-compose.yml 文件

- borker.conf的配置如下:
# Licensed to the Apache Software Foundation (ASF) under one or more
# contributor license agreements.  See the NOTICE file distributed with
# this work for additional information regarding copyright ownership.
# The ASF licenses this file to You under the Apache License, Version 2.0
# (the "License"); you may not use this file except in compliance with
# the License.  You may obtain a copy of the License at
#
#     http://www.apache.org/licenses/LICENSE-2.0
#
#  Unless required by applicable law or agreed to in writing, software
#  distributed under the License is distributed on an "AS IS" BASIS,
#  WITHOUT WARRANTIES OR CONDITIONS OF ANY KIND, either express or implied.
#  See the License for the specific language governing permissions and
#  limitations under the License.


# 所属集群名字
brokerClusterName=DefaultCluster

# broker 名字,注意此处不同的配置文件填写的不一样,如果在 broker-a.properties 使用: broker-a,
# 在 broker-b.properties 使用: broker-b
brokerName=broker-a

# 0 表示 Master,> 0 表示 Slave
brokerId=0

# nameServer地址,分号分割
namesrvAddr=192.168.31.169:9876

# 启动IP,如果 docker 报 com.alibaba.rocketmq.remoting.exception.RemotingConnectException: connect to <192.168.0.120:10909> failed
# 解决方式1 加上一句 producer.setVipChannelEnabled(false);,解决方式2 brokerIP1 设置宿主机IP,不要使用docker 内部IP
brokerIP1=192.168.31.169

# 在发送消息时,自动创建服务器不存在的topic,默认创建的队列数
defaultTopicQueueNums=4

# 是否允许 Broker 自动创建 Topic,建议线下开启,线上关闭 !!!这里仔细看是 false,false,false
autoCreateTopicEnable=true

# 是否允许 Broker 自动创建订阅组,建议线下开启,线上关闭
autoCreateSubscriptionGroup=true

# Broker 对外服务的监听端口
listenPort=10911

# 删除文件时间点,默认凌晨4点
deleteWhen=04

# 文件保留时间,默认48小时
fileReservedTime=120

# commitLog 每个文件的大小默认1G
mapedFileSizeCommitLog=1073741824

# ConsumeQueue 每个文件默认存 30W 条,根据业务情况调整
mapedFileSizeConsumeQueue=300000

# destroyMapedFileIntervalForcibly=120000
# redeleteHangedFileInterval=120000
# 检测物理文件磁盘空间
diskMaxUsedSpaceRatio=88
# 存储路径
# storePathRootDir=/home/ztztdata/rocketmq-all-4.1.0-incubating/store
# commitLog 存储路径
# storePathCommitLog=/home/ztztdata/rocketmq-all-4.1.0-incubating/store/commitlog
# 消费队列存储
# storePathConsumeQueue=/home/ztztdata/rocketmq-all-4.1.0-incubating/store/consumequeue
# 消息索引存储路径
# storePathIndex=/home/ztztdata/rocketmq-all-4.1.0-incubating/store/index
# checkpoint 文件存储路径
# storeCheckpoint=/home/ztztdata/rocketmq-all-4.1.0-incubating/store/checkpoint
# abort 文件存储路径
# abortFile=/home/ztztdata/rocketmq-all-4.1.0-incubating/store/abort
# 限制的消息大小
maxMessageSize=65536

# flushCommitLogLeastPages=4
# flushConsumeQueueLeastPages=2
# flushCommitLogThoroughInterval=10000
# flushConsumeQueueThoroughInterval=60000

# Broker 的角色
# - ASYNC_MASTER 异步复制Master
# - SYNC_MASTER 同步双写Master
# - SLAVE
brokerRole=ASYNC_MASTER

# 刷盘方式
# - ASYNC_FLUSH 异步刷盘
# - SYNC_FLUSH 同步刷盘
flushDiskType=ASYNC_FLUSH

# 发消息线程池数量
# sendMessageThreadPoolNums=128
# 拉消息线程池数量
# pullMessageThreadPoolNums=128
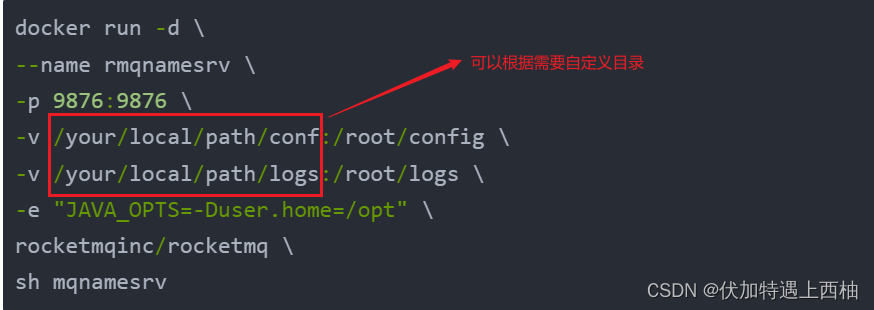
需要注意:borkerIp1需要写成自己服务的ip

- docker-compose.yml配置如下:
version: '3.5'
services:
  rmqnamesrv:
    image: foxiswho/rocketmq:server
    container_name: rmqnamesrv
    ports:
      - 9876:9876
    volumes:
      - ./logs:/opt/logs
      - ./store:/opt/store
    networks:
        rmq:
          aliases:
            - rmqnamesrv

  rmqbroker:
    image: foxiswho/rocketmq:broker
    container_name: rmqbroker
    ports:
      - 10909:10909
      - 10911:10911
    volumes:
      - ./logs:/opt/logs
      - ./store:/opt/store
      - ./conf/broker.conf:/etc/rocketmq/broker.conf
    environment:
        NAMESRV_ADDR: "rmqnamesrv:9876"
        JAVA_OPTS: " -Duser.home=/opt"
        JAVA_OPT_EXT: "-server -Xms128m -Xmx128m -Xmn128m"
    command: mqbroker -c /etc/rocketmq/broker.conf
    depends_on:
      - rmqnamesrv
    networks:
      rmq:
        aliases:
          - rmqbroker

  rmqconsole:
    image: styletang/rocketmq-console-ng
    container_name: rmqconsole
    ports:
      - 8080:8080
    environment:
        JAVA_OPTS: "-Drocketmq.namesrv.addr=rmqnamesrv:9876 -Dcom.rocketmq.sendMessageWithVIPChannel=false"
    depends_on:
      - rmqnamesrv
    networks:
      rmq:
        aliases:
          - rmqconsole

networks:
  rmq:
    name: rmq
    driver: bridge
2.执行docker-compose
docker-compose up -d

docker ps 查看是否都启动了,如果都启动成功了,如果有没有启动成功,则可以查看docker日志,一般都是,ip设置问题。

访问:http://你自己的ip:8080/#/


![蓝桥杯[OJ 3791]—珠宝的最大交替和—CPP-贪心](https://img-blog.csdnimg.cn/direct/d4998200945d4ceb93ed31d51e9d04b0.png)