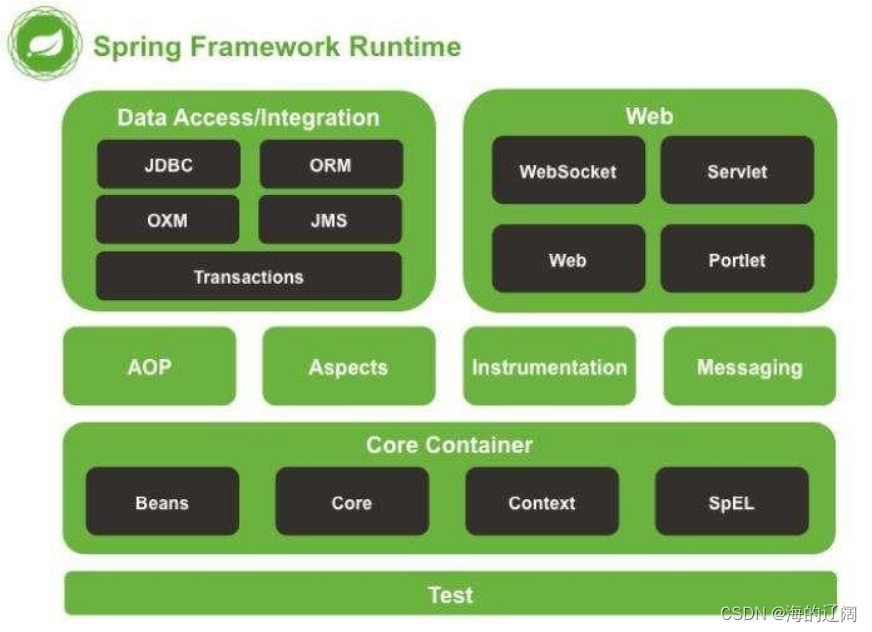
文章目录
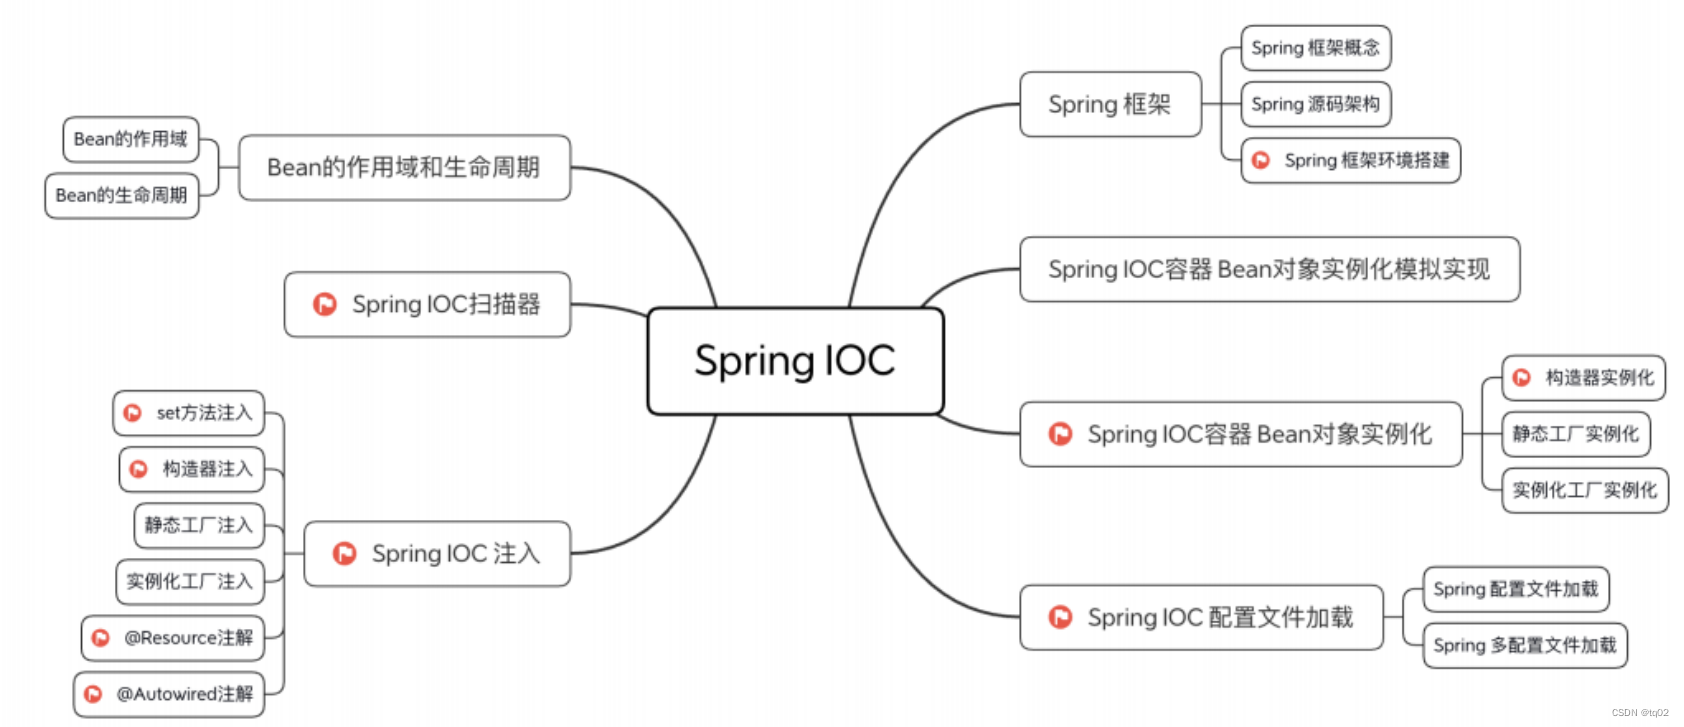
入门IOC
IOC控制反转
使用对象时,由主动new产生对象转换为有外部提供对象,此过程中对象创建控制权由程序转移到外部,此思想称为控制反转
Spring提供了一个容器从称为IOC容器,用来充当IOC思想中的外部
IOC容器负责对象的创建,初始化等一系列列工作,被创建或被管理的对象在IOC容器中统称为Bean
演示利用IOC容器创建对象
1.导入依赖坐标
<dependencies>
    <dependency>
        <groupId>org.springframework</groupId>
        <artifactId>spring-context</artifactId>
        <version>5.2.11.RELEASE</version>
    </dependency>

    <dependency>
        <groupId>junit</groupId>
        <artifactId>junit</artifactId>
        <version>4.12</version>
        <scope>test</scope>
    </dependency>
</dependencies>
2.在resource目录下创建一个spring的xml文件命名为applicationContext.xml
文件内容:
<?xml version="1.0" encoding="UTF-8"?>3.创建实体类
public class Person {
public void doWork(){
    System.out.println("我在敲代码");
}
}
4、配置bean
在applicationConten.xml中,创建bean
5.测试:
public class spring01 {
private ApplicationContext applicationContext=new ClassPathXmlApplicationContext("applicationContent.xml");

@Test
public void test01(){
    Person person = (Person) applicationContext.getBean("person");
    person.doWork();
}
}
Spring 底层默认通过反射技术调用组件类的无参构造器来创建组件对象,这一点需要注意。如果在需要无参构造器时,没有无参构造器,则会抛出下面的异常:
所以对一个JavaBean来说,无参构造器和属性的getXxx()、setXxx()方法是必须存在的,特别是在框架中。
获取bean
1、根据id获取
由于 id 属性指定了 bean 的唯一标识,所以根据 bean 标签的 id 属性可以精确获取到一个组件对象。刚才的演示我们使用的就是这种方式。
2、根据类型获取
public class spring01 {


    private ApplicationContext applicationContext=new ClassPathXmlApplicationContext("applicationContent.xml");

    @Test
    public void test01(){

        //1、根据id获取
//        Person person = (Person) applicationContext.getBean("person");
//        person.doWork();
        //2、根据类型获取
        Person bean = applicationContext.getBean(Person.class);
        bean.doWork();
    }
}
如果相同类型的 bean 在IOC容器中一共配置了两个:
<bean id="person1" class="com.iflytek.entity.Person"></bean>
    <bean id="person2" class="com.iflytek.entity.Person"></bean>
根据类型获取时会抛出异常:
org.springframework.beans.factory.NoUniqueBeanDefinitionException: No qualifying bean of type ‘com.atguigu.ioc.component.HappyComponent’ available: expected single matching bean but found 2: happyComponent,happyComponent2
思考:
如果组件类实现了接口,根据接口类型可以获取 bean 吗?
可以,前提是bean唯一
如果一个接口有多个实现类,这些实现类都配置了 bean,根据接口类型可以获取 bean 吗?
不行,因为bean不唯一
结论:
根据类型来获取bean时,在满足bean唯一性的前提下,其实只是看:『对象 instanceof 指定的类型』的返回结果,只要返回的是true就可以认定为和类型匹配,能够获取到。
给bean的属性赋值
1、setter注入
给Person实体类添加属性和对应的get,set方法
public class Person {

    private String personName;
    private Integer age;

    public String getPersonName(){

        return this.personName;
    }

    public void setPersonName(String personName) {

        this.personName = personName;
    }


}
设置属性值
<bean id="person" class="com.iflytek.entity.Person">
<!--    通过set方法赋值-->
    <property name="personName" value="张三"></property>

</bean>
获取personName
        Person bean = applicationContext.getBean(Person.class);
        System.out.println(bean.getPersonName());
2、引用外部已声明的bean
创建一个新的实体类
public class Car {

    private String name;
    private String color;


    public String getName() {

        return name;
    }

    public void setName(String name) {

        this.name = name;
    }

    public String getColor() {

        return color;
    }

    public void setColor(String color) {

        this.color = color;
    }
}
在Person类中引用这个对象实体类
public class Person {

    private String personName;
    private Integer age;

    private Car car;


    public Car getCar() {

        return car;
    }

    public void setCar(Car car) {

        this.car = car;
    }


    public String getPersonName(){

        return this.personName;
    }

    public void setPersonName(String personName) {

        this.personName = personName;
    }
}
在Spring配置文件中,给Car设置默认属性值,在Person中通过ref引用Car
<bean id="person" class="com.iflytek.entity.Person">
<!--    通过set方法赋值-->
    <property name="personName" value="张三"></property>
    <property name="car" ref="car"></property>

</bean>

<bean id="car" class="com.iflytek.entity.Car">
    <property name="name" value="奔驰"></property>
    <property name="color" value="黑色"></property>
 </bean>
获取Person中的Car
    @Test
    public void test01(){

        Person bean = applicationContext.getBean(Person.class);

        Car car = bean.getCar();
       System.out.println(car.getName()+car.getColor());
    }
bean中的属性
lazy-init=“true”:懒加载
init-method:初始化化方法
destory-method:销毁时执行的方法
scope:单例(singleton)单例,只创建一次,后面直接拿该对象
多例模式(prototype)调用一次就创建一次
depends-on=“ ”:实例化user对象之前必须要实例化这个对象
DI依赖注入:
DI:Dependency Injection,翻译过来是依赖注入。
DI 是 IOC 的另一种表述方式:即组件以一些预先定义好的方式(例如:setter 方法)接受来自于容器的资源注入。相对于IOC而言,这种表述更直接。
所以结论是:IOC 就是一种反转控制的思想, 而 DI 是对 IOC 的一种具体实现。
在容器中建立bean与bean之间的依赖关系的整个过程称为依赖注入
public class BookServiceImpl implements BookService {
BookDao bookDao=new BookDaoImpl();
public void save() {
    System.out.println("BookService Save!");
    bookDao.save();
}
}
由于此时service中还需要new一个bookdao对象,我们要用spring的方法生成这个对象
解决:
将new删除,生成一个set方法
如下BookServiceImpl和BookDao有某种依赖关系
public class BookServiceImpl implements BookService {
BookDao bookDao;
public void save() {
    System.out.println("BookService Save!");
    bookDao.save();
}

public void setBookDao(BookDao bookDao) {
    this.bookDao = bookDao;
}
}
修改pom文件,配置Service和Dao的关系
<!--配置bean-->
<bean  id= "bookDao" class="com.itheima.dao.impl.BookDaoImpl"/>
<bean id="bookService" class="com.itheima.service.impl.BookServiceImpl">

    <!--配置service和dao的关系-->
    <!--name属性表示配置哪一个具体的属性
      ref属性表示参照哪一个bean
    -->
    <property name="bookDao" ref="bookDao"/>
3、内部bean
<bean id="person" class="com.iflytek.entity.Person">
<!--    通过set方法赋值-->
    <property name="personName" value="张三"></property>
<!--    <property name="car" ref="car"></property>-->
    <property name="car">
        <bean class="com.iflytek.entity.Car">
            <property name="name" value="奔驰"></property>
            <property name="color" value="黑色"></property>
        </bean>
    </property>

</bean>
测试:
   @Test
    public void test01(){

        Person bean = applicationContext.getBean(Person.class);

        String color = bean.getCar().getColor();
        String name = bean.getCar().getName();
        System.out.println(name+color);
    }
4、引入外部属性文件
eg:配置数据库连接
1、引入依赖:
       <dependency>
            <groupId>mysql</groupId>
            <artifactId>mysql-connector-java</artifactId>
            <version>8.0.23</version>
        </dependency>
        <dependency>
            <groupId>com.alibaba</groupId>
            <artifactId>druid</artifactId>
            <version>1.2.8</version>
        </dependency>
2、在resource目录下创建jdbc.properties文件
填写数据库连接信息
jdbc.user=root
jdbc.password=root
jdbc.url=jdbc:mysql://localhost:3306/demo
jdbc.driver=com.mysql.cj.jdbc.Driver
3、配置DataSource的bean
回到Spring的配置文件中
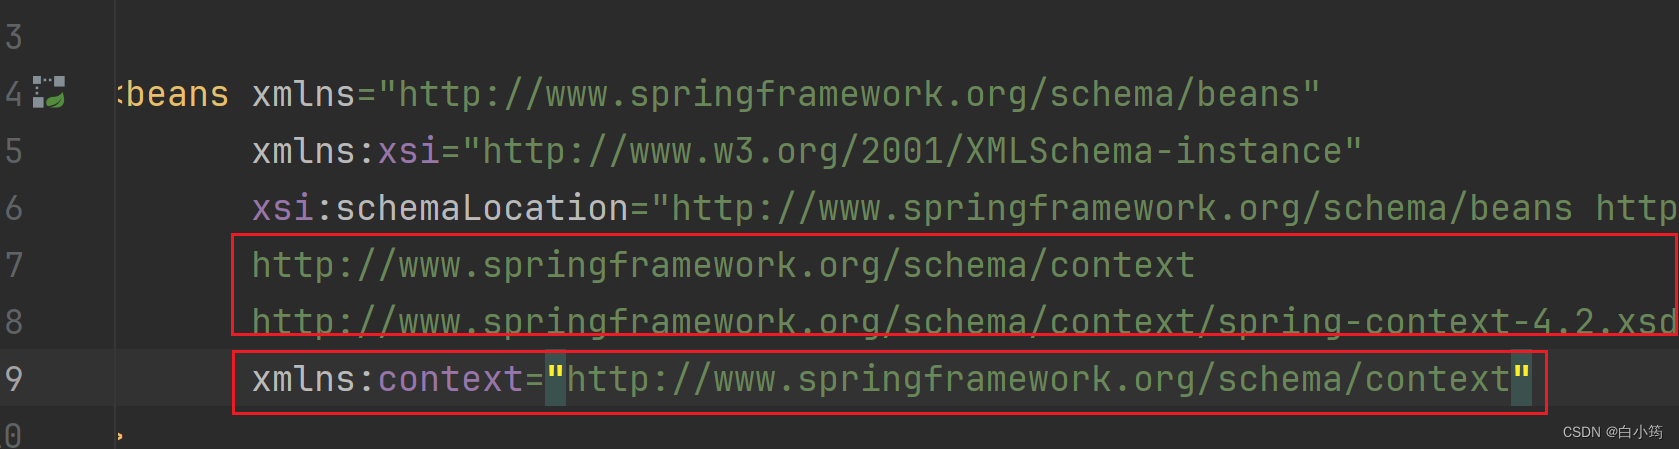
引入 xmlns:context=“http://www.springframework.org/schema/context”
并在xsi:schemaLocation中加入两个连接
http://www.springframework.org/schema/context
http://www.springframework.org/schema/context/spring-context-4.2.xsd
完整的:
<beans xmlns="http://www.springframework.org/schema/beans"
       xmlns:xsi="http://www.w3.org/2001/XMLSchema-instance"
       xsi:schemaLocation="http://www.springframework.org/schema/beans http://www.springframework.org/schema/beans/spring-beans.xsd
       http://www.springframework.org/schema/context
       http://www.springframework.org/schema/context/spring-context-4.2.xsd"
       xmlns:context="http://www.springframework.org/schema/context"
>
    <!-- 引入外部属性文件 -->
    <context:property-placeholder location="classpath:jdbc.properties"/>

    <bean id="druidDataSource" class="com.alibaba.druid.pool.DruidDataSource">
        <property name="url" value="${jdbc.url}"></property>
        <property name="driverClassName" value="${jdbc.driver}"></property>
        <property name="username" value="${jdbc.user}"></property>
        <property name="password" value="${jdbc.password}"></property>

    </bean>
5、测试
    @Test
    public  void test03() throws SQLException {

       DataSource dataSource= applicationContext.getBean(DataSource.class);

        Connection connection = dataSource.getConnection();
        System.out.println(connection);
    }
5、级联属性赋值
    <bean id="person" class="com.iflytek.entity.Person">
<!--    通过set方法赋值-->
    <property name="personName" value="张三"></property>
    <property name="car" ref="car"></property>
        <property name="car.name" value="奔驰"></property>
        <property name="car.color" value="红色"></property>
</bean>

<bean id="car" class="com.iflytek.entity.Car">

 </bean>
6、构造器注入
    <bean id="person" class="com.iflytek.entity.Person">
<!--    通过set方法赋值-->
<!--    <property name="personName" value="张三"></property>-->
<!--    <property name="car" ref="car"></property>-->
<!--        <property name="car.name" value="奔驰"></property>-->
<!--        <property name="car.color" value="红色"></property>-->

<!--        通过构造器注入-->
        <constructor-arg name="personName" value="张三"></constructor-arg>
        <constructor-arg name="age" value="18"></constructor-arg>

</bean>
注意给实体类添加构造器
    public Person(String personName, Integer age) {

        this.personName = personName;
        this.age = age;

    }
补充:
constructor-arg标签还有两个属性可以进一步描述构造器参数:
- index属性:指定参数所在位置的索引(从0开始)
- name属性:指定参数名
- type属性:指定参数类型
7、特殊值处理
[1]字面量举例
<!-- 使用value属性给bean的属性赋值时,Spring会把value属性的值看做字面量 -->
<property name="commonValue" value="hello"/>
[2]类似变量举例
<!-- 使用ref属性给bean的属性复制是,Spring会把ref属性的值作为一个bean的id来处理 -->
<!-- 此时ref属性的值就不是一个普通的字符串了,它应该是一个bean的id -->
<property name="happyMachine" ref="happyMachine"/>
[3]null值
        <property name="commonValue">
            <!-- null标签:将一个属性值明确设置为null -->
            <null/>
        </property>
[4]XML实体
<!-- 实验九 给bean的属性赋值:特殊值处理 -->
<bean id="propValue" class="com.atguigu.ioc.component.PropValue">
<!-- 小于号在XML文档中用来定义标签的开始,不能随便使用 -->
<!-- 解决方案一:使用XML实体来代替 -->
<property name="expression" value="a < b"/>
</bean>
[5]CDATA节
<!-- 实验九 给bean的属性赋值:特殊值处理 -->
<bean id="propValue" class="com.atguigu.ioc.component.PropValue">
    <property name="expression">
        <!-- 解决方案二:使用CDATA节 -->
        <!-- CDATA中的C代表Character,是文本、字符的含义,CDATA就表示纯文本数据 -->
        <!-- XML解析器看到CDATA节就知道这里是纯文本,就不会当作XML标签或属性来解析 -->
        <!-- 所以CDATA节中写什么符号都随意 -->
        <value><![CDATA[a < b]]></value>
    </property>
</bean>
8、使用p名称空间
使用 p 名称空间的方式可以省略子标签 property,将组件属性的设置作为 bean 标签的属性来完成。
1、写入坐标
xmlns:p=“http://www.springframework.org/schema/p”
2、
<bean id="person" class="com.iflytek.entity.Person" p:personName="张三" p:age="18"/>
3、测试:
   @Test
    public void test01(){

        Person bean = applicationContext.getBean(Person.class);
        String personName = bean.getPersonName();

        System.out.println(personName);
    }
9、集合属性
给Person添加集合属性,并设置get和set方法
    private List<String> sons;

    public List<String> getSons() {

        return sons;
    }

    public void setSons(List<String> sons) {

        this.sons = sons;
    }
在bean中给集合属性赋值
    <bean id="person" class="com.iflytek.entity.Person">

           <property name="sons" >
               <list>
                   <value>张大</value>
                   <value>张二</value>
                   <value>张三</value>
               </list>
           </property>
</bean>
测试:
    @Test
    public void test01(){

        Person bean = applicationContext.getBean(Person.class);

        List<String> sons = bean.getSons();
        for (String son : sons) {

            System.out.println(son);
        }

    }
其他变化形式
<!--  给bean的属性赋值:集合属性 -->
<bean id="happyTeam2" class="com.atguigu.ioc.component.HappyTeam">
    <property name="memberNameList">
        <!-- list标签:准备一组集合类型的数据,给集合属性赋值 -->
        <!--<list>
            <value>member01</value>
            <value>member02</value>
            <value>member03</value>
        </list>-->
        <!-- 使用set标签也能实现相同效果,只是附带了去重功能 -->
        <!--<set>
            <value>member01</value>
            <value>member02</value>
            <value>member02</value>
        </set>-->
        <!-- array也同样兼容 -->
        <array>
            <value>member01</value>
            <value>member02</value>
            <value>member02</value>
        </array>
    </property>
    <property name="managerList">
        <!-- 给Map类型的属性赋值 -->
        <!--<map>
            <entry key="财务部" value="张三"/>
            <entry key="行政部" value="李四"/>
            <entry key="销售部" value="王五"/>
        </map>-->
        <!-- 也可以使用props标签 -->
        <props>
            <prop key="财务部">张三2</prop>
            <prop key="行政部">李四2</prop>
            <prop key="销售部">王五2</prop>
        </props>
    </property>
</bean>
自动装配
BookController中需要BookService类
public class BookService {

}
public class BookController {

    private BookService bookService;

    public BookService getBookService(){

        return bookService;
    }
    public void setBookService(BookService bookService){

        this.bookService=bookService;
    }
}
在spring配置文件中
注入两个bean
设置BookController中的装配方式autowire=“byType”
①byType表示根据类型进行装配,此时如果类型匹配的bean不止一个,那么会抛NoUniqueBeanDefinitionException
    <bean class="com.iflytek.service.BookService"></bean>
    <bean class="com.iflytek.controller.BookController" autowire="byType"></bean>
测试:
   @Test
    public void test04(){

        BookController bean = applicationContext.getBean(BookController.class);
        System.out.println( bean.getBookService());

    }
②byName表示根据bean的id进行匹配。而bean的id是根据需要装配组件的属性的属性名来确定的
eg:修改BookCcontroller中的BookService属性名为 bookService1
public class BookController {

    private BookService bookService1;

    public BookService getBookService(){

        return bookService1;
    }
    public void setBookService(BookService bookService){

        this.bookService1=bookService;
    }
}
设置autowire方式为byName
    <bean class="com.iflytek.service.BookService" id="bookService"></bean>

    <bean class="com.iflytek.controller.BookController" autowire="byName"></bean>
测试:
   @Test
    public void test04(){

        BookController bean = applicationContext.getBean(BookController.class);
        System.out.println( bean.getBookService());

    }
结果为:null
在注入一个 BookService的bean,设置id为bookService1
<bean class="com.iflytek.service.BookService" id="bookService1"></bean>
测试:注入成功
手动装配
    <bean class="com.iflytek.controller.BookController" >
        <property name="bookService" ref="bookService"></property>
    </bean>
集合类型的Bean
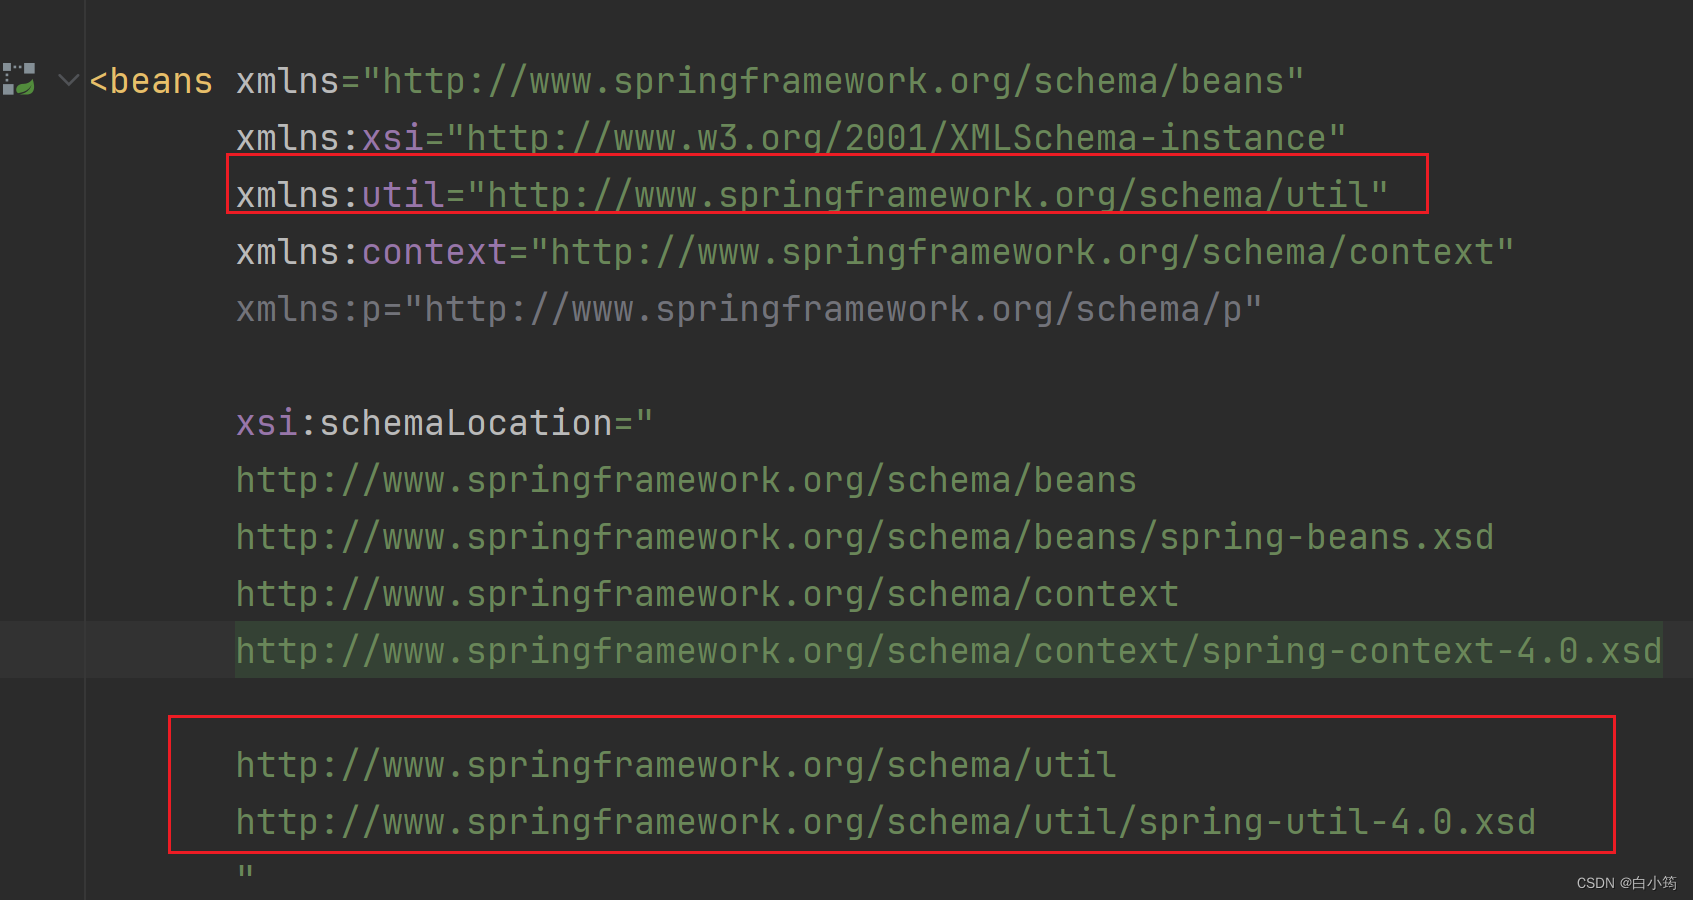
1、添加util的坐标
xmlns:util=“http://www.springframework.org/schema/util”
xsi:schemaLocation=“http://www.springframework.org/schema/util
http://www.springframework.org/schema/util/spring-util-4.0.xsd”
2、创建集合类型的bean
    <util:list id="personList">
        <bean class="com.iflytek.entity.Person">
            <property name="personName" value="张三"></property>
        </bean>
        <bean class="com.iflytek.entity.Person">
            <property name="personName" value="李四"></property>
        </bean>
        <bean class="com.iflytek.entity.Person">
            <property name="personName" value="王五"></property>
        </bean>

    </util:list>
3、测试
    @Test
    public void test05(){

        List<Person> list= (List<Person>) applicationContext.getBean("personList");
        list.forEach(item->{

            System.out.println(item.getPersonName());
        });
    }
Bean的作用域
在Spring中可以通过配置bean标签的scope属性来指定bean的作用域范围,各取值含义参加下表:
| 取值 | 含义 | 创建对象的时机 |
|---|---|---|
| singleton | 在IOC容器中,这个bean的对象始终为单实例 | IOC容器初始化时 |
| prototype | 这个bean在IOC容器中有多个实例 | 获取bean时 |
如果是在WebApplicationContext环境下还会有另外两个作用域(但不常用):
| 取值 | 含义 |
|---|---|
| request | 在一个请求范围内有效 |
| session | 在一个会话范围内有效 |
测试:
    <bean class="com.iflytek.controller.BookController" scope="prototype" >
    </bean>
    @Test
    public void test04(){

        BookController bean1 = applicationContext.getBean(BookController.class);

        BookController bean2 = applicationContext.getBean(BookController.class);
        System.out.println(bean1.hashCode()==bean2.hashCode());

    }
bean的生命周期
1、bean的生命周期清单
- bean对象创建(调用无参构造器)
- 给bean对象设置属性
- bean对象初始化之前操作(由bean的后置处理器负责)
- bean对象初始化(需在配置bean时指定初始化方法)
- bean对象初始化之后操作(由bean的后置处理器负责)
- bean对象就绪可以使用
- bean对象销毁(需在配置bean时指定销毁方法)
- IOC容器关闭
2、指定bean的初始化方法和销毁方法
①创建两个方法作为初始化和销毁方法
在HappyComponent中
public void happyInitMethod() {

    System.out.println("HappyComponent初始化");
}

public void happyDestroyMethod() {

    System.out.println("HappyComponent销毁");
}
②配置bean时指定初始化和销毁方法
<!-- 实验十六 bean的生命周期 -->
<!-- 使用init-method属性指定初始化方法 -->
<!-- 使用destroy-method属性指定销毁方法 -->
<bean id="happyComponent"
      class="com.atguigu.ioc.component.HappyComponent"
      init-method="happyInitMethod"
      destroy-method="happyDestroyMethod"
>
    <property name="happyName" value="uuu"/>
</bean>
3、bean的后置处理器
①创建后置处理器类
package com.atguigu.ioc.process;

import org.springframework.beans.BeansException;
import org.springframework.beans.factory.config.BeanPostProcessor;

// 声明一个自定义的bean后置处理器
// 注意:bean后置处理器不是单独针对某一个bean生效,而是针对IOC容器中所有bean都会执行
public class MyHappyBeanProcessor implements BeanPostProcessor {

    //bean初始化之前
    @Override
    public Object postProcessBeforeInitialization(Object bean, String beanName) throws BeansException {


        System.out.println("☆☆☆" + beanName + " = " + bean);

        return bean;
    }
    //bean初始化之后
    @Override
    public Object postProcessAfterInitialization(Object bean, String beanName) throws BeansException {


        System.out.println("★★★" + beanName + " = " + bean);

        return bean;
    }
}
②把bean的后置处理器放入IOC容器
<!-- bean的后置处理器要放入IOC容器才能生效 -->
<bean id="myHappyBeanProcessor" class="com.atguigu.ioc.process.MyHappyBeanProcessor"/>
③执行效果示例
HappyComponent创建对象
HappyComponent要设置属性了
☆☆☆happyComponent = com.atguigu.ioc.component.HappyComponent@ca263c2
HappyComponent初始化
★★★happyComponent = com.atguigu.ioc.component.HappyComponent@ca263c2
HappyComponent销毁