第2章 基本库的使用
2.1 urllib库的使用
2.1.1 请求
(1)urlopen的使用
#示例
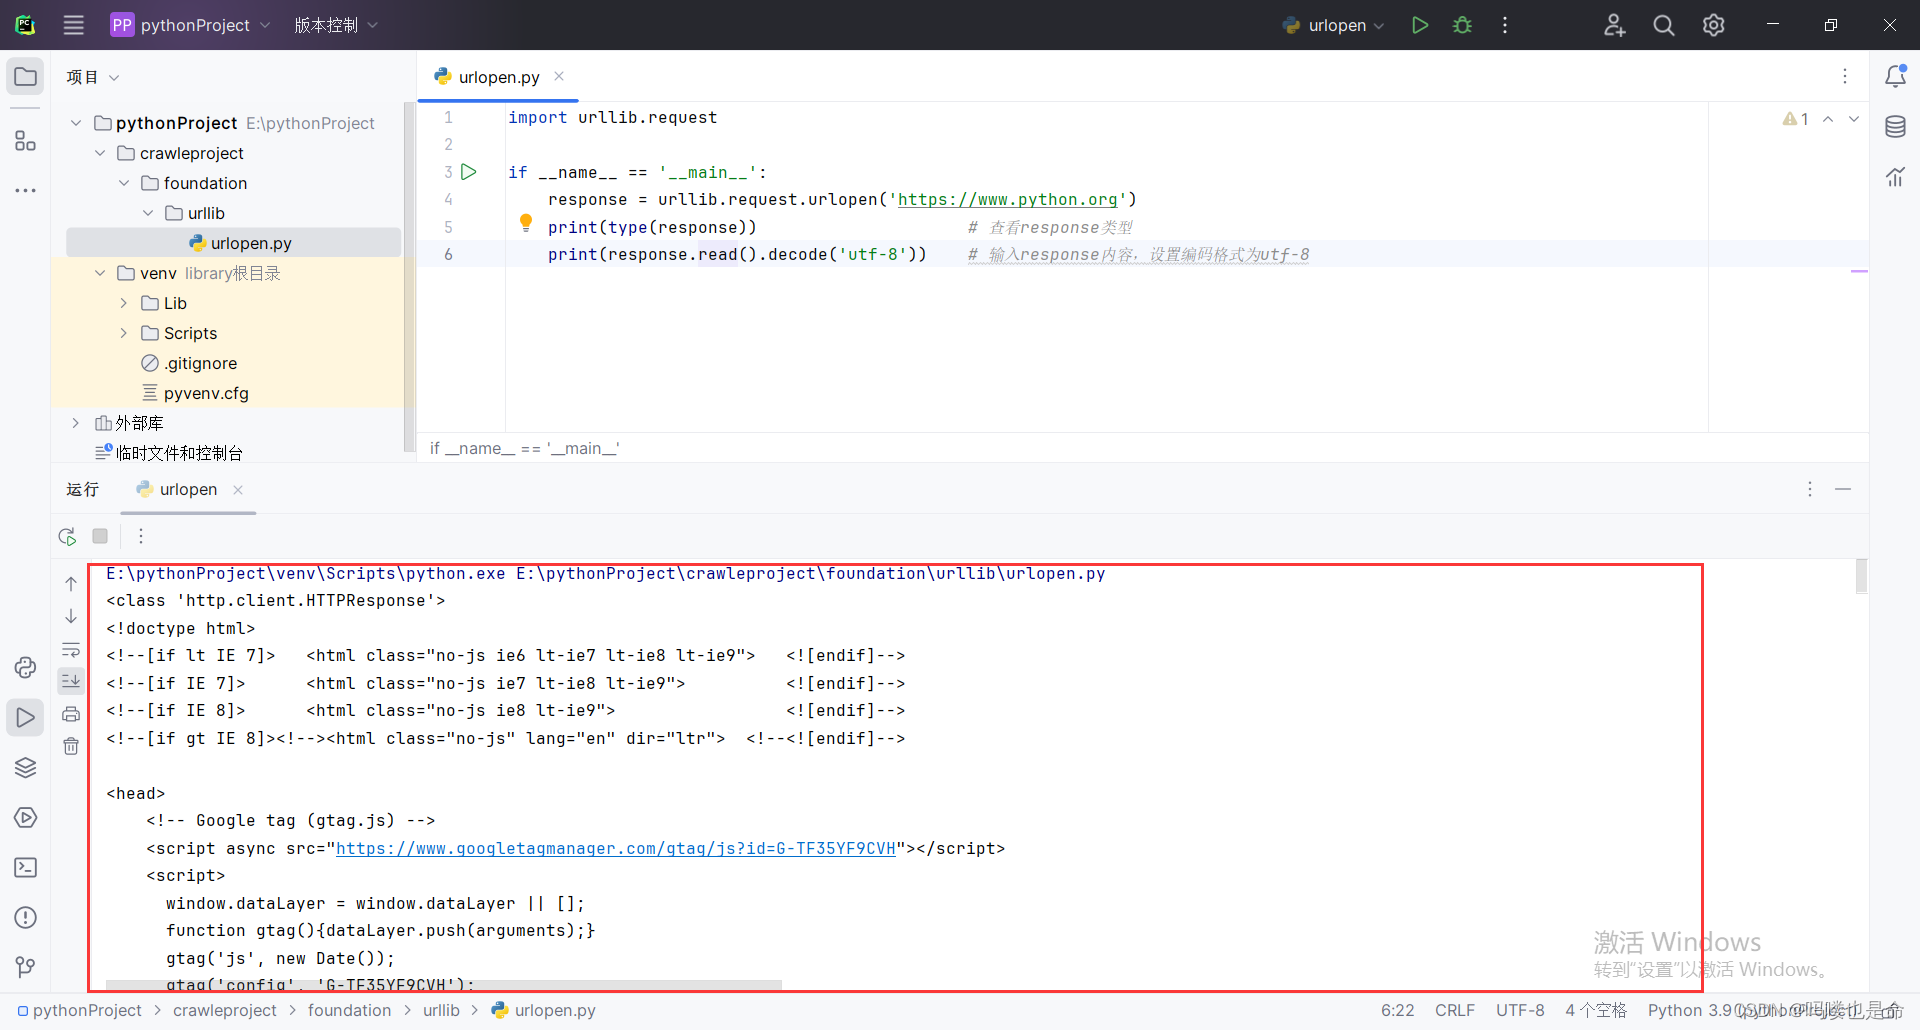
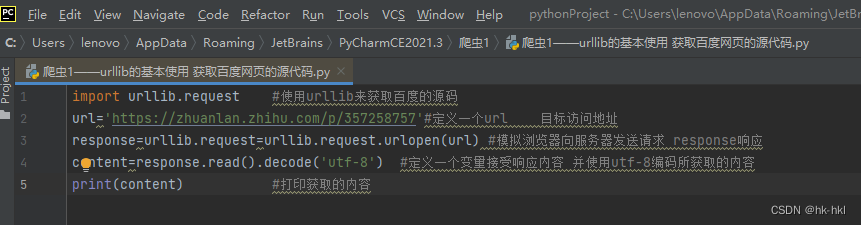
import urllib.request
response=urllib.request.urlopen('https://www.python.org')
print(response.read().decode('utf-8'))#输出网页源代码
print(type(response))#返回响应的类型
print(response.status)#获取状态信息
print(response.getheaders())#获取请求头
print(response.getheader('Server'))#获取调用getheader方法,并获取了响应头中Server的值
1)urlopen的使用方法
##urlopen方法的API:
urllib.request.urlopen(url,data=None,[timeout,]*,cafile=None,capath=None,cadefault=False,context=None)
#data参数示例
import urllib.parse
import urllib.request
data = bytes(urllib.parse.urlencode({'name':'germey'}),encoding='utf-8')#将参数name,值germey转码成bytes类型;用uI111b.parse模块里的urlenode方法将字典参数转化为字符串
response = urllib.request.urlopen('https://www.httpbin.org/post',data=data)
print(response.read().decode('utf-8'))
#timeout参数示例
import urllib.request
response = urllib.request.urlopen('https://www.httpbin.org/get',timeout=0.1)#设置超时时间为0.1S
print(response.read())
#或者使用try except实现
import socket
import urllib.request
import urllib.error
try:
response = urllib.request.urlopen('https://www.httpbin.org/get', timeout=0.1)
except urllib.error.URLError as e:
if isinstance(e.reason, socket.timeout):
print('TIME OUT')
#其他参数
context参数,参数必须是ssl.SSLContext类型,用于指定SSL位置
cafile和capath这两个参数分别用来指定CA证书和其路径,在请求HTTPS链接时会有用
(2)request的使用方法
1)request的用法示例
import urllib.request
request =urllib.request.Request('https://python.org')
response =urllib.request.urlopen(request)
print(response.read().decode('utf-8'))
2)构造Request类
class urllib.request.Request(url,data-None,headers={},origin_req host-None,unverifiablesFalse,method=None)
第一个参数url用于请求URL,这是必传参数,其他的都是可选参数。
第二个参数data如果要传数据,必须传bytes类型的。如果数据是字典,可以先用urllib.parse模块里的urlencode方法进行编码。
第三个参数headers是一个字典,这就是请求头,我们在构造请求时,既可以通过headers参数直接构造此项,也可以通过调用请求实例的add_header方法添加。
第四个参数origin_req_host指的是请求方的host名称或者IP地址。
第五个参数unverifiable表示请求是否是无法验证的,默认取值是False。
第六个参数method是一个字符串,用来指示请求使用的方法,例如GET、POST和PUT等。
#示例
from urllib import request, parse
url = 'https://httpbin.org/post'
headers = {'User-Agent': 'Mozilla/4.0 (compatible; MSIE 5.5; Windows NT)', 'Host': 'httpbin.org'}
data = bytes(parse.urlencode({'name': 'germey'}), encoding='utf-8')
req = request.Request(url=url, data=data, headers=headers, method='POST')
response = request.urlopen(req)
print(response.read().decode('utf-8'))
(3)高级用法
1)BaseHandler类,是其他所有Handler类的父类。提供了最基本的方法,例如default_open、protocol_request等。
继承BaseHandler类的各种Handler子类,具体如下:
HTTPDefaultErrortHandler用于处理HTTP响应错误,所有错误都会抛出HTTPError类型的异常。
HTTPRedirectHandler用于处理重定向。
HTTPCookieProcessor用于处理Cookie。
ProxyHandler用于设置代理,代理默认为空。
HTTPPaSSwordNgr用于管理密码,它维护着用户名密码的对照表。
HTTPBasicAuthHandler用于管理认证,如果一个链接在打开时需要认证,那么可以用这个类来解决认证问题。
2)利用Handler类来构建Opener类
#Handler类和Opener类的用法(解决网页需要登录的问题)
from urllib.request import HTTPPasswordMgrWithDefaultRealm, HTTPBasicAuthHandler, build_opener, install_opener
from urllib.error import URLError
username = 'admin'
password = 'admin'
url = 'https://ssr3.scrape.center/'
p = HTTPPasswordMgrWithDefaultRealm()
p.add_password(None, url, username, password)
auth_handler = HTTPBasicAuthHandler(p)
opener = build_opener(auth_handler)
install_opener(opener)
try:
result = opener.open(url)
html = result.read().decode('utf-8')
print(html)
except URLError as e:
print(e.reason)
解析(分析):
首先,实例化了一个HTTPBasicAuthHandler对象auth_handler,其参数是HTTPPasswordMgr-WithDefaultRealm对象,它利用add_password方法添加用户名和密码,这样就建立了一个用来处理验证的Handler类。
然后,将刚建立的auth_handler类当作参数传入build_opener方法,构建一个Opener,这个Opener在发送请求时就相当于已经验证成功了。
最后,利用Opener类中的open方法打开链接,即可完成验证。
(4)代理
1)代理添加
from urllib.error import URLError
from urllib.request import ProxyHandler, build_opener
proxy_handler = ProxyHandler({
'http': 'http://127.0.0.1:8080',
'https': 'https://127.0.0.1:8080'
})
opener = build_opener(proxy_handler)
try:
response = opener.open('https://www.baidu.com')
print(response.read().decode('utf-8'))
except URLError as e:
print(e.reason)
#原理
使用了ProxyHandler,其参数是一个字典,键名是协议类型(例如HTTP或者HTTPS等)、键值是代理链接,可以添加多个代理。然后利用这个Handler和build_opener方法构建了一个Opener,之后发送请求即可。
(5)处理Cookie需要的Handler
##获取网站的Cookie
import http.cookiejar,urllib.request
cookie = http.cookiejar.CookieJar()
handler = urllib.request.HTTPCookieProcessor(cookie)
opener = urllib.request.build_opener(handler)
response = opener.open('https://ww.baidu.com')
for item in cookie:
print(item.name +"-"+item.value)#输出Cookie条目的名称和值
首先,必须声明一个Cookie]ar对象。然后需要利用HTTPCookieProcessor构建一个Handler,最后利用build_opener方法构建Opener,执行open函数即可。
#输出文件格式的内容
import urllib.request,http.cookiejar
filename = 'cookie.txt'
cookie = http.cookiejar.MozillaCookie]ar(filename)#将CookieJar换成MozillaCookieJar即可,要保存LWP格式的Cookie文件,改为cookie = http.cookiejar.LWPCookie]ar(filename)
handler = urllib.request.HTTPCookieProcessor(cookie)
opener = urllib.request.build_opener(handler)
response = opener.open('https://ww.baidu.com')
cookie.save(ignore_discard=True,ignore_expires=True)
#读取生成的Cookie文件
import urllib.request
import http.cookiejar
cookie = http.cookiejar.LWPCookieJar()
cookie.load('cookie.txt', ignore_discard=True, ignore_expires=True)#调用load方法来读取本地的Cookie文件
handler = urllib.request.HTTPCookieProcessor(cookie)
opener = urllib.request.build_opener(handler)
response = opener.open('https://www.baidu.com')
print(response.read().decode('utf-8'))
2.1.2 处理异常
(1)URLError
URLError类来自urllib库的error模块,继承自OSError类,是error异常模块的基类,由request模块产生的异常都可以通过捕获这个类来处理。它具有一个属性reason,即返回错误的原因。
#示例
from urllib import request,error
try:
response -request.urlopen('https://cuiqingcai.com/404')
except error.URLError as e:
print(e.reason)#返回错误原因
(2)HTTPError
HTTPError是URLError的子类,专门用来处理HTTP请求错误,如认证请求失败等。
3个属性:
code:返回HTTP状态码,例如404表示网页不存在,500表示服务器内部错误等。
reason:同父类一样,用于返回错误的原因。
headers:返回请求头。
#示例
from urllib import request,error
try:
response-request.urlopen('https://cuiqingcai.com/404')
except error.HTTPError as e:
print(e.reason,e.code,e.headers,sep-'\n')
注:由于URLError是HTTPError的父类,可以先选择捕获子类的错误,再捕获父类的错误
#最优程序
from urllib import request,error
try:
response = request.urlopen('https://cuiqingcai.com/404')
except error.HTTPError as e:
print(e.reason,e.code,e.headers,sep='\n')
except error.URLError as e:
print(e.reason)
else:
print('Request Successfully')
##这样写的好处:
首先,捕获HTTPError,获取它的错误原因、状态码、请求头等信息。
接着,如果不是HTTPEITor异常,就会捕获URLError异常,输出错误原因。
最后,用else语句来处理正常的逻辑。
#reason属性返回一个对象
import socket
import urllib.request
import urllib.error
try:
response = urllib.request.urlopen('https://wo.baidu.com',timeout=0.01)
except urllib.error.URLError as e:
print(type(e.reason))
if isinstance(e.reason,socket.timeout):
print('TIME OUT')
2.1.3 解析链接
parse模块定义了处理URL的标准接口,如实现URL各部分的抽取、合并以及链接转换。
支持协议URL处理:file、tp、gopher、hdl、http、htps、imap、mailto、mms、news、nmtp、prospero、syne、tsp、rtspu、stp、sip、sips、shews、svn、svn+sh、telnet和wais。
#parse模块的用法
(1)urlparse(实现URL的识别和分段)
#示例
from urllib.parse import urlparse
result = urlparse('https://ww.baidu.com/index.html;user?id=5#comment')
print(type(result))print(result)#结果是一个ParseResult类型的对象,包含6部分,分别是scheme、netloc、path、params、query和fragment。
分析链接:urlparse方法在解析URL时有特定的分隔符。
//前面的内容就是scheme,代表协议。
第一个/符号前面便是netloc,即域名;
后面是path,即访问路径。
分号;后面是params,代表参数。
问号?后面是查询条件query,一般用作GET类型的URL。
井号#后面是锚点fragment,用于直接定位页面内部的下拉位置。
#标准的链接格式:scheme://netloc/path;params?query#fragment(可用urlparse拆解)
urlparse的API用法:urllib.parse.urlparse(urlstring,scheme='",allow_fragments=True)
urlparse方法有3个参数:
urlstring:必填项,即待解析的URL。
scheme:默认的协议(http或htps等)。
allow_fragments:是否忽略fragment。
#示例
from urllib.parse import urlparse
result = urlparse('wsw.baidu.com/index.html;user?id-5#comment',scheme='https')#带上协议信息:result =urlparse('http://www.baidu.com/index.htnl;user?id-5#comment',schemes='https')
print(result)
注:scheme参数只有在URL中不包含协议信息的时候才生效。如果URL中有,就会返回解析出的scheme。
#第3个参数示例
from urllib.parse import urlparse
result = urlparse('https://ww.baidu.com/index.html;user?id-5#comment',allow_fragments=False)
print(result)
(2)urlunparse
urlunparse,用于构造URL。方法是接收的参数是一个可迭代对象,其长度必须是6,否则会抛出参数数量不足或者过多的问题。
#示例
from urllib.parse import urlunparse#urlparse的对立方法
data = ['https','ww.baidu.com','index.htnl','user','a=6','comment']
print(urlunparse(data))
(3)urlsplit
和urlparse方法非常相似,不过它不再单独解析params这一部分(params会合并到path中),只返回5个结果。
#示例
from urllib.parse import urlsplit
result = urlsplit('https://www.baidu.com/index.html;user?1d=5#coment')#属性获取
print(result)
from urllib.parse import urlsplit
result = urlsplit('https://ww.baidu.com/index.html;user?id=5#comment')
print(result.scheme,result[o])#索引获取
(4)urlunsplit
与urlunparse方法类似,是将链接各个部分组合成完整链接的方法,传入的参数也是一个可迭代对象,例如列表、元组等,唯一区别是这里参数的长度必须为5。
#实例
from urllib.parse import urlunsplit
data = ['https','ww.baidu.com','index.html','a=6','comment']
print(urlunsplit(data))
(5)urljoin
urlunparse和urlunsplit方法都可以完成链接的合并,不过前提都是必须有特定长度的对象,链接的每一部分都要清晰分开。除了这两种方法,还有一种生成链接的方法,是urljoin。
##基本原理:
首先,提供一个base_url(基础链接)作为该方法的第一个参数,将新的链接作为第二个参数;
其次,urljoin方法会分析base_url的scheme、netloc和path这3个内容,并对新链接缺失的部分进行补充;
最后,返回结果。
#示例
from urllib.parse import urljoin
print(urljoin('https://wnw.baidu.com','FAQ.html'))
print(urljoin('https://wnw.baidu.com','https://cuiqingcai.com/FAQ.html'))
print(urljoin('https://ww.baidu.com/about.html,'https://cuiqingcai.com/FAQ.html'))
print(urljoin('https://www.baidu.com/about.html','https://cuiqingcai.com/FAQ.html?question=2'))
print(urljoin('https://ww.baidu.com?wd=abc','https://cuiqingcai.com/index.php'))
print(urljoin('https://www.baidu.com','?category=2#comment'))
print(urljoin('www.baidu.com','?category=2#comment'))
print(urljoin('www.baidu.com#comment','category=2'))
(6)urlencode(构造GET请求参数)
#示例
from urllib.parse import urlencode
params ={
'name':'germey',
'age':25
}
base_url = 'https://ww.baidu.com?'
url = base_url+urlencode(params)
print(url)
#原理:
首先声明一个字典params,用于将参数表示出来;
然后调用urlencode方法将params序列化为GET请求的参数。
(7)parse_qs(反序列化:将一串GET请求参数转回字典)
#示例
from urllib.parse import parse_qsquery'name-germeyaage=25'
print(parse_qs(query))
(8)parse_qsl(将参数转化为由元组组成的列表)
#示例
from urllib.parse import parse_qsl
query = 'name=germey&age=25'
print(parse_qsǐ(query)
(9)quote(将中文字符转化为URL编码)
#示例
from urllib.parse import quote
keyword =‘壁纸”
url = 'https://ww.baidu.com/s?wd='+quote(keyword)
print(url)
(10)unquote(进行URL解码)
#示例
from urllib.parse import unquote
url = 'https://ww.baidu.Com/s?wd=%E5%A3%81%E7%BA%B8'
print(unquote(url))
2.1.4 分析Robots协议
利用urllib库的robotparser模块,可以分析网站的Robots协议。
(1)Robots协议
1)概念
Robots协议也称作爬虫协议、机器人协议,全名为网络爬虫排除标准(Robots Exclusion Protocol ),用来告诉爬虫和搜索引擎哪些页面可以抓取、哪些不可以。它通常是一个叫作robots.txt的文本文件,一般放在网站的根目录下。
#robots.txt的样例:
User-agent:*
Disallow:/
Allow:/public/
#解析:限定了所有搜索爬虫只能爬取public目录。
2)robots.txt的常见写法
禁止所有爬虫访问所有目录的代码如下:
User-agent:*
Disallow:/
允许所有爬虫访问所有目录的代码如下:
User-agent:*
Disallow:
注:直接把robots.txt文件留空也是可以的。
禁止所有爬虫访问网站某些目录的代码如下:
User-agent:*
Disallow:/private/
Disallow:/tmp/
只允许某一个爬虫访问所有目录的代码如下:
User-agent:WebCrawlei
Disallow:
User-agent:*
Disallow:/
(2)常见爬虫

(3)robotparser
1)概述
可以使用robotparser模块来解析robots.txt文件。该模块提供了一个类RobotFileParser,可以根据某网站的robots.tt文件判断一个爬取爬虫是否有权限爬取这个网页。
操作时,只需要在构造方法里传人robotstxt文件的链接即可。
robotparser的声明:urllib.robotparser.RobotFileParser(url=`')
2)RobotFileParser类的常用方法。
seturl:用来设置robots.txt文件的链接。
read:读取robots.txt文件并进行分析。
注意,该方法执行读取和分析操作,如果不调用这个方法,接下来的判断都会为False。
parse:用来解析robots.txt文件,传人其中的参数是robots.txt文件中某些行的内容,它会按照robots.txt的语法规则来分析这些内容。
can_fetch:该方法有两个参数,第一个是User-Agent,第二个是要抓取的URL。返回结果是True或False,表示User-Agent指示的搜索引擎是否可以抓取这个URL。
mtime:返回上次抓取和分析robots.txt文件的时间,这对于长时间分析和抓取robots.txt文件的搜索爬虫很有必要,你可能需要定期检查以抓取最新的robots.txt文件。
modified:它同样对长时间分析和抓取的搜索爬虫很有帮助,可以将当前时间设置为上次抓取和分析robots.txt文件的时间。
#示例
from urllib.robotparser import RobotFileParser
rp = RobotFileParser()
rp.set_url('https://www.baidu.com/robots.txt')#可用rp=RobotFileParser('https://www.baidu.com/robots.txt')
rp.read()
print(rp.can_fetch('Baiduspider','https://www.baidu.com'))
print(rp.can_fetch('Baiduspider','https://www.baidu.com/homepage/'))
print(rp.can_fetch('Cooglebot','https://www.baidu.com/homepage/'))
#解析:以百度为例,首先创建了一个RobotFileParser对象rp,然后通过set_url方法设置了robots.txt文件的链接。
附:部分练习结果


![C++程序设计(一) [cin,cout加速,基本数据类型,保留浮点数]](https://img-blog.csdnimg.cn/direct/0c4db7f70e2d42ebb9740e2d2baa5324.bmp#pic_center)