一、Mac下安装&连接mysql
1、下载
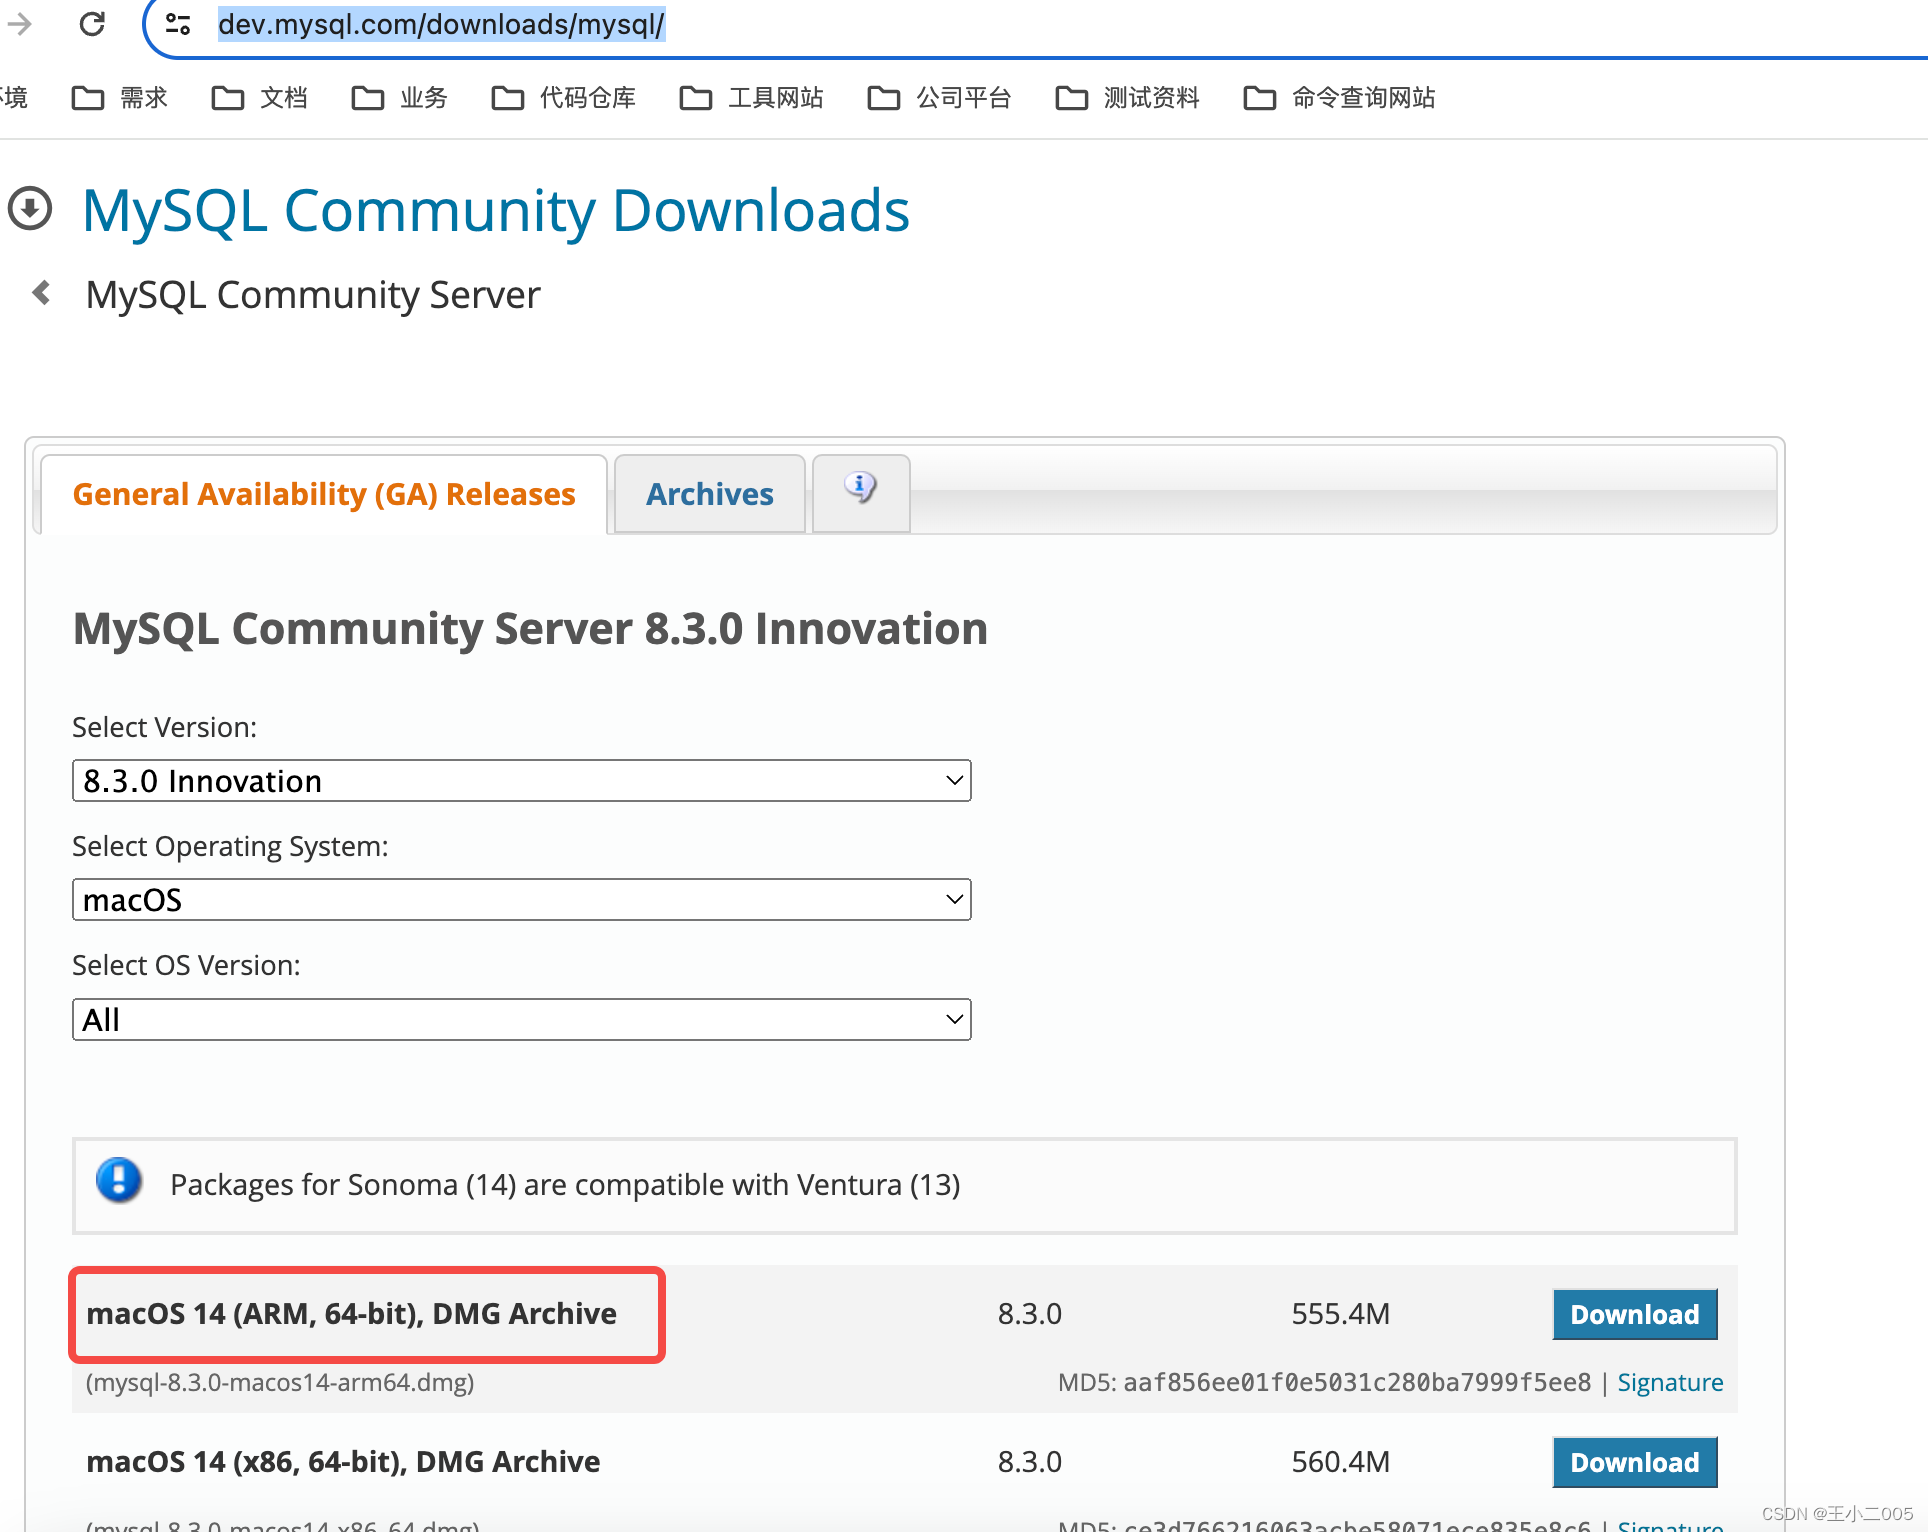
MySQL :: Download MySQL Community Server
进入下载页面,选择对应的版本,mac上选择第一个,dmg安装包即可
2、安装
下载后,双击打开,按提示下一步安装完成
command+空格,输入mysql,点击设置中的mysql,如下所示:

出现如下页面,表示安装成功

3、启动、停止mysql服务
点击上图中的Start MySQL Server,启动服务
服务启动后,按钮变成Stop MySQL Server,点击,停止服务
4、连接
1、使用mysql 可视化工具,比如MySQL Workbench、navicat
2、使用命令行连接
安装后直接输入mysql命令,提示zsh: command not found: mysql
需要将mysql 安装路径加到系统变量中
(1).打开.bash_profile 文件
open -e ~/.bash_profile
(2)将mysql路径添加进去
export PATH=${PATH}:/usr/local/mysql/bin
(3)配置立即生效
source ~/.bash_profile
(4) 连接
mysql -u root -p
输入密码
wyl@WYLdeMacBook-Air bin % mysql -u root -p
Enter password:
Welcome to the MySQL monitor. Commands end with ; or \g.
Your MySQL connection id is 8
Server version: 8.3.0 MySQL Community Server - GPL
Copyright (c) 2000, 2024, Oracle and/or its affiliates.
Oracle is a registered trademark of Oracle Corporation and/or its
affiliates. Other names may be trademarks of their respective
owners.
Type 'help;' or '\h' for help. Type '\c' to clear the current input statement.
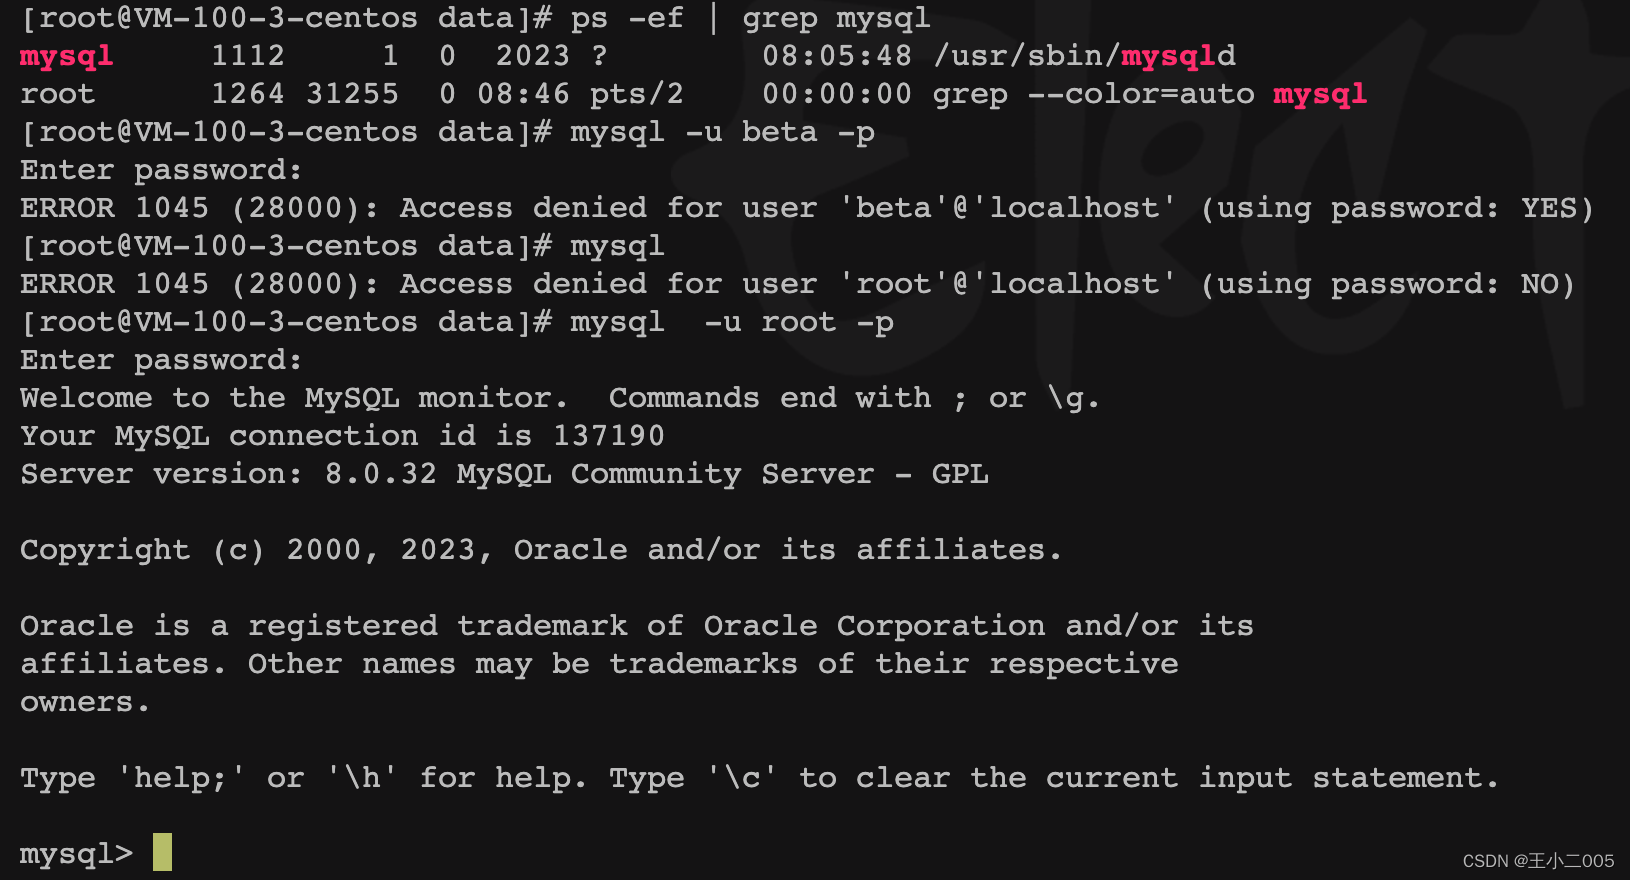
mysql>二、linux 下连接mysql
1、连接前,查看下mysql服务是否启动: ps -ef | grep mysql
2、连接:mysql -u 用户名 -p 回车,然后输入密码
如果提示:Access denied for user 'beta'@'localhost' (using password: YES),表示账号权限不够