一.介绍
随着上一篇文章的内容,讲解了Mybatis中数据源池化技术中的无池化技术,在这一章我们开始讲解有池化技术。
二.分析
1.部分
Mybatis源码中实现有池化技术的板块中主要包含了四个部分:
1.有池化代理的链接PooledConnection
2.池状态PoolState
3.有池化数据源实现PooledDataSource
4.池化工厂PooledDataSourceFactory
2.有池化代理的链接PooledConnection
就是你可以看作一个个连接池里的连接对象个体,每个连接里面都需要包含自己的代理连接、合法性、hashCode码、创建时间等
读之前建议你要思考如果你自己设计一个连接对象,都需要包含哪些属性点,读完源码之后,你自己再比对和你设计有什么不同,带着你自己的疑问去学习应该会更容易理解
class PooledConnection implements InvocationHandler {
    private static final String CLOSE = "close";

    private static final Class<?>[] IFACES = new Class<?>[]{Connection.class};

    //hashCode码
    private int hashCode = 0;
    //池化数据源
    private PooledDataSource dataSource;
    //真实的连接对象
    private Connection realconnection;
    //代理的连接对象
    private Connection proxyConnection;
    //连接取出当前时间
    private long checkoutTimestamp;
    //创建时间
    private long createTimestamp;
    //最近使用时间
    private long lastUsedTimestamp;
    //连接的标识码
    private int connectionTypeCode;
    //连接是否合法
    private boolean valid;

    public PooledConnection(Connection connection, PooledDataSource dataSource) {
//这个hashCode码就得到Connection对象的hashCode码
        this.hashCode = connection.hashCode();
        this.realConnection = connection;
        this.dataSource = dataSource;
        this.createdTimestamp = System.currentTimeMillis();
        this.lastUsedTimestamp = System.currentTimeMillis();
        this.valid = true;
//通过Proxy类的newProxyInstance方法去创建链接代理
        this.proxyConnection = (Connection)Proxy.newProxyInstance(Connection.class.getClassLoader(), IFACES, this);
    }

//设置连接失效
    public void invalidate() {
        this.valid = false;
    }

//判断连接是否合法,就是是否有效
    public boolean isValid() {
        return this.valid && this.realConnection != null && this.dataSource.pingConnection(this);
    }


   。。。还是省略一些set、get方法 自行阅读源码就好,很简单

//重写equals,判断是不是同一个连接
    public boolean equals(Object obj) {
        if (obj instanceof PooledConnection) {
            return this.realConnection.hashCode() == ((PooledConnection)obj).realConnection.hashCode();
        } else if (obj instanceof Connection) {
            return this.hashCode == obj.hashCode();
        } else {
            return false;
        }
    }


//这个就不用多说,主要实现InvocationHandler接口,实现invoked代理方法。从而实现连接本身所包含的方法
    public Object invoke(Object proxy, Method method, Object[] args) throws Throwable {
        String methodName = method.getName();
//如果调用CLOSE方法,就代表要关闭连接,并把连接放入到连接池中,返回null值
        if ("close".equals(methodName)) {
            this.dataSource.pushConnection(this);
            return null;
        } else {
            try {
                if (!Object.class.equals(method.getDeclaringClass())) {
               //除了toString方法以外,任何一个连接对象包含方法在调用之前,都要检查连接对象是否合法,不合法抛出异常
                    this.checkConnection();
                }
//最后通过真实的连接对象去调用方法,也就是传入前面构造器中的连接对象
                return method.invoke(this.realConnection, args);
            } catch (Throwable var6) {
                throw ExceptionUtil.unwrapThrowable(var6);
            }
        }
    }

//判断连接是否合法
    private void checkConnection() throws SQLException {
        if (!this.valid) {
            throw new SQLException("Error accessing PooledConnection. Connection is invalid.");
        }
    }
}
3.池状态PoolState
讲完了连接个体,就要去讲讲他们的容器-连接池,连接池也是有很多状态的,例如池中空闲队列的情况、活跃链接的情况,还涉及到连接池一些参数,比如每个连接请求的平均请求时间等
public class PoolState {

    //关联的数据源
    private PooledDataSource dataSource;
    //空闲链接
    protected final List<PooledConnection> idleConnections = new ArrayList<>();
    //活跃链接
    protected final List<PooledConnection> activeConnections = new ArrayList<>();
    //请求次数
    protected long requestCount = 0L;
    //总请求时间
    protected long accumulatedRequestTime = 0L;
    //累计连接被使用的时间,从pop到push的时间。
    protected long accumulatedCheckoutTime = 0L;
    //过期的连接总数目
    protected long claimedOverdueConnectionCount = 0L;
    //累计过期连接的使用总时长
    protected long accumulatedCheckoutTimeOfOverdueConnections = 0L;
    //总等待时间
    protected long accumulatedWaitTime = 0L;
    //要等待的次数
    protected long hadToWaitCount = 0L;
    //失败连接次数
    protected long badConnectionCount = 0L;

    public PoolState(PooledDataSource dataSource) {
        this.dataSource = dataSource;
    }

//获取请求连接的总数量
    public synchronized long getRequestCount(){
        return requestCount;
    }

  //连接的平均请求时间
    public synchronized long getAverageRequestTime(){
        return requestCount == 0L ? 0L : accumulatedRequestTime /requestCount;
    }

  //链接的平均等待时间
    public synchronized long getAverageWaitTime(){
        return hadToWaitCount == 0L ? 0L : accumulatedWaitTime / hadToWaitCount;
    }

//获取等待连接的总数量
    public synchronized long getHadToWaitCount() {
        return hadToWaitCount;
    }

//获得失败链接总数量
    public synchronized long getBadConnectionCount() {
        return badConnectionCount;
    }

//获得过期连接所使用的总时间
    public synchronized long getClaimedOverdueConnectionCount() {
        return claimedOverdueConnectionCount;
    }

  //过期链接的平均使用时间
    public synchronized long getAverageOverdueCheckoutTime() {
        return claimedOverdueConnectionCount == 0L ? 0L : accumulatedCheckoutTimeOfOverdueConnections / claimedOverdueConnectionCount;
    }

  //单个链接平均被使用时间
    public synchronized long getAverageCheckoutTime() {
        return requestCount == 0L ? 0L : accumulatedCheckoutTime / requestCount;
    }

  //获取空闲连接数
    public synchronized int getIdleConnectionCount() {
        return idleConnections.size();
    }

  //获取活跃连接数
    public synchronized int getActiveConnectionCount() {
        return activeConnections.size();
    }
}
4.有池化数据源实现PooledDataSource
前面全是铺垫,这个地方才是核心!!
!!个人建议,读这个地方的时候,稍作休息一会,喝喝水溜达一下,建议看看我写的流程逻辑,带着逻辑去研究源码,效果更好更快。
流程逻辑
1)创建连接
1.创建连接时,如果空闲队列中有连接,直接去第一个连接使用即可;如果空闲队列中没有连接,判断活跃队列中数量情况
2.池中有一个最大活跃连接数的变量,当活跃队列中数量小于最大活跃连接数时,证明活跃队列连接数不足,之间创建新的连接即可。
3.当活跃队列中数量等于最大活跃连接数时,证明活跃队列连接数已满,取出活跃队列中最老的连接,判断是否过期,过期删除,没有过期,等待过期后删除,然后重新创建新的连jie即可
2)关闭连接
1.关闭连接时,池中有一个最小空闲连接数的变量,当删除活跃连接后导致空闲队列中的连接数太少的时候,通过这个活跃连接创建一个新的连接加入空闲队列即可。
2.当删除活跃连接后没有导致空闲队列中的连接数太少的时候,直接关闭连接即可。
看完流程,有个大概认识,就可以学习源码具体怎么实现的啦!!
(注:这个部分代码量太多,为了读者能看下去,我会拆开,一部分一部分给你们讲解)
代码实现
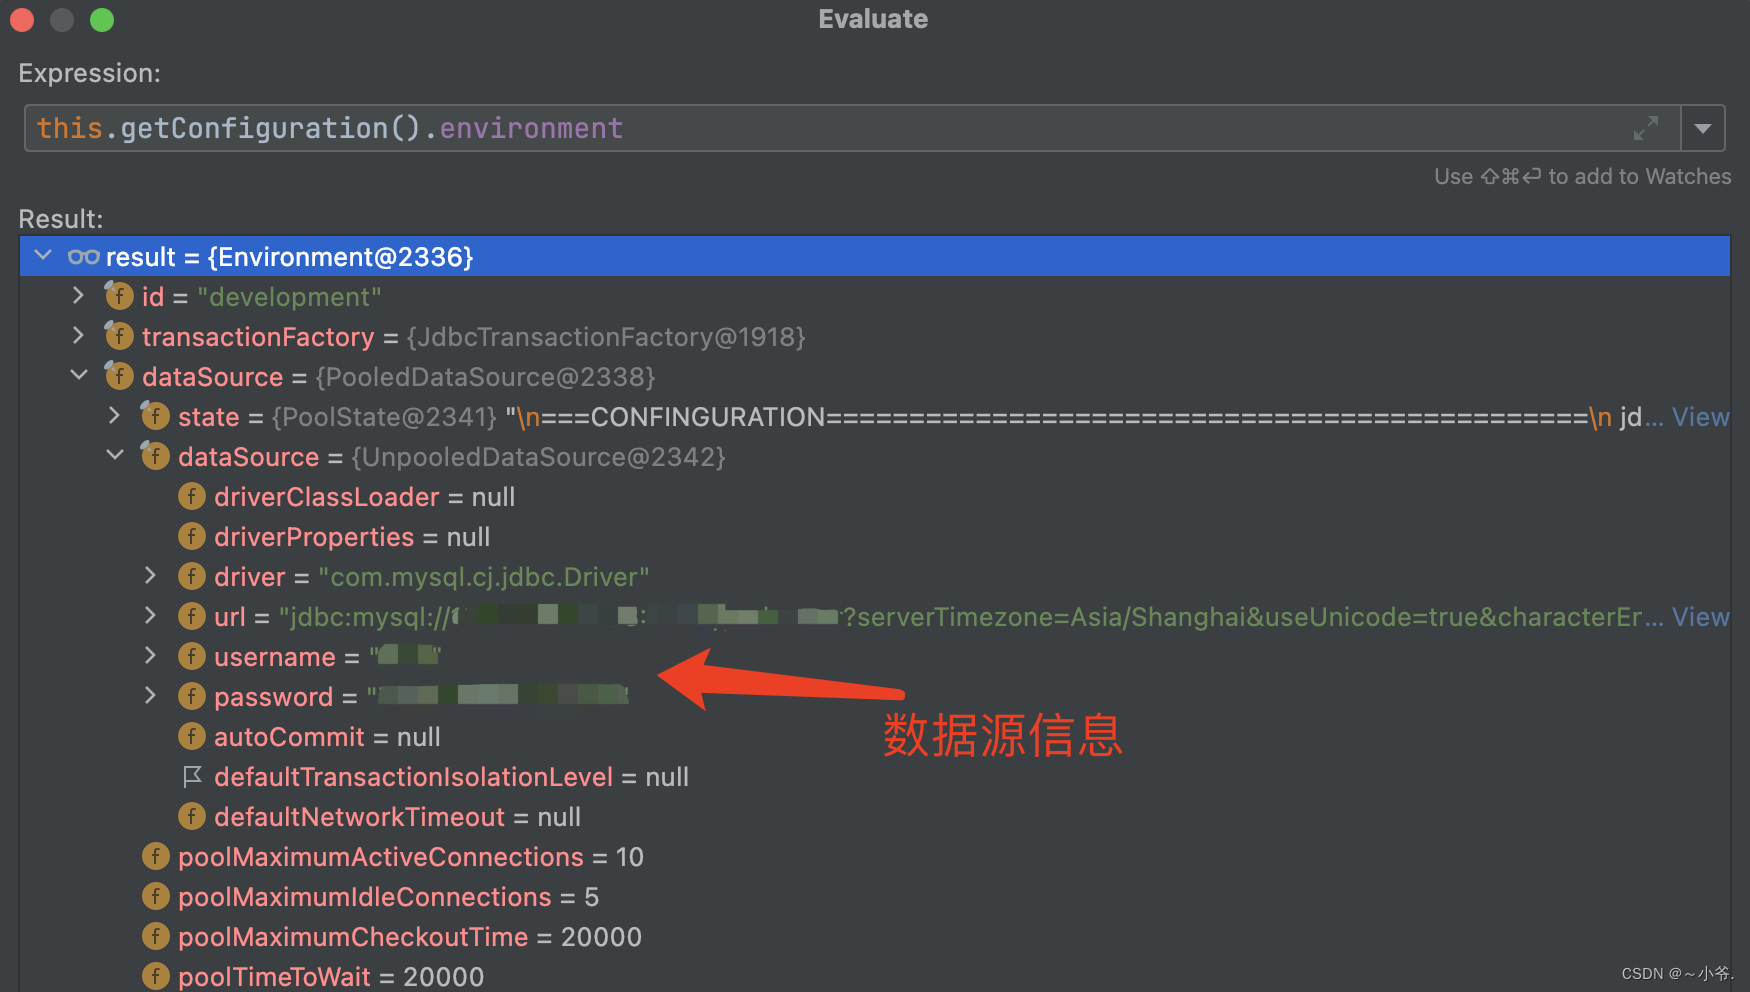
1.成员属性
必须要有池状态,通过池状态进行池的状态判断,还需要有对链接数的限定:比如活跃连接数、空闲连接数等,还有一些不可少的辅助属性
public class PooledDataSource implements DataSource {

//打印日志用的
    private static final Log log = LogFactory.getLog(PooledDataSource.class);
//池状态
    private final PoolState state = new PoolState(this);

    //无池化数据源
    private final UnpoopledDataSource dataSource;

    // 活跃连接数
    protected int poolMaximumActiveConnections = 10;
    // 空闲连接数
    protected int poolMaximumIdleConnections = 5;
    // 在被强制返回之前,池中连接被检查的时间
    protected int poolMaximumCheckoutTime = 20000;
    // 这是给连接池一个打印日志状态机会的低层次设置,还有重新尝试获得连接, 这些情况下往往需要很长时间 为了避免连接池没有配置时静默失败)。
    protected int poolTimeToWait = 20000;
//就是允许最大的失败连接数
   protected int poolMaximumLocalBadConnectionTolerance = 3;
    // 发送到数据的侦测查询,用来验证连接是否正常工作,并且准备 接受请求。默认是“NO PING QUERY SET” ,这会引起许多数据库驱动连接由一 个错误信息而导致失败
    protected String poolPingQuery = "NO PING QUERY SET";
    // 开启或禁用侦测查询,就是看看能不能ping成功,你可以暂时这理解
    protected boolean poolPingEnabled;
    // 用来配置 poolPingQuery 多次时间被用一次
    protected int poolPingConnectionsNotUsedFor;
    //预连接类型码
    private int expectedConnectionTypeCode;
set、get方法还有一些构造器和配置方法,我暂时不赘述啦,主要讲一些和核心方法。
2.核心方法
这里面有很多方法,我只讲一下主要的核心方法。
获取链接(popConnection)
private PooledConnection popConnection(String username, String password) throws SQLException {
        boolean countedWait = false;//判断连接需不需要等待
        PooledConnection conn = null;//初始化连接
        long t = System.currentTimeMillis();//获得当前的时间戳,方便对时间进行统计
        int localBadConnectionCount = 0;//初始化失败连接的数量

        while(conn == null) {
             //加锁
            synchronized(this.state) {
                PoolState var10000;

               //如果有空闲链接,返回第一个
                if (!this.state.idleConnections.isEmpty()) {
//从空闲队列中删除第一个并取出
                    conn = (PooledConnection)this.state.idleConnections.remove(0);
                    if (log.isDebugEnabled()) {
                        log.debug("Checked out connection " + conn.getRealHashCode() + " from pool.");
                    }
                }
                           //如果无空闲链接,创建新的链接
                    else
                           //活跃链接数不足
                    if (this.state.activeConnections.size() < this.poolMaximumActiveConnections) {
                    conn = new PooledConnection(this.dataSource.getConnection(), this);
                    if (log.isDebugEnabled()) {
                        log.debug("Created connection " + conn.getRealHashCode() + ".");
                    }
                }
                        //活跃连接数已满
                    else {
                       //取出活跃列表中最老的一个链接
                    PooledConnection oldestActiveConnection = (PooledConnection)this.state.activeConnections.get(0);
                     //获取这个最老的链接存在的时间
                    long longestCheckoutTime = oldestActiveConnection.getCheckoutTime();

                       //判断是否超时,如果超时就标记过期
                    if (longestCheckoutTime > (long)this.poolMaximumCheckoutTime) {
                        //过期连接数+1
                        ++this.state.claimedOverdueConnectionCount;
                        var10000 = this.state;
                           //更新过期连接的使用时间
                        var10000.accumulatedCheckoutTimeOfOverdueConnections += longestCheckoutTime;
                        var10000 = this.state;
                        //更新总请求时间
                        var10000.accumulatedCheckoutTime += longestCheckoutTime;
                        //从活跃连接数中删除这个连接
                        this.state.activeConnections.remove(oldestActiveConnection);
                        if (!oldestActiveConnection.getRealConnection().getAutoCommit()) {
                            try {
                                oldestActiveConnection.getRealConnection().rollback();
                            } catch (SQLException var15) {
                                log.debug("Bad connection. Could not roll back");
                            }
                        }

                            //超时,删除最老的链接,然后重新建立一个链接
                        conn = new PooledConnection(oldestActiveConnection.getRealConnection(), this);
                        conn.setCreatedTimestamp(oldestActiveConnection.getCreatedTimestamp());
                        conn.setLastUsedTimestamp(oldestActiveConnection.getLastUsedTimestamp());
                        oldestActiveConnection.invalidate();
                        if (log.isDebugEnabled()) {
                            log.debug("Claimed overdue connection " + conn.getRealHashCode() + ".");
                        }
                    }
                         //如果没有过期,等待超时
                       else {
                        try {
                            if (!countedWait) {
                                ++this.state.hadToWaitCount;
                                countedWait = true;
                            }

                            if (log.isDebugEnabled()) {
                                log.debug("Waiting as long as " + this.poolTimeToWait + " milliseconds for connection.");
                            }

                            long wt = System.currentTimeMillis();

                               //等待超时
                            this.state.wait((long)this.poolTimeToWait);
                            var10000 = this.state;
                            var10000.accumulatedWaitTime += System.currentTimeMillis() - wt;
                        } catch (InterruptedException var16) {
                            break;
                        }
                    }
                }

                if (conn != null) {
                        //链接不为空
                    if (conn.isValid()) {
                            //连接合法
                        if (!conn.getRealConnection().getAutoCommit()) {
                            //判断链接是否自动提交,如果不是就要触发回滚
                            conn.getRealConnection().rollback();
                        }
                            //设置连接的标识码
                        conn.setConnectionTypeCode(this.assembleConnectionTypeCode(this.dataSource.getUrl(), username, password));
                            //记录checkOut时间
                        conn.setCheckoutTimestamp(System.currentTimeMillis());
                        //记录连接使用最近的时间
                        conn.setLastUsedTimestamp(System.currentTimeMillis());
                        //添加到活跃连接队列中
                        this.state.activeConnections.add(conn);
                        //池内请求连接计数加一
                        ++this.state.requestCount;
                        //池内累计请求链接时间
                        var10000 = this.state;
                        var10000.accumulatedRequestTime += System.currentTimeMillis() - t;
                    } else {
                        if (log.isDebugEnabled()) {
                            log.debug("A bad connection (" + conn.getRealHashCode() + ") was returned from the pool, getting another connection.");
                        }

                        //如果不合法,统计信息,失败连接+1
                        ++this.state.badConnectionCount;
                        ++localBadConnectionCount;
                        conn = null;
                            //失败次数超过规定的次数,就抛出异常
                           if (localBadConnectionCount > this.poolMaximumIdleConnections + this.poolMaximumLocalBadConnectionTolerance) {
                            if (log.isDebugEnabled()) {
                                log.debug("PooledDataSource: Could not get a good connection to the database.");
                            }

                            throw new SQLException("PooledDataSource: Could not get a good connection to the database.");
                        }
                    }
                }
            }
        }

        if (conn == null) {
            if (log.isDebugEnabled()) {
                log.debug("PooledDataSource: Unknown severe error condition.  The connection pool returned a null connection.");
            }

            throw new SQLException("PooledDataSource: Unknown severe error condition.  The connection pool returned a null connection.");
        } else {
            return conn;
        }
    }
三.总结
恭喜您🎉,到这里你已经学习了一大部分有池化数据源的核心原理,在这里你可以再休息一会,
方便您能坚持下去,我把剩下的几个核心方法还有数据源工厂放到下一章。您完全有时间好好消化一下,再读下一章
如果您对本章内容理解到位,不妨可以先试试自己学习Mybatis源码中的回收链接(pushConnnection)、强制关闭所有链接(forceCloseAll)等方法来,我会在下一篇文章继续讲解
———————————————————————————————————————————
-如果您对我文章满意,不妨点个赞关注我,会持续更新高质量作品。
-如果您对我文章有疑问,欢迎您评论指导,我会虚心接受改正
--说明:本篇文章属于个人原创,如需文章部分内容,请在您的文章开头加入本篇文章的链接!

