SpringBoot概述
Spring Boot是Spring提供的一个子项目,用于快速构建Spring应用程序
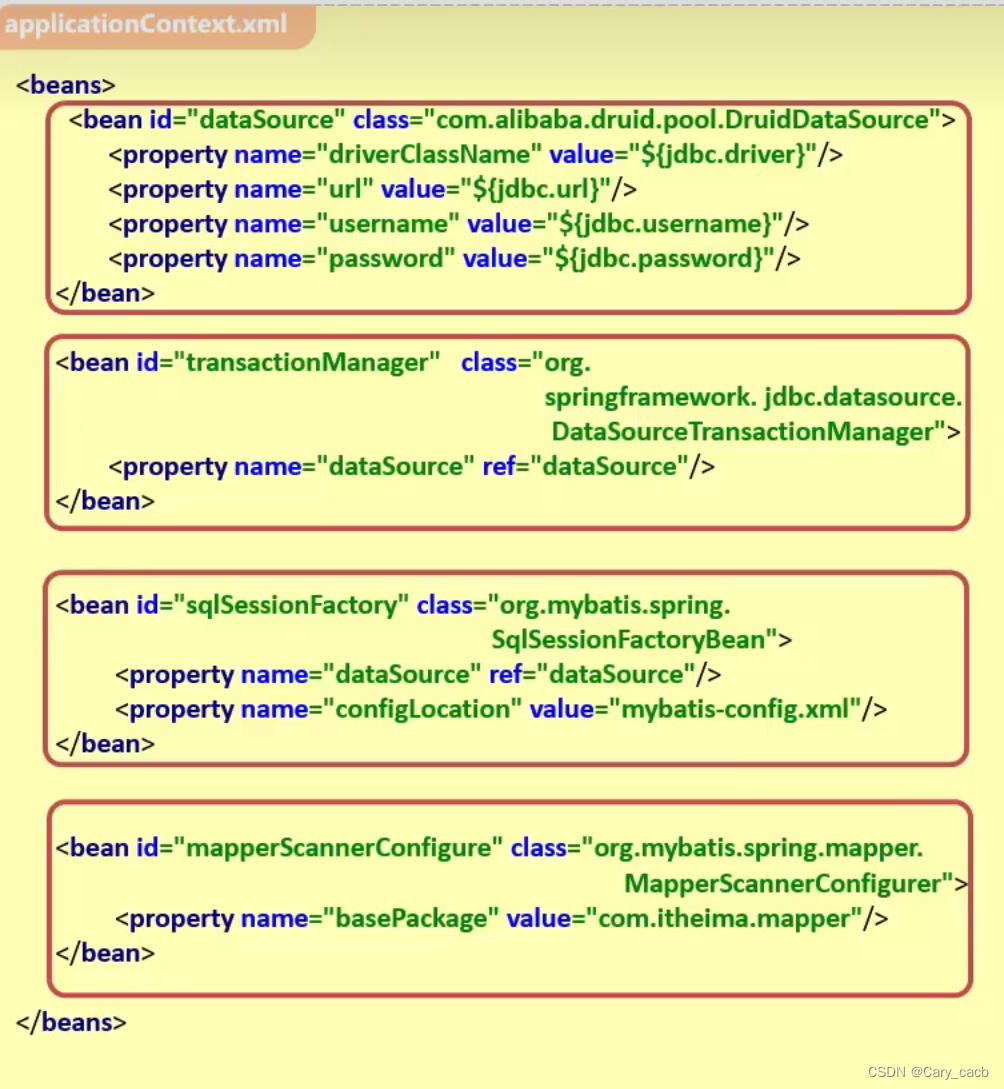
传统方式构建Spring应用程序
导入依赖繁琐
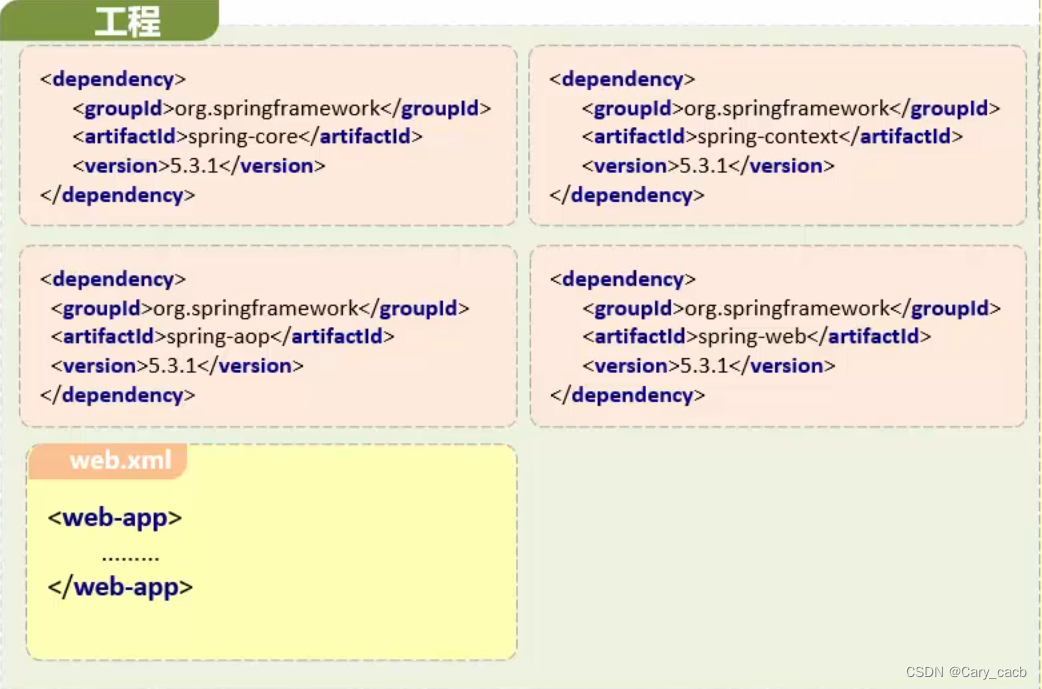
项目配置繁琐
为了简化如此繁琐的配置流程,SpringBoot这一子项目提供了如下特性
SpringBoot特性
起步依赖
本质上就是一个Maven坐标,整合了完成一个功能所需要的所有坐标
自动配置
遵循约定大于配置的原则,再boot程序启动后,一些Bean对象会自动注入到IOC容器,不需要手动声明,简化开发
其他特性
内嵌的Tomcat、Jetty(无需部署WAR文件)
外部化配置
不需要XML配置(properties/yml)
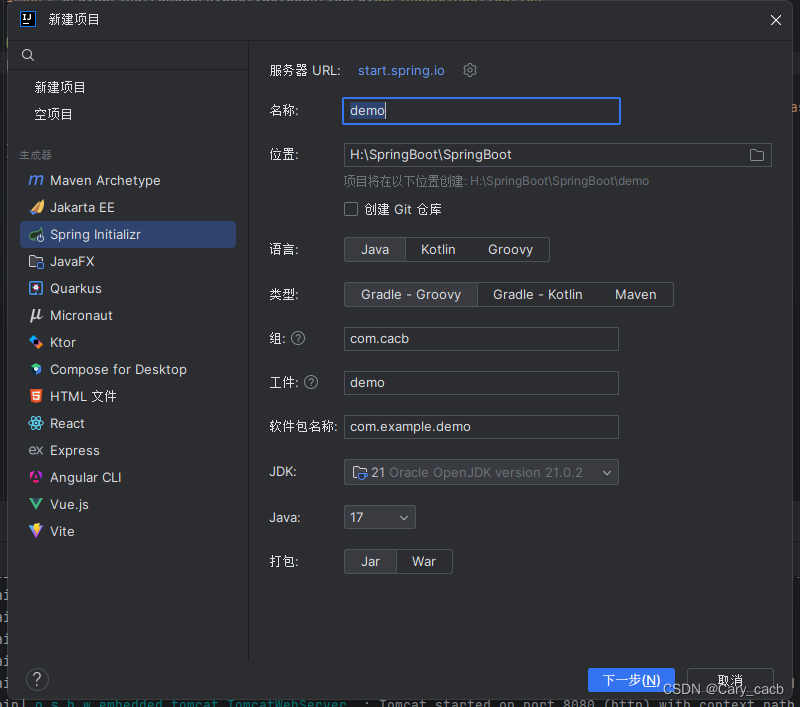
IDEA创建SpringBoot工程步骤
第一步、创建Maven工程
第二步、导入spring-boot-stater-web起步依赖
        <dependency>
            <groupId>org.springframework.boot</groupId>
            <artifactId>spring-boot-starter-web</artifactId>
        </dependency>
第三步、编写Controller
以我用于测试的hellocontroller为例
@RestController
public class helloController {

    @RequestMapping("/hello")
    public String hello(){
        System.out.println("hello");
        return "hello";
    }
}
第四步、提供启动类
@SpringBootApplication
public class SpringBootQsDemo1Application {

    public static void main(String[] args) {
        SpringApplication.run(SpringBootQsDemo1Application.class, args);
    }

}
手动创建SpringBoot工程
第一步、创建Maven工程

第二步、引入依赖
继承parent工程
<parent>
        <groupId>org.springframework.boot</groupId>
        <artifactId>spring-boot-starter-parent</artifactId>
        <version>3.2.2</version>
        <relativePath/> <!-- lookup parent from repository -->
    </parent>
引入相应起步依赖
        <dependency>
            <groupId>org.springframework.boot</groupId>
            <artifactId>spring-boot-starter-web</artifactId>
        </dependency>
第三步、提供启动类
@SpringBootApplication
public class SpringBootQsDemo1Application {

    public static void main(String[] args) {
        SpringApplication.run(SpringBootQsDemo1Application.class, args);
    }

}
SpringBoot 配置文件
properties配置文件
application.properties
以配置端口和访问路径为例
server.port=8080
server.servlet.context-path=/start
yaml配置文件
application.yml / application.yaml
同上例
server:
  servlet:
    context-path: /start2
  port: 8282
在实际开发中,更常用的是yaml配置文件
yaml层级表示更加明显
yml配置信息书写与获取
书写
第一种、三方技术配置信息
第二种、自定义配置信息
例如,如果我们在类中要调用email.username,email.code,email.host这三个值
在配置文件中就应该进行如下书写
application.properties
email.user=Cary_cacb
email.code=dawdawdadawd
email.host=smtp.qq.com
application.yml / application.yaml
email:
  user: Cary_cacb
  code: awdawdawd
  host: smtp.qq.com
yml书写注意事项:
值前边必须有空格,作为分隔符
使用空格作为缩进表示层级关系,相同的层级左对齐
获取
以上面配置的三个键为例
在实体类中进行如下书写
    @Value("${email.user}")
    private String user;
    @Value("${email.code}")
    private String code;
    @Value("${email.host}")
    private String host;
还可以使用@ConfigurationProperties()注解来完成
沿用上例
在实体类中进行如下书写
@ConfigurationProperties(prefix = "email")
@Component
public class EmailController {

    private String user;
    private String code;
    private String host;
}
注意事项:该注解中的perfix必须与配置未见中的前缀名一致
类内部的成员变量名与配置文件中的键名也要保持一致
SpringBoot 整合Mybatis
第一步、导入mybatis和mysql相关坐标
		<dependency>
			<groupId>com.mysql</groupId>
			<artifactId>mysql-connector-j</artifactId>
		</dependency>

		<dependency>
			<groupId>org.mybatis.spring.boot</groupId>
			<artifactId>mybatis-spring-boot-starter</artifactId>
			<version>3.0.3</version>
		</dependency>
第二步、配置application.yml配置文件
spring:
  datasource:
    driver-class-name: com.mysql.cj.jdbc.Driver
    url: jdbc:mysql://localhost:3306/cary_cacb
    username: root
    password: psw
第三步、书写相关文件,实现调用
以之前用过的tbl_book表为例
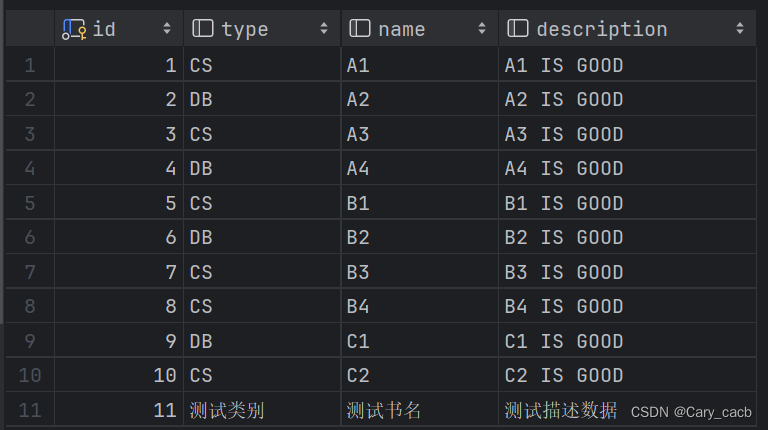
1、给出Book实体类
package com.cacb.springboot_mybatis.pojo;

public class Book {
    private Integer id ;
    private String type;
    private String name;
    private String description;

    public Book(Integer id, String type, String name, String description) {
        this.id = id;
        this.type = type;
        this.name = name;
        this.description = description;
    }

    public Integer getId() {
        return id;
    }

    public void setId(Integer id) {
        this.id = id;
    }

    public String getType() {
        return type;
    }

    public void setType(String type) {
        this.type = type;
    }

    public String getName() {
        return name;
    }

    public void setName(String name) {
        this.name = name;
    }

    public String getDescription() {
        return description;
    }

    public void setDescription(String description) {
        this.description = description;
    }

    @Override
    public String toString() {
        return "Book{" +
                "id=" + id +
                ", type='" + type + '\'' +
                ", name='" + name + '\'' +
                ", description='" + description + '\'' +
                '}';
    }
}
2、BookMapper
@Mapper
public interface BookMapper {
    @Select("select * from tbl_book where id = #{id}")
    public Book getByID(Integer id);


}
3、service层
public interface BookService {
    public Book getByID(Integer id);
}
4、serviceimpl
@Service
public class BookServiceImpl implements BookService {
    @Autowired
    private BookMapper bookMapper;
    @Override
    public Book getByID(Integer id) {
        return bookMapper.getByID(id);
    }
}
5、controller
public class BookController {
@Autowired
private BookService bookService;
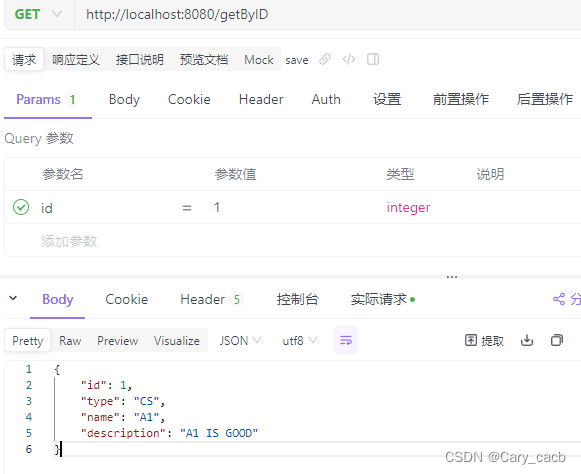
@RequestMapping("getByID")
public Book getByID(Integer id){
return bookService.getByID(id);
}
}使用测试软件测试结果如下:


![[数据结构] 基于交换的排序 冒泡排序&&快速排序](https://i-blog.csdnimg.cn/direct/28ca1fe401ac4c2693aefd9439cd9727.png)