02 安装Python3和PyQT6
《开始使用PyQT》 第01章 PyQT入门 02 安装Python3和PyQT6
So that all readers are on the same page, let’s begin by installing or updating your version of Python.
为了让所有读者都能理解,让我们从安装或更新 Python 版本开始。
检查你的Python版本
In order to use PyQt, you will first need to have Python 3.7 or higher installed.
要使用 PyQt,首先需要安装 Python 3.7 或更高版本。
Note when pyQt6 was first released, it was compatible with python 3.6.1 or higher. however, that was scheduled to be discontinued at some point in the future. you should have python 3.7 or higher on your system just to be on the safe side.
注意,在 pyQt6 发布之初,它兼容 Python 3.6.1 或更高版本。
To check which version of Python 3 you have installed on your system, open your system’s shell, and run the command
要查看系统中安装的 Python 3 版本,请打开系统 shell 并运行以下命令
python3 --version
Change python3 to python on Windows. This will return your system’s Python 3 version. If yours happens to be lower than Python 3.7 or you don’t have Python installed, then have a look at www.python.org/downloads/ to get the latest version.
在 Windows 上将 python3 更改为 python。这将返回系统的 Python 3 版本。如果您的系统版本低于 Python 3.7 或没有安装 Python,请访问 www.python.org/downloads/ 获取最新版本。
Tip For those readers that might not want to remove their current version of python and would like to manage multiple python versions on their system, have a look at the python version management tool, pyenv.
提示 如果读者不想删除当前的 python 版本,但又想在自己的系统上管理多个 python 版本,可以参考 python 版本管理工具 pyenv。
安装PyQT6
Since PyQt does not come included with your Python installation, the next step is to use pip to install the PyQt6 package from the Python Package Index (PyPI). To create the bindings between Python and C++, the SIP binding generator tool is used. When downloading PyQt6 from PyPI, the sip module will automatically be downloaded too.To install PyQt6, enter the following command into your shell:
由于 Python 安装中不包含 PyQt,下一步是使用 pip 从 Python 包索引 (PyPI) 中安装 PyQt6 包。要在 Python 和 C++ 之间创建绑定,需要使用 SIP 绑定生成器工具。从 PyPI 下载 PyQt6 时,也会自动下载 sip 模块:
pip3 install PyQt6
If you are using Windows, you will probably need to change pip3 to pip. To make sure PyQt is downloaded properly, open up the Python 3 interpreter by entering python3 (python for Windows) into the command line. Then enter the following command:
如果您使用的是 Windows,可能需要将 pip3 改为 pip。要确保 PyQt 已正确下载,请在命令行中输入 python3 (Windows 版的 python),打开 Python 3 解释器。然后输入以下命令:
import PyQt6
Tip throughout the course of this book, you’ll create a number of pyQt GUis. For those readers who are interested in managing their different pyQt projects and their dependencies, have a look at using virtual environments and the python module, venv.
在本书的整个学习过程中,你会创建大量的 pyQt GUis。如果读者对管理不同的 pyQt 项目及其依赖关系感兴趣,可以参考使用虚拟环境和 python 模块 venv。
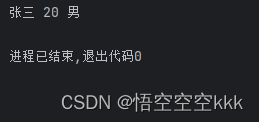
If no errors are returned, we can now move on and learn a little bit more about user interfaces.
如果没有错误返回,我们就可以继续学习更多关于用户界面的知识。


![[<span style='color:red;'>Python</span> GUI <span style='color:red;'>PyQt</span>] <span style='color:red;'>PyQt</span>5快速<span style='color:red;'>入门</span>](https://img-blog.csdnimg.cn/direct/4d1ff94cc2d24945abe0deec92d9cfad.png#pic_center)


![[网鼎杯 2020 朱雀组]phpweb](https://img-blog.csdnimg.cn/img_convert/a404a4237fdec0feb92af881eaa8d0fa.png)