提示:文章写完后,目录可以自动生成,如何生成可参考右边的帮助文档
前言
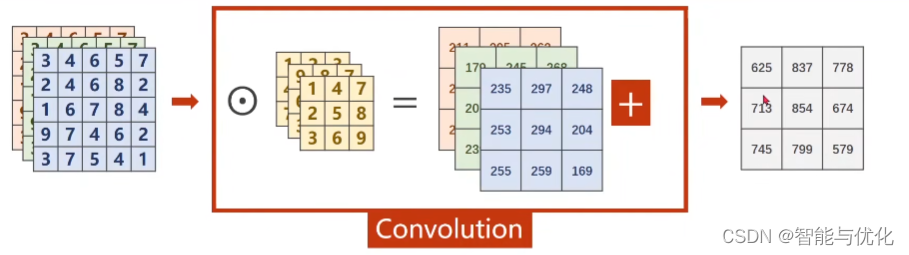
如果对卷积层和卷积不是很了解的可以去看博主之前的文章:
卷积到底卷了个啥?五千字详细介绍数学卷积、图像卷积和卷积神经网络的卷积
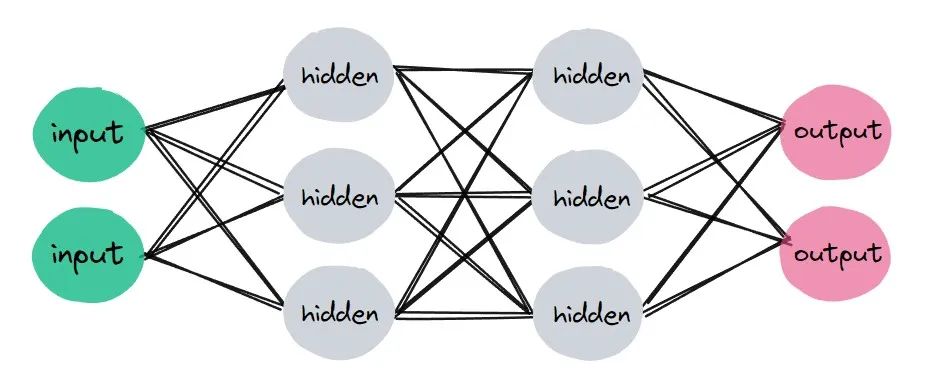
一、nn.Module(网络的构建)
#导包
import torch.nn as nn
import torch.nn.functional as F
# 创类
class Model(nn.Module):
    def __init__(self):
        super(Model,self).__init__()#初始化子类
        self.conv1 = nn.Conv2d(1,20,5)
        self.conv2 = nn.Conv2d(20,20,5)
	# 向前传播
    def forward(self,x):
        x = F.relu(self.conv1(x))
        return F.relu(self.conv2(x))
二、torch.nn.functional.conv2d(卷积运算)
2维卷积
conv2d(input: Tensor,
weight: Tensor,
bias: Tensor | None = None,
stride: int | Size | list[int] | tuple[int, …] = 1,
padding: str = “valid”,
dilation: int | Size | list[int] | tuple[int, …] = 1,
groups: int = 1) -> Tensor)
#导包
import torch.nn.functional as F
import torch
#设置输入矩阵
input = torch.tensor([[1,2,0,3,1],
                      [0,1,2,3,1],
                      [1,2,1,0,0],
                      [5,2,3,1,1],
                      [2,1,0,1,1]])
#设置卷积核大小
kernel = torch.tensor([[1,2,1],
                       [0,1,0],
                       [2,1,0]])
#转换成函数参数要求的形状
input = torch.reshape(input,(1,1,5,5))
kernel = torch.reshape(kernel,(1,1,3,3))
#调用函数
output = F.conv2d(input,kernel,stride=1)
print(output)
'''
tensor([[[[10, 12, 12],
          [18, 16, 16],
          [13,  9,  3]]]])
'''
三、神经网络–卷积层(一层卷积网络的构建)
- 主要对2维卷积进行演示
- Conv2d(self,
in_channels: int,
out_channels: int,
kernel_size: Union[int, tuple[int, int]],
stride: Union[int, tuple[int, int]] = 1,
padding: Union[str, int, tuple[int, int]] = 0,
dilation: Union[int, tuple[int, int]] = 1,
groups: int = 1,
bias: bool = True,
padding_mode: str = ‘zeros’,
device: Any = None,
dtype: Any = None) -> None) - in_channels:输入通道数
- out_channels:输出通道数
- kernel_size:卷积核大小
- stride:步子(一次移动距离为多少)
- padding:间距
import torchvision
import torch
from torch import nn
from torch.nn import Conv2d
from torch.utils.data import DataLoader
# 从官网下载数据
dataset = torchvision.datasets.CIFAR10('./dataset/CIFAR10',transform=torchvision.transforms.ToTensor(),download=True)
# 加载数据
dataloader = DataLoader(dataset,batch_size=64)
# 构建网络
class Model(nn.Module):
    def __init__(self):
        super(Model, self).__init__()
        self.conv1 = Conv2d(in_channels=3,out_channels=6,kernel_size=3,stride=1,padding=0)
# 向前传播
    def forward(self,x):
        x = self.conv1(x)
        return x
# 实例化网络
model = Model()
#对数据进行卷积
for data in dataloader:
    img,target = data
    output = model(img)
    print(output.shape)


![[Android] Android架构体系(2)](https://img-blog.csdnimg.cn/direct/3f559b64ccee424d9293368a903b39f8.png)