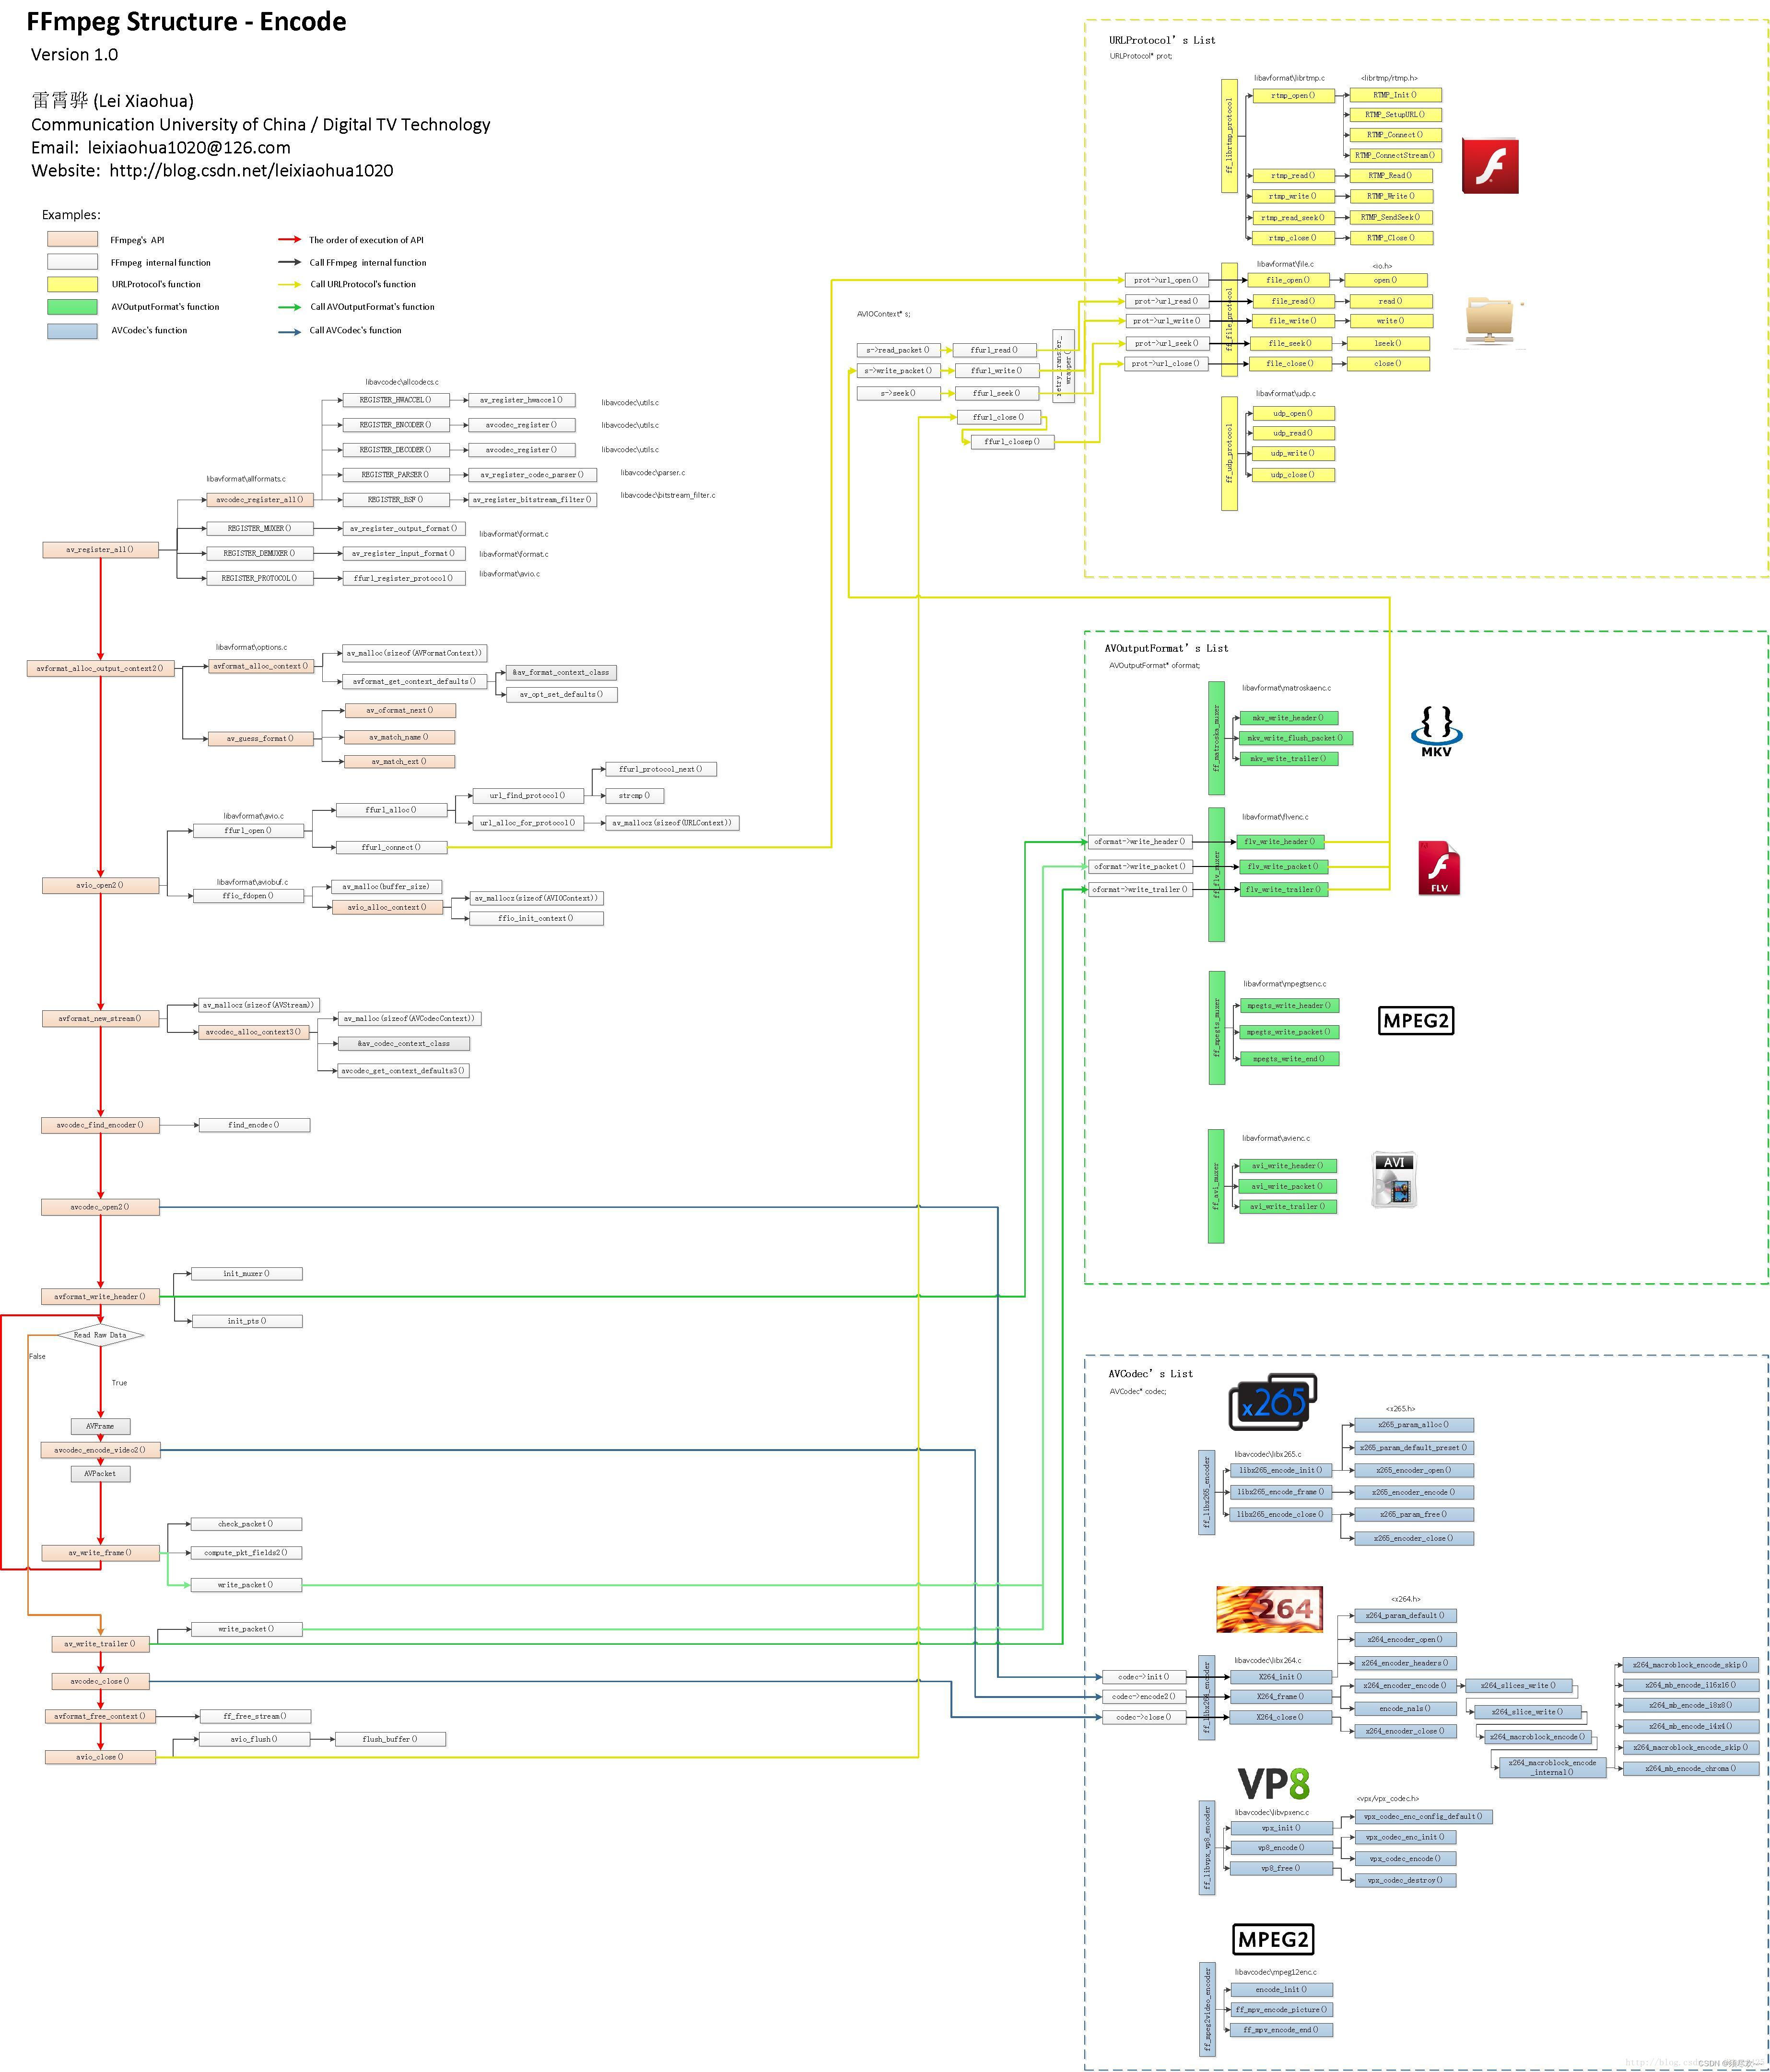
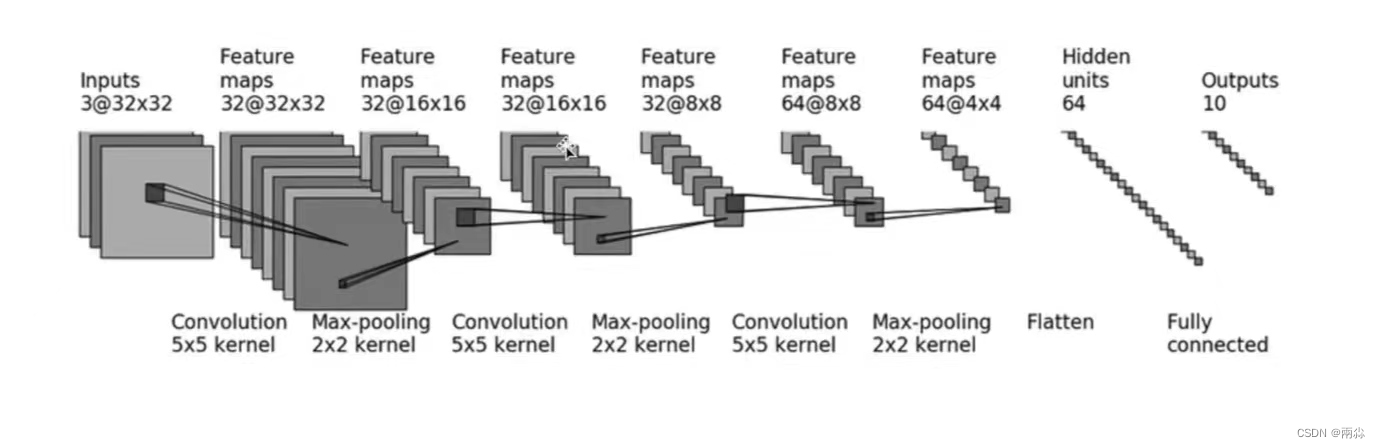
CIFAR-10 model structure
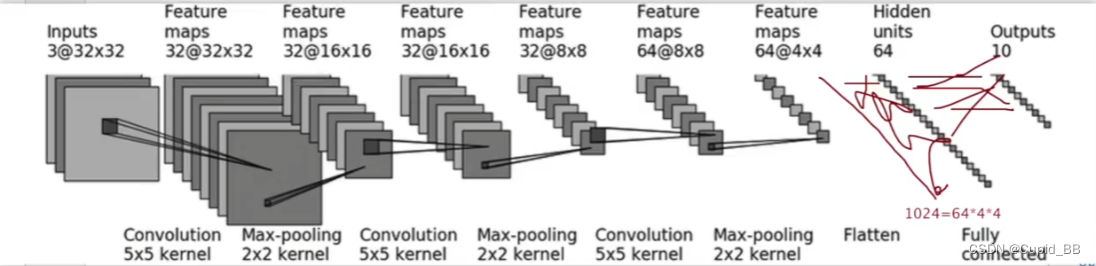
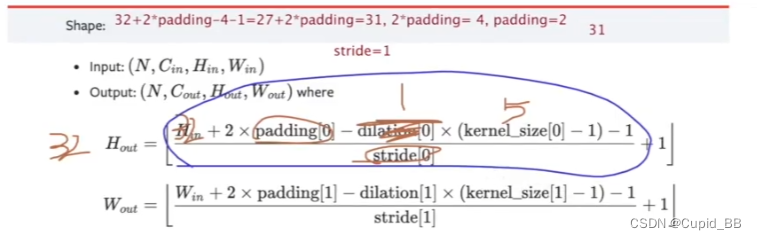
通过已知参数(高、宽、dilation=1、kernel_size)推断stride和padding的大小
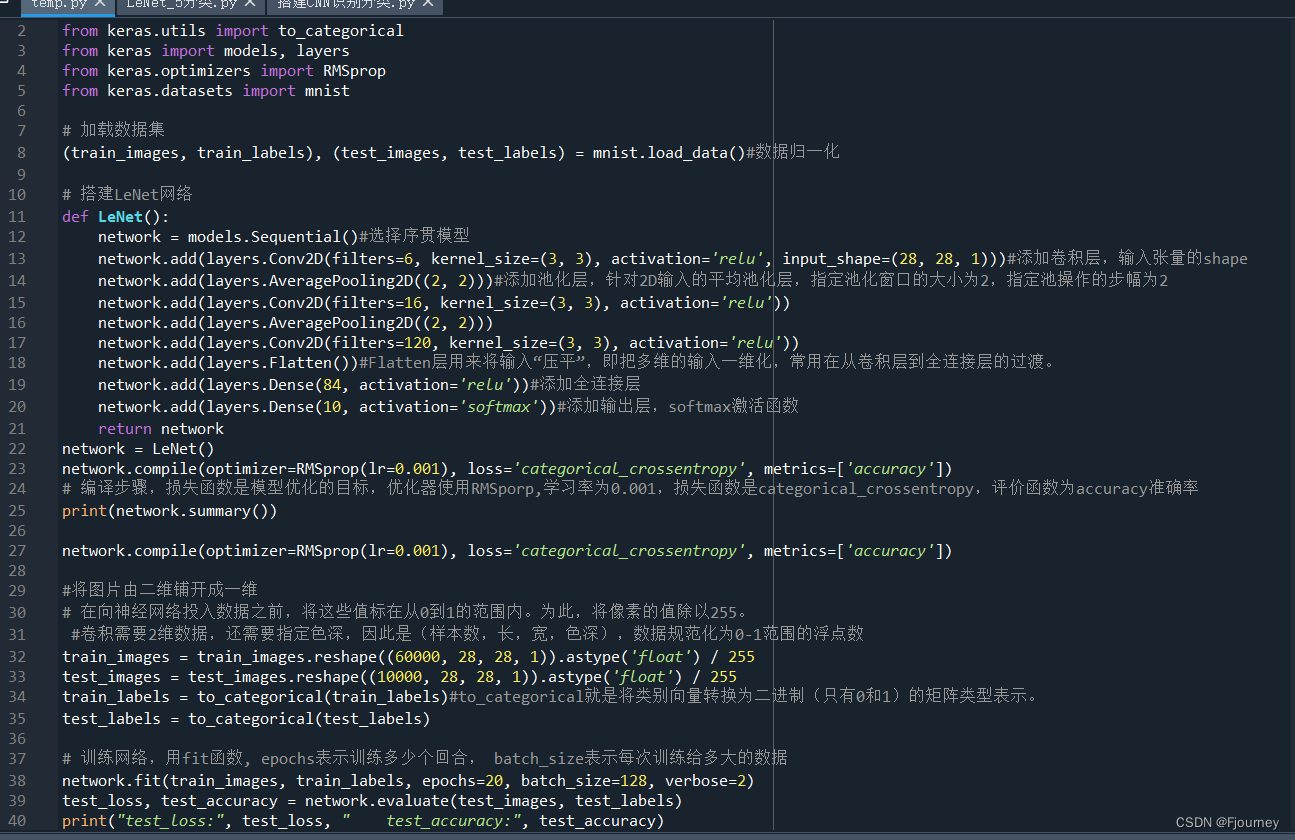
网络
import torch
from torch import nn
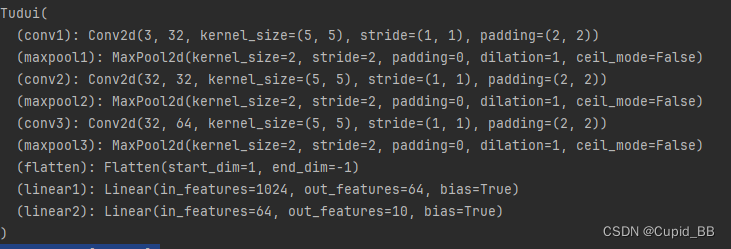
class Tudui(nn.Module):
def __init__(self):
super(Tudui, self).__init__()
self.conv1 = nn.Conv2d(in_channels=3, out_channels=32, kernel_size=5, stride=1, padding=2)
self.maxpool1 = nn.MaxPool2d(kernel_size=2)
self.conv2 = nn.Conv2d(in_channels=32, out_channels=32, kernel_size=5, stride=1, padding=2)
self.maxpool2 = nn.MaxPool2d(2)
self.conv3 = nn.Conv2d(32, 64, 5,padding=2)
self.maxpool3 = nn.MaxPool2d(2)
self.flatten = nn.Flatten()
self.linear1 = nn.Linear(1024, 64)
self.linear2 = nn.Linear(64, 10)
def forward(self, x):
x = self.conv1(x)
x = self.maxpool1(x)
x = self.conv2(x)
x = self.maxpool2(x)
x = self.conv3(x)
x = self.maxpool3(x)
x = self.flatten(x)
x = self.linear1(x)
x = self.linear2(x)
return x
tudui = Tudui()
print(tudui)
对网络进行检验
input = torch.ones((64, 3, 32, 32))
output = tudui(input)
print(output.shape)

线性层如果不知道输入特征是多少,注释掉线性层,查看输入特征(这里是1024)

使用nn.Sequential
import torch
from torch import nn
class Tudui(nn.Module):
def __init__(self):
super(Tudui, self).__init__()
self.model1 = nn.Sequential(
nn.Conv2d(in_channels=3, out_channels=32, kernel_size=5, stride=1, padding=2),
nn.MaxPool2d(kernel_size=2),
nn.Conv2d(in_channels=32, out_channels=32, kernel_size=5, stride=1, padding=2),
nn.MaxPool2d(2),
nn.Conv2d(32, 64, 5, padding=2),
nn.MaxPool2d(2),
nn.Flatten(),
nn.Linear(1024, 64),
nn.Linear(64, 10)
)
def forward(self, x):
x = self.model1(x)
return x
tudui = Tudui()
print(tudui)
input = torch.ones((64, 3, 32, 32))
output = tudui(input)
print(output.shape)

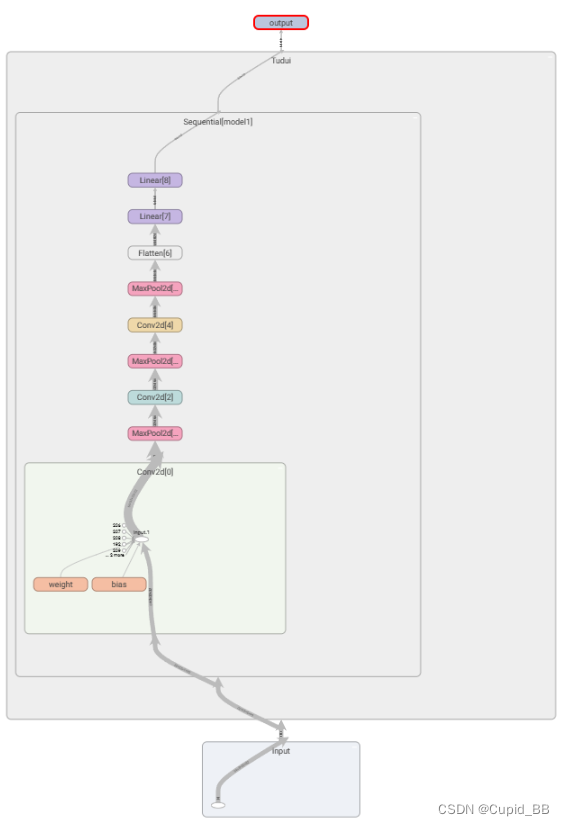
可视化模型结构
writer = SummaryWriter('logs_seq')
writer.add_graph(tudui, input)
writer.close()
![[pytorch] 7. <span style='color:red;'>神经</span><span style='color:red;'>网络</span><span style='color:red;'>搭</span><span style='color:red;'>建</span><span style='color:red;'>实例</span>](https://img-blog.csdnimg.cn/direct/85c28e9b9abc403c8c41d73735ef8696.png)