页面结构
展示页面
<template>
<div class="login flex flex-col">
<div class="scene" id="scene"></div>
</div>
</template>
<script lang="ts" setup>
import {
computed, onMounted, reactive, ref, shallowRef } from "vue";
import type {
InputInstance, FormInstance } from "element-plus";
import useAppStore from "@/stores/modules/app";
import useUserStore from "@/stores/modules/user";
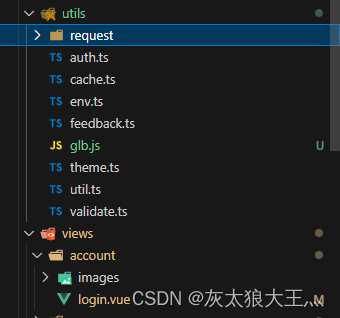
import cache from "@/utils/cache";
const passwordRef = shallowRef<InputInstance>();
const formRef = shallowRef<FormInstance>();
const appStore = useAppStore();
const userStore = useUserStore();
const route = useRoute();
const router = useRouter();
const config = computed(() => appStore.config);
import Base3d from "@/utils/glb";
const data = reactive({
base3d: {
},
});
onMounted(() => {
data.base3d = new Base3d("#scene");
});
</script>
glb.js文件
import * as THREE from 'three' //导入整个 three.js核心库
import {
EquirectangularReflectionMapping } from 'three' //导入纹理映射模块
import {
RGBELoader } from 'three/examples/jsm/loaders/RGBELoader' //导入RGB加载器
import {
OrbitControls } from 'three/examples/jsm/controls/OrbitControls' //导入控制器模块,轨道控制器
import {
GLTFLoader } from 'three/examples/jsm/loaders/GLTFLoader' //导入GLTF模块,模型解析器,根据文件格式来定
class Base3d {
constructor(selector) {
this.container = document.querySelector(selector)
this.camera
this.scene
this.renderer
this.controls
this.init()
this.animate()
}
init() {
//初始化场景
this.initScene()
//初始化相机
this.initCamera()
//初始化渲染器
this.initRender()
//初始化控制器,控制摄像头,控制器一定要在渲染器后
this.initControls()
// 添加物体模型
this.addMesh()
//监听场景大小改变,跳转渲染尺寸
window.addEventListener("resize", this.onWindowResize.bind(this))
}
initScene() {
this.scene = new THREE.Scene()
this.setEnvMap('079')
}
initCamera() {
this.camera = new THREE.PerspectiveCamera(45, window.innerWidth / window.innerHeight, 0.25, 200)
this.camera.position.set(-1.8, 0.6, 20)
}
initRender() {
this.renderer = new THREE.WebGLRenderer({
antialias: true }) //设置抗锯齿
//设置屏幕像素比
this.renderer.setPixelRatio(window.devicePixelRatio)
//渲染的尺寸大小
this.renderer.setSize(window.innerWidth, window.innerHeight)
//色调映射
this.renderer.toneMapping = THREE.ACESFilmicToneMapping
//曝光
this.renderer.toneMappingExposure = 3
this.container.appendChild(this.renderer.domElement)
}
setEnvMap(hdr) {
//设置环境背景
new RGBELoader().setPath('').load('http://xx.xx/image/' + hdr + '.hdr', (texture) => {
texture.mapping = EquirectangularReflectionMapping //圆柱形形纹理映射
this.scene.background = texture
this.scene.environment = texture
})
}
render() {
this.renderer.render(this.scene, this.camera)
}
animate() {
this.renderer.setAnimationLoop(this.render.bind(this))
}
initControls() {
this.controls = new OrbitControls(this.camera, this.renderer.domElement)
}
//加载模型
setModel(modelName) {
return new Promise((resolve, reject) => {
const loader = new GLTFLoader().setPath('')
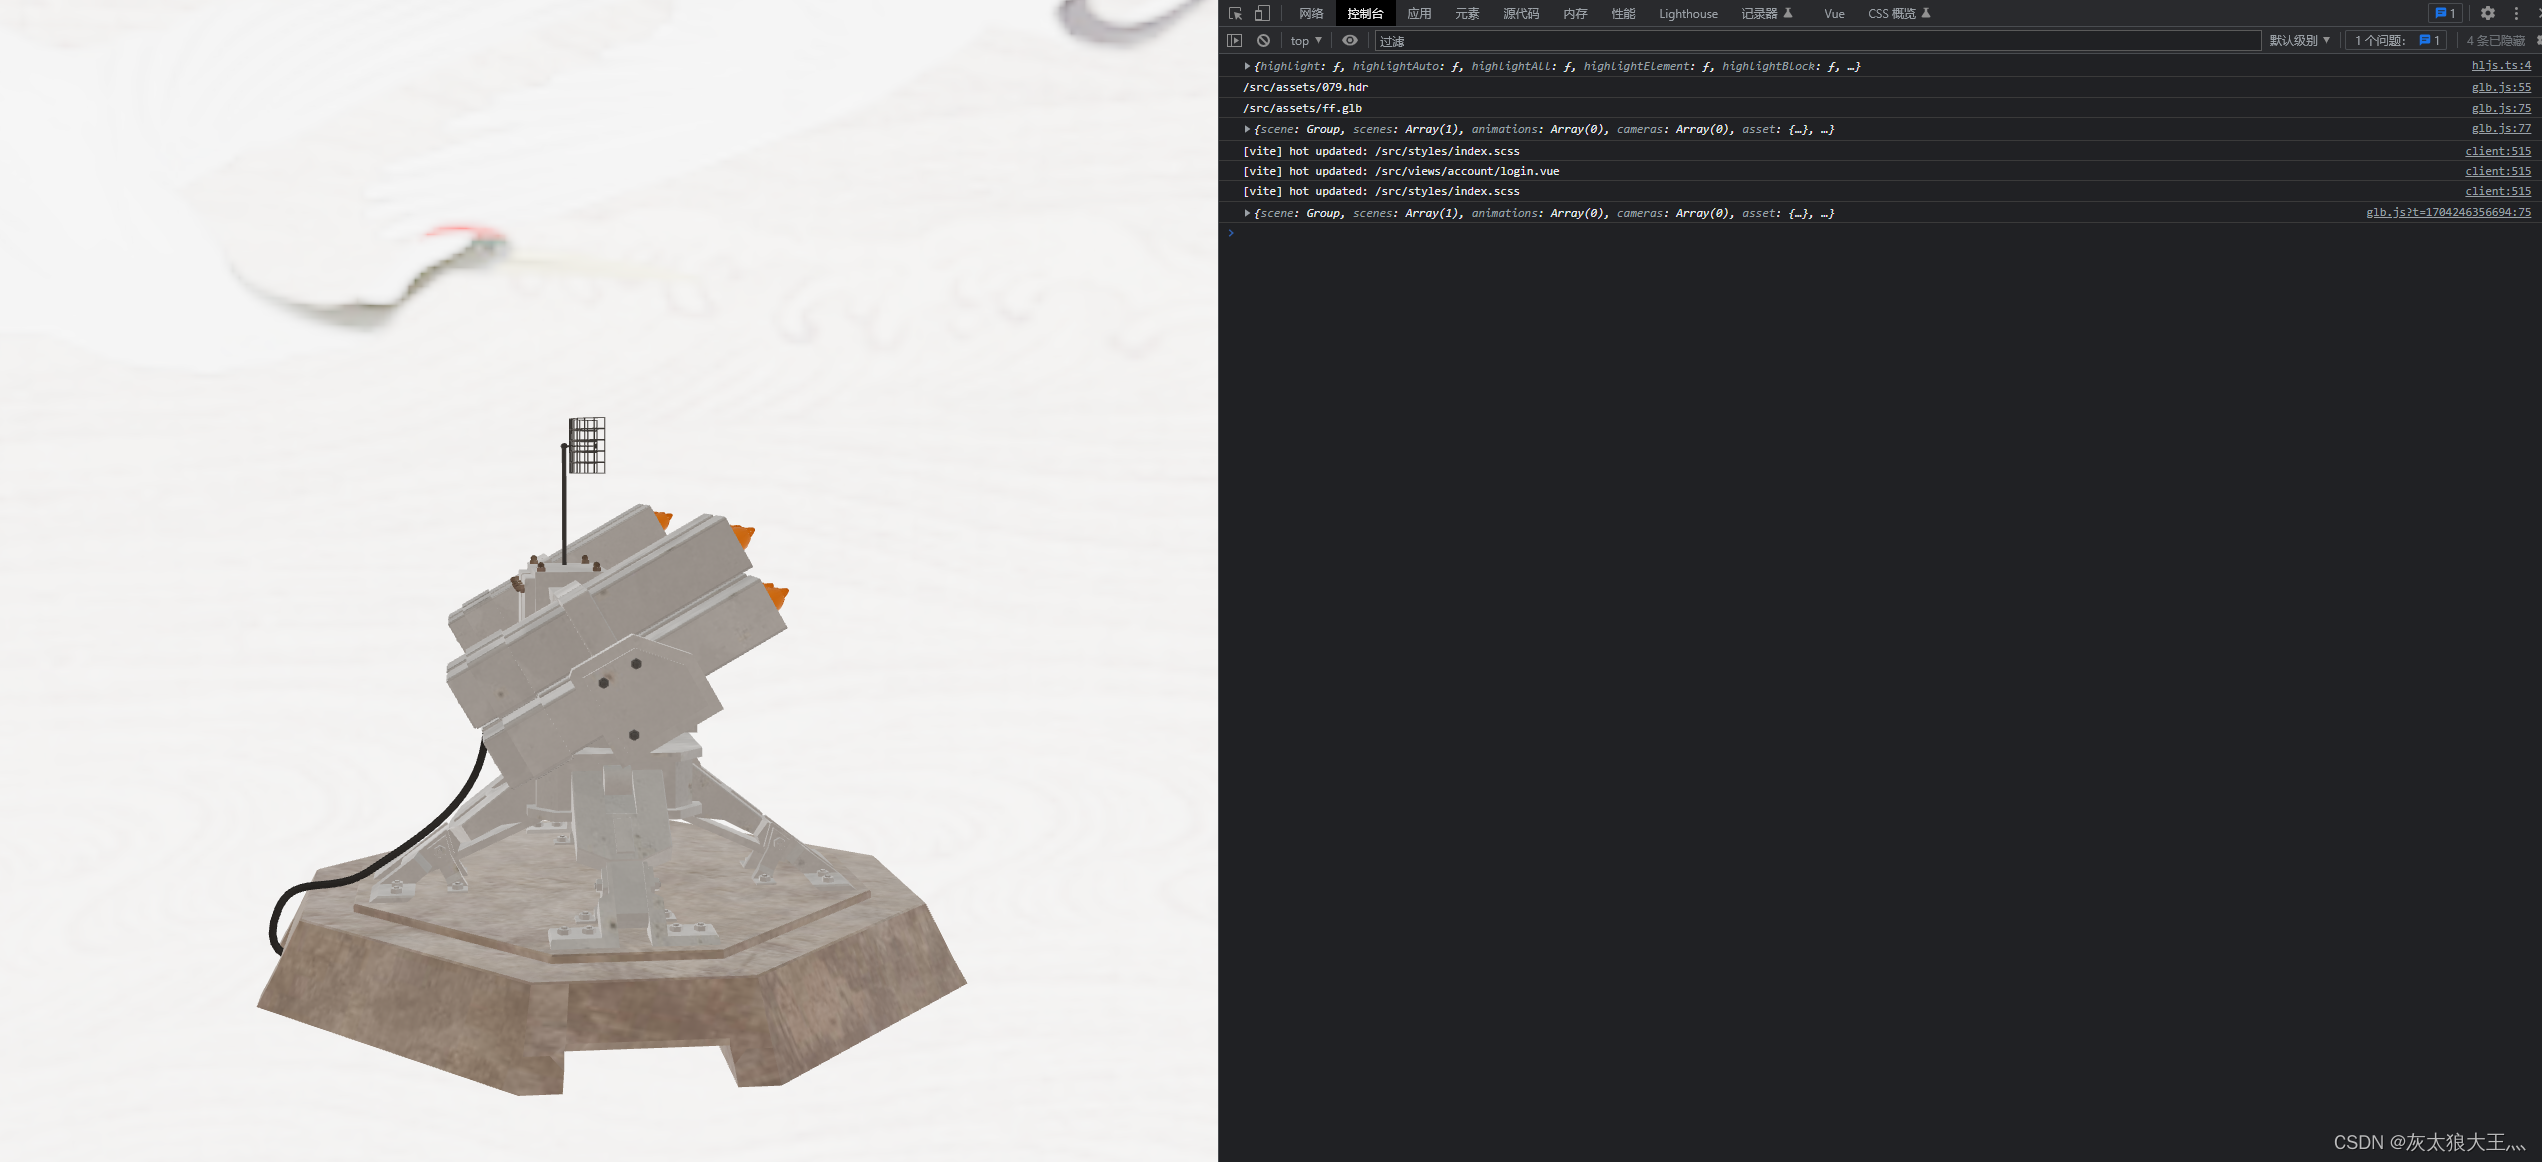
loader.load('http://xx.xx/image/ff.glb', (gltf) => {
console.log(gltf);
this.model = gltf.scene.children[0]
this.scene.add(this.model)
resolve(this.modelName + '模型添加成功')
})
})
}
addMesh() {
this.setModel('ff.glb')
}
onWindowResize() {
//调整屏幕大小
this.camera.aspect = window.innerWidth / window.innerHeight //摄像机宽高比例
this.camera.updateProjectionMatrix() //相机更新矩阵,将3d内容投射到2d面上转换
this.renderer.setSize(window.innerWidth, window.innerHeight)
}
}
export default Base3d
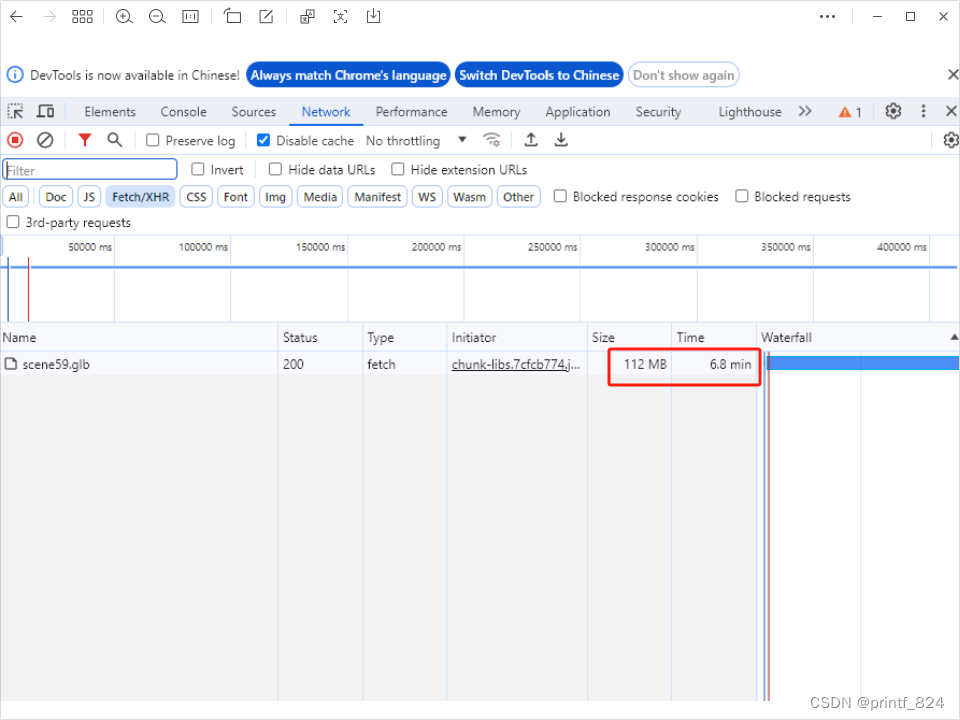
上边的http://xx.xx/image/为服务器资源地址,记得开启Nginx配置跨源资源共享(CORS)请求
设置 add_header Access-Control-Allow-Origin *; 即可 例如:

location /image/ {

    add_header Access-Control-Allow-Origin ***
    ***
    ***
}


也可以把静态资源放在项目中 setPath('./')设置为./
 new RGBELoader().setPath('./').load('/xxx/xxx/xxx' + hdr + '.hdr', (texture) => {

            texture.mapping = EquirectangularReflectionMapping  //圆柱形形纹理映射
            this.scene.background = texture
            this.scene.environment = texture
        })
还有部署到服务器后进入页面第一次正常刷新404的问题
在conf文件中添加属性
try_files $uri $uri/ /index.html;
尝试解析下列2个文件/文件夹(分辨IP后面的路径是文件还是文件夹), $uri/$uri/,解析到则返回 否则就跳转index.thml

try_files  固定语法
$uri       指代home文件(ip地址后面的路径,假如是127.0.0.1/index/a.png,那就指代index/a.png)
$uri/      指代home文件夹
/index.html  向ip/index.html 地址发起请求

location / {

            root   /deplay/dist;
            index  index.html index.htm;
            try_files $uri $uri/ /index.html;
        }
还有打包时 如果静态文件在本地,结构如图hdr和glb文件引用路径会错
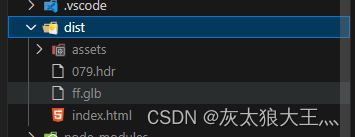
第一种方式在dist里创建一个public文件夹 再把文件放进去即可
第二种方式是服务器引入则无需改动
第三种
引入对应资源文件
在vite.config.ts文件中配置
assetsInclude: [‘/*.hdr’, '/*.glb’]
我的配置 供参考
export default defineConfig({

    base: './',
    server: {

        host: '0.0.0.0',
    },
    plugins: [
        vue(),
        vueJsx(),
        AutoImport({

            imports: ['vue', 'vue-router'],
            resolvers: [ElementPlusResolver()],
            eslintrc: {

                enabled: true
            }
        }),
        Components({

            directoryAsNamespace: true,
            resolvers: [ElementPlusResolver()]
        }),
        createStyleImportPlugin({

            resolves: [ElementPlusResolve()]
        }),
        createSvgIconsPlugin({

            // 配置路劲在你的src里的svg存放文件
            iconDirs: [fileURLToPath(new URL('./src/assets/icons', import.meta.url))],
            symbolId: 'local-icon-[dir]-[name]'
        }),
        vueSetupExtend()
        // legacyPlugin({

        //     targets: ['defaults', 'IE 11']
        // })
    ],
    resolve: {

        alias: {

            '@': fileURLToPath(new URL('./src', import.meta.url))
        }
    },
    assetsInclude: ['**/*.hdr', '**/*.glb'],
    build: {

        rollupOptions: {

            manualChunks(id) {

                if (id.includes('node_modules')) {

                    return id.toString().split('node_modules/')[1].split('/')[0].toString()
                }
            },
            output: {

                assetFileNames: (assetInfo: any) => {

                    if (/\.(mp4|webm|ogg|mp3|wav|flac|aac)$/.test(assetInfo.name)) {
    // 匹配资源文件后缀
                        return `media/[name].[hash][ext]`;  // 创建media文件夹存放匹配的资源文件,name为该文件的原名,hash为哈希值,ext为文件后缀名,以[name].[hash][ext]命名规则
                    }

					// else if (/\.(glb|hdr)$/.test(assetInfo.name)) { // 匹配资源文件后缀 可以自定义存放位置
                     //   return `public/[name].[ext]`;  // 创建media文件夹存放匹配的资源文件,name为该文件的原名,hash为哈希值,ext为文件后缀名,以[name].[hash][ext]命名规则
                //    }
                    return `assets/[name]-[hash].[ext]`; // 不匹配的资源文件存放至assets,以[name]-[hash].[ext]命名规则,注意两处的命名规则不同
                },

            }
        }
    }
})
import hdr from '../assets/079.hdr'
import glb from '../assets/ff.glb'
使用时
  const loader = hdr.includes('http') ? new RGBELoader().setPath('') : new RGBELoader().setPath('./')
  const loader = glb.includes('http') ? new GLTFLoader().setPath('') : new GLTFLoader().setPath('./')
判断绝对|相对路径
打包后对应的资源路径

最后我还尝试在uniapp中进行配置 发现只能使用服务器引用资源才会成功