一、目的
对于Flume的聚合拓扑结构,进行一个开发测试
二、聚合
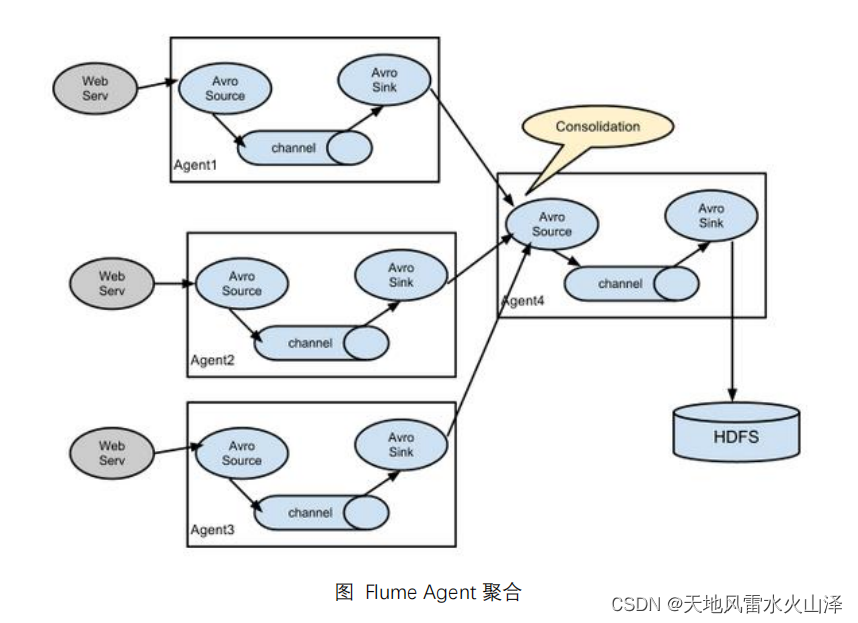
(一)结构含义
这种模式是我们最常见的,也非常实用。日常web应用通常分布在上百个服务器,大者甚至上千个、上万个服务器产生的日志,处理起来也非常麻烦。
(二)结构特征
用flume的这种组合方式能很好的解决这一问题,每台服务器部署一个 flume 采集日志,传送到一个集中收集日志的flume,再由此flume上传到hdfs、hive、hbase等,进行日志分析。
三、需求案例
(一)案例需求
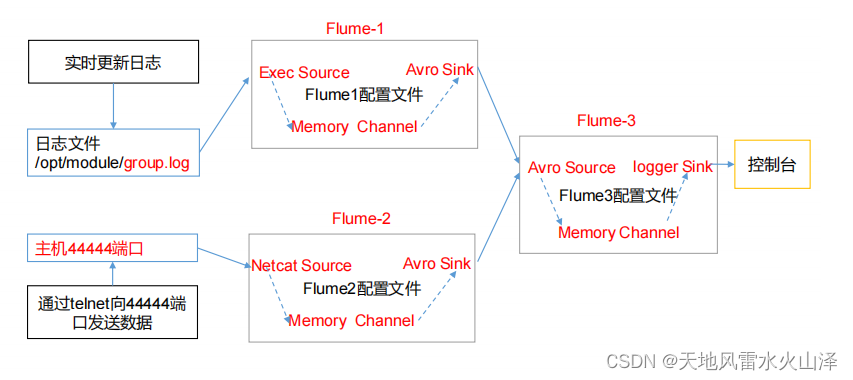
hurys23 上的 Flume-2 监控某一个端口的数据流,
Flume-1 与 Flume-2 将数据发送给 hurys24 上的 Flume-3,Flume-3 将最终数据打印到控制台。
(二)需求分析
四、前期准备
(一)在hurys22、hurys23、hurys24上安装好Flume

(二)在hurys22、hurys23、hurys24上创建测试任务的文件夹group3
[root@hurys22 ~]# cd /usr/local/hurys/dc_env/flume/flume190/conf/
[root@hurys22 conf]# mkdir group3

(三)在hurys22上创建Flume-1的 监控文件 /opt/flume/group.log
[root@hurys22 opt]# cd ./flume/
[root@hurys22 flume]# touch group.log
[root@hurys22 flume]# ll
总用量 0
-rw-r--r-- 1 root root 0 12月 13 10:47 group.log

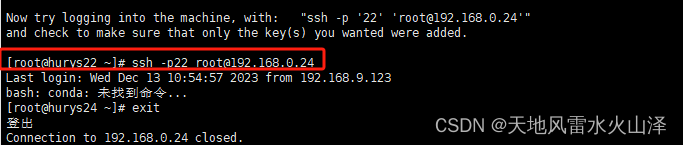
(四)hurys22、hurys23都可以ssh连接hurys24(192.168.0.24)
1、hurys22 ssh连接192.168.0.24
[root@hurys22 ~]# ssh -p22 root@192.168.0.24
Last login: Wed Dec 13 10:54:57 2023 from 192.168.9.123
2、hurys23 ssh连接192.168.0.24
[root@hurys23 ~]# ssh -p22 root@192.168.0.24
Last login: Wed Dec 13 11:10:32 2023 from 192.168.0.22

五、在group3中创建flume的任务文件
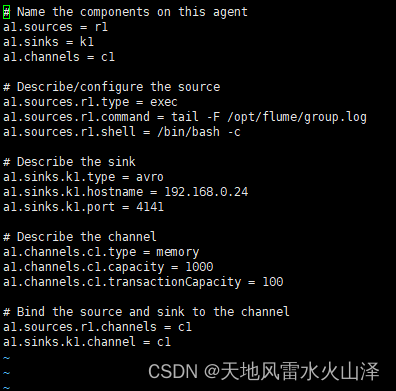
(一)在hurys22创建任务文件 a1 flume1-logger-flume.conf
配置 Source 用于监控 group.log 文件,配置 Sink 输出数据到下一级 Flume。
[root@hurys22 group3]# vi flume1-logger-flume.conf
# Name the components on this agent
a1.sources = r1
a1.sinks = k1
a1.channels = c1
# Describe/configure the source
a1.sources.r1.type = exec
a1.sources.r1.command = tail -F /opt/flume/group.log
a1.sources.r1.shell = /bin/bash -c
# Describe the sink
a1.sinks.k1.type = avro
a1.sinks.k1.hostname = 192.168.0.24
a1.sinks.k1.port = 4141
# Describe the channel
a1.channels.c1.type = memory
a1.channels.c1.capacity = 1000
a1.channels.c1.transactionCapacity = 100
# Bind the source and sink to the channel
a1.sources.r1.channels = c1
a1.sinks.k1.channel = c1
注意:
1、配置文件中的各项参数需要调式,这里只是为了演示,实现目的、打通路径即可!实际在项目中操作时需要调试参数。
2、a1.sources.r1.command = tail -F /opt/flume/group.log 为监控文件的group.log路径
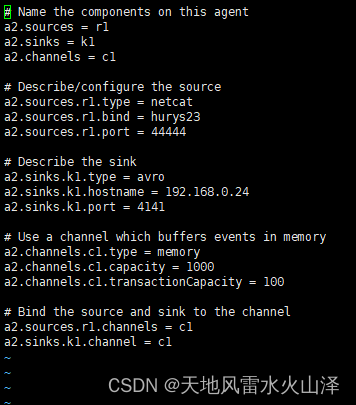
(二)在hurys23创建任务文件 a2 flume2-netcat-flume.conf
配置 Source 监控端口 44444 数据流,配置 Sink 数据到下一级 Flume
[root@hurys23 group3]# vi flume2-netcat-flume.conf
# Name the components on this agent
a2.sources = r1
a2.sinks = k1
a2.channels = c1
# Describe/configure the source
a2.sources.r1.type = netcat
a2.sources.r1.bind = hurys23
a2.sources.r1.port = 44444
# Describe the sink
a2.sinks.k1.type = avro
a2.sinks.k1.hostname = 192.168.0.24
a2.sinks.k1.port = 4141
# Use a channel which buffers events in memory
a2.channels.c1.type = memory
a2.channels.c1.capacity = 1000
a2.channels.c1.transactionCapacity = 100
# Bind the source and sink to the channel
a2.sources.r1.channels = c1
a2.sinks.k1.channel = c1
(三)在hurys24创建任务文件 a3 flume3-flume-logger.conf
配置 source 用于接收 flume1 与 flume2 发送过来的数据流,最终合并后 sink 到控制台。
[root@hurys24 group3]# vi flume3-flume-logger.conf
# Name the components on this agent
a3.sources = r1
a3.sinks = k1
a3.channels = c1
# Describe/configure the source
a3.sources.r1.type = avro
a3.sources.r1.bind = hurys24
a3.sources.r1.port = 4141
# Describe the sink
a3.sinks.k1.type = logger
# Describe the channel
a3.channels.c1.type = memory
a3.channels.c1.capacity = 1000
a3.channels.c1.transactionCapacity = 100
# Bind the source and sink to the channel
a3.sources.r1.channels = c1
a3.sinks.k1.channel = c1

六、分别启动Flume任务文件
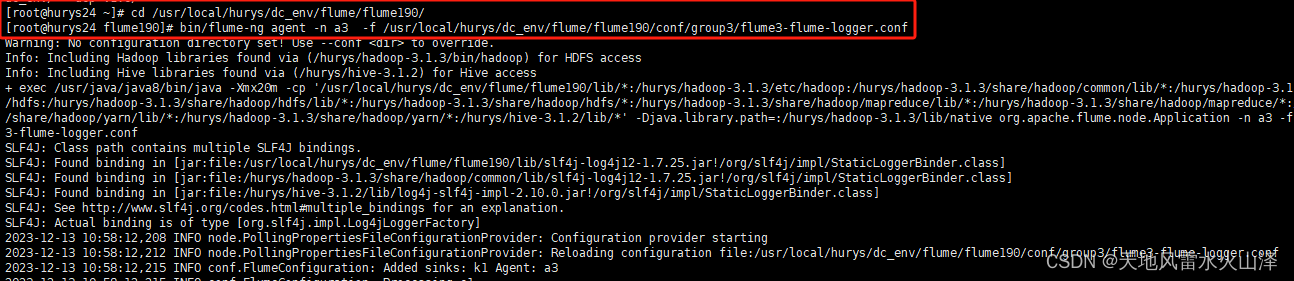
(一)首先在hurys24启动 a3任务 flume3-flume-logger.conf
[root@hurys24 flume190]# bin/flume-ng agent -n a3 -f /usr/local/hurys/dc_env/flume/flume190/conf/group3/flume3-flume-logger.conf
(二)其次在hurys23启动 a2任务 flume2-netcat-flume.conf
[root@hurys23 flume190]# bin/flume-ng agent -n a2 -f /usr/local/hurys/dc_env/flume/flume190/conf/group3/flume2-netcat-flume.conf

(三)其次在hurys22启动 a1任务 flume1-logger-flume.conf
[root@hurys22 flume190]# bin/flume-ng agent -n a1 -f /usr/local/hurys/dc_env/flume/flume190/conf/group3/flume1-logger-flume.conf

七、Flume任务运行执行状况
(一)hurys22 a1任务运行截图

(二)hurys23 a2任务运行截图
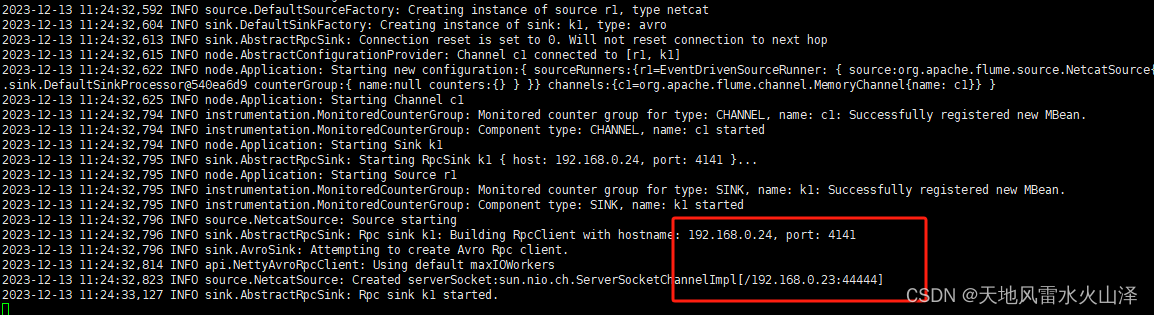
(三)hurys24 a3任务运行截图

八、在 hurys22上向/opt/flume/目录下的 group.log 追加内容,观察hurys24的控制台打印情况
(一)在 hurys22上向/opt/flume/目录下的 group.log 追加内容
[root@hurys22 group3]# cd /opt/flume/
[root@hurys22 flume]# echo 'hello' > group.log
[root@hurys22 flume]# echo 'hello java' > group.log

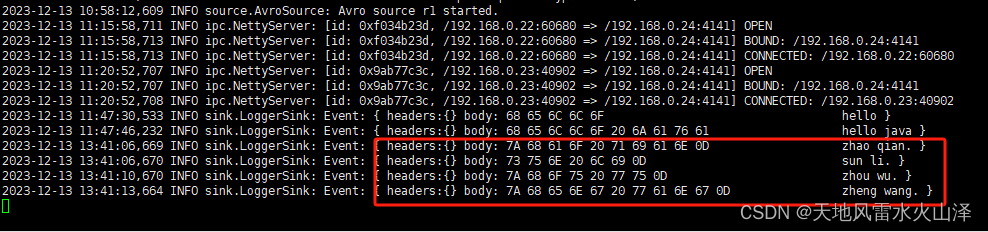
(二)观察hurys24的控制台打印情况

九、在 hurys23上用netcat 工具向 44444 端口发送数据,观察hurys24的控制台打印情况
(一)在 hurys23上用netcat 工具向 44444 端口发送数据
[root@hurys23 flume3]# telnet hurys23 44444
Trying fe80::65e8:aec4:9ddc:391%eth0...
telnet: connect to address fe80::65e8:aec4:9ddc:391%eth0: Connection refused
Trying 192.168.0.23...
Connected to hurys23.
Escape character is '^]'.
zhao qian
OK
sun li
OK
zhou wu
OK
zheng wang
OK

(二)观察hurys24的控制台打印情况
Flume的聚合结构案例就到这里吧,有点明白了。
把2个Flume的数据聚合到第3个Flume里面,然后一起输出,这样省的一个个输出。节省功夫