目录
1、线段的绘制
OpenCvSharp提供Cv2.Line方法,使用该方法可以绘制各种线段,Cv2.Line方法如下:
public static void Line(InputOutputArray img, Point pt1, Point pt2, Scalar color, int thickness = 1, LineTypes lineType = LineTypes.Link8, int shift = 0)
说明:
摘要:
Draws a line segment connecting two points
参数:
img:
The image.
pt1:
First point of the line segment.
pt2:
Second point of the line segment.
color:
Line color.
thickness:
Line thickness. [By default this is 1]
lineType:
Type of the line. [By default this is LineType.Link8]
shift:
Number of fractional bits in the point coordinates. [By default this is 0]
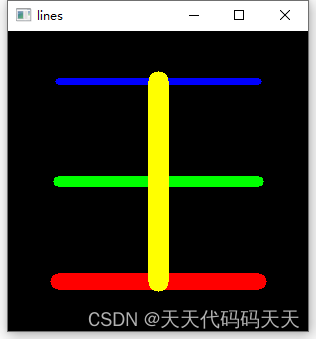
1.1实例1-绘制线段拼成一个"王"字
代码如下:
Mat canvas = Mat.Zeros(300, 300, MatType.CV_8UC3);
Cv2.Line(canvas, new Point(50, 50), new Point(250, 50), new Scalar(255, 0, 0), 5);
Cv2.Line(canvas, new Point(50, 150), new Point(250, 150), new Scalar(0, 255, 0), 10);
Cv2.Line(canvas, new Point(50, 250), new Point(250, 250), new Scalar(0, 0, 255), 15);
Cv2.Line(canvas, new Point(150, 50), new Point(150, 250), new Scalar(0, 255, 255), 20);Cv2.ImShow("lines", canvas);
Cv2.WaitKey();
Cv2.DestroyAllWindows();
效果
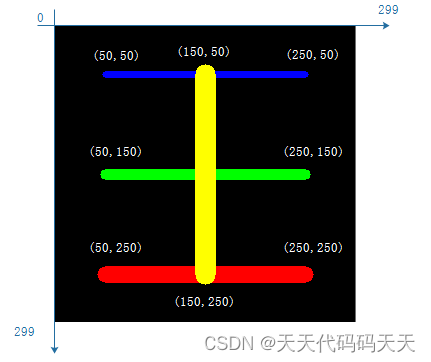
每条线段的起点坐标和终点坐标
2、矩形的绘制
OpenCvSharp提供Cv2.Rectangle方法,该方法既可以绘制矩形边框,也可以绘制实心矩形,其函数如下:
public static void Rectangle(InputOutputArray img, Point pt1, Point pt2, Scalar color, int thickness = 1, LineTypes lineType = LineTypes.Link8, int shift = 0)
说明:
摘要:
Draws simple, thick or filled rectangle
参数:
img:
Image.
pt1:
One of the rectangle vertices.
pt2:
Opposite rectangle vertex.
color:
Line color (RGB) or brightness (grayscale image).
thickness:
Thickness of lines that make up the rectangle. Negative values make the function
to draw a filled rectangle. [By default this is 1]
lineType:
Type of the line, see cvLine description. [By default this is LineType.Link8]
shift:
Number of fractional bits in the point coordinates. [By default this is 0]
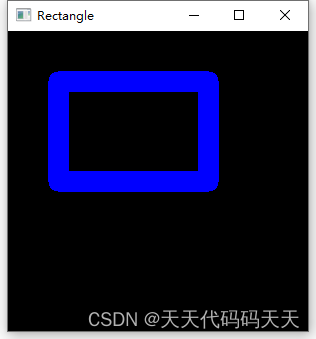
2.1实例2-绘制一个矩形边框
代码如下:
Mat canvas = Mat.Zeros(300, 300, MatType.CV_8UC3);
Cv2.Rectangle(canvas, new Point(50, 50), new Point(200, 150), new Scalar(255, 0, 0), 20);
Cv2.ImShow("Rectangle", canvas);
Cv2.WaitKey();
Cv2.DestroyAllWindows();
效果
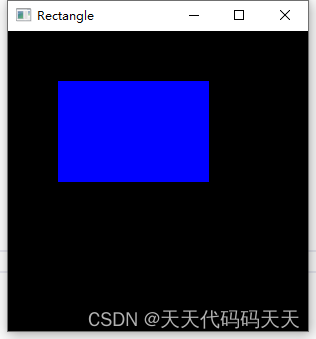
2.2实例3-绘制一个实心矩形
代码如下:
Mat canvas = Mat.Zeros(300, 300, MatType.CV_8UC3);
Cv2.Rectangle(canvas, new Point(50, 50), new Point(200, 150), new Scalar(255, 0, 0), -1);
Cv2.ImShow("Rectangle", canvas);
Cv2.WaitKey();
Cv2.DestroyAllWindows();
效果
3、圆的绘制
OpenCvSharp提供Cv2.Circle方法,该方法既可以绘制圆形边框,也可以绘制实心圆形,Cv2.Circle函数如下:
public static void Circle(InputOutputArray img, int centerX, int centerY, int radius, Scalar color, int thickness = 1, LineTypes lineType = LineTypes.Link8, int shift = 0)
说明:
摘要:
Draws a circle
参数:
img:
Image where the circle is drawn.
centerX:
X-coordinate of the center of the circle.
centerY:
Y-coordinate of the center of the circle.
radius:
Radius of the circle.
color:
Circle color.
thickness:
Thickness of the circle outline if positive, otherwise indicates that a filled
circle has to be drawn. [By default this is 1]
lineType:
Type of the circle boundary. [By default this is LineType.Link8]
shift:
Number of fractional bits in the center coordinates and radius value. [By default
this is 0]
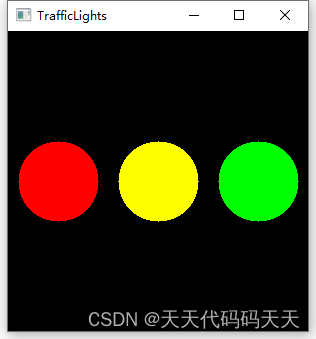
3.1实例4-绘制"交通灯"
代码如下:
Mat canvas = Mat.Zeros(300, 300, MatType.CV_8UC3);
Cv2.Circle(canvas, new Point(50, 150), 40, new Scalar(0, 0, 255), -1);
Cv2.Circle(canvas, new Point(150, 150), 40, new Scalar(0, 255, 255), -1);
Cv2.Circle(canvas, new Point(250, 150), 40, new Scalar(0, 255, 0), -1);
Cv2.ImShow("TrafficLights", canvas);
Cv2.WaitKey();
Cv2.DestroyAllWindows();
效果
4、多边形绘制
OpenCvSharp提供Polylines方法绘制多边形,其函数如下:
public static void Polylines(Mat img, IEnumerable<IEnumerable<Point>> pts, bool isClosed, Scalar color, int thickness = 1, LineTypes lineType = LineTypes.Link8, int shift = 0)
说明:
摘要:
draws one or more polygonal curves
参数:
img:
画布
pts:
多边形各顶点组成的列表
isClosed:
是否闭合
color:
颜色
thickness:
线条宽度
lineType:
shift:
4.1实例5-绘制等腰梯形
代码如下:
Mat canvas = Mat.Zeros(300, 300, MatType.CV_8UC3);
List<OpenCvSharp.Point> pts1 = new List<OpenCvSharp.Point>
{
new OpenCvSharp.Point(100,50),
new OpenCvSharp.Point(200,50),
new OpenCvSharp.Point(50,250),
new OpenCvSharp.Point(250,250)
};List<List<OpenCvSharp.Point>> pts = new List<List<Point>>();
pts.Add(pts1);Cv2.Polylines(canvas, pts, true, new Scalar(0, 0, 255), 1);
Cv2.ImShow("Polylines", canvas);
Cv2.WaitKey();
Cv2.DestroyAllWindows();
效果

5、文字的绘制
OpenCvSharp提供Cv2.PutText方法进行文字绘制,其函数如下:
public static void PutText(InputOutputArray img, string text, Point org, HersheyFonts fontFace, double fontScale, Scalar color, int thickness = 1, LineTypes lineType = LineTypes.Link8, bool bottomLeftOrigin = false)
说明:
摘要:
renders text string in the image
参数:
img:
Image.
text:
Text string to be drawn.
org:
Bottom-left corner of the text string in the image.
fontFace:
Font type, see #HersheyFonts.
fontScale:
Font scale factor that is multiplied by the font-specific base size.
color:
Text color.
thickness:
Thickness of the lines used to draw a text.
lineType:
Line type. See #LineTypes
bottomLeftOrigin:
When true, the image data origin is at the bottom-left corner. Otherwise, it is at the top-left corner.
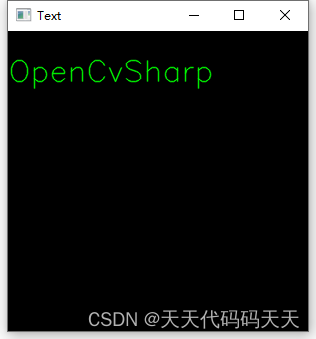
5.1实例6-绘制文字OpenCvSharp
代码如下:
Mat canvas = Mat.Zeros(300, 300, MatType.CV_8UC3);
Cv2.PutText(canvas, "OpenCvSharp", new Point(0, 50), HersheyFonts.Italic, 1, new Scalar(0,255,0), 1, LineTypes.AntiAlias, false);
Cv2.ImShow("Text", canvas);
Cv2.WaitKey();
Cv2.DestroyAllWindows();
效果


![[Linux] 基于LAMP架构安装论坛](https://img-blog.csdnimg.cn/direct/6c5e3a526102408ca0fea23943096c73.png)