环境说明
这里使用为 CentOS 7.9版本进行测试验证,zabbix Server 采用源码包部署,数据库采用 MySQL5.7.42版本,zabbix-web使用 ,nginx+php来实现。
具体信息如下:
| 软件名 | 版本 |
|---|---|
| zabbix-server | 5.0.39LTS |
| zabbix-agent | 5.0.39LTS |
| mysql | 5.7.42 |
| nginx | 1.22.1 |
| php | 7.4.33 |
说明:
1,LTS版相对稳定,多用于生产正式环境。
2,mysql5.7.42,为目前5.7版本稳定版,未出现5.7版本漏洞。
3,nginx1.22.1,为目前稳定版,未出现漏洞。
4,php-7.4.33,为目前稳定版,未出现漏洞。
一,安装nginx
说明:本nginx配置可以用于 四层,七层代理,也可以用于nginx监控!
1.1,创建nginx用户和用户组:
useradd -M -s /sbin/nologin nginx
1.2,配置好系统yum源,安装如下依赖包:
yum install -y wget unzip gcc gcc-c++ autoconf automake make pcre-devel openssl openssl-devel GeoIP-devel patch
1.3,下载上传 nginx安装包和各个依赖模块包至服务器,解压文件包如下:
tar xf nginx-1.22.1.tar.gz
unzip nginx-module-vts.zip
unzip echo-nginx-module-master.zip
unzip nginx_upstream_check_module-master.zip
unzip ngx_http_proxy_connect_module-master.zip
准备好安装目录
mkdir -p /usr/local/third-module
mkdir -p /usr/local/nginx1.22.1
mv echo-nginx-module-master  nginx_upstream_check_module-master ngx_http_proxy_connect_module-master nginx-module-vts-master /usr/local/third-module
1.4,隐藏nginx信息
cd /usr/local/nginx-1.22.1
vim /usr/local/nginx-1.22.1/src/http/ngx_http_header_filter_module.c

static u_char ngx_http_server_string[] = "Server: linux" CRLF; ##将NGINX改为Linux
static u_char ngx_http_server_full_string[] = "Server: " NGINX_VER CRLF;
static u_char ngx_http_server_build_string[] = "Server: " NGINX_VER_BUILD CRLF;
1.5,安装编译nginx命令如下:
patch -p1  < ../third-module/ngx_http_proxy_connect_module-master/patch/proxy_connect_rewrite_102101.patch
patch -p1  < ../third-module/nginx_upstream_check_module-master/check_1.20.1+.patch
./configure --prefix=/usr/local/nginx1.22.1 \
 --with-http_ssl_module \
 --with-http_realip_module \
 --with-http_addition_module \
 --with-http_sub_module \
 --with-http_dav_module \
 --with-http_flv_module \
 --with-http_mp4_module \
 --with-http_gunzip_module \
 --with-http_gzip_static_module \
 --with-http_random_index_module \
 --with-http_secure_link_module \
 --with-http_stub_status_module \
 --with-http_auth_request_module \
 --with-http_geoip_module \
 --with-http_geoip_module=dynamic \
 --with-threads \
 --with-file-aio \
 --with-pcre \
 --with-select_module \
 --with-stream \
 --with-stream=dynamic \
 --with-stream_ssl_module \
 --with-stream_realip_module \
 --with-stream_geoip_module \
 --with-stream_geoip_module=dynamic \
 --with-stream_ssl_preread_module \
 --add-dynamic-module=../third-module/echo-nginx-module-master \
 --add-dynamic-module=../third-module/nginx-module-vts-master \
 --add-dynamic-module=../third-module/ngx_http_proxy_connect_module-master \
 --add-dynamic-module=../third-module/nginx_upstream_check_module-master

make && make install
1.6,编辑配置文件
cd /usr/local/nginx1.22.1/conf
vi nginx.conf
load_module modules/模块.so; #写在全局段

load_module modules/ngx_http_geoip_module.so;
load_module modules/ngx_http_echo_module.so;
load_module modules/ngx_http_vhost_traffic_status_module.so;
load_module modules/ngx_http_proxy_connect_module.so;
load_module modules/ngx_stream_module.so;
cat>nginx.conf<<\EOF
user  nginx;
worker_processes  auto;

#error_log  logs/error.log;
#error_log  logs/error.log  notice;
error_log  logs/error.log  info;

#pid        logs/nginx.pid;

load_module modules/ngx_http_geoip_module.so;
load_module modules/ngx_http_echo_module.so;
load_module modules/ngx_http_vhost_traffic_status_module.so;
load_module modules/ngx_http_proxy_connect_module.so;
load_module modules/ngx_stream_module.so;

worker_rlimit_nofile 819200;

events {

    worker_connections  65535;
    use epoll;

}

# 是否以守护进程方式启动nginx进程
daemon on;

# nginx 四层调度
stream {

    log_format proxy '$remote_addr [$time_local] '
                 '$protocol $status $bytes_sent $bytes_received '
                 '$session_time "$upstream_addr" '
                 '"$upstream_bytes_sent" "$upstream_bytes_received" "$upstream_connect_time"';

# include conf.d/zabbix5.conf;
}

http {

    include       /usr/local/nginx1.22.1/conf/soc.conf;
    include       mime.types;
    default_type  application/octet-stream;

    #log_format  main  '$remote_addr - $remote_user [$time_local] "$request" '
    #                  '$status $body_bytes_sent "$http_referer" '
    #                  '"$http_user_agent" "$http_x_forwarded_for"';

    #access_log  logs/access.log  main;

#日志格式json

log_format log_json '{
    "@timestamp": "$time_iso8601", '
'"remote_addr": "$remote_addr", '
'"referer": "$http_referer", '
'"request": "$request", '
'"status": $status, '
'"bytes": $body_bytes_sent, '
'"agent": "$http_user_agent", '
'"x_forwarded": "$http_x_forwarded_for", '
'"up_addr": "$upstream_addr",'
'"up_host": "$upstream_http_host",'
'"up_resp_time": "$upstream_response_time",'
'"request_time": $request_time s ,'
'"http_x_request_id": "$http_x_request_id"'
'
}';

#日志按天生成

    map $time_iso8601 $logdate {

    default 'date-not-found';
    '~^(?<ymd>\d{4}-\d{2}-\d{2})' $ymd;
    }

#监控
    vhost_traffic_status_zone;
    vhost_traffic_status_filter_by_host on;
    vhost_traffic_status_filter_by_set_key $uri uris::$server_name;

#哈希表
    variables_hash_max_size 53284;
    add_header RealServerIP $upstream_addr;
    add_header RealServerCode $upstream_status;

    # 连接超时及异常
    proxy_ignore_client_abort on;
    proxy_read_timeout 75;
    proxy_connect_timeout 120;
    proxy_http_version 1.1;
    proxy_set_header Connection "";

    sendfile        on;
    #tcp_nopush     on;

    #keepalive_timeout  0;
    #keepalive_timeout  65;

    gzip  on;

    # 开启服务器读取文件的缓存
    open_file_cache max=200 inactive=2h;
    open_file_cache_valid 3h;
    open_file_cache_errors off;

    # 定义服务端连续两次发送响应报文给客户端的中间时差即超时时长,如果客户端在此时间内没有接收,连接就关闭
    #send_timeout 60s;

    # 定义接收客户端每个请求报文的body部分的缓冲区大小
    client_max_body_size 30m;
    client_body_buffer_size 64k;

    proxy_headers_hash_max_size 51200;
    proxy_headers_hash_bucket_size 6400;

    client_header_buffer_size 64k;
    large_client_header_buffers 4 128k;

    include conf.d/zabbix5.conf;
    #include conf.d/status.conf;

}
EOF
1.7,设置安全基线
cat >/usr/local/nginx1.22.1/conf/soc.conf<<
# Nginx安全配置基线

##  一.检查是否限制客户端下载速度
    limit_conn_zone $remote_addr zone=connip:10m;
    limit_conn_log_level error;
    limit_conn_status 503;
    limit_conn connip 8000;

    limit_rate_after 5m;
    limit_rate 20k;

##  二. 检查是否配置日志
    #access_log logs/access.log;
    #error_log logs/errori.log;

##  三.检查是否控制超时时间
    client_body_timeout 60s;
    client_header_timeout 60s;
    #keepalive_timeout 75s;
    #send_timeout 60s;

##  四.检查是否自定义nginx返回的错误信息
    error_page 400 404 413     /40x.html;
    error_page 500 502 503 504 /50x.html;

##  五.检查是否隐藏nginx版本
    server_tokens off;
EOF
1.8,创建子目录,编辑子配置文件
mkdir -p /usr/local/nginx1.22.1/conf/conf.d

cat >conf.d/zabbix5.conf<<\EOF
    server {

        listen 54110;
        server_name  localhost 10.10.10.11 zabbix.com.cn;

       location / {

             root /usr/local/webapp/zabbix;
             try_files $uri $uri/ /index.php?query_string;
             index index.php index.html index.htm;
        }
        error_page   500 502 503 504  /50x.html;
        location = /50x.html {

            root   html;
        }
        location ~* /WEB-INF/ {

             return 403;
         }
        location ~ \.php$ {

            root   /usr/local/webapp/zabbix;
            index index.php index.html index.htm;
            fastcgi_pass   127.0.0.1:9000;
            fastcgi_index  index.php;
            fastcgi_param SCRIPT_FILENAME $document_root$fastcgi_script_name;
            include        fastcgi_params;
        }

    }
EOF
1.9,检查nginx,是否报错
/usr/local/nginx1.22.1/sbin/nginx -t
nginx: the configuration file /usr/local/nginx1.22.1/conf/nginx.conf syntax is ok
nginx: configuration file /usr/local/nginx1.22.1/conf/nginx.conf test is successful
1.10,启动nginx
/usr/local/nginx1.22.1/sbin/nginx
1.11,做system启动项
创建/usr/lib/systemd/system/nginx.service文件,输入如下内容:
cat >/usr/lib/systemd/system/nginx.service<<\EOF

[Unit]
Description=nginx - high performance web server
Documentation=http://nginx.org/en/docs/
After=network.target remote-fs.target nss-lookup.target

[Service]
Type=forking
PIDFile=/usr/local/nginx1.22.1/logs/nginx.pid
ExecStartPre=/usr/local/nginx1.22.1/sbin/nginx -t -c /usr/local/nginx1.22.1/conf/nginx.conf
ExecStart=/usr/local/nginx1.22.1/sbin/nginx -c /usr/local/nginx1.22.1/conf/nginx.conf
ExecReload=/bin/kill -s HUP $MAINPID
ExecStop=/bin/kill -s QUIT $MAINPID
PrivateTmp=true

[Install]
WantedBy=multi-user.target
EOF
重载系统服务:
systemctl daemon-reload
设置开机启动:
systemctl enable nginx.service
systemctl start nginx.service
二,安装PHP7.4.33
2.1,下载安装如下依赖包
yum -y install libxml2-devel sqlite-devel libcurl-devel libpng-devel libjpeg-turbo-devel libXpm-devel freetype-devel libicu-devel gcc-c++ libxslt-devel oniguruma-devel libsodium-devel openldap-devel net-snmp-devel libwebp-devel
cp -frp /usr/lib64/libldap* /usr/lib/
2.2,centos7.9系统自带libzip-0.10.1-8版本太低,PHP不支持,所以源码安装libzip-1.2.0
tar zxf libzip-1.2.0.tar.g
cd libzip-1.2.0
 ./configure
make && make install
export PKG_CONFIG_PATH="/usr/local/lib/pkgconfig/"
2.3,源码安装php,需要在root环境下编译,否则会提示libzip错误,
tar -xvf php-7.4.33.tar.gz
mkdir -p /usr/local/php7.4.33
cd /usr/local/php-7.4.33

./configure --prefix=/usr/local/php7.4.33 \
--with-config-file-path=/usr/local/php7.4.33/etc \
--with-config-file-scan-dir=/usr/local/php7.4.33/conf.d \
--enable-fpm \
--with-fpm-user=nginx \
--with-fpm-group=nginx \
--enable-mysqlnd \
--with-mysqli=mysqlnd \
--with-pdo-mysql=mysqlnd \
--with-iconv-dir=/usr/local/php7.4.33 \
--with-freetype \
--with-jpeg  \
--with-zlib  \
--enable-xml \
--disable-rpath \
--enable-bcmath \
--enable-shmop \
--enable-sysvsem \
--enable-inline-optimization \
--with-curl \
--enable-mbregex \
--enable-mbstring \
--enable-intl \
--enable-ftp \
--enable-gd \
--with-openssl \
--with-mhash \
--enable-pcntl \
--enable-sockets \
--with-xmlrpc \
--with-zip  \
--enable-soap \
--with-gettext \
--enable-opcache \
--with-xsl \
--with-webp \
--with-xpm \
--with-snmp \
--with-ldap

vim Makefile    # 开头是‘EXTRA_LIBS’,结尾加上‘-llber’
make && make install
2.4,配置php-fpm,
cp /usr/local/php-7.4.33/php.ini-production /usr/local/php/etc/php.ini
2.5,修改php.ini文件,将对应参数做如下修改。
vi /usr/local/php/etc/php.ini

  max_execution_time = 300
  max_input_time = 300
  post_max_size = 16M
  date.timezone =Asia/Shanghai
cp php-fpm.conf.default /usr/local/php/etc/php-fpm.conf
cp php-fpm.d/www.conf.default php-fpm.d/www.conf
2.6,测试php-fpm配置
 /usr/local/php7.4.33/sbin/php-fpm -t -c /usr/local/php7.4.33/etc/php.ini -y /usr/local/php7.4.33/etc/php-fpm.conf
chown -R nginx:nginx /usr/local/php/var
2.7,php启动命令
/usr/local/php7.4.33/sbin/php-fpm -c /usr/local/php7.4.33/etc/php.ini -y /usr/local/php7.4.33/etc/php-fpm.conf
2.8,配置php-fpm开机自启动
cat >/usr/lib/systemd/system/php-fpm.service<<\EOF
[Unit]
Description=PHP-FPM
After=network.target syslog.target2

[Install]
WantedBy=default.target
Alias=php-fpm.service

[Service]
User=nginx
Group=nginx
#User and Group can be set in the php-fpm configure file
Type=forking
#PIDFile=/usr/local/php/var/run/php-fpm.pid
#不需要在这里指定pid文件位置,需要到php-fpm.conf文件中指定
ExecStart=/usr/local/php7.4.33/sbin/php-fpm -c /usr/local/php7.4.33/etc/php.ini -y /usr/local/php7.4.33/etc/php-fpm.conf
ExecStop=/bin/kill -INT $MAINPID
ExecReload=/bin/kill -USR2 $MAINPID
EOF
cp /usr/local/php-7.4.33/sapi/fpm/init.d.php-fpm /etc/init.d/php-fpm
systemctl daemon-reload
systemctl enable php-fpm.service
systemctl start php-fpm.service
systemctl restart php-fpm.service
三,安装mysql
3.1,创建用户
groupadd mysql
useradd -r -g mysql mysql
3.2,上传,解压安装包,并做软链接
tar zxf mysql-5.7.42-linux-glibc2.12-x86_64.tar.gz -C /usr/local/
cd /usr/local/
ln -s mysql-5.7.42-linux-glibc2.12-x86_64 mysql
3.3,编辑配置文件
cp /etc/my.cnf{
   ,.bak}

cat >/etc/my.cnf<<\EOF
# FOR Percona 5.7
#thread_handling = pool-of-threads
#thread_pool_oversubscribe = 16
#extra_port = 33306
#extra_max_connections = 2

[client]
port            = 3306
socket          = /data/3306/dbdata/mysql.sock

[mysql]
no-auto-rehash
max_allowed_packet = 128M
#pager="less -i -n -S"
#tee=/opt/mysql/query.log
prompt                         = '(zabbix)\u@\h [\d]> '
default-character-set=utf8

[mysqldump]
quick
max_allowed_packet = 128M
#myisam_max_sort_file_size = 10G

[myisamchk]
key_buffer_size = 8M
sort_buffer_size = 8M
read_buffer = 4M
write_buffer = 4M

[mysqld_safe]
#malloc-lib=  /usr/lib64/libjemalloc.so

[mysqld_multi]
mysqld = /usr/local/mysql/bin/mysqld_safe
mysqladmin = /usr/local/mysql/bin/mysqladmin
log = /data/3306/slowlog/mysqld_multi.log

[mysqld]
#===============>[mysql Base]<=================
bind-address	= 0.0.0.0
port            = 3306
user            = mysql
basedir         = /usr/local/mysql
datadir         = /data/3306/dbdata
tmpdir          = /data/3306/tmp
socket          = /data/3306/dbdata/mysql.sock
skip_name_resolve = 1
innodb_file_per_table = 1
default-storage-engine = InnoDB
character-set-server = utf8
lower_case_table_names = 1
transaction_isolation = READ-COMMITTED
#sql_mode = NO_ENGINE_SUBSTITUTION,STRICT_TRANS_TABLES
symbolic-links = 0
skip_name_resolve = 1
#skip-grant-tables
#skip-networking
#skip-external-locking
explicit_defaults_for_timestamp = 1
default-time-zone = '+8:00'

#============>[mysql procedure,event]<===========
log_bin_trust_function_creators = 1
event_scheduler=1

#========================>[mysql perfomance]<===============
back_log = 1024
max_connections = 3000
max_connect_errors = 6000
max_user_connections=1000
external-locking = FALSE
connect_timeout = 20
open_files_limit = 65535
table_open_cache = 1024
interactive_timeout = 600
wait_timeout = 28800
max_allowed_packet = 16M
max_heap_table_size = 1024M
tmp_table_size = 128M
join_buffer_size = 16M
sort_buffer_size = 16M
read_rnd_buffer_size = 8M
read_buffer_size = 4M
thread_cache_size = 64
# query_cache_type = OFF
# query_cache_size = 8M
# query_cache_limit = 2M
key_buffer_size = 256M
performance_schema = 1
performance_schema_instrument = '%=on'

#========================>[mysql log related]<===============
log_bin = /data/3306/binlog/mysql-bin	 ##从库要注释,不需要
binlog_format = row
binlog_cache_size = 256M
max_binlog_cache_size = 2G
max_binlog_size = 1G
expire_logs_days = 30					 ##binlog过期时间可以设成7天
slow_query_log = 1
long_query_time = 1.5
slow_query_log_file = /data/3306/slowlog/mysql-slow.log
#general_log = ON
#general_log_file = /data/3306/slowlog/sql.log
log_timestamps = system
log-output="FILE"
log-error   = /data/3306/slowlog/error.log
log_error_verbosity = 2
log-slow-slave-statements = 1
#log_slow_verbosity = "full"
#log-queries-not-using-indexes = 1
#log_throttle_queries_not_using_indexes = 10
log-slow-admin-statements = 1

#========================>[ mysql Replication]<================
log_slave_updates = true
master-info-repository = TABLE
relay_log_info_repository = TABLE
relay_log = /data/3306/relaylog/relay-bin
max_relay_log_size = 1G
relay_log_purge = OFF      			 ##从库要修改成开启自动清理
#relay_log_recovery = 1
sync_master_info = 1
sync_binlog = 1
slave_parallel_type=LOGICAL_CLOCK
slave_parallel_workers = 16
binlog_checksum = CRC32
master_verify_checksum = 1
slave_sql_verify_checksum = 1
binlog_rows_query_log_events = 1
server-id = 1                         ##从slave上的server-id要大于master主的
report_port = 3306
report_host = 10.135.81.4
slave-skip-errors=1022,1032,1062
slave_allow_batching = 1
slave-rows-search-algorithms = 'INDEX_SCAN,HASH_SCAN'
#read_only = 1						  ##slave从上要开启只读模式
#super_read_only = 1				  ##slave从上要开启只读模式
slave-net-timeout=30
#gtid_mode = on
#enforce_gtid_consistency = 1
#auto_increment_increment=2
#auto_increment_offset=1
#binlog-ignore=mysql
#binlog-ignore=information_schema
#replicate-do-db=aa
replicate-wild-ignore-table=mysql.%
replicate-wild-ignore-table=information_schema.%
replicate-wild-ignore-table=sys.%

#semi replication
#plugin_load = "validate_password.so;rpl_semi_sync_master=semisync_master.so;rpl_semi_sync_slave=semisync_slave.so"
plugin_load = "semisync_master.so;semisync_slave.so;validate_password.so"
rpl_semi_sync_master_enabled=1
rpl_semi_sync_master_timeout=3000 # 3000 second
rpl_semi_sync_slave_enabled=1
rpl_semi_sync_master_wait_for_slave_count=1

#group relplication
binlog_group_commit_sync_delay=10
binlog_group_commit_sync_no_delay_count=20

#=======>[myisam engine]<=========
myisam_sort_buffer_size = 128M
myisam_max_sort_file_size = 10G
myisam_repair_threads = 1
lock_wait_timeout = 3600

#========>[innodb engine]<==========
#innodb_data_home_dir = /data/3306/dbdata
#innodb_log_group_home_dir = /data/3306/slowlog
innodb_data_file_path = ibdata1:1G:autoextend
innodb_buffer_pool_size = 8G
#innodb_buffer_pool_instances = 8
innodb_spin_wait_delay = 30
innodb_flush_log_at_trx_commit = 1
innodb_log_buffer_size = 64M
innodb_log_file_size = 256M
innodb_log_files_in_group = 3
innodb_max_dirty_pages_pct = 50
innodb_lock_wait_timeout = 10
innodb_rollback_on_timeout= 1
innodb_print_all_deadlocks = 1
innodb_status_file = 1
innodb_read_io_threads = 16
innodb_write_io_threads = 16
innodb_io_capacity = 1000
#innodb_max_io_capacity = 2000
innodb_flush_neighbors = 1
innodb_adaptive_flushing = 1
innodb_flush_method = O_DIRECT
innodb_lru_scan_depth = 4000
innodb_checksum_algorithm = crc32
innodb_buffer_pool_load_at_startup = 1
innodb_buffer_pool_dump_at_shutdown = 1
innodb_sync_spin_loops = 100
#innodb_support_xa = 0
innodb_thread_concurrency = 0
innodb_thread_sleep_delay = 500
#innodb_file_io_threads    = 4
innodb_concurrency_tickets = 1000
#innodb_file_format = Barracuda
innodb_purge_threads=4
innodb_page_cleaners = 4
innodb_open_files = 65535
innodb_purge_batch_size = 32
innodb_old_blocks_pct=75
innodb_change_buffering=all
innodb_online_alter_log_max_size = 4G
internal_tmp_disk_storage_engine = InnoDB
innodb_stats_on_metadata = 0
innodb_max_undo_log_size=4G
innodb_status_output = 0
innodb_status_output_locks = 0

#=========>[innodb monitor]<============
innodb_monitor_enable="module_innodb"
innodb_monitor_enable="module_server"
innodb_monitor_enable="module_dml"
innodb_monitor_enable="module_ddl"
innodb_monitor_enable="module_trx"
innodb_monitor_enable="module_os"
innodb_monitor_enable="module_purge"
innodb_monitor_enable="module_log"
innodb_monitor_enable="module_lock"
innodb_monitor_enable="module_buffer"
innodb_monitor_enable="module_index"
innodb_monitor_enable="module_ibuf_system"
innodb_monitor_enable="module_buffer_page"
innodb_monitor_enable="module_adaptive_hash"

#======>[mysql security]<==============
validate_password_policy = STRONG
validate-password = FORCE_PLUS_PERMANENT
validate_password_dictionary_file = /data/3306/dbdata/pwd_dict_file.txt
EOF
3.4, 创建目录、以及授权
mkdir -pv /data/3306/{
   dbdata,binlog,relaylog,slowlog,tmp}
chown -R mysql.mysql /data/3306/
chown -R mysql.mysql /usr/local/mysql/
3.5,初始化
cd /usr/local/mysql-5.7.26-linux-glibc2.12-x86_64
bin/mysqld --initialize --basedir=/usr/local/mysql --datadir=/data/3306/dbdata --user=mysql
3.6,添加环境变量
echo 'export PATH=/usr/local/mysql/bin:$PATH' > /etc/profile.d/mysql-5.7.sh
echo '/usr/local/mysql/lib' > /etc/ld.so.conf.d/mysql-5.7.42.conf && ldconfig
exec bash
3.7,做启动项
cp /usr/local/mysql-5.7.26-linux-glibc2.12-x86_64/support-files/mysql.server /etc/init.d/mysql
配置启动文件
vim /etc/init.d/mysql

basedir=/usr/local/mysql
datadir=/data/3306/dbdata
chown -R root.root   /etc/init.d/mysql
chmod +x /etc/init.d/mysql
chkconfig --level 35 mysql on
service mysql start
3.8,登录mysql,修改密码
###获取mysql密码
grep 'root@localhost:'  /data/3306/slowlog/error.log |  awk  -F 'root@localhost: ' '{print $2}'

###修改密码
mysql -uroot -p

alter user root@localhost identified by 'Zbx@2023';
flush privileges;
四,zabbix安装
4.1,创建用户和组
groupadd --system zabbix
useradd --system -g zabbix -d /usr/local/zabbix -s /sbin/nologin -c "Zabbix Monitoring System" zabbix

或者
useradd -M -s /sbin/nologin zabbix
4.2,安装编译所需的依赖,这里根据启用的模块不一样,所需要的依赖也不一样(内网环境需要在公网上下载 go 》“golang”的rpm包)
yum install gcc mysql-devel libevent-devel libcurl-devel libxml2-devel libssh2-devel OpenIPMI-devel net-snmp-devel go java-devel -y
4.3,下载上传zabbix-5.0.39.tar.gz源码包并解压
tar -xvf zabbix-5.0.39.tar.gz
mkdir /usr/local/zabbix
4.4,向数据库导入数据
cd  /usr/local/zabbix-5.0.39/database/mysql

登录mysql
mysql -uroot -p

创建zabbix库
create database zabbix character set utf8 collate utf8_bin;
###创建用户
grant all privileges on *.* to zabbix@'127.0.0.1' identified by 'Zbxpass@2019';
flush privileges;

导入zabbix数据
use zabbix;

source schema.sql;
source images.sql;
source data.sql;

quit
4.5,编译安装zabbix
cd /usr/local/zabbix-5.0.39

./configure --prefix=/usr/local/zabbix  --enable-server --enable-agent --with-mysql --enable-ipv6 --with-net-snmp --with-libcurl --with-libxml2 --with-openipmi --with-ssh2 --enable-java

make install
4.6,修改配置文件
cp /usr/local/zabbix/etc/zabbix_server.conf{
   ,.bak}
cd /usr/local/zabbix/etc

cat >zabbix_server.conf<<\EOF
ListenPort=10051
SourceIP=10.10.10.11
LogType=file
LogFile=/usr/local/zabbix/logs/zabbix_server.log
LogFileSize=100
DebugLevel=3
PidFile=/usr/local/zabbix/zabbix_server.pid
DBHost=127.0.0.1
DBName=zabbix
DBUser=zabbix
DBPassword=Zbx@2023
DBPort=3306
StartPollers=200
StartPreprocessors=60
StartPollersUnreachable=20
StartTrappers=30
StartPingers=5
StartDiscoverers=10
StartEscalators=3
StartAlerters=10
ListenIP=0.0.0.0
HousekeepingFrequency=2
CacheSize=4096M
StartDBSyncers=8
HistoryCacheSize=512M
TrendCacheSize=256M
ValueCacheSize=256M
Timeout=30
UnreachablePeriod=90
UnreachableDelay=30
LogSlowQueries=3000
StartProxyPollers=3
ProxyConfigFrequency=3600
ProxyDataFrequency=1
AllowRoot=0
User=zabbix
JavaGateway=127.0.0.1
JavaGatewayPort=10052
StartJavaPollers=5
EOF
4.7,创建相关配置目录及权限设置
mkdir -p /usr/local/zabbix/logs
mkdir /var/run/zabbix
chown zabbix.zabbix /var/run/zabbix/
chown zabbix.zabbix /usr/local/zabbix/ -R
4.8,做启动项
cp /usr/local/zabbix-5.0.39/misc/init.d/fedora/core/zabbix_server /etc/init.d/

vim /etc/init.d/zabbix_server

        # Zabbix-Directory
        BASEDIR=/usr/local/zabbix	         #修改zabbix安装的位置
        # Binary File
        BINARY_NAME=zabbix_server
        # Full Binary File Call
        FULLPATH=$BASEDIR/sbin/$BINARY_NAME
        # PID file
        PIDFILE=$BASEDIR/$BINARY_NAME.pid	#定义zabbix安装位置的变量
chmod +x /etc/init.d/zabbix_server
chkconfig zabbix_server on
service zabbix_server start
service zabbix_server status
4.9,或者配置systemd启动
cat <<EOF > /etc/systemd/system/zabbix-server.service
[Unit]
Description=Zabbix Server
After=syslog.target network.target network-online.target
Wants=network.target network-online.target

[Service]
Type=simple
User=root
ExecStart=/usr/local/zabbix/sbin/zabbix_server -c /usr/local/zabbix/etc/zabbix_server.conf
RemainAfterExit=yes
PIDFile=/usr/local/zabbix/zabbix_server.pid

[Install]
WantedBy=multi-user.target
EOF
加入开机启动并启动
systemctl daemon-reload
systemctl enable zabbix-server --now
systemctl start zabbix-server
4.10,前端访问配置项
mkdir -p /usr/local/webapp/zabbix
cp -r /usr/local/zabbix-5.0.39/ui/* /usr/local/webapp/zabbix
cd /usr/local/webapp/zabbix/conf/
cp zabbix.conf.php.example zabbix.conf.php
cat zabbix.conf.php
<?php
// Zabbix GUI configuration file.

$DB['TYPE']				= 'MYSQL';
$DB['SERVER']			= '127.0.0.1';
$DB['PORT']				= '3306';
$DB['DATABASE']			= 'zabbix';
$DB['USER']				= 'zabbix';
$DB['PASSWORD']			= 'passwordxxxxx';
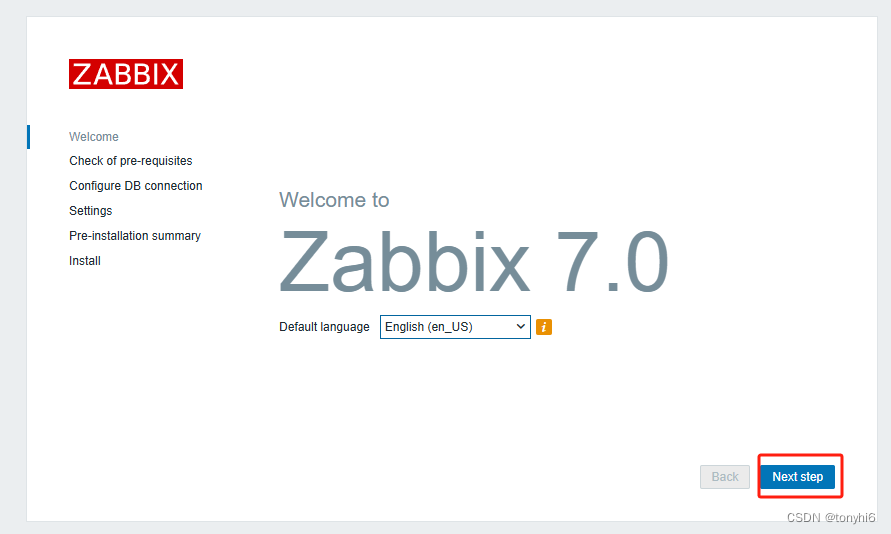
4.11,前端访问zabbix,并配置安装
http://10.10.10.11:54110/zabbix
4.12,前端配置可参考如下
https://blog.csdn.net/xiaohuai0444167/article/details/128801590?spm=1001.2014.3001.5501
五,安装zabbix-agent
5.1,安装agent
tar -xvf zabbix-5.0.39.tar.gz
mkdir /usr/local/zabbix
cd /usr/local/zabbix
./configure --prefix=/usr/local/zabbix  --enable-agent

make install
5.2,编辑配置文件
cp /usr/local/zabbix/etc/zabbix_agent.conf{
   ,.bak}
cd /usr/local/zabbix/etc
cat >zabbix_agentd.conf<<\EOF
# zabbix-agent 服务进程pid
PidFile=/usr/local/zabbix/zabbix_agentd.pid
# zabbix-agent 日志记录类型为本地file
LogType=file
# zabbix-agent 日志文件路径
LogFile=/usr/local/zabbix/logs/zabbix_agentd.log
# zabbix-agent 日志回滚大小,单位为兆/M
LogFileSize=1
# zabbix-agent 日志记录级别 1-5
DebugLevel=3
# zabbix-agent 连接使用的源地址(多ip地址时可以指定)
SourceIP=10.10.10.10
# 是否允许zabbix-server执行远程命令请求,0表示不允许
EnableRemoteCommands=1
# zabbix-server执行远程命令是否记录日志,1表示记录
LogRemoteCommands=1
# zabbix-agent被动检测时zabbix-server地址,可以使用主机名或者IP地址,多个主机之间使用逗号隔开,只有出现在该列表中的主机才能执行相关命令,比如zabbix_get
Server=10.10.10.11
# zabbix-agent 监听的tcp端口,默认为10050
ListenPort=10050
# zabbix-agent 监听的ip地址
ListenIP=0.0.0.0
# zabbix-agent listent进程启动的进程数
StartAgents=3
# zabbix-agent 主动检测时,zabbix-server的地址
ServerActive=10.10.10.11
# zabbix-agent 主动检测生效时,zabbix-server定义监控主机名字必须与这里保持一致,且大小写敏感
Hostname=10.10.10.10
# zabbix-agent 进程默认不允许以root身份启动
AllowRoot=0
# zabbix-agent 进程启动的用户
User=zabbix
# 用户自定义key文件路径
Include=/usr/local/zabbix/etc/zabbix_agentd.userparams.conf
# 是否允许自定义key参数使用特殊字符,1表示可以使用
UnsafeUserParameters=1
# 等待超时时间
Timeout=15
EOF
5.3,配置启动项
cp /usr/local/zabbix-5.0.39/misc/init.d/fedora/core/zabbix_agentd /etc/init.d/

vim /etc/init.d/zabbix_agentd

        # Zabbix-Directory
        BASEDIR=/usr/local/zabbix	         #修改zabbix安装的位置
        # Binary File
        BINARY_NAME=zabbix_agentd
        # Full Binary File Call
        FULLPATH=$BASEDIR/sbin/$BINARY_NAME
        # PID file
        PIDFILE=$BASEDIR/$BINARY_NAME.pid	#定义zabbix安装位置的变量
chmod +x /etc/init.d/zabbix_agentd
chkconfig zabbix_agentd on
service zabbix_agentd start
service zabbix_agentd status
备注:可参考zabbix6.0LTS版本安装文档
https://blog.csdn.net/xiaohuai0444167/article/details/128801590?spm=1001.2014.3001.5501