一,虚拟机安装
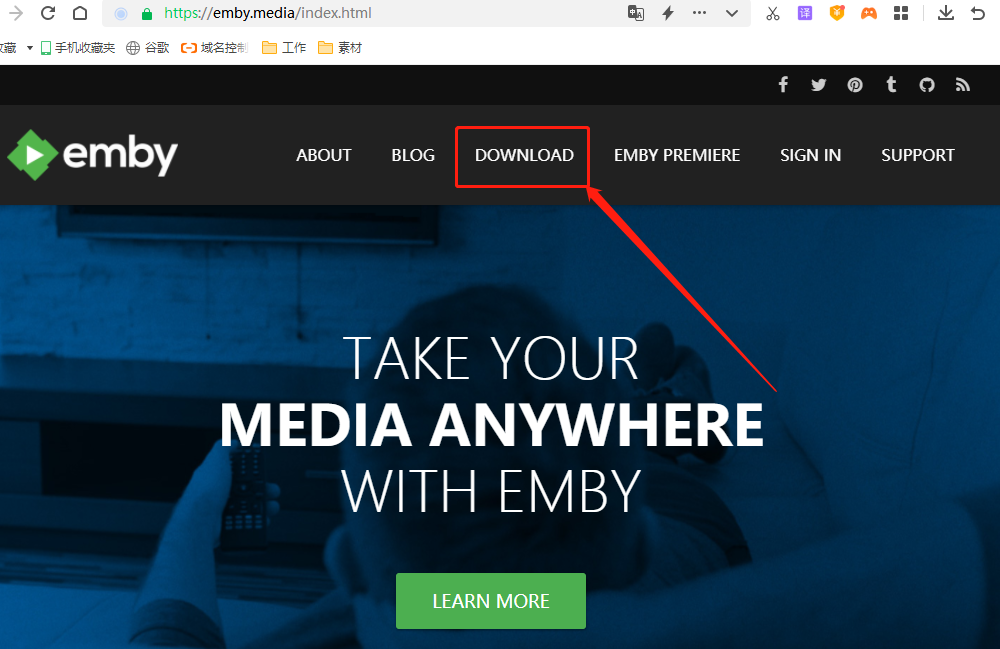
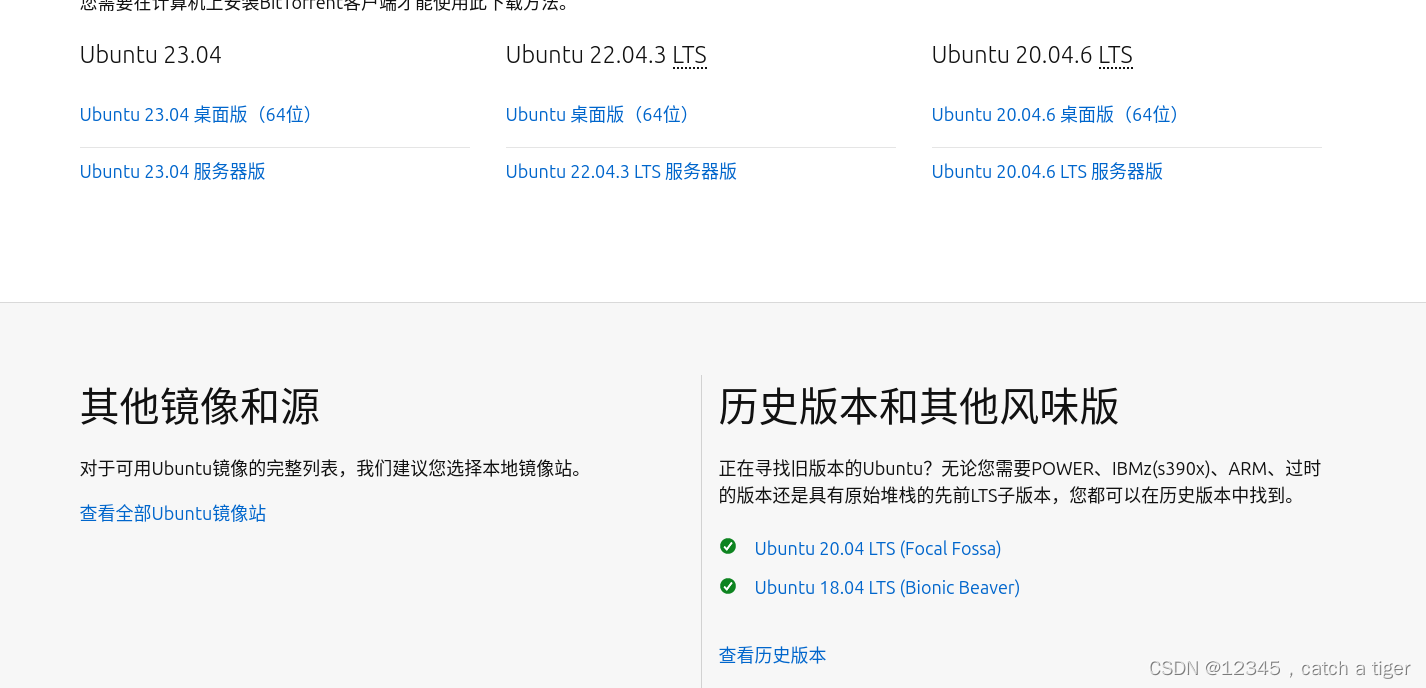
1.1 进入https://cn.ubuntu.com/download中文官网下载iso镜像

1.2 这里我们下载Ubuntu 18.04 LTS
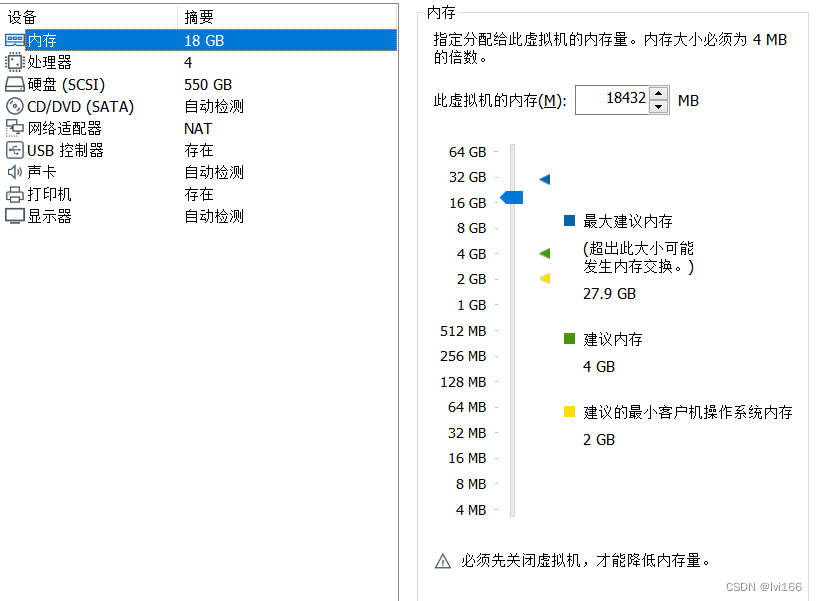
1.3虚拟VM机安装ubuntu系统,注意编译源码需要至少16G运行内存和400G磁盘空间,尽量设大点

二 配置编译环境
2.1 下载android源码,安装python
apt-get install python (Repo 是基于 Python 2.x 中的特定功能构建的,与 Python 3 不兼容。要使用 Repo,请安装 Python 2.x:)
如果是 Ubuntu 18.04 只能使用python2.x
如果是Ubuntu 20.04 则使用python3.x
由于环境变量默认python,所以用python3 -v才能获取指令。
不过我们可以合并,使用以下命令
sudo ln -s /usr/bin/python3 /usr/bin/python
这样python -v就可以获取指令了
遇到错误,无root权限
apt-get install python
E: 无法打开锁文件 /var/lib/dpkg/lock-frontend - open (13: 权限不够)
E: 无法获取 dpkg 前端锁 (/var/lib/dpkg/lock-frontend),请查看您是否正以 root 用户运行?解决方法:
输入su root 获得权限
如果提示认证失败,则改下密码
dong@dong:~/桌面$ su root
密码:
su: 认证失败解决方法:
修改 root 用户密码
sudo passwd root
再次输入命令apt-get install python,遇到错误,资源占用,再次输入命令apt-get install python,这个时候可以安装成功了
E: 无法获得锁 /var/lib/dpkg/lock-frontend - open (11: 资源暂时不可用)
E: 无法获取 dpkg 前端锁 (/var/lib/dpkg/lock-frontend),是否有其他进程正占用它?解决方法:
先执行卸载:sudo rm /var/lib/dpkg/lock
然后再执行命令重新配置一下:sudo dpkg --configure -a
再次运行安装命令:sudo apt-get install python
如果出现以下错误,被加锁
dong@dong:~$ sudo dpkg --configure -a
dpkg: 错误: 另外一个进程已经为 dpkg frontend 加锁解决方法:依次执行以下命令
sudo rm /var/lib/dpkg/updates/*
sudo apt-get update
sudo apt-get upgrade
卸载更新python版本
检查版本
python --version
卸载版本
sudo apt-get purge python<版本号>
删除Python安装目录
sudo rm -rf /usr/lib/python<版本号>
清理残留文件
sudo apt-get autoremove
sudo apt-get autoclean
验证卸载结果,如果输出显示 “command not found” 或类似的消息,说明Python已成功卸载。
python --version
如果需要指定python,则按下面的操作
sudo apt install python3
sudo update-alternatives --install /usr/bin/python python /usr/bin/python2.7(python2安装地址) 2(权重号)
sudo update-alternatives --install /usr/bin/python python /usr/bin/python3.7(python3的安装地址) 3(权重号)sudo update-alternatives --config python
2.2 安装Git & 配置Git信息
sudo apt-get install git
git config --global user.name dong
git config --global user.email 809459535@qq.com
2.3 安装curl
sudo apt-get install curl
如果直接下载源码会报错, 提示需要curl
dong@dong:~/桌面$ curl https://storage.googleapis.com/git-repo-downloads/repo > ~/.bin/repo
Command 'curl' not found, but can be installed with:
sudo snap install curl # version 8.1.2, or
sudo apt install curl # version 7.68.0-1ubuntu2.20See 'snap info curl' for additional versions.
我们根据提示输入
sudo snap install curl # version 8.1.2
2.4 下载repo
mkdir ~/bin
PATH=~/bin:$PATH
curl https://storage.googleapis.com/git-repo-downloads/repo > ~/bin/repo
chmod a+x ~/bin/repo
//打开环境变量文件
sudo vim /etc/profile
添加下面两行
export PATH=~/.bin:$PATH
export REPO_URL=https://mirrors.tuna.tsinghua.edu.cn/git/git-repo///刷新缓存
source /etc/profile
下载报错
curl https://storage.googleapis.com/git-repo-downloads/repo > ~/bin/repo
% Total % Received % Xferd Average Speed Time Time Time Current
Dload Upload Total Spent Left Speed
0 0 0 0 0 0 0 0 --:--:-- --:--:-- --:--:-- 0
curl: (35) OpenSSL SSL_connect: SSL_ERROR_SYSCALL in connection to storage.googleapis.com:443解决办法:需要fanqiang,我们切换为清华镜像:
curl https://mirrors.tuna.tsinghua.edu.cn/git/git-repo > ~/bin/repo
repo文件可能会报错,出现以下错误,
我们检测到您所在的子网和/或所使用的客户端存在大量下载某些较大二进制文件的行为,为保证用户的正常使用,我们阻断了此类请求。
We have detected enormous traffic from your network or client and have blocked your requests to ensure the quality of service for normal users.
Nous avons détecté un grand nombre de téléchargements de certains fichiers binaires volumineux à partir de votre sous-réseau et/ou du client que vous utilisez et avons bloqué ces requêtes pour garantir un accès normal aux utilisateurs.
お客様のサブネットおよび/またはクライアントで、特定の大きなバイナリのダウンロードを多数検出しました。お客様の通常の使用のためこれらのリクエストをブロックさせていただきます。
您可以尝试更改网络环境或更换客户端;您也可以联系 support@tuna.tsinghua.edu.cn 并附上下方的标识符。
解决:
这个可能是连接的公共不安全的网络,禁止下载大型二进制文件,我们主机换个wifi,再次执行repo应该就可以了
执行sudo vim /etc/profile,报错找不到vim命令
dong@dong:~/桌面$ sudo vim /etc/profile
sudo: vim:找不到命令解决方法:需要安装vim
sudo apt-get install vim
2.5 创建源码存放目录
mkdir aosp (根据实际情况来新建目录)
cd aosp
报错,提示无法创建目录
mkdir: 无法创建目录"/home/ubuntu/aosp": 没有那个文件或目录
解决:
先进入root模式:
sudo -s
再进入home目录
cd /home
再创建 ubuntu目录
mkdir /home/ubuntu/
再创建 aosp目录
mkdir /home/ubuntu/aosp
2.6 查看要下载的分支
git clone https://aosp.tuna.tsinghua.edu.cn/platform/manifest
cd manifest/
git branch -a用q退出预览
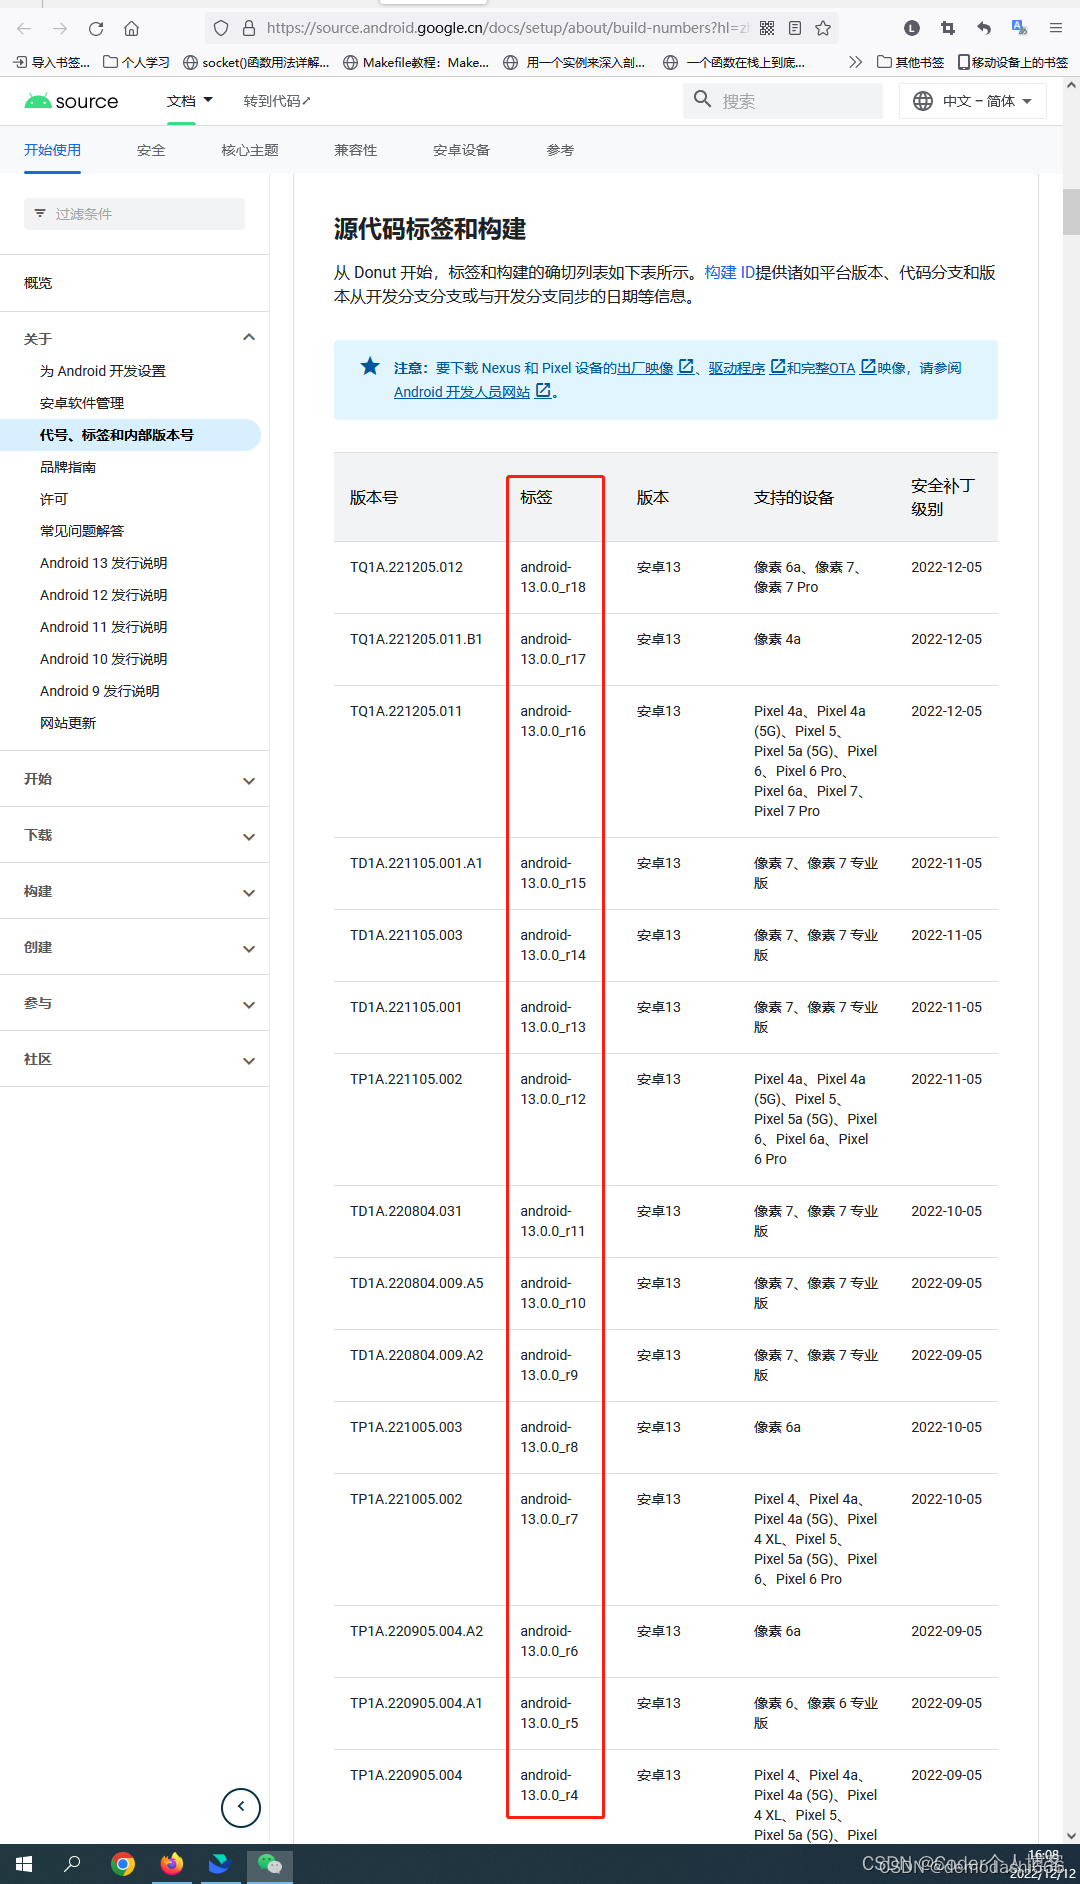
或者Google官网查看版本代号标记
https://source.android.com/docs/setup/about/build-numbers?hl=zh-cn#source-code-tags-and-builds
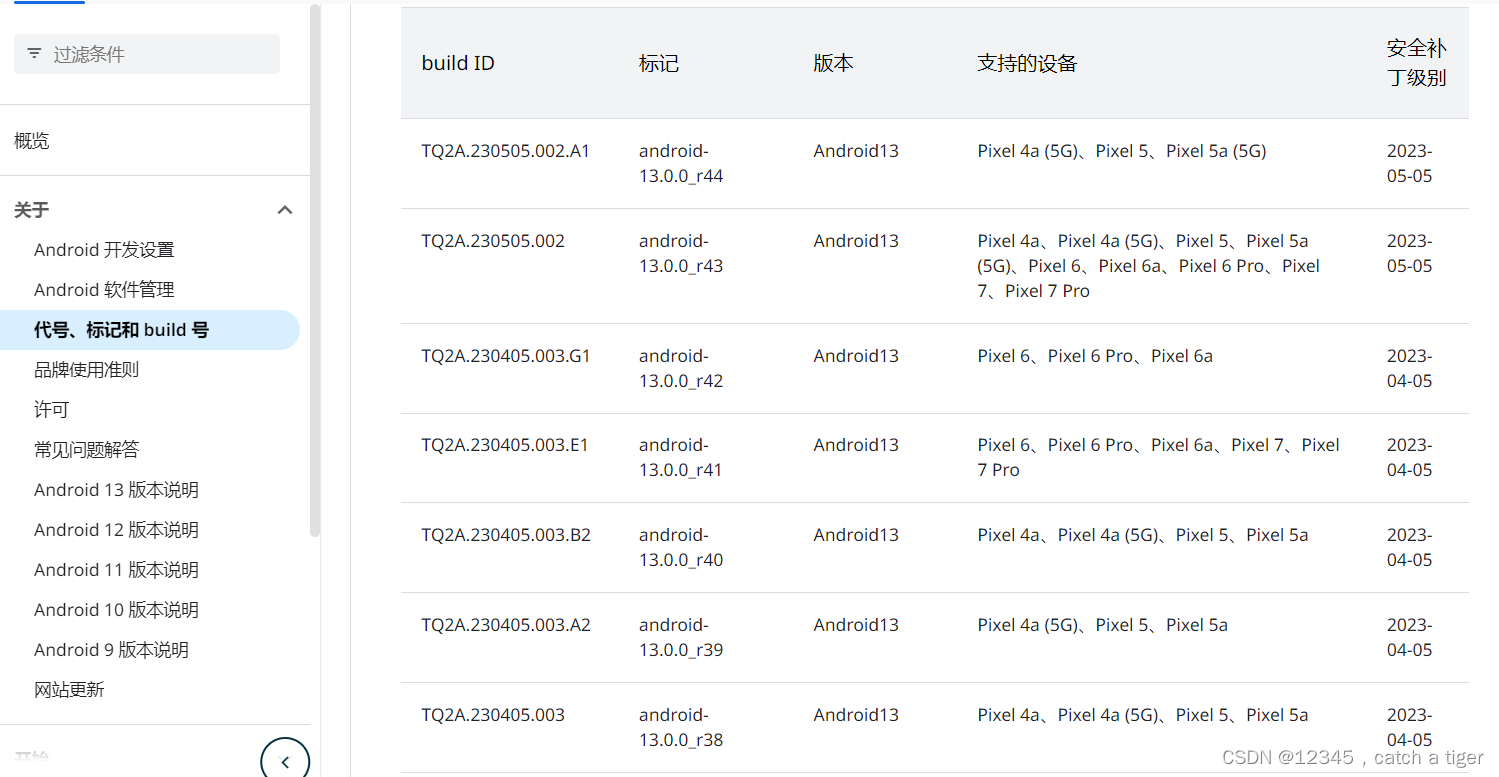
比如Android7.1.0的 对应的标记
| NDE63X | android-7.1.0_r7 | Nougat | Pixel XL、Pixel | 2016-11-05 |
| NDE63V | android-7.1.0_r6 | Nougat | Pixel XL、Pixel | 2016-11-05 |
| NDE63U | android-7.1.0_r5 | Nougat | Pixel XL、Pixel | 2016-11-05 |
| NDE63P | android-7.1.0_r4 | Nougat | Pixel XL、Pixel | 2016-10-05 |
| NDE63L | android-7.1.0_r2 | Nougat | Pixel XL、Pixel | 2016-10-05 |
| NDE63H | android-7.1.0_r1 | Nougat | Pixel XL、Pixel | 2016-10-05 |
2.7 初始化仓库
repo init -u https://aosp.tuna.tsinghua.edu.cn/platform/manifest
2.8 repo指定Android版本
repo init -u https://aosp.tuna.tsinghua.edu.cn/platform/manifest -b android-7.1.0_r1
repo init -u https://aosp.tuna.tsinghua.edu.cn/platform/manifest -b android-9.0.0_r46
repo init -u https://mirrors.tuna.tsinghua.edu.cn/git/AOSP/platform/manifest -b android-13.0.0_r35
repo init -u https://mirrors.tuna.tsinghua.edu.cn/git/AOSP/platform/manifest -b android-7.1.0_r1
报错:没有python文件夹
dong@dong:~/桌面/aosp$ repo init -u https://mirrors.tuna.tsinghua.edu.cn/git/AOSP/platform/manifest -b android-13.0.0_r35
/usr/bin/env: “python”: 没有那个文件或目录解决:
查看python安装位置
whereis python3
显示如下:
python3: /usr/bin/python3.8 /usr/bin/python3 /usr/lib/python3.8 /usr/lib/python3.9 /usr/lib/python3 /etc/python3.8 /etc/python3 /usr/local/lib/python3.8 /usr/include/python3.8 /usr/share/python3 /usr/share/man/man1/python3.1.gz
sudo ln -s /usr/bin/python3 /usr/bin/python
报错,不能下载google的仓库,需要切换清华镜像
root@dong:/home/dong/桌面/aosp# repo init -u https://aosp.tuna.tsinghua.edu.cn/platform/manifest -b android-7.1.0_r1
Downloading Repo source from https://gerrit.googlesource.com/git-repo
fatal: Cannot get https://gerrit.googlesource.com/git-repo/clone.bundle
fatal: error [Errno 111] Connection refused
fatal: double check your --repo-rev setting.
fatal: cloning the git-repo repository failed, will remove '.repo/repo'解决:
打开全局变量配置文件
sudo gedit ~/.bashrc
添加全局变量我,们在末尾添加这两行并保存:
export REPO_URL='https://mirrors.tuna.tsinghua.edu.cn/git/git-repo/'使配置文件生效
source ~/.bashrc
报错,找不到repo命令
root@dong:/home/dong/桌面/aosp# repo init -u https://aosp.tuna.tsinghua.edu.cn/platform/manifest -b android-7.1.0_r1
找不到命令“repo”,您的意思是:
command 'reno' from deb python3-reno (2.11.2-2build1)
command 'repl' from deb mailutils-mh (1:3.7-2.1)
command 'repl' from deb mmh (0.4-2)
command 'repl' from deb nmh (1.7.1-6)
command 'rep' from deb rep (0.92.5-3build5)
command 'repc' from deb qtchooser (66-2build1)尝试 apt install <deb name>
解决:
卸载重装repo
sudo apt-get remove repo
如果提示版本不对,就按命令安装repo
root@dong:/home/dong/aosp# repo init -u https://aosp.tuna.tsinghua.edu.cn/platform/manifest -b android-7.1.0_r1
Command 'repo' not found, but can be installed with:
snap install git-repo # version 1.12.37-3, or
apt install repoSee 'snap info git-repo' for additional versions.
解决:
apt install repo
报错,repo设置失败
dong@dong:~/桌面/aosp$ repo init -u https://mirrors.tuna.tsinghua.edu.cn/git/AOSP/platform/manifest -b android-13.0.0_r35
Downloading Repo source from https://gerrit.googlesource.com/git-repo
fatal: Cannot get https://gerrit.googlesource.com/git-repo/clone.bundle
fatal: error [Errno 111] Connection refused
fatal: double check your --repo-rev setting.
fatal: cloning the git-repo repository failed, will remove '.repo/repo'解决:
重新初始化repo,设置repo环境变量
export PATH=~/.bin:$PATH
export REPO_URL=https://mirrors.tuna.tsinghua.edu.cn/git/git-repo/
成功实例:
dong@dong:~/桌面/aosp$ repo init -u https://mirrors.tuna.tsinghua.edu.cn/git/AOSP/platform/manifest -b android-13.0.0_r35
Downloading Repo source from https://mirrors.tuna.tsinghua.edu.cn/git/git-repo/
remote: Enumerating objects: 4882, done.
remote: Counting objects: 100% (4882/4882), done.
remote: Compressing objects: 100% (2422/2422), done.
remote: Total 8618 (delta 4305), reused 2460 (delta 2460), pack-reused 3736
接收对象中: 100% (8618/8618), 4.18 MiB | 3.54 MiB/s, 完成.
处理 delta 中: 100% (5569/5569), 完成.
2.9 同步源码
repo sync j8(j8是开启的线程数量,等待源代码下载完成,长时间等待,若失败请检查网络等情况)
开始下载源码,大概需要5到6个小时,占了100多G的磁盘空间
开始同步
dong@dong:~/桌面/aosp$ repo sync
remote: Enumerating objects: 5288, done.
remote: Counting objects: 0% (1/5288)
remote: Counting objects: 1% (53/5288)
remote: Counting objects: 2% (106/5288)
remote: Counting objects: 3% (159/5288)
remote: Counting objects: 4% (212/5288)
remote: Counting objects: 5% (265/5288)
remote: Counting objects: 6% (318/5288)
remote: Counting objects: 7% (371/5288)下载成功,4到5个钟头
处理 delta 中: 95% (32415/34113)
处理 delta 中: 96% (32750/34113)
处理 delta 中: 97% (33208/34113)
处理 delta 中: 98% (33455/34113)
处理 delta 中: 99% (34110/34113)
处理 delta 中: 100% (34113/34113)
处理 delta 中: 100% (34113/34113), 完成 413 个本地对象.
Fetching: 22% (252/1135) 1:10:04 | 4 jobs | 5:19 platform/external/icu @ exter..
Fetching: 100% (1135/1135), done in 4h53m27.407s更新,又需要1个小时
Checking out: 95% (1083/1135) platform/prebuilts/vndk/v29正在更新文件: 73% (531Checking out: 97% (1103/1135) platform/system/keymaster正在更新文件: 73% (533/7正在更新文件: 100% (724/724), 完成.
正在更新文件: 100% (119/119), 完成.
正在更新文件: 100% (111/111), 完成.
Checking out: 97% (1108/1135) platform/prebuilts/gcc/linux-x86/host/x86_64-linuxChecking out: 97% (1109/1135) platform/prebuilts/gcc/linux-x86/host/x86_64-w64-mChecking out: 99% (1129/1135) platform/prebuilts/module_sdk/OnDevicePersonalizatChecking out: 100% (1135/1135), done in 1h23m34.934s
repo sync has finished successfully.
2.10 如果出现失败可以把repo脚本里面替换REPO_URL镜像源
REPO_URL = "https://gerrit.googlesource.com/git-repo"
换为
REPO_URL = 'https://mirrors.tuna.tsinghua.edu.cn/git/git-repo'

三 linux vim 编辑 保存 退出
vim /etc/profile
3.2 编辑文件
按 i 进行编辑
3.3 保存与退出
首先按esc键返回命令编辑模式,刚才的Insert会消失
按英文状态的 :
:q! 不保存文件,强制退出
:w 保存文件,不退出vi命令
:wq 保存文件,退出vi命令
四 驱动下载
4.1 官网下载对应版本的驱动
https://developers.google.cn/android/drivers#redfintp1a.221105.002
4.2 找到piexl 5对应的驱动文件
4.3 解压到aosp根目录
tar -xvzf qcom-redfin-tp1a.221005.002-e7e20f49.tgz -C ~/GitProjects/aosp/
tar -xvzf google_devices-redfin-tp1a.221005.002-3daf7ea0.tgz -C ~/GitProjects/aosp/
4.4 运行解压出来的脚本
./extract-qcom-redfin.sh
./extract-google_devices-redfin.sh
五 AOSP项目源码结构
- abi Application Binary Interface 应用程序二进制接口,abi相信同学们在SO库调用上遇到过,如果不支持该平台的话就说不ABI不支持。
- art Android Runtime 安卓运行时。这个会提前把字节码编译成二进制机器码保存起来,执行的时候加载速度比较快。Dalvik虚拟机则是在加载以后再去编译的,所以速度上ART会比Dalvik快一点。牺牲空间来赢取时间。
- bionic 基础库,Android系统与Linux内核的桥梁。Bionic 音标为 bīˈänik,翻译为"仿生"。
- bootable 系统启动引导相关程序
- build 用于构建Android系统的工具,也就是用于编译Android系统的
- cts Compatibility Test Suite 兼容性测试
- dalvik dalvik虚拟机,用于解析执行dex文件的虚拟机
- developers 开发者目录
- developerment 开发目录,比如说应用,application就在里面了,apps
- devices 设备相关的配置信息,什么索尼、HTC、自己的产品,就可以定义在这个目录下了
- docs 文档
- external 开源模组相关文件
- frameworks 系统架构,Android的核心了
- hardware hal层代码,硬件抽象层
- libcore 核心库
- libnativehelper native帮助库,实现JNI的相关文件
- ndk native development kit
- out 输出目录,编译以后生成的目录,相关的产出就在这里了
- packages 应用程序包。一些系统的应用就在这里了,比如说蓝牙,Launcher,相机,拨号之类的。
- pdk Plug-in Development Kit (PDK) is designed to help you build your own pattern projects
- platform_testing 平台测试
- prebuilts x86/arm架构下预编译的文件
- sdk software development kit
- system 底层系统文件
- toolchain 工具链
- tools 工具文件
- Makefile mk文件,用于控制编译
六 系统编译
6.1 Android10以上需要安装以下工具包
sudo apt install unzip zip libssl-dev libffi-dev gnupg flex bison gperf build-essential curl zlib1g-dev gcc-multilib g++-multilib libc6-dev-i386 lib32ncurses5-dev x11proto-core-dev libx11-dev libz-dev ccache libgl1-mesa-dev libxml2-utils xsltproc
6.2 安装openjdk8
sudo apt-get install openjdk-8-jdk
(安装不成功检查ubuntu是否换源、是否有更新软件包列表)
sudo apt-get update
6.3 安装依赖
sudo apt-get install libx11-dev:i386 libreadline6-dev:i386 libgl1-mesa-dev g++-multilib
sudo apt-get install -y git flex bison gperf build-essential libncurses5-dev:i386
sudo apt-get install tofrodos python-markdown libxml2-utils xsltproc zlib1g-dev:i386
sudo apt-get install dpkg-dev libsdl1.2-dev libesd0-dev
sudo apt-get install git-core gnupg flex bison gperf build-essential
sudo apt-get install zip curl zlib1g-dev gcc-multilib g++-multilib
sudo apt-get install libc6-dev-i386
sudo apt-get install lib32ncurses5-dev x11proto-core-dev libx11-dev
sudo apt-get install libgl1-mesa-dev libxml2-utils xsltproc unzip m4
sudo apt-get install lib32z-dev ccache
sudo apt-get install libssl-dev
如果安装 sudo apt-get install libesd0-dev 报 Unable to locate package libesd0-dev 这个错,解决办法
sudo gedit /etc/apt/sources.list //在行尾添加如下两行的内容
deb http://us.archive.ubuntu.com/ubuntu/ xenial main universe
deb-src http://us.archive.ubuntu.com/ubuntu/ xenial main universe
6.4 设置启用ccache (加快重新编译源码时的速度。可选)
export USE_CCACHE=1 (在你home主目录的.bashrc中加入)
export CCACHE_DIR=/home/ubuntu/.ccache (指定一个缓存目录,也可以不指定,默认目录为你当前用户目录下的.ccache)
aosp/prebuilts/misc/linux-x86/ccache/ccache -M 50G (这个命令在Android源码中,缓存大小按照自己的硬盘来适当调整)
source ~/.bashrc (source命令使修改立即生效)
6.5 编译
cd aosp
source build/envsetup.sh
lunch 47 (lunch选定的版本按照实际情况来)
make -j16 (和cpu有关,适当调整数字)
6.6 如果编译报以下错误,则标识内存不足,保证16GB以上内存
98% 392/397] analyzing Android.bp files and generating ninja file at out/soong
FAILED: out/soong/build.ninja
cd “KaTeX parse error: Expected 'EOF', got '&' at position 49: …soong_build")" &̲& BUILDER="PWD/KaTeX parse error: Expected 'EOF', got '&' at position 50: …soong_build")" &̲& cd / && env -…BUILDER” --top “$TOP” --soong_out “out/soong” --out “out” -o out/soong/build.ninja --globListDir build --globFile out/soong/globs-build.ninja -t -l out/.module_paths/Android.bp.list --available_env out/soong/soong.environment.available --used_env out/soong/soong.environment.used.build Android.bp
Killed
00:31:16 soong bootstrap failed with: exit status 1解决:
1. 回到根目录
cd
2. 查看交换区大小
free -m
3. 关闭原来的swap文件
sudo swapoff /swapfile
4. 删除原来的swpa文件
sudo rm /swapfile
5. 重新创建spap文件
sudo dd if=/dev/zero of=/swapfile bs=1G count=16
6. 赋予权限
sudo chmod 0600 /swapfile
7.创建文件系统
sudo mkswap -f /swapfile
8. 开启swapfile
sudo swapon /swapfile
6.7 删除上一次编译的结果,初次编译可以不需要这一步
make clobbe
如果提示make找不到,则需要安装make工具
oot@dong:/home/dong/桌面# make clean
Command 'make' not found, but can be installed with:
apt install make # version 4.2.1-1.2, or
apt install make-guile # version 4.2.1-1.2解决方法:按提示输入以下命令
apt install make # version 4.2.1-1.2
6.8 编译成功会显示下面内容:
Creating filesystem with parameters:
Size: 2147483648
Block size: 4096
Blocks per group: 32768
Inodes per group: 8192
Inode size: 256
Journal blocks: 8192
Label: system
Blocks: 524288
Block groups: 16
Reserved block group size: 127
Created filesystem with 2216/131072 inodes and 199826/524288 blocks
[100% 7669/7669] Install system fs ima.../target/product/generic_x86/system.img
out/target/product/generic_x86/system.img+ maxsize=2192446080 blocksize=2112 total=2147483648 reserve=22146432#### make completed successfully (01:24:41 (hh:mm:ss)) ####
会在源码跟目录out/target/product/angler目录下生成镜像文件:
- system.img:系统镜像
- ramdisk.img:根文件系统镜像
- userdata.img:用户数据镜像
- recovery.img:recovery镜像
- boot.img:启动镜像
- vendor.img:驱动镜像
最终会在 out/target/product/generic_x86/目录生成了三个重要的镜像文件: system.img、userdata.img、ramdisk.img。大概介绍着三个镜像文件:
- system.img:系统镜像,里面包含了Android系统主要的目录和文件,通过init.c进行解析并mount挂载到/system目录下。
- userdata.img:用户镜像,是Android系统中存放用户数据的,通过init.c进行解析并mount挂载到/data目录下。
- ramdisk.img:根文件系统镜像,包含一些启动Android系统的重要文件,比如init.rc。
6.9 其它指令说明
- croot: Changes directory to the top of the tree.
- m: Makes from the top of the tree.
- mm: Builds all of the modules in the current directory.
- mmm: Builds all of the modules in the supplied directories.
- cgrep: Greps on all local C/C++ files.
- jgrep: Greps on all local Java files.
- resgrep: Greps on all local res/*.xml files.
- godir: Go to the directory containing a file.
- clean - m clean 会删除此配置的所有输出和中间文件。此内容与 rm -rf out/ 相同
其中mmm指令就是用来编译指定目录.通常来说,每个目录只包含一个模块.比如这里我们要编译Setting 模块,执行指令:
mmm packages/apps/Settings/
6.8 参考
https://www.cnblogs.com/stlong/p/17654389.html
https://blog.csdn.net/lucky_tom/article/details/127825300
https://blog.csdn.net/m0_37099118/article/details/123767615
https://www.cnblogs.com/stlong/p/17645300.html
https://www.jianshu.com/p/5eaec7be3da7
https://www.jianshu.com/p/197096d3206d
七 Ubuntu上删除AOSP源码
7.1 打开终端,进入AOSP源码的目录。如果你不知道源码的具体位置,可以使用以下命令来查找:这将会在整个系统中搜索build/envsetup.sh文件,该文件存在于AOSP源码目录中。
find / -name "build/envsetup.sh"
7.2 执行以下命令来进入AOSP源码环境:
source build/envsetup.sh
7.3 进入AOSP源码目录:
cd <AOSP源码目录>
7.4 执行以下命令来清除源码:会清除所有生成的文件和目录。
make clean
7..5 删除AOSP源码目录: 会永久删除源码
rm -rf <AOSP源码目录>
八 需要安装的工具集合
sudo apt-get install openjdk-8-jdk //jdk 这个不用说了吧
sudo apt-get install python //Repo 是基于 Python 2.x 中的特定功能构建的,与 Python 3 不兼容
sudo apt-get install phablet-tools //git工具包
sudo apt-get install curl //上传和下载数据的工具
sudo apt-get install build-essential //提供编译程序必须软件包的列表信息
sudo apt-get install make //源码编译工具
sudo apt-get install gcc //GNU编译器套件
sudo apt-get install g++
sudo apt-get install libc6-dev //共享库
sudo apt-get install patch //补丁工具
sudo apt-get install texinfo //文档系统
sudo apt-get install libncurses-dev //系统的必备库
sudo apt-get install git-core gnupg //git的工具包,虽然有git了,但是有备无患
sudo apt-get install ncurses-dev //编译内核的时候需要
sudo apt-get install valgrind //内存检查器
九 模拟器安装
9.1 在Google手机上刷机时需要下载Google硬件驱动,找到对应的机型,点击Link即可下载
下载网址:https://developers.google.cn/android/blobs-preview

9.2 提取驱动,将下载的驱动压缩包拷贝的Android源码根目录,并进行解压,解压后得到一个.sh的脚本
9.3 解压驱动
tar -zxvf google_devices-oriole-sp2a.220305.013.a3-04c512f4.tgz
9.4 执行extract-google_devices-oriole.sh脚本提取驱动,运行提示"Press Enter to view the license"时输入回车后即可,后面输入d来进行翻页
./extract-google_devices-oriole.sh

9.5 直到提示输入"I ACCEPT"时,按提示输入后回车即可完成驱动的提取,完成后源码根目录多了一个vendor的目录

9.6 设置代码编译环境,每次重启shell时都需要配置编译环境,在根目录执行如下命令:
source build/envsetup.sh
或
. build/envsetup.sh
9.7 执行build/envsetup.sh脚本后则在环境中配置几个shell命令,后续即可使用这些命令选择设备目标和编译,输入hmm命令即可查看完整的命令列表:
- lunch: lunch <product_name>-<build_variant>
Selects <product_name> as the product to build, and <build_variant> as the variant to
build, and stores those selections in the environment to be read by subsequent
invocations of 'm' etc.
- tapas: tapas [<App1> <App2> ...] [arm|x86|arm64|x86_64] [eng|userdebug|user]
Sets up the build environment for building unbundled apps (APKs).
- banchan: banchan <module1> [<module2> ...] [arm|x86|arm64|x86_64] [eng|userdebug|user]
Sets up the build environment for building unbundled modules (APEXes).
- croot: Changes directory to the top of the tree, or a subdirectory thereof.
- m: Makes from the top of the tree.
- mm: Builds and installs all of the modules in the current directory, and their
dependencies.
- mmm: Builds and installs all of the modules in the supplied directories, and their
dependencies.
To limit the modules being built use the syntax: mmm dir/:target1,target2.
- mma: Same as 'mm'
- mmma: Same as 'mmm'
- provision: Flash device with all required partitions. Options will be passed on to fastboot.
- cgrep: Greps on all local C/C++ files.
- ggrep: Greps on all local Gradle files.
- gogrep: Greps on all local Go files.
- jgrep: Greps on all local Java files.
- ktgrep: Greps on all local Kotlin files.
- resgrep: Greps on all local res/*.xml files.
- mangrep: Greps on all local AndroidManifest.xml files.
- mgrep: Greps on all local Makefiles and *.bp files.
- owngrep: Greps on all local OWNERS files.
- rsgrep: Greps on all local Rust files.
- sepgrep: Greps on all local sepolicy files.
- sgrep: Greps on all local source files.
- godir: Go to the directory containing a file.
- allmod: List all modules.
- gomod: Go to the directory containing a module.
- pathmod: Get the directory containing a module.
- outmod: Gets the location of a module's installed outputs with a certain extension.
- dirmods: Gets the modules defined in a given directory.
- installmod: Adb installs a module's built APK.
- refreshmod: Refresh list of modules for allmod/gomod/pathmod/outmod/installmod.
- syswrite: Remount partitions (e.g. system.img) as writable, rebooting if necessary.
9.8 使用lunch启动模拟器
lunch sdk_phone_x86_64
9.8 使用lunch启动Car
lunch aosp_oriole-userdebug
不同的设备选择的目标不同,根据Android官网给出的设备目录选项来选择
网址:https://source.android.google.cn/setup/build/running#selecting-device-build

9.9开始编译,输入m或make即可编译整个Android源码,也可使用参数-j指定线程数
m
或
make -j8
如果只编译某一部分,则先切换的对应的目录下,使用mm命令进行编译
mm
十 刷机
10.1 刷机方式
Android模拟设备,输入emulator命令即可启动Android模拟器
emulator -verbose -show-kernel -cores 4
10.2 window系统下载adb和fastboot工具,解压后将目录添加到环境变量中
下载链接:https://developer.android.google.cn/studio/releases/platform-tools#downloads
10.3 手机上启动USB调试
如要在通过 USB 连接的设备上使用 adb,则必须在设备的系统设置中启用 USB 调试
10.4 安装驱动,在设备管理器中找到对应的设备安装驱动,安装好后则会多出一个"Android Device"设备
10.5 解锁加载引导程序
- 在cmd中输入"adb reboot bootloader"进入fastboot模式,查看是否处于锁定模式
- 如果处于锁定模式则输入"fastboot flashing unlock"进行解锁,同时需要在手机上进行确认
- 处于解锁模式后,设备每次启动都会先进入fastboot模式,如需处于锁定模式,则输入"fastboot flashing lock"命令
10.6 刷写设备
- 在cmd中输入"adb reboot bootloader"进入fastboot模式
- 切换到Android镜像目录,输入"fastboot flashall -w"命令即可将镜像刷写到设备中,刷写完成等待设备重启就是运行的原生Android系统了