用数学和C++绘制一些纹理
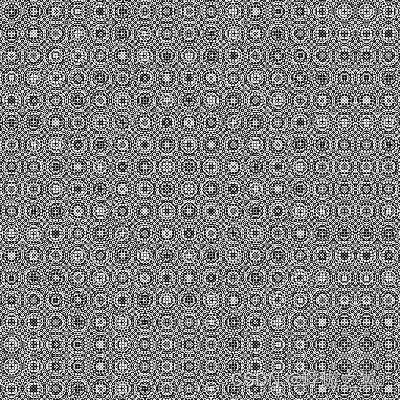
sin(x * x + y * y)
int main() {
	int width = 400; // 宽度
	int height = 400; // 高度
	Mat texture = Mat::zeros(height, width, CV_8UC1);

	for (int y = 0; y < height; ++y) {
	    for (int x = 0; x < width; ++x) {
	        int value = static_cast<int>(255 * sin(x * x + y * y));
	        texture.at<uchar>(y, x) = static_cast<uchar>(value);
	    }
	}

	imshow("Generated Texture", texture);
	imwrite("D:\\doc\\image\\sin(xx+yy).jpg", texture);
	waitKey(0);
    return 0;
}
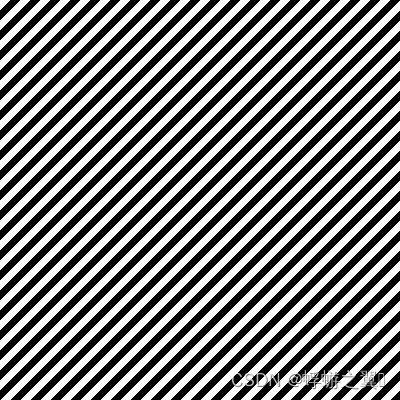
交错斜线
 // 生成交错斜线风格的黑白纹理
    for (int y = 0; y < height; ++y) {
        for (int x = 0; x < width; ++x) {
            if ((x + y) % 20 < 10) {
                texture.at<uchar>(y, x) = 255; // 白色
            }
            else {
                texture.at<uchar>(y, x) = 0; // 黑色
            }
        }
    }
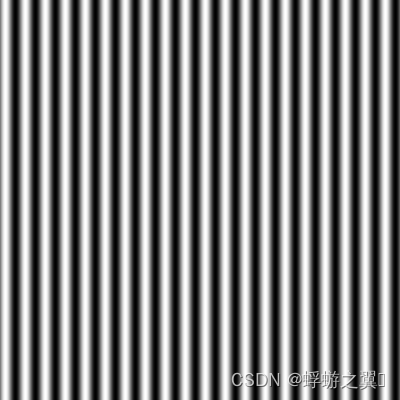
竖纹
int width = 400; // 宽度
int height = 400; // 高度

Mat texture = Mat::zeros(height, width, CV_8UC1);

for (int y = 0; y < height; ++y) {
    for (int x = 0; x < width; ++x) {
        int value = static_cast<int>(255 * 0.5 * (1 + sin(2 * M_PI * x / 20)));//竖纹
    }
}
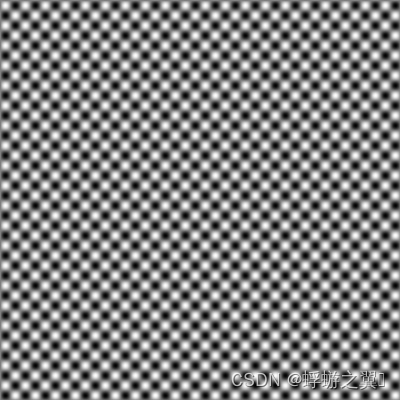
交错方块
int width = 400; // 宽度
int height = 400; // 高度

Mat texture = Mat::zeros(height, width, CV_8UC1);

for (int y = 0; y < height; ++y) {
    for (int x = 0; x < width; ++x) {
        int value = static_cast<int>(255 * 0.5 * (1 + sin(2 * M_PI * x / 20) * sin(2 * M_PI * y / 20)));
    }
}
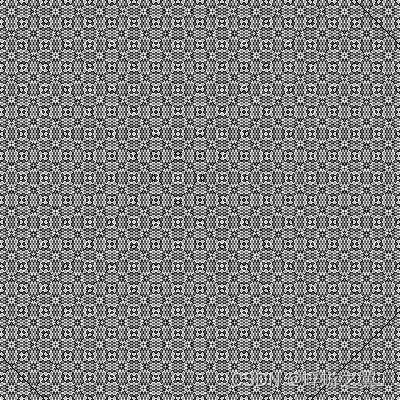
sin(abs(x)) + sin(abs(y))
int width = 400; // 宽度
int height = 400; // 高度

Mat texture = Mat::zeros(height, width, CV_8UC1);

for (int y = 0; y < height; ++y) {
    for (int x = 0; x < width; ++x) {
       int value = static_cast<int>(255 * (sin(abs(x)) + sin(abs(y)))) ;
    }
}
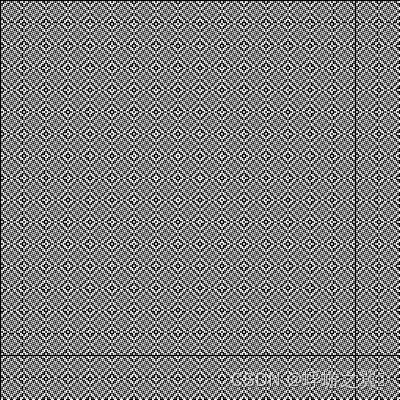
sin(x)*sin(y)
int width = 400; // 宽度
int height = 400; // 高度

Mat texture = Mat::zeros(height, width, CV_8UC1);

for (int y = 0; y < height; ++y) {
    for (int x = 0; x < width; ++x) {
       int value = static_cast<int>(255 * ( sin(x)*sin(y) )) ;
    }
}
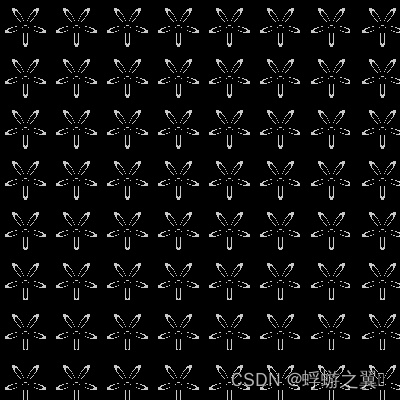
花纹1
公式 坐标系下的函数: r=sin(n*t)
for (int y = 0; y < height; ++y) {
    for (int x = 0; x < width; ++x) {
        int curx = x % 50;
        int cury = y % 50;
        originX = x/50+25;
        originY = y/50+25;
        float t = atan2(cury - originY, curx - originX);
        float r = sqrt((curx - originX) * (curx - originX) + (cury - originY) * (cury - originY));
        float functionValue = sin(n * t);
        if (abs(r - functionValue * 20) < 5) // 乘以20是为了放大图像
        {
            texture.at<uchar>(y, x) = static_cast<uchar>(200);
        }
    }
}
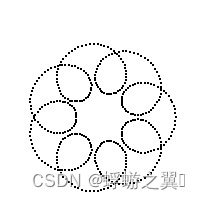
花纹2
void drawFunction() {

    // 创建一个空白图像
    int width = 200;
    int height = 200;
    cv::Mat image(height, width, CV_8UC3, cv::Scalar(255, 255, 255));

    // 设置极坐标参数
    int numPoints = max(width, height)*2;
    double radius = min(width, height)/4;

    // 绘制极坐标曲线
    for (int i = 0; i < numPoints; ++i) {

        double angle = 2 * CV_PI * i / numPoints;
        int x = static_cast<int>(radius * (cos(angle) +cos(angle*8)/2 + sin(0*angle) / 3)) + width / 2; // 将坐标平移到图像中心
        int y = static_cast<int>(radius * (sin(angle) +sin(angle*8)/2 + cos(0*angle)/3)) + height / 2; // 将坐标平移到图像中心
        if (x+1 >= 0 && x+1 < width && y+1 >= 0 && y+1 < height) {

            image.at<cv::Vec3b>(y, x) = cv::Vec3b(0, 0, 0); // 绘制像素点
            image.at<cv::Vec3b>(y+1, x) = cv::Vec3b(0, 0, 0); // 绘制像素点
            image.at<cv::Vec3b>(y, x + 1) = cv::Vec3b(0, 0, 0); // 绘制像素点
            image.at<cv::Vec3b>(y + 1, x + 1) = cv::Vec3b(0, 0, 0); // 绘制像素点
        }
    }


    imshow("Generated Texture", image);
    imwrite("D:\\code\\noise\\image\\polar_plot.jpg", image);
    waitKey(0);

}
https://www.zhihu.com/zvideo/1471926178575970304
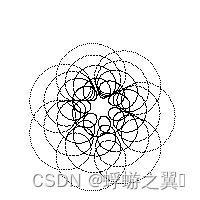
叠加
void drawFunction() {

    // 创建一个空白图像
    int width = 200;
    int height = 200;
    cv::Mat image(height, width, CV_8UC3, cv::Scalar(255, 255, 255));

    // 设置极坐标参数
    int numPoints = max(width, height)*4;
    double radius = min(width, height)/4;

    // 绘制极坐标曲线
    for (int i = 0; i < numPoints; ++i) {

        double angle = 2 * CV_PI * i / numPoints;


        double tempx = cos(angle) + cos(angle * 8) / 2 + sin(0 * angle) / 3;
        double tempy = sin(angle) + sin(angle * 8) / 2 + cos(0 * angle) / 3;
        int x = static_cast<int>(radius * (tempx)) + width / 2; // 将坐标平移到图像中心
        int y = static_cast<int>(radius * (tempy)) + height / 2; // 将坐标平移到图像中心
        if (x+1 >= 0 && x+1 < width && y+1 >= 0 && y+1 < height) {

            image.at<cv::Vec3b>(y, x) = cv::Vec3b(0, 0, 0); // 绘制像素点
            //image.at<cv::Vec3b>(y+1, x) = cv::Vec3b(0, 0, 0); // 绘制像素点
            //image.at<cv::Vec3b>(y, x + 1) = cv::Vec3b(0, 0, 0); // 绘制像素点
            //image.at<cv::Vec3b>(y + 1, x + 1) = cv::Vec3b(0, 0, 0); // 绘制像素点
        }

        x = static_cast<int>(radius * (tempx)*0.8) + width / 2; // 将坐标平移到图像中心
        y = static_cast<int>(radius * (tempy) * 0.8) + height / 2; // 将坐标平移到图像中心
        if (x + 1 >= 0 && x + 1 < width && y + 1 >= 0 && y + 1 < height) {

            image.at<cv::Vec3b>(y, x) = cv::Vec3b(0, 0, 0); // 绘制像素点
            //image.at<cv::Vec3b>(y + 1, x) = cv::Vec3b(0, 0, 0); // 绘制像素点
            //image.at<cv::Vec3b>(y, x + 1) = cv::Vec3b(0, 0, 0); // 绘制像素点
            //image.at<cv::Vec3b>(y + 1, x + 1) = cv::Vec3b(0, 0, 0); // 绘制像素点
        }

        x = static_cast<int>(radius * (tempx) * 0.618) + width / 2; // 将坐标平移到图像中心
        y = static_cast<int>(radius * (tempy) * 0.618) + height / 2; // 将坐标平移到图像中心
        if (x + 1 >= 0 && x + 1 < width && y + 1 >= 0 && y + 1 < height) {

            image.at<cv::Vec3b>(y, x) = cv::Vec3b(0, 0, 0); // 绘制像素点
            //image.at<cv::Vec3b>(y + 1, x) = cv::Vec3b(0, 0, 0); // 绘制像素点
            //image.at<cv::Vec3b>(y, x + 1) = cv::Vec3b(0, 0, 0); // 绘制像素点
            //image.at<cv::Vec3b>(y + 1, x + 1) = cv::Vec3b(0, 0, 0); // 绘制像素点
        }
        x = static_cast<int>(radius * (tempx) * 0.4) + width / 2; // 将坐标平移到图像中心
        y = static_cast<int>(radius * (tempy) * 0.4) + height / 2; // 将坐标平移到图像中心
        if (x + 1 >= 0 && x + 1 < width && y + 1 >= 0 && y + 1 < height) {

            image.at<cv::Vec3b>(y, x) = cv::Vec3b(0, 0, 0); // 绘制像素点
            //image.at<cv::Vec3b>(y + 1, x) = cv::Vec3b(0, 0, 0); // 绘制像素点
            //image.at<cv::Vec3b>(y, x + 1) = cv::Vec3b(0, 0, 0); // 绘制像素点
            //image.at<cv::Vec3b>(y + 1, x + 1) = cv::Vec3b(0, 0, 0); // 绘制像素点
        }
    }


    imshow("Generated Texture", image);
    imwrite("D:\\code\\noise\\image\\polar_plot.jpg", image);
    waitKey(0);

}