目录
友情提醒
| 先看文章目录,大致了解文章知识点结构,点击文章目录可直接跳转到文章指定位置。 |
第一章、准备
1.1)准备数据库表
①使用MySQL数据库,在navicat中导入sql,sql文件已经上传了,表结构如下

1.2)创建springboot项目,添加依赖
创建springboot项目参考这个博客链接:快速构建springboot项目
创建好后的目录结构如下
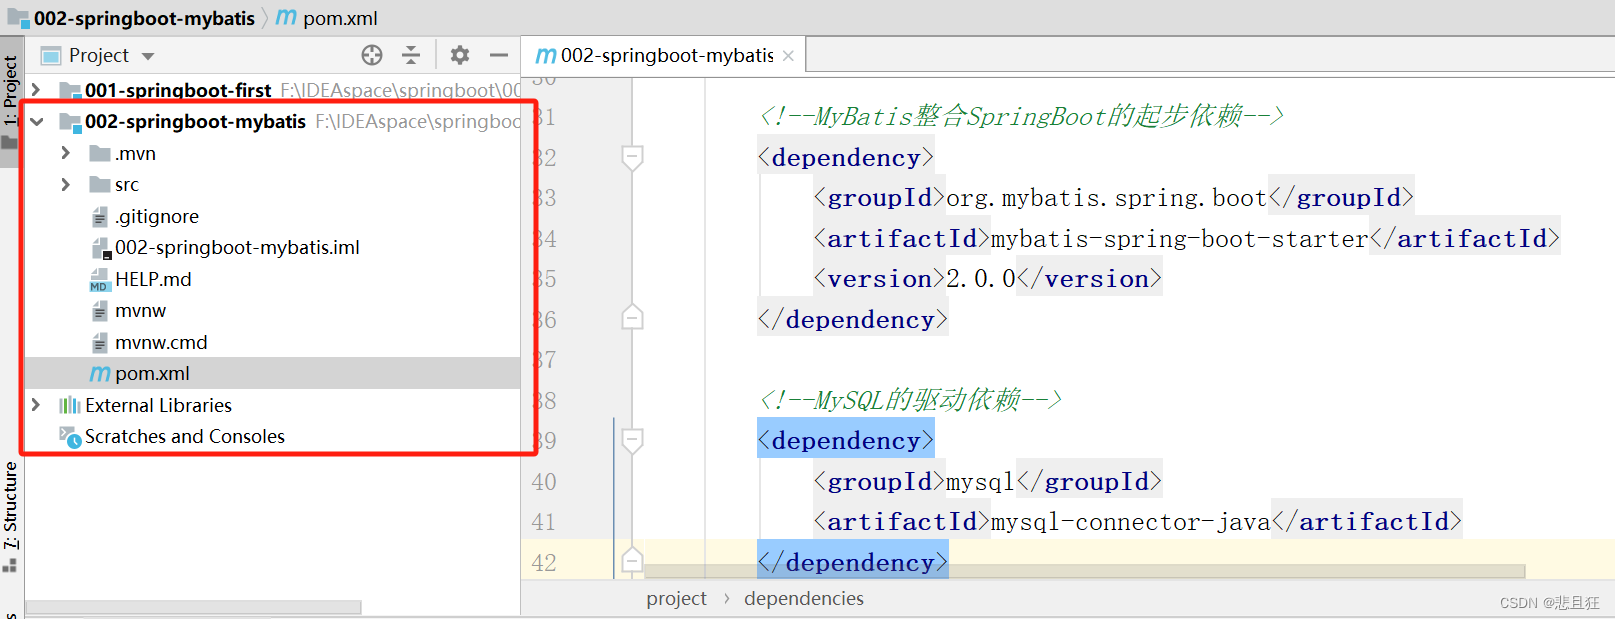
添加相关依赖
<!--MyBatis整合SpringBoot的起步依赖-->
<dependency>
    <groupId>org.mybatis.spring.boot</groupId>
    <artifactId>mybatis-spring-boot-starter</artifactId>
    <version>2.0.0</version>
</dependency>

<!--MySQL的驱动依赖-->
<dependency>
    <groupId>mysql</groupId>
    <artifactId>mysql-connector-java</artifactId>
    <version>8.0.28</version>
</dependency>
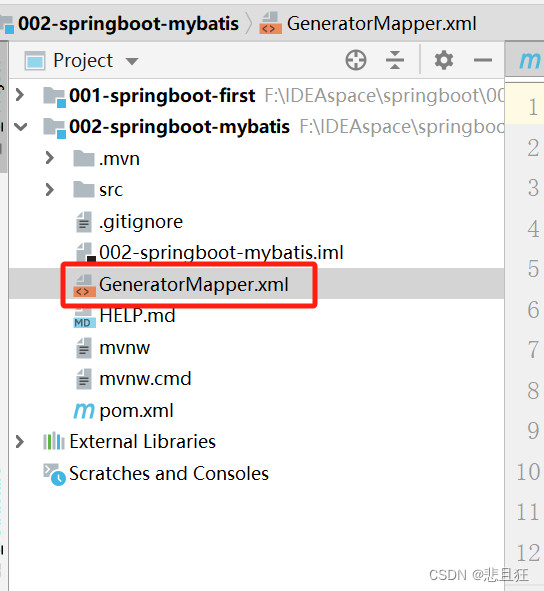
1.3)使用mybatis逆向工程
①添加Generator.xml配置文件到如图目录下,配置文件已经上传了,这里要注意驱动jar包和项目的路径为自己本机实际的路径
②pom文件中添加mybatis代码自动生成插件
<!--mybatis代码自动生成插件-->
            <plugin>
                <groupId>org.mybatis.generator</groupId>
                <artifactId>mybatis-generator-maven-plugin</artifactId>
                <version>1.3.6</version>
                <configuration>
                    <!--配置文件的位置-->
                    <configurationFile>GeneratorMapper.xml</configurationFile>
                    <verbose>true</verbose>
                    <overwrite>true</overwrite>
                </configuration>
            </plugin>
③双击红色选中命令,生成相关文件

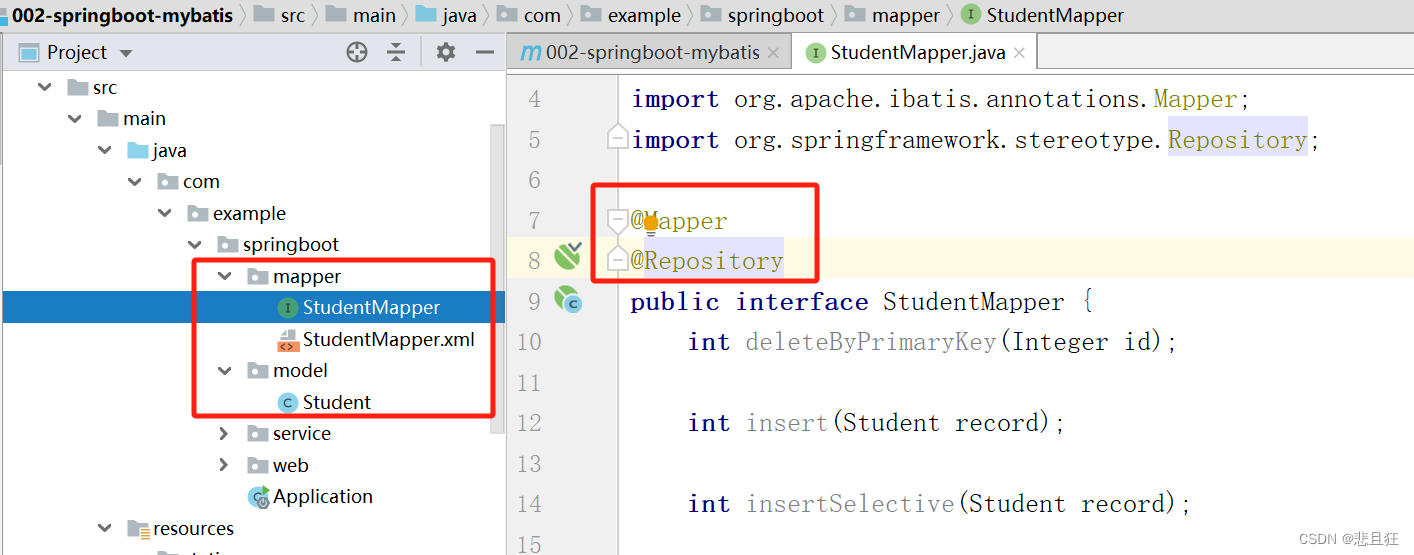
④成功生成mapper和model,并在生成的StudentMapper接口中手动加上@Mapper注解和@Repository注解
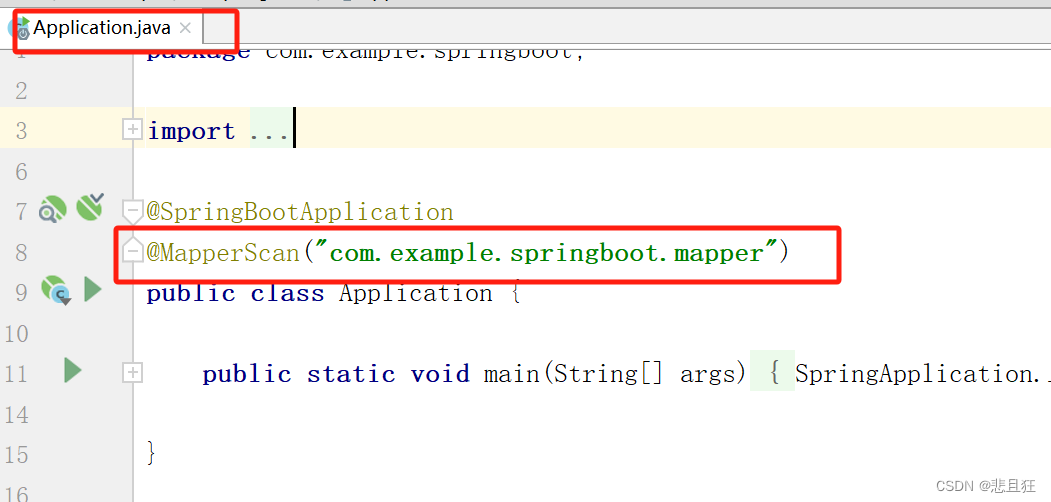
⑤每次都手动添加@Mapper注解很麻烦,我们可以再Application类中使用@MapperScan注解进行扫描包操作达到自动识别的效果
第二章、代码开发
2.1)建包并编写代码
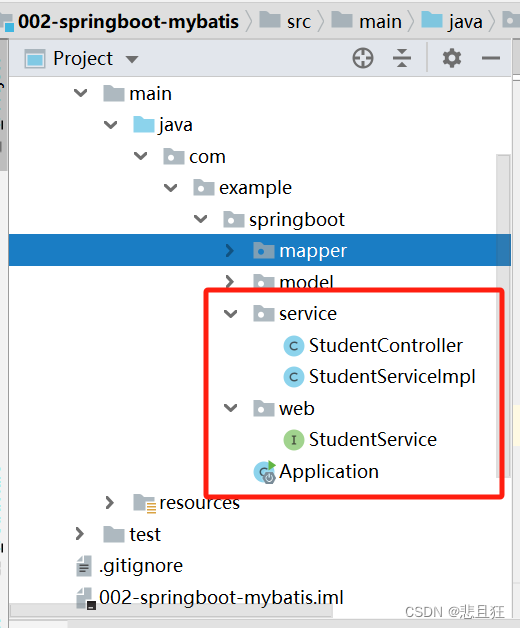
①在com.example.springboot目录下创建web包和service包。
②web包下创建StudentController并编写代码
package com.example.springboot.service;

import com.example.springboot.model.Student;
import com.example.springboot.web.StudentService;
import org.springframework.beans.factory.annotation.Autowired;
import org.springframework.stereotype.Controller;
import org.springframework.web.bind.annotation.RequestMapping;
import org.springframework.web.bind.annotation.ResponseBody;

@Controller
public class StudentController {

    @Autowired
    private StudentService studentService;

    @RequestMapping(value = "/springBoot/student")
    public @ResponseBody
    Object student() {

        Student student = studentService.queryStudentById(1);

        return student;
    }
}
③service包下创建StudentService 接口并编写代码
package com.example.springboot.web;

import com.example.springboot.model.Student;

public interface StudentService {

    /**
     * 根据学生标识获取学生详情
     * @param id
     * @return
     */
    Student queryStudentById(Integer id);
}
⑤service包下创建StudentServiceImpl并编写代码
package com.example.springboot.service;

import com.example.springboot.mapper.StudentMapper;
import com.example.springboot.model.Student;
import com.example.springboot.web.StudentService;
import org.springframework.beans.factory.annotation.Autowired;
import org.springframework.stereotype.Service;

@Service
public class StudentServiceImpl implements StudentService {

    @Autowired
    private StudentMapper studentMapper;

    @Override
    public Student queryStudentById(Integer id) {
        return studentMapper.selectByPrimaryKey(id);
    }
}
2.2)application配置文件
#配置内嵌Tomcat端口号
server.port=9003

#配置项目上下文根
server.servlet.context-path=/002-springboot-mybatis

#配置数据库的连接信息
#注意这里的驱动类有变化
spring.datasource.driver-class-name=com.mysql.cj.jdbc.Driver
spring.datasource.url=jdbc:mysql://localhost:3306/springboot?serverTimezone=UTC&characterEncoding=utf-8
spring.datasource.username=root
spring.datasource.password=root
2.3)设置编译位置
 <resources>
            <resource>
                <directory>src/main/java</directory>
                <includes>
                    <include>**/*.xml</include>
                </includes>
            </resource>
        </resources>
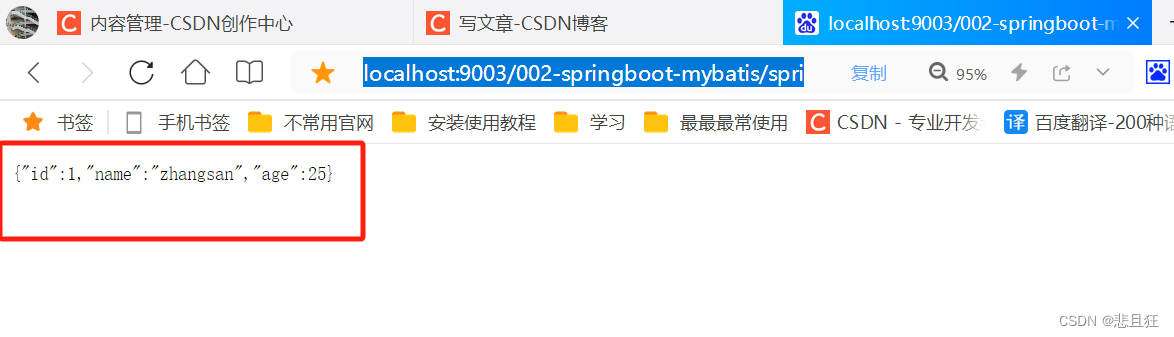
第三章、测试访问
3.1)访问浏览器
访问http://localhost:9003/002-springboot-mybatis/springBoot/student成功查询到数据